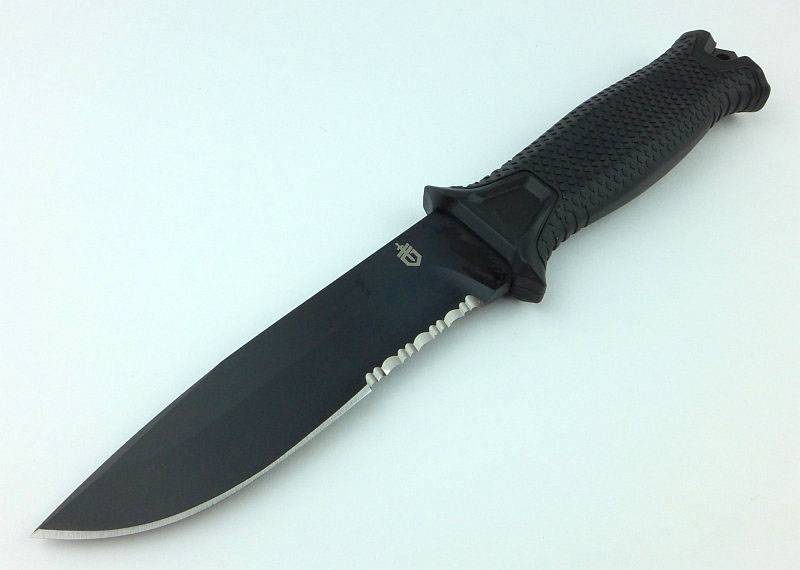
Gerber’s latest incarnation of the military/tactical survival knife has taken its evolution to another level. Paring down each element of the design to provide the essential functions without any excess bulk has resulted in a tool that works with you and remains totally reliable.
The Blade and Handle Geometry:
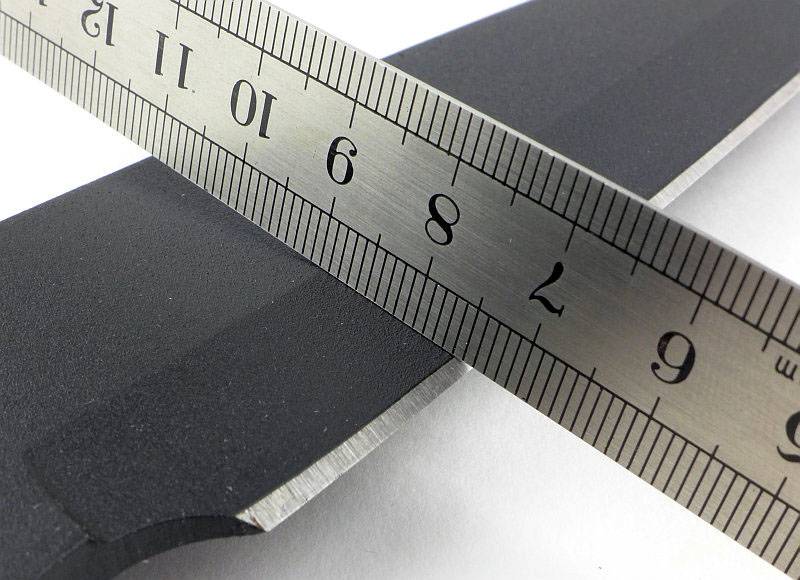
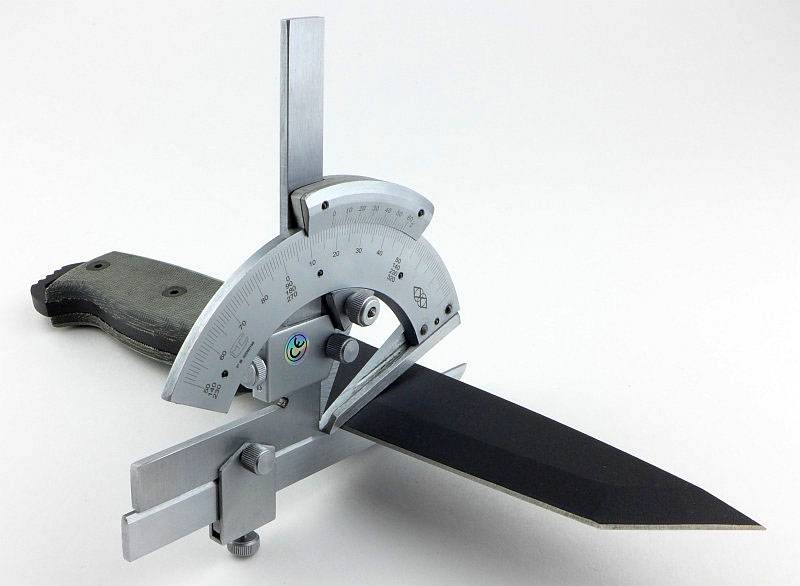
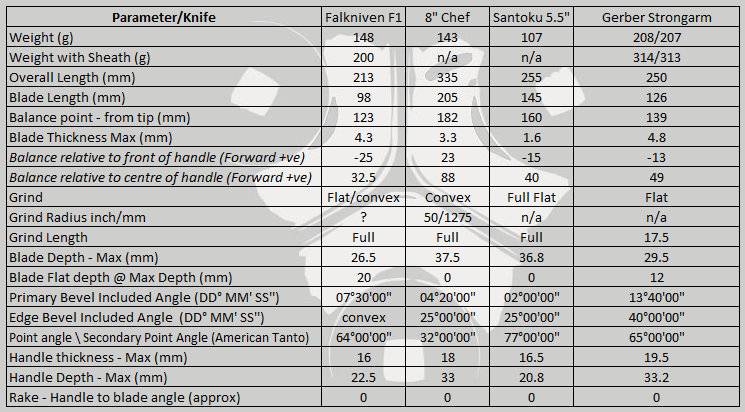
Most knife specifications have a basic description of the blade geometry, but in this section I will be taking a more detailed look at geometry and balance.
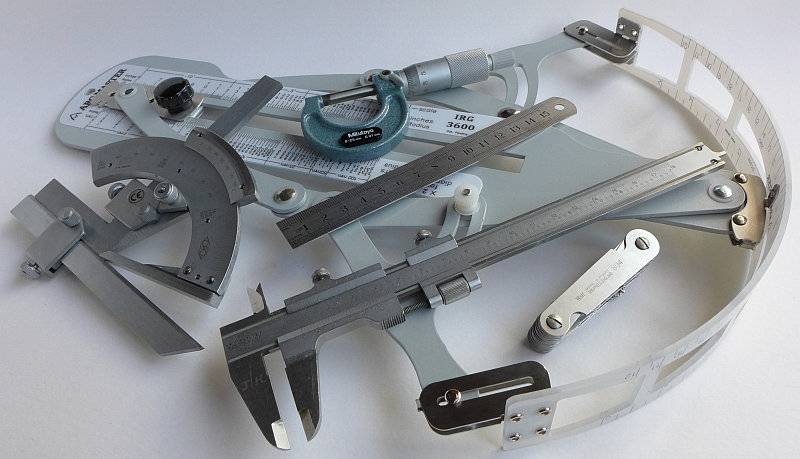
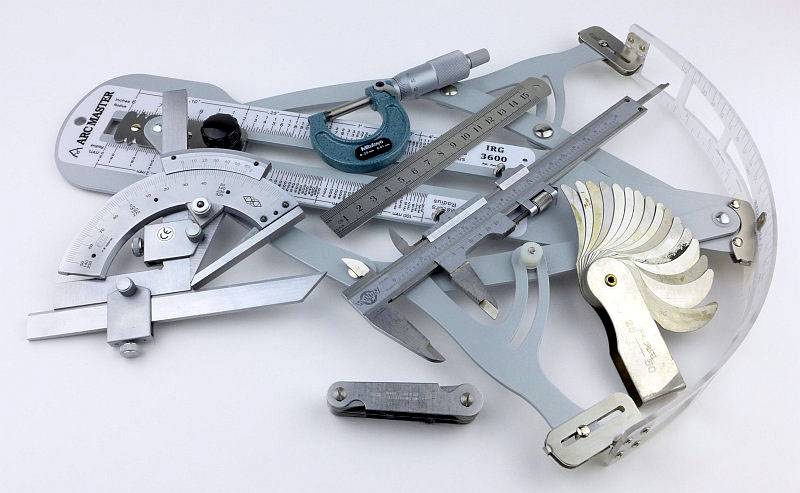
Using a set of gauges and precision measuring equipment including a Vernier protractor, callipers, fixed radius gauges and the unique Arc Master adjustable radius gauge (the one that looks like a crossbow).
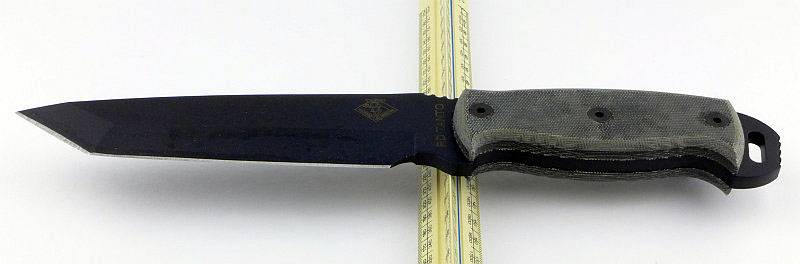
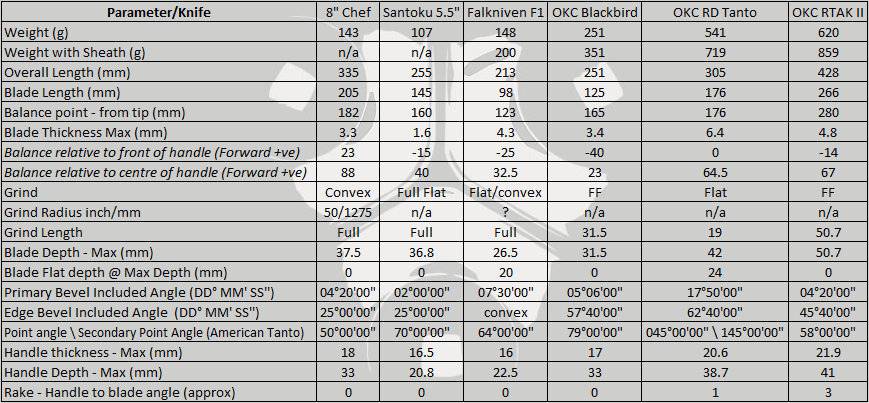
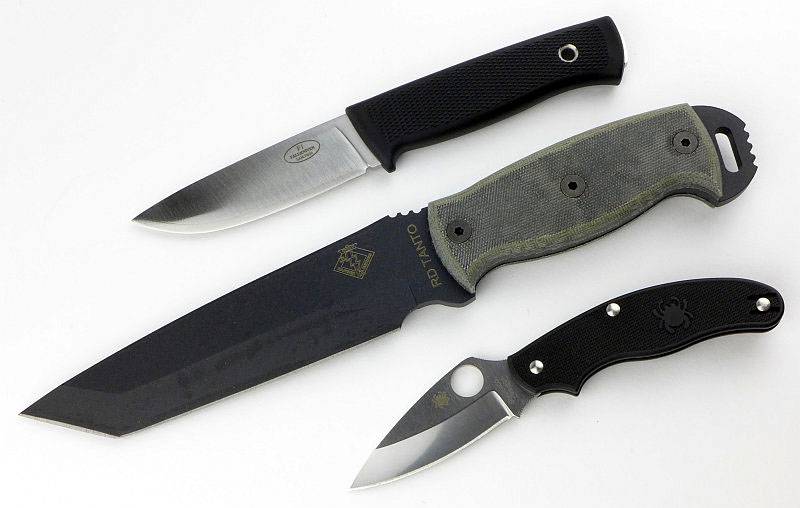
These measurements have been tabulated and are presented along with a few reference blades (8″ Chef’s Knife, 5.5″ Santoku and the popular Fällkniven F1).
Key aspects such as the primary bevel angle, grind type, blade depth, blade thickness, length, weight are detailed, along with balance information.
The ‘Balance relative to the front of the handle’ tells you if the knife will feel front heavy, or if the weight is in your hand (a positive value means the weight is forward of the front of the handle). The ‘Balance relative to the centre of the handle’ indicates how close to a ‘neutral balance’ the knife has in the hand.
In the case of full convex grinds the approximate centre of the grind is used for the primary bevel angle estimate.
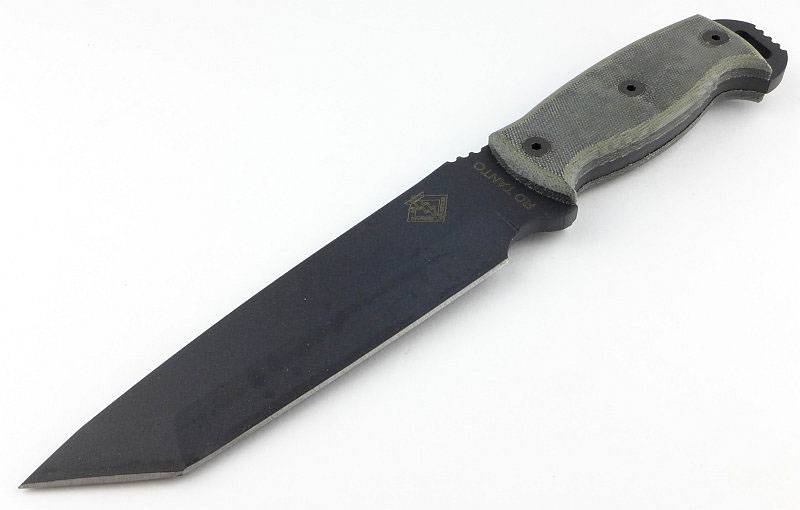
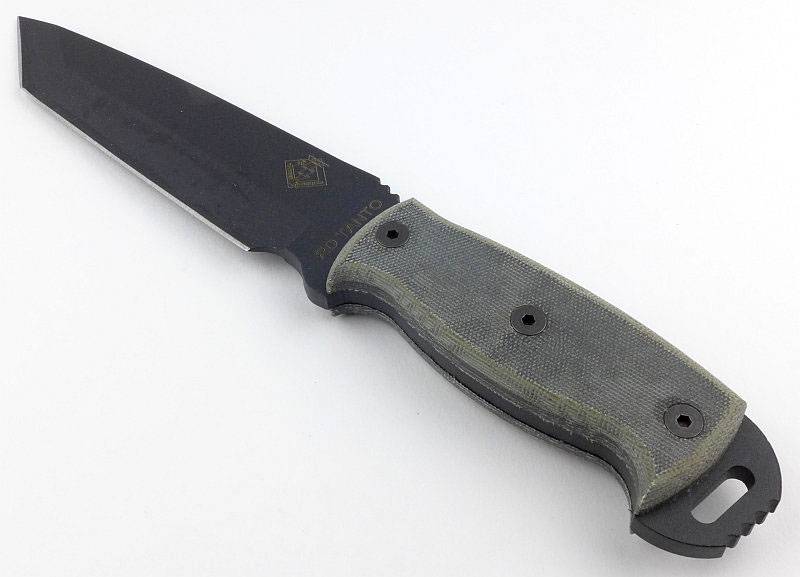
The blade is made from 420HC steel.
Explained by the Maker:
The reasons for certain design choices may not be clear when simply looking at an object, so this section is intended to give an insight into the thinking behind a design by speaking to the designer themselves.
Unfortunately I can’t always get time with the designer so will use this section to include relevant information about the knife and its designer.
The Strongarm is the result of an evolution of Gerber’s survival knives which I can trace back through several models. In this section I’d like to share a personal perspective of the evolution that has lead to the Strongarm. This might not be how Gerber would chart its development, but is based on my own knives and experience.
As any child of the 80s will know, the 1982 film ‘Rambo – First Blood’ has been one of the most influential films in terms of interest in survival and in knife design at the time. With Lyle knives way out of reach, I ended up owning some of the rather nasty cheap hollow handle Rambo style knives. There were other more serious designs available but pricing also made them out of reach.
Still hankering after a decent and stylish blade I was struck by the appearance of one in another film from 1988 staring Sidney Poitier and Tom Berenger – Deadly Pursuit (Shoot to Kill). In this film Tom Berenger’s character is carrying a Gerber BMF (Basic Multi-Function) in its original pattern with 8″ blade, and this was the saw back version that wasstill in fashion at the time. I loved it and knew this was the knife I had to have. Unfortunately with the UK market starved of this knife I had to wait for one to arrive, and when it did changes had been made to the size and grind. It now had a 9″ blade and the one I found didn’t have the saw-back. It was still a meaty solid knife, so had to do. The BMF was produced by Gerber between 1986 and 1998 and had several ‘updates’ during this time.
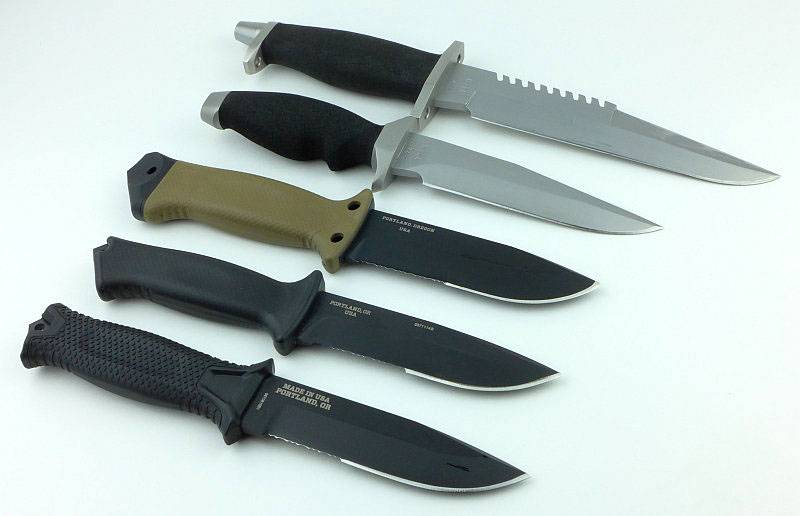
In the following evolution photographs is the original pattern BMF I eventually found only a couple of years ago (and this one has been on active duty in war zones).
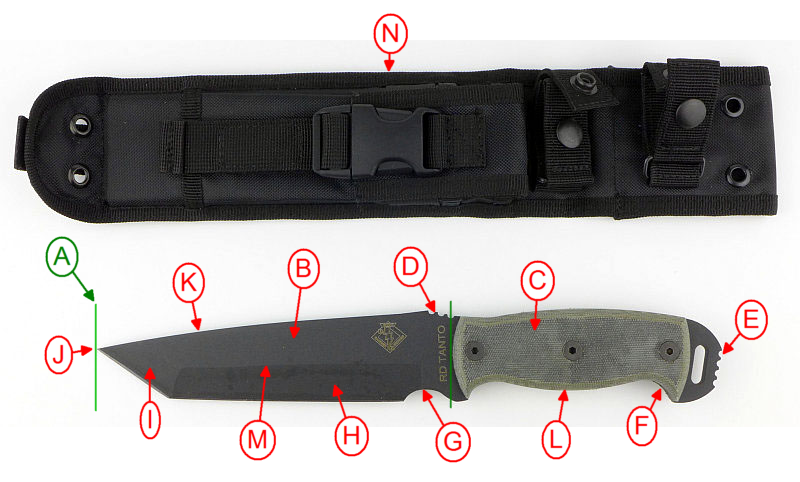
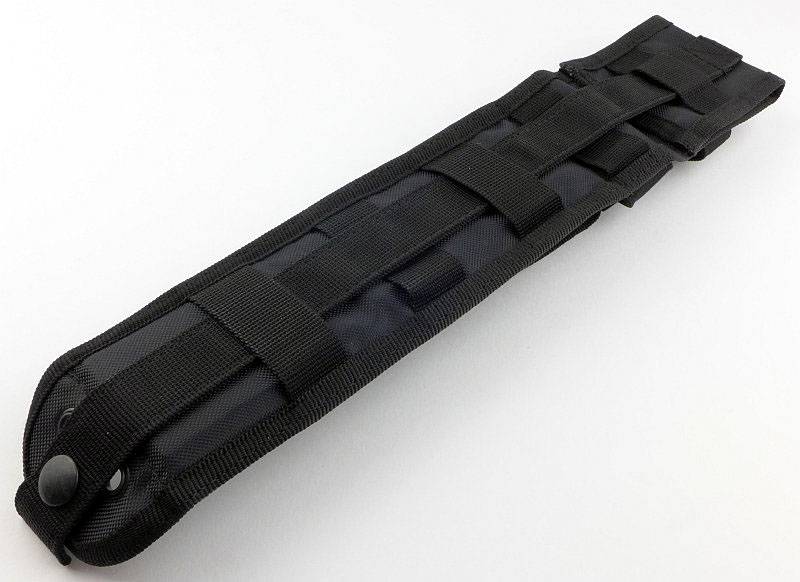
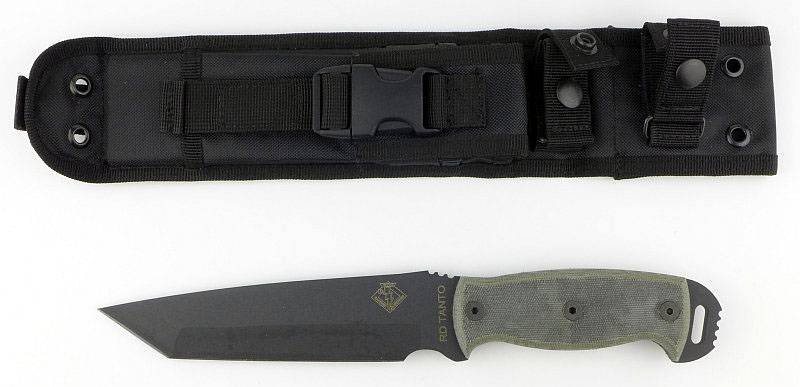
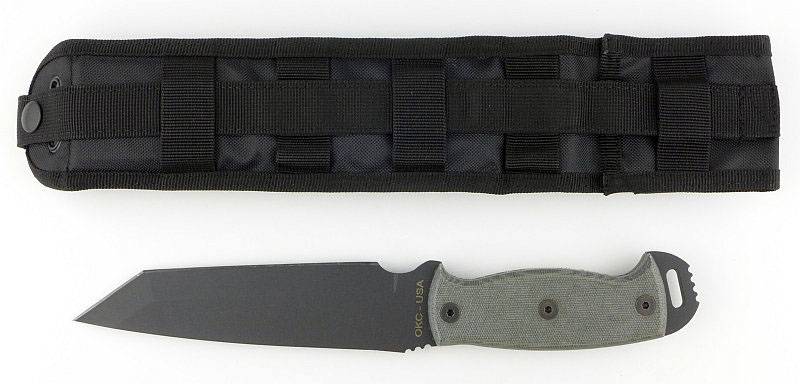
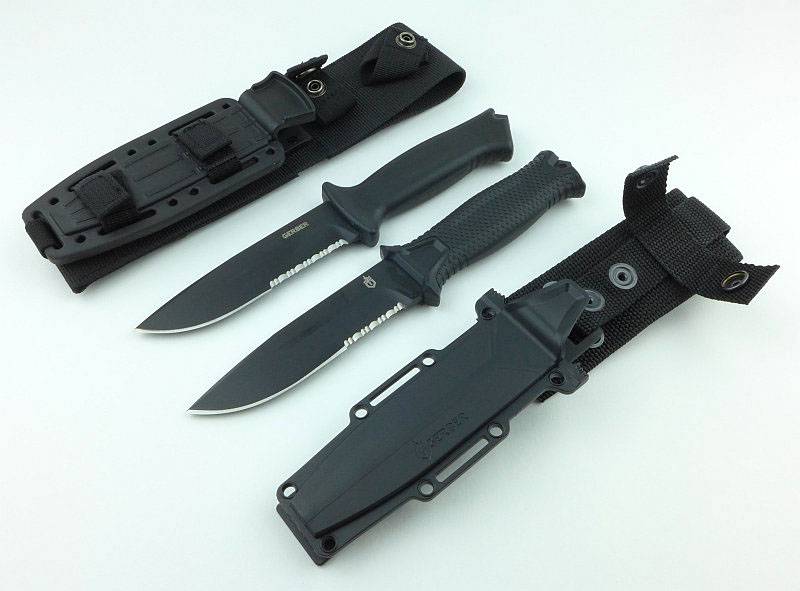
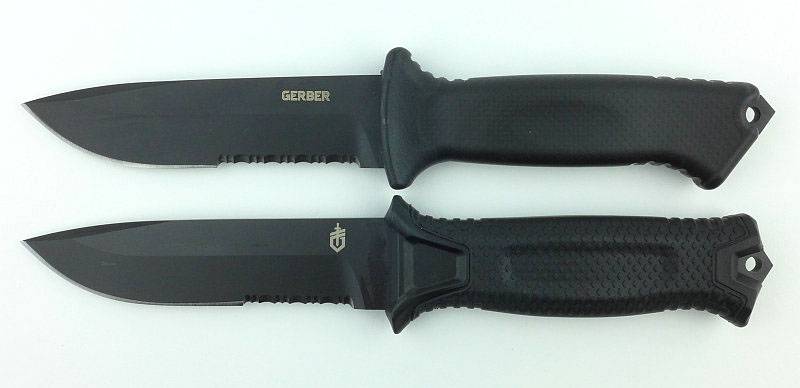
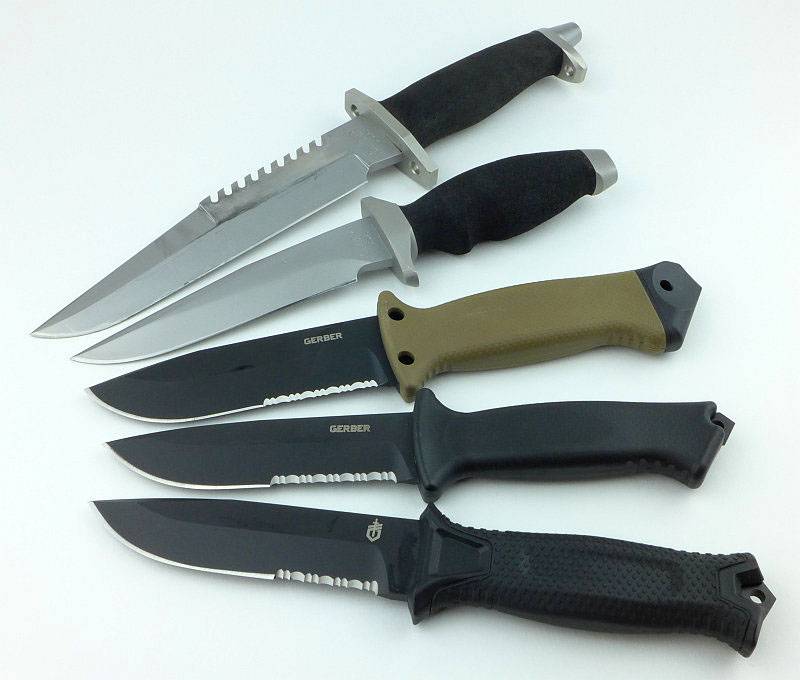
The sheath is as important as the knife in providing the overall package, so starting here we can see all the knives in this evolution in their sheaths. The knives shown are the BMF 8″ saw-back, then a LMF, the LMF II, a Prodigy and finally the Strongarm.
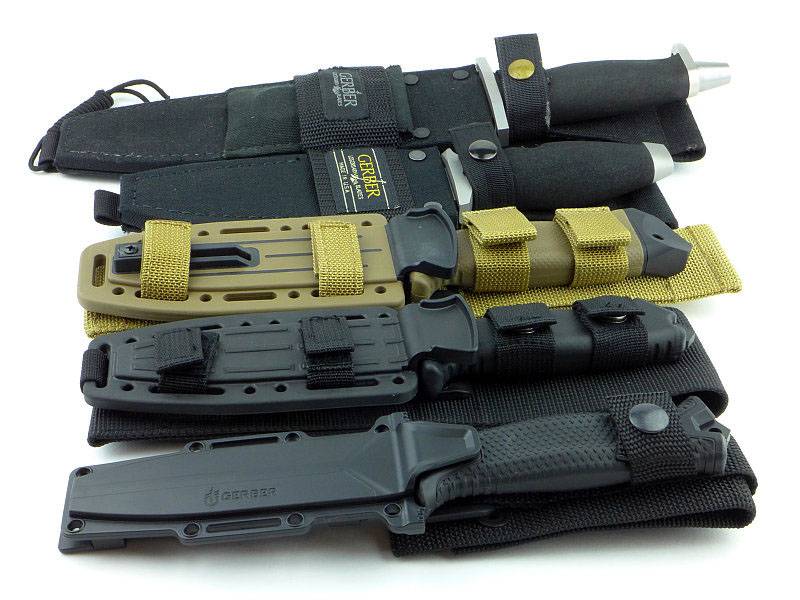
With the BMF (first made in 1986) being a big knife there was demand for a similar design but smaller. In 1988 Gerber released the LMF (Light Multi-Function). In its first year the LMF had a full flat grind, but from 1989 onwards (until 1997 when it was discontinued) it was the style shown here. The original LMF had the bias towards blade length as a proportion of overall length. After a few years, the LMF was reborn in May 2005 as the LMF II designed specifically as a military survival knife. Becoming known as the standard by which all survival knives should be judged, many found the LMF II a little too big, so a smaller alternative was made with the name Prodigy. Working hard to make this knife all the more versatile, Gerber designed the multi-mount and tweaked the design further to create the Strongarm.
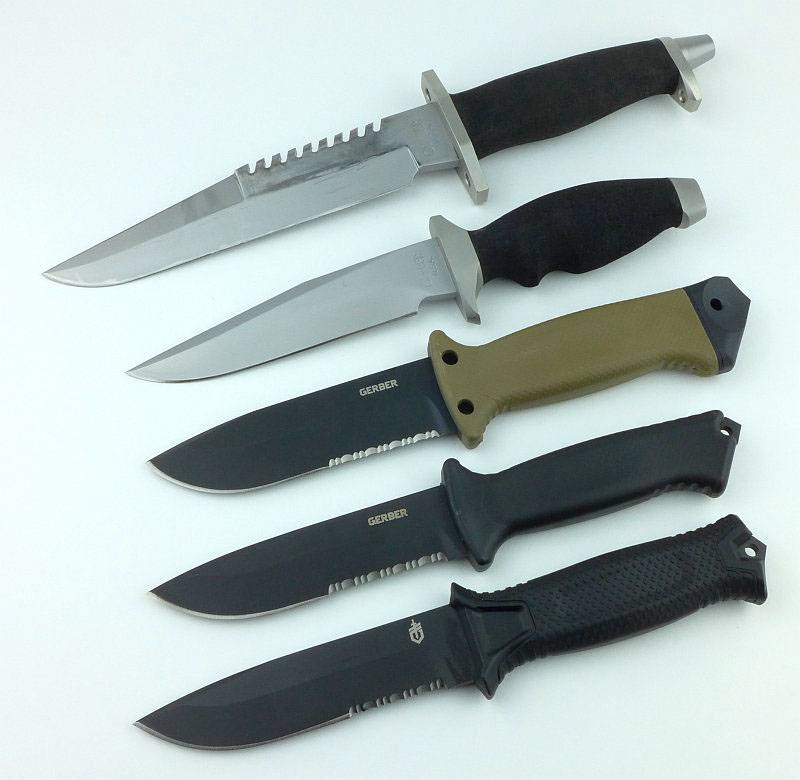
Following the evolution series you can see how blade and handle lengths changed over time.
A few more details:
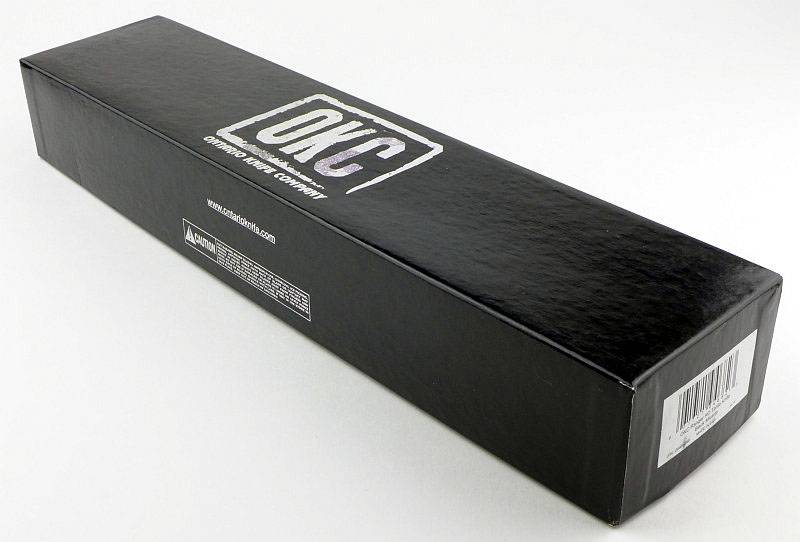
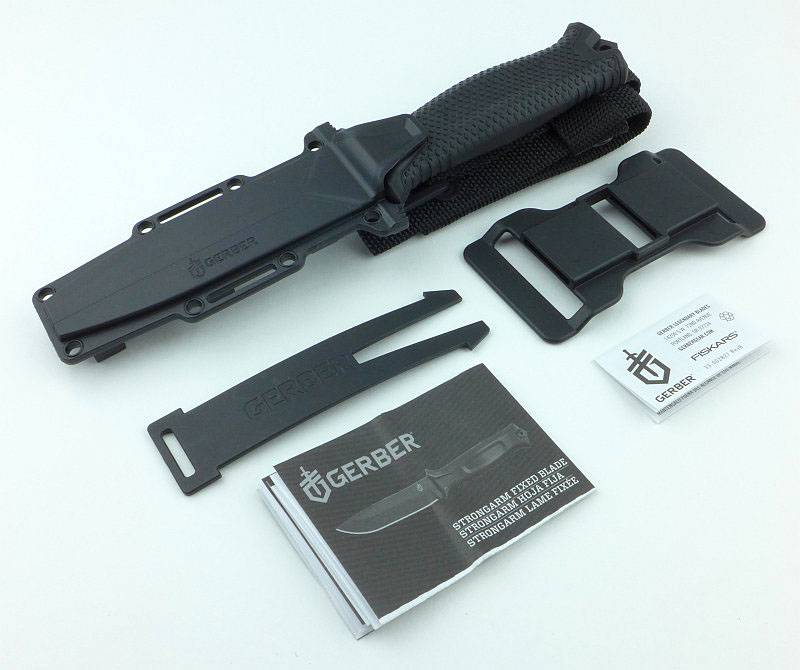
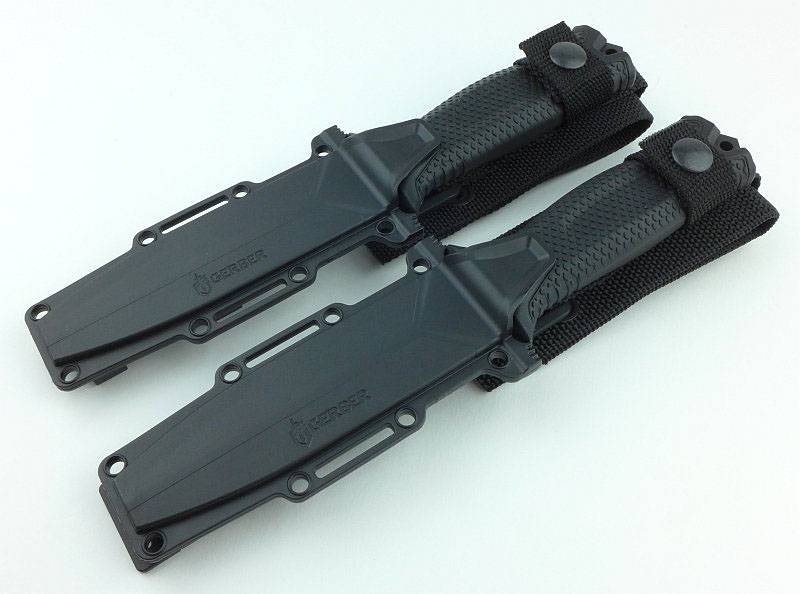
Both the plain edge and part-serrated version were provided for review, hence the two boxes.

A cardboard insert keep the knife in place and prevents the striker pommel breaking through the outer box.

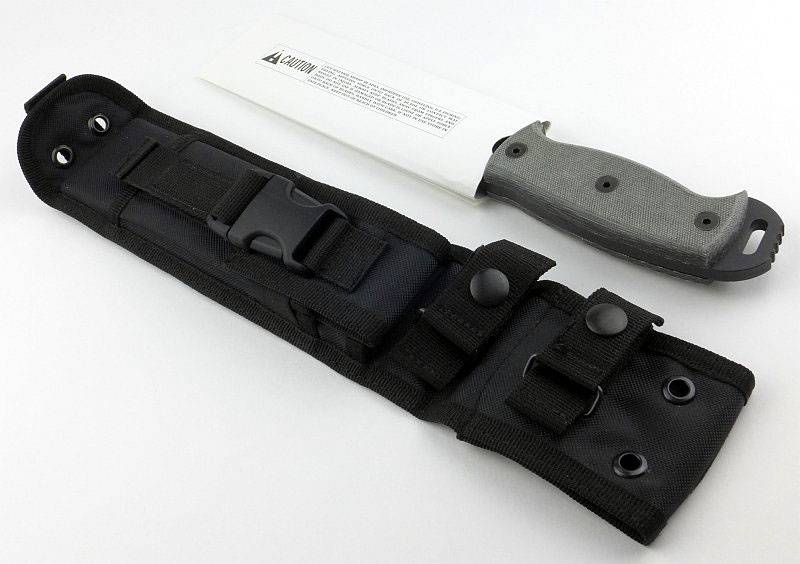
Fresh out of the box, and as well as the sheathed knife there is the PALS webbing clip, a horizontal belt loop adapter and the instructions.
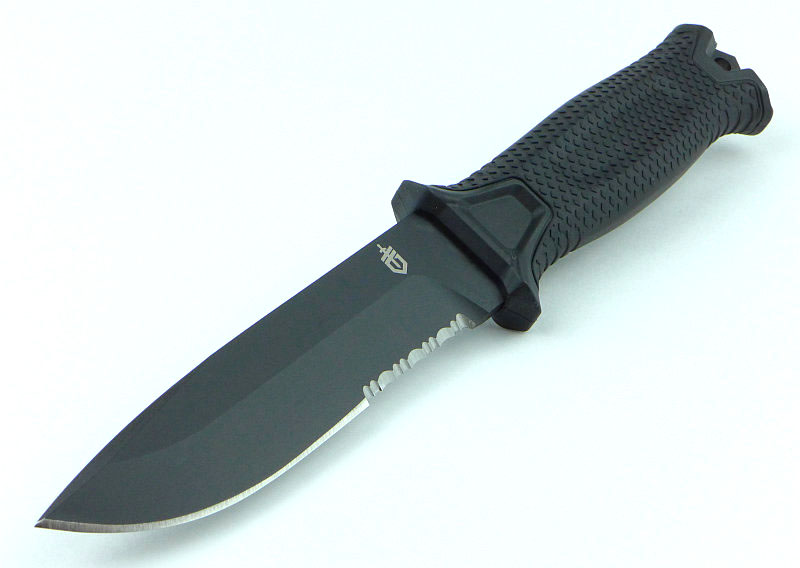
It is immediately obvious how much more streamlined Gerber have made the Strongarm compared to earlier knives in the line.
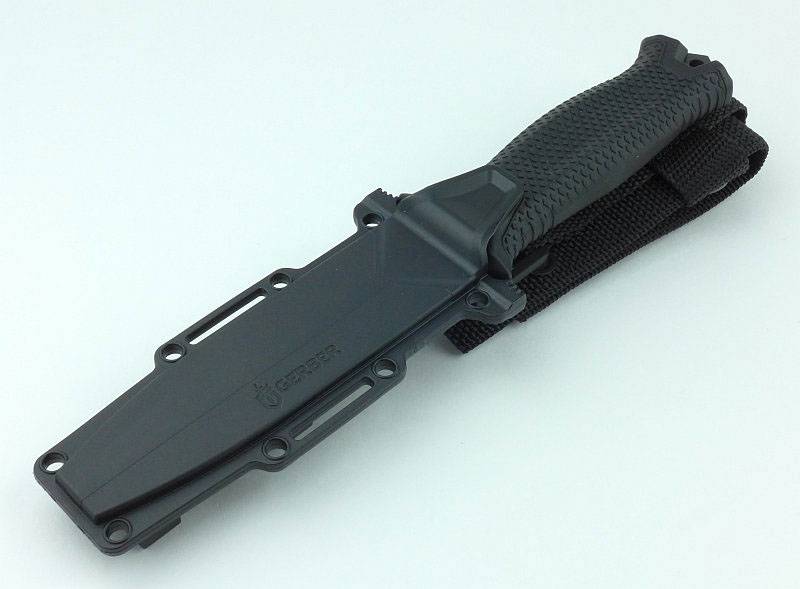
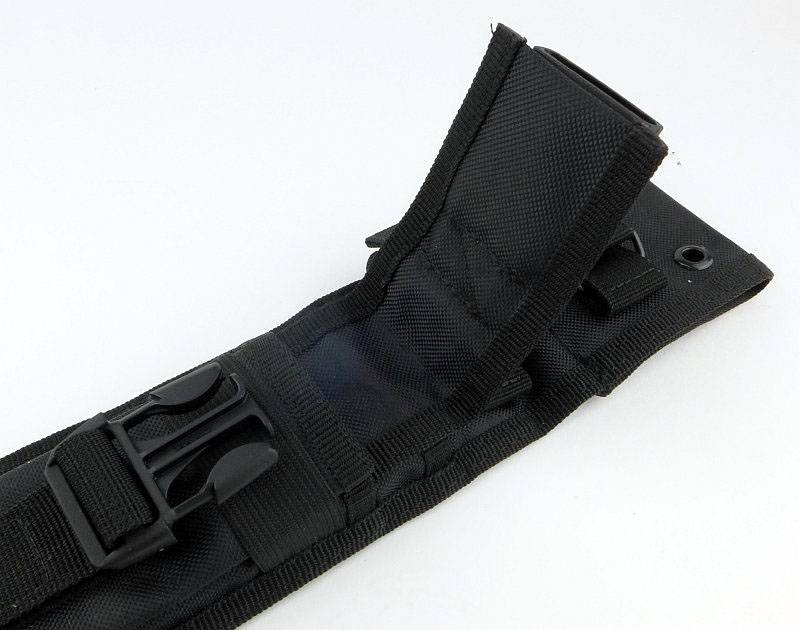
The moulded plastic sheath is suspended by a webbing hanger. For those sharp eyed readers you might notice that only a single press-stud is used for the hanger loop on the sheath, but even if this were to become un-popped, it cannot come out of the sheath while the knife is in the sheath.
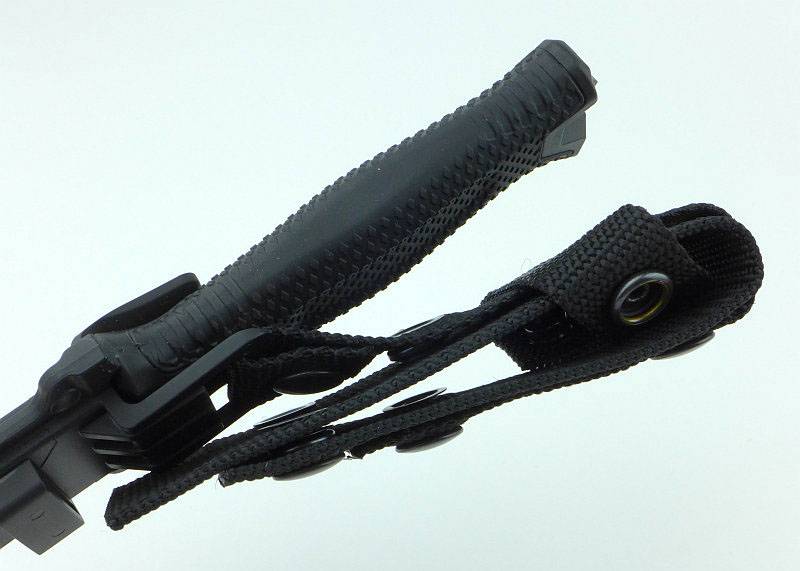
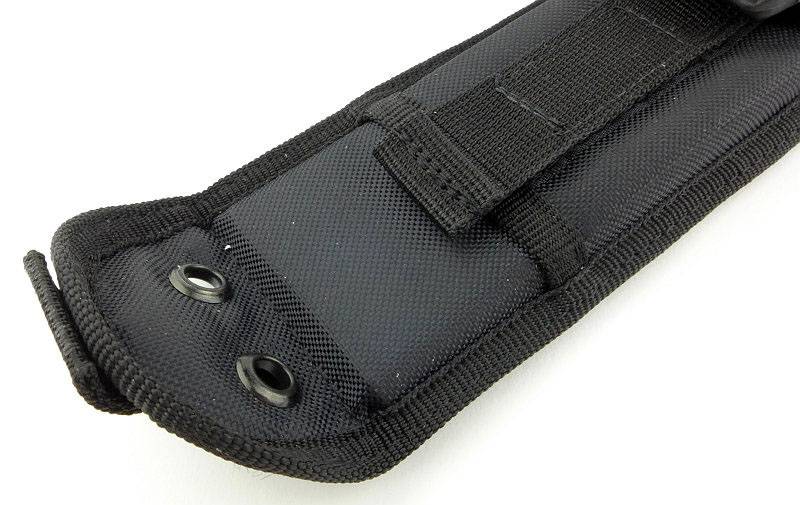
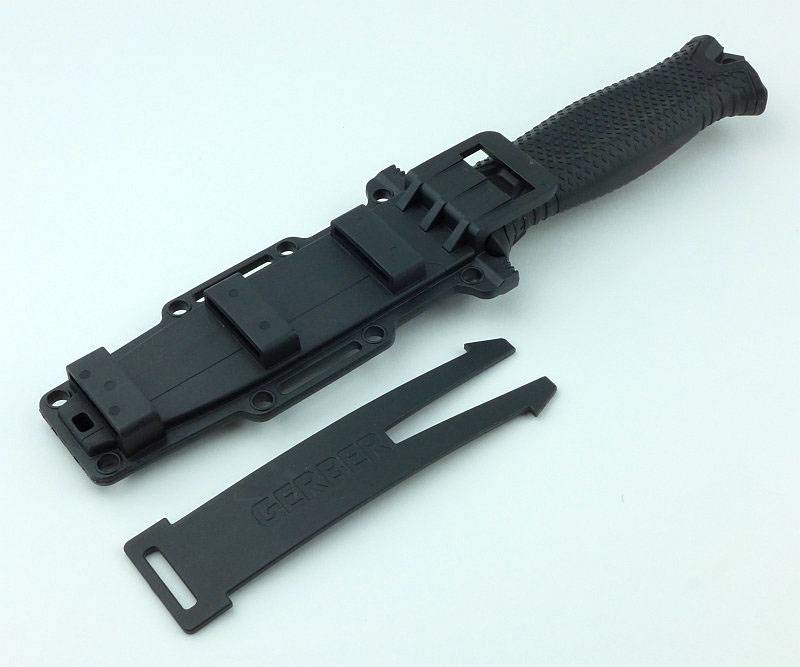
These are the parts of the sheath hanger/belt loop.

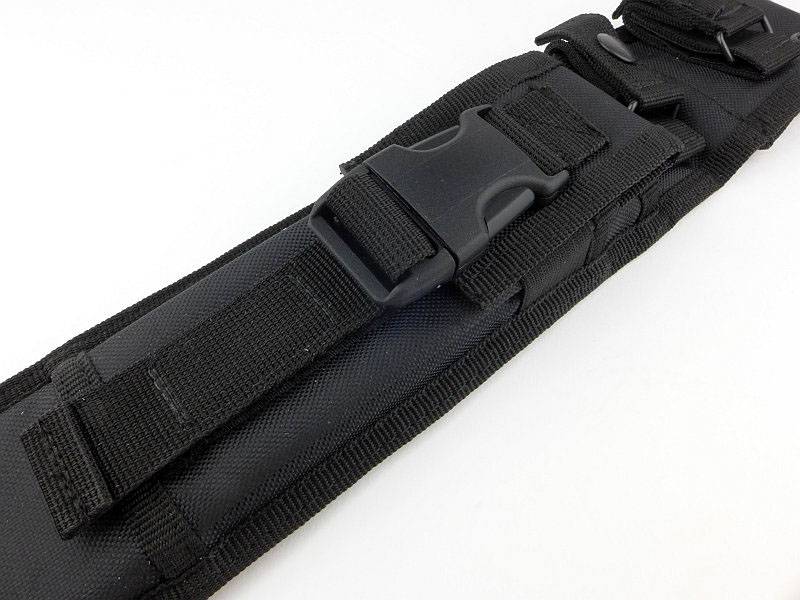
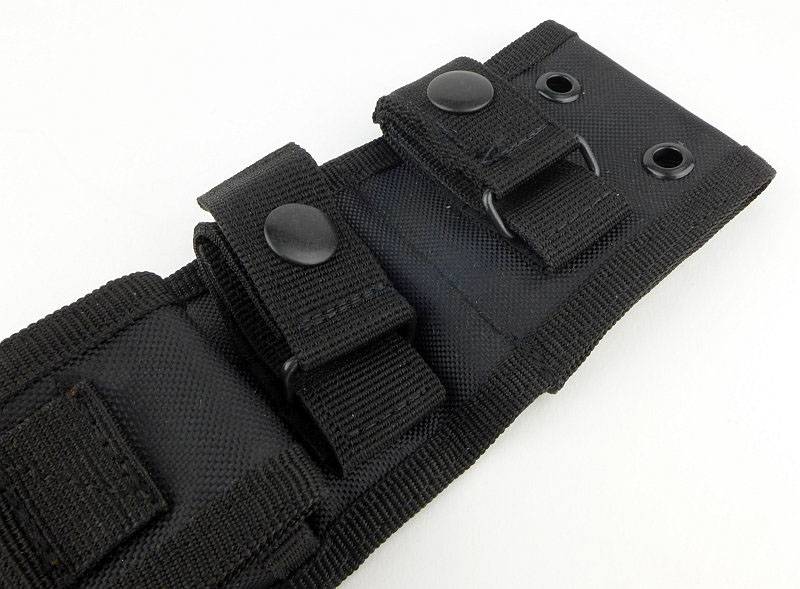
To replace the belt loop, lay out the hanger strap as shown. (The cross piece is a knife retention strap for added security)
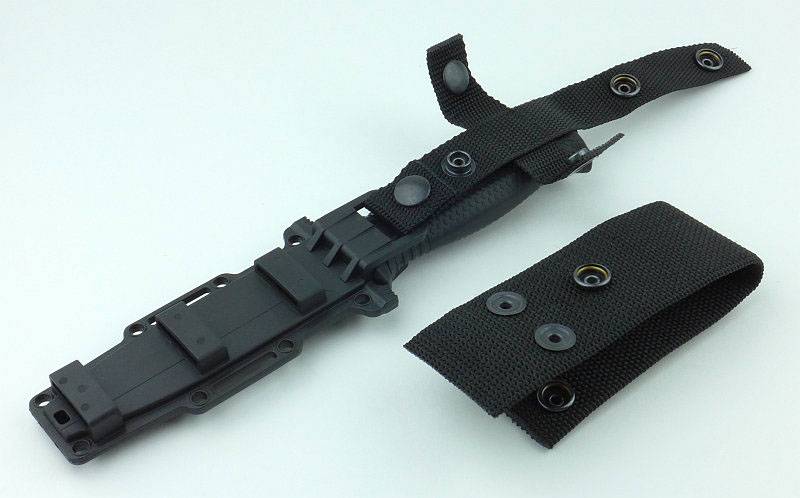
Fit the belt loop in place with the single press-stud on the underneath.
Close the belt loop with its two press-studs.
Then lay the hanger strap over the top and secure the two press-studs.
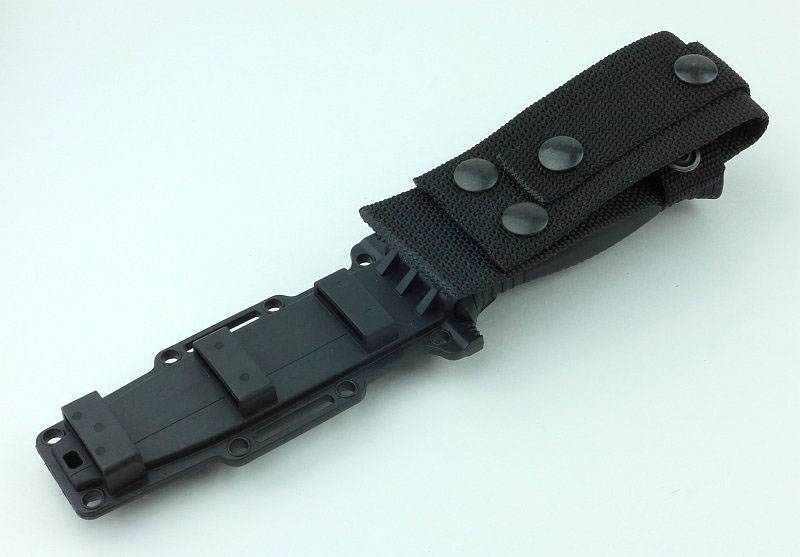
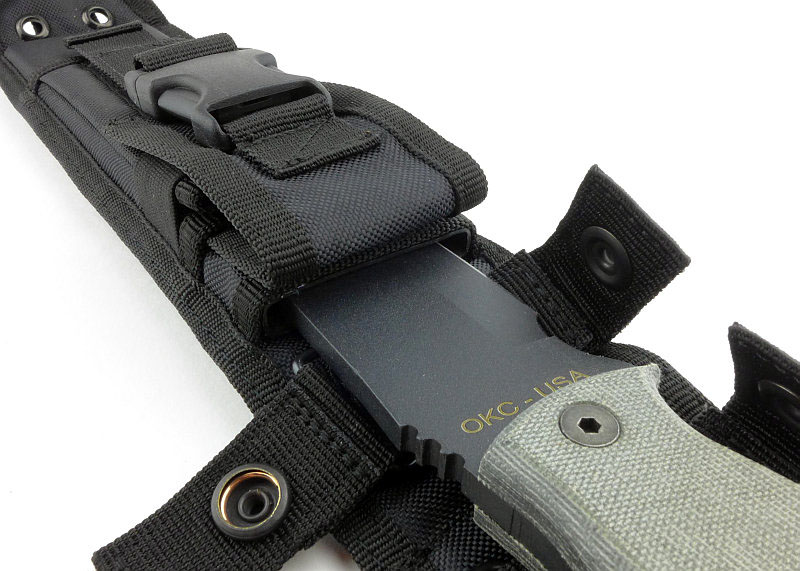
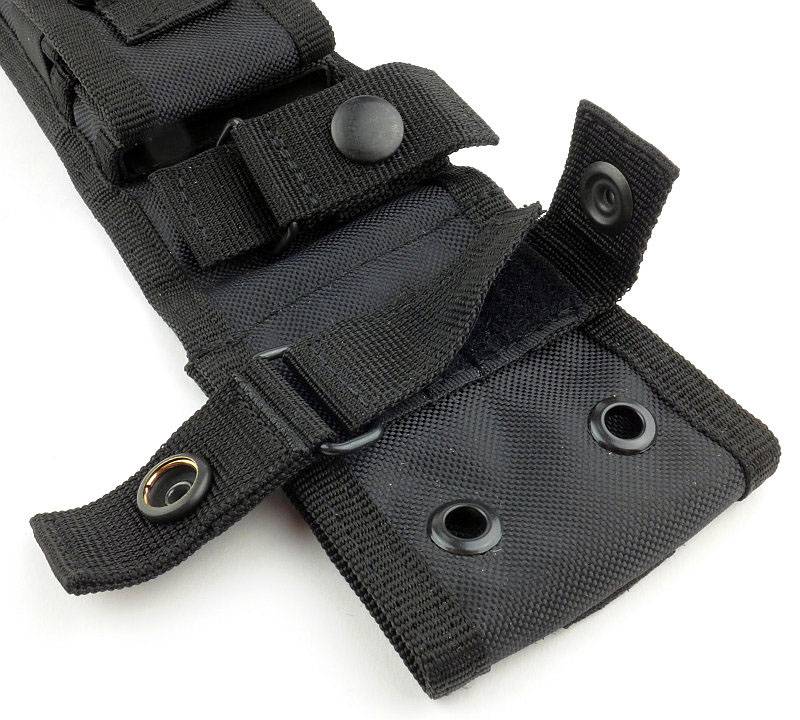
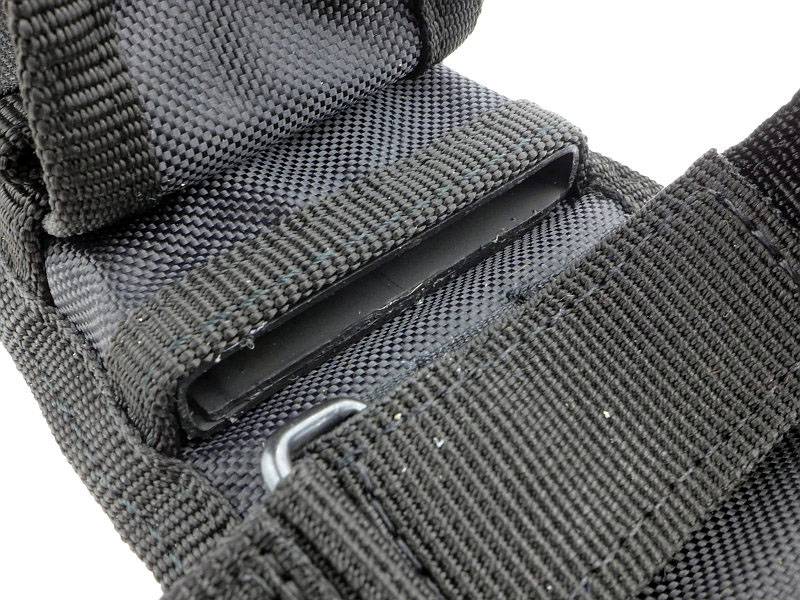
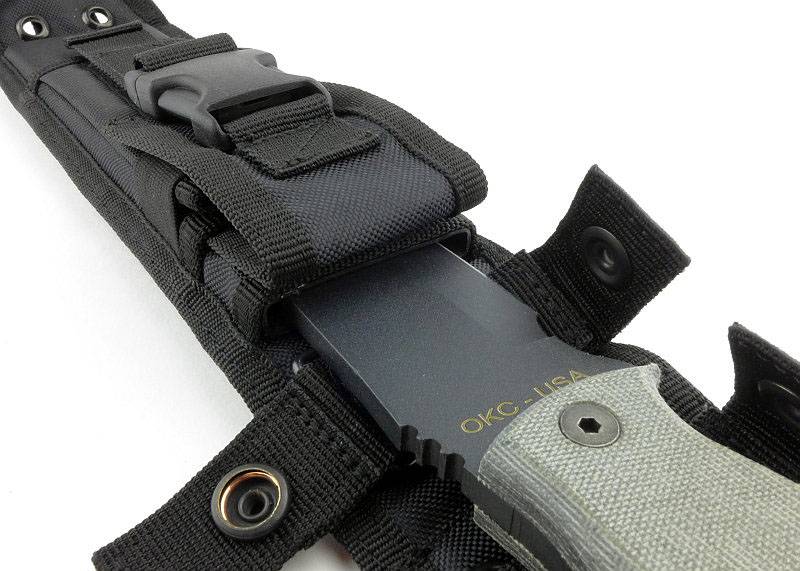
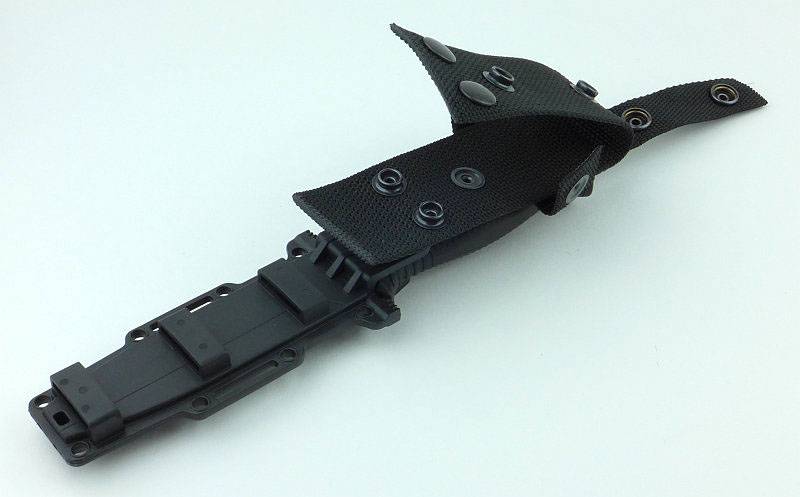
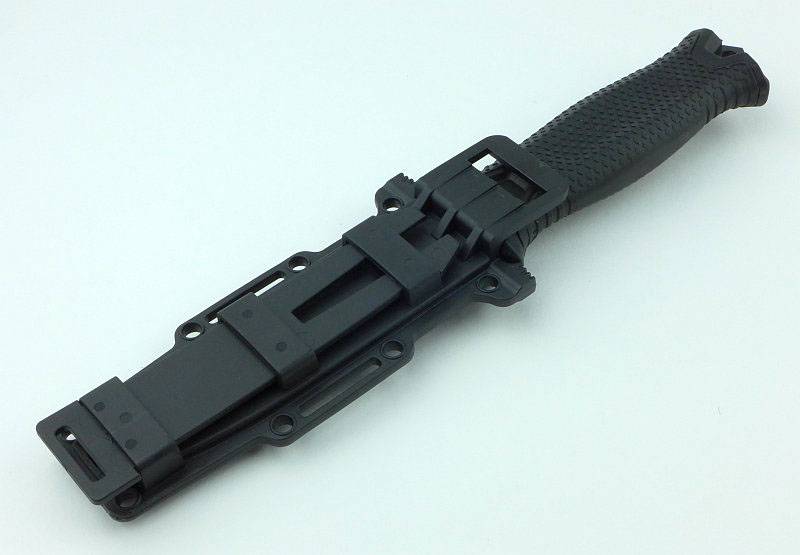
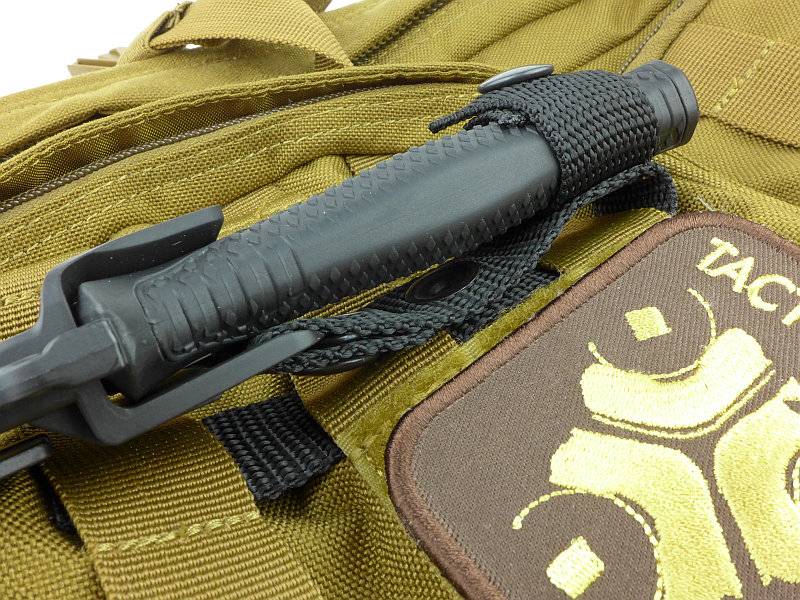
Taking the hanger off for clarity, here we are looking at the moulded sheath’s PALS fixing.
Once in place over the PALS webbing you slide the locking bar through the loops to attach it.
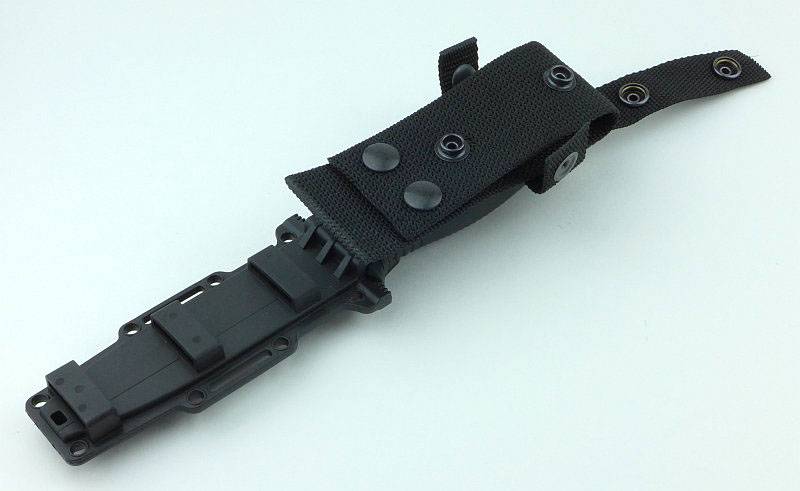
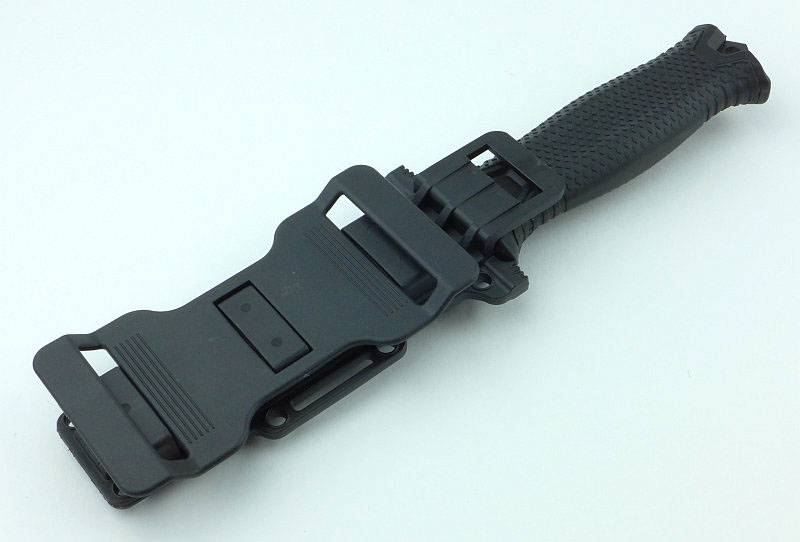
The PALS fixing can also be used to fit the horizontal belt loops.
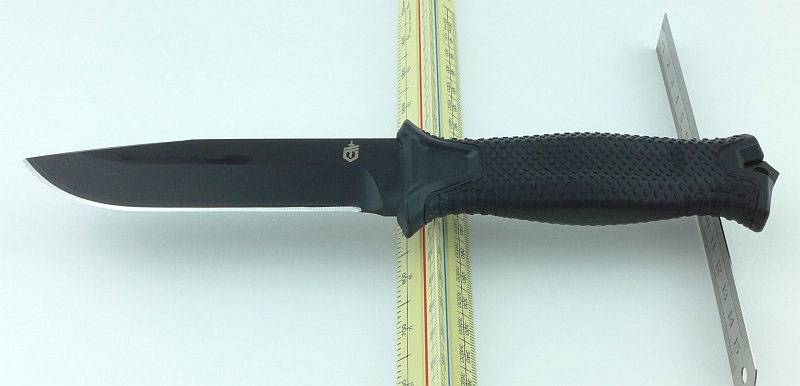
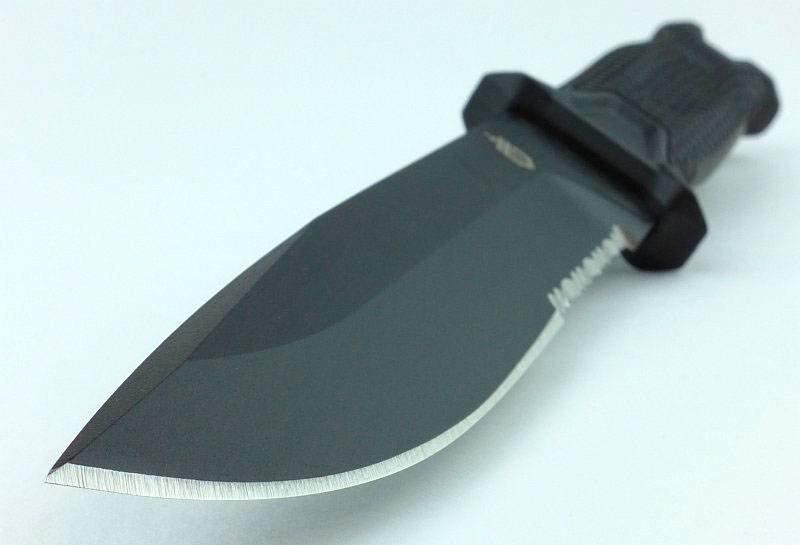
Despite the blade being stainless steel, and having a black ceramic coating the Strongarm arrived with an oiled blade.
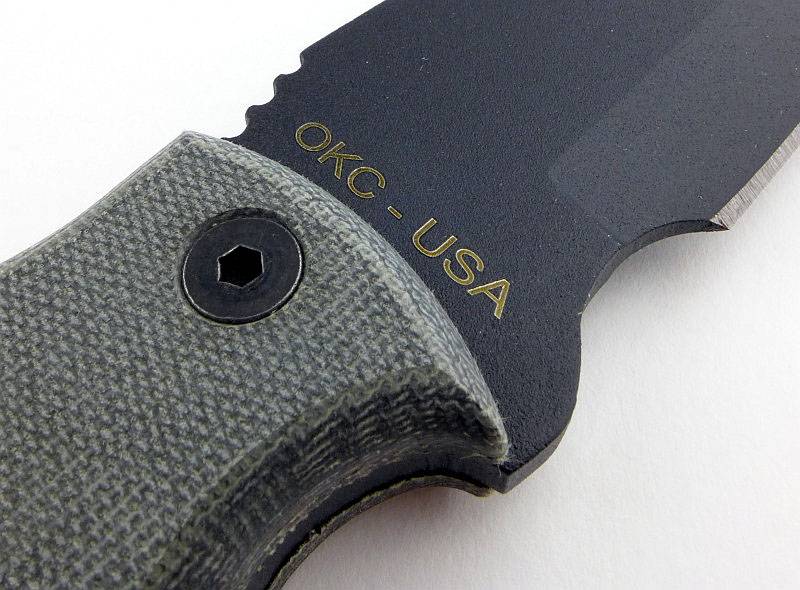
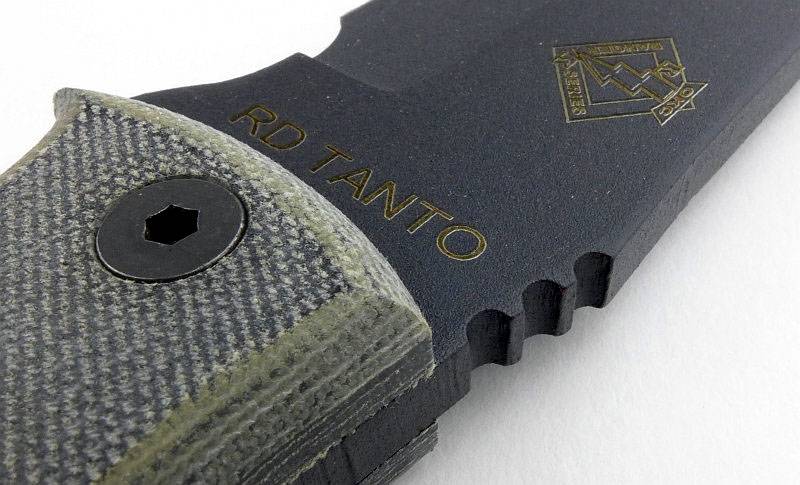
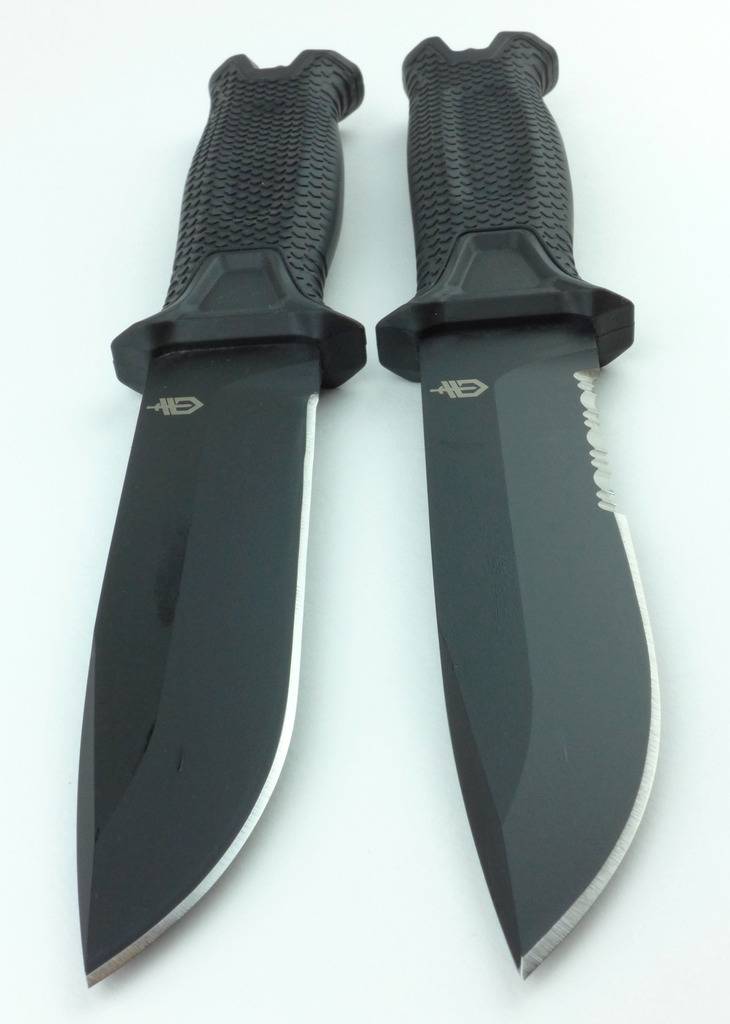
Each knife has a serial number and “Made in USA Portland, OR” proudly inscribed on the blade.
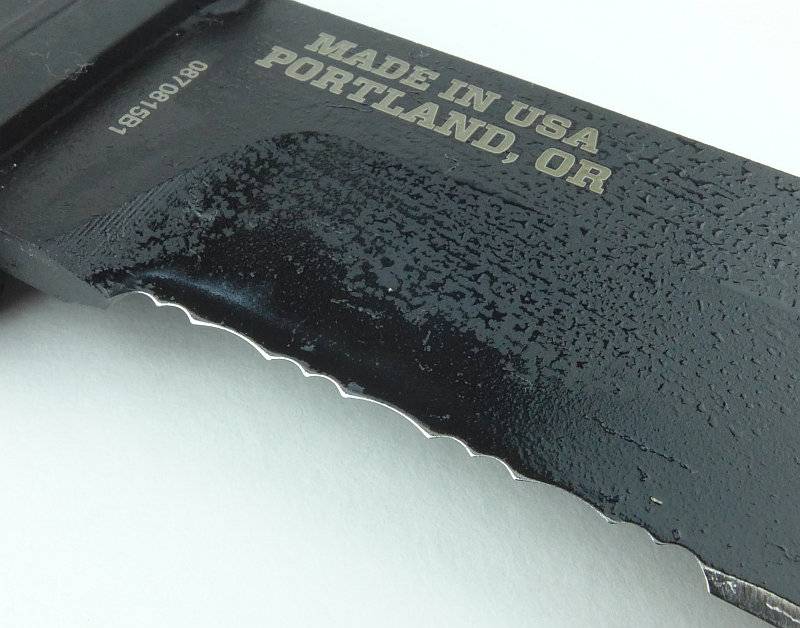
The ceramic coating seems to have a slight non-stick effect as the oil beads up on it.
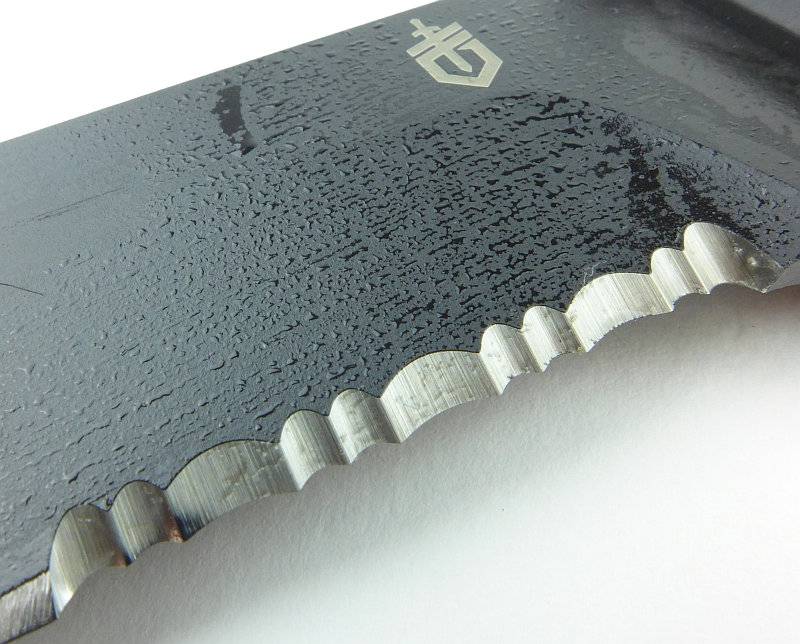
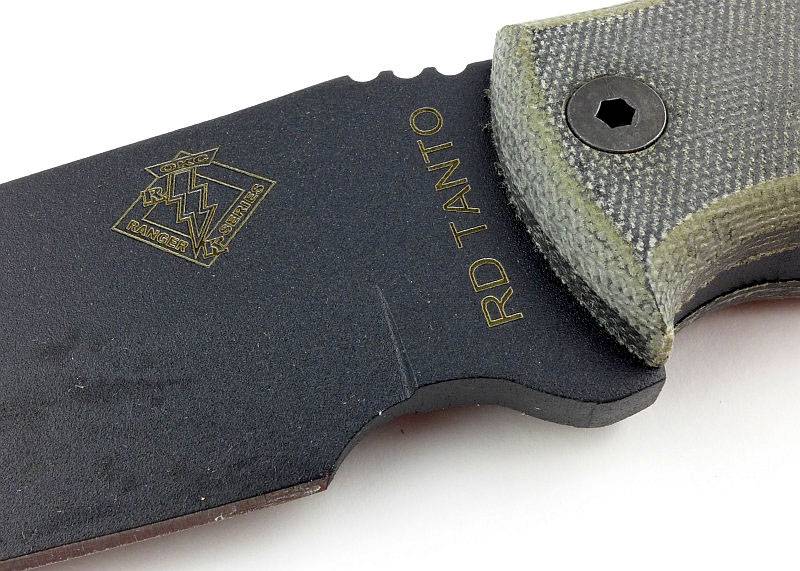
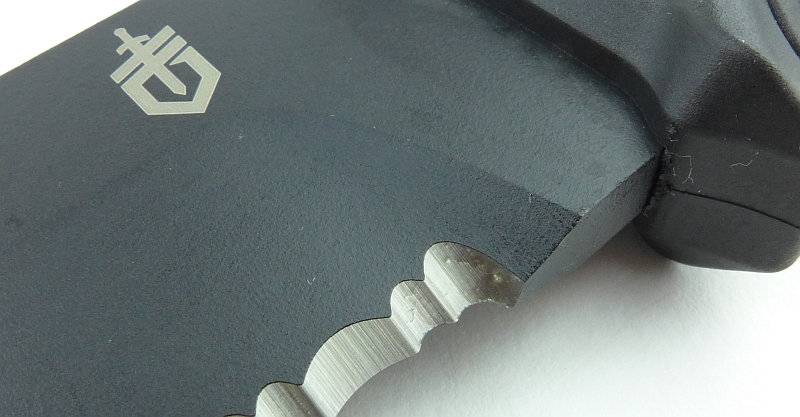
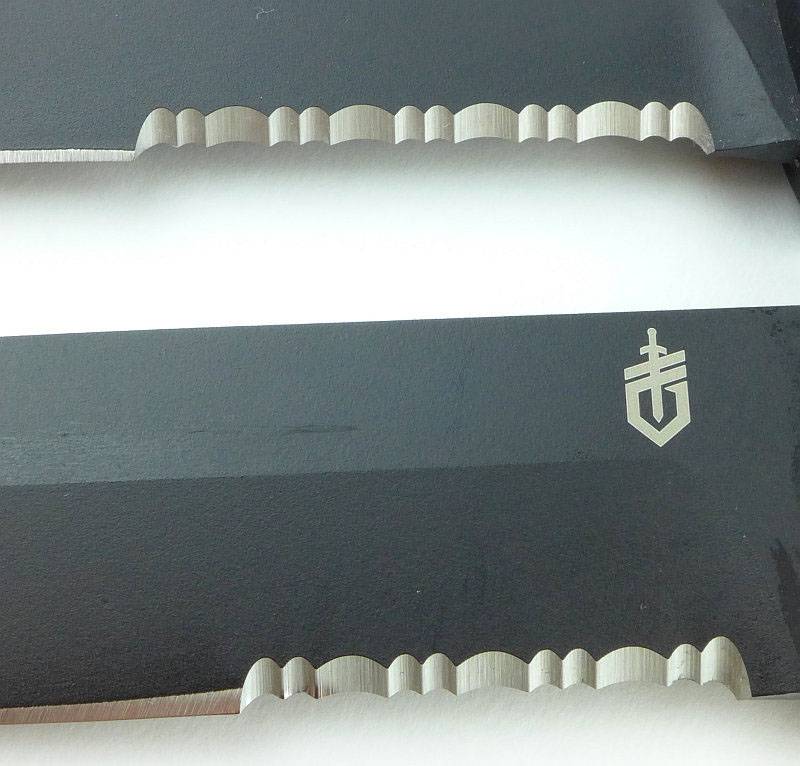
You might also note that the length of the serrations is less than one third of the blade’s cutting edge.
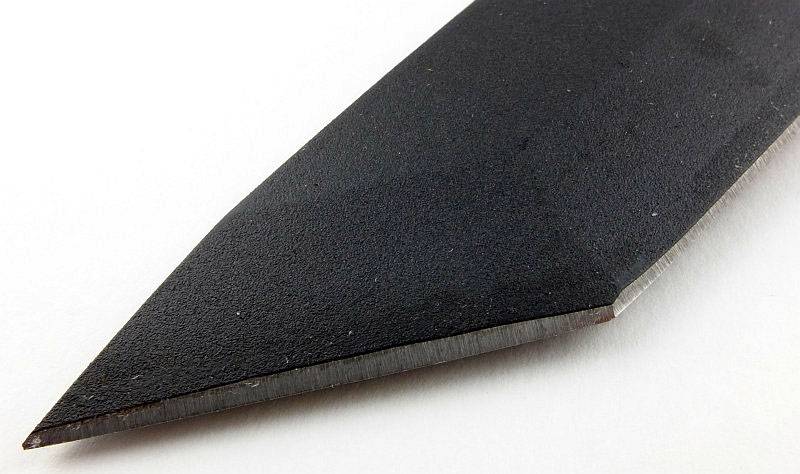
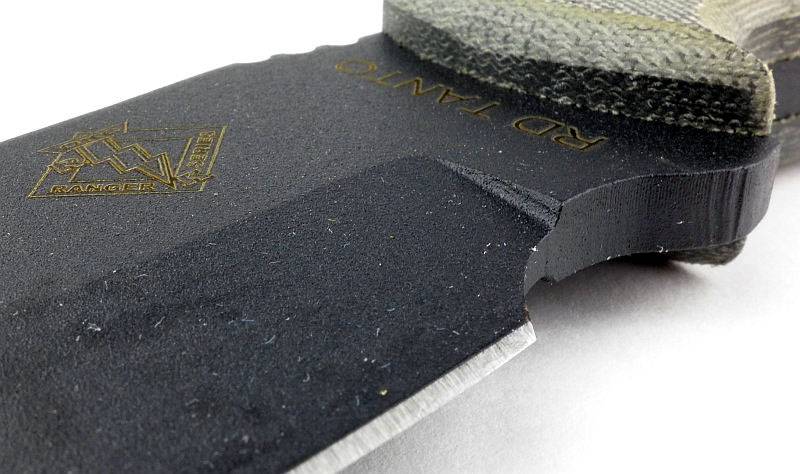
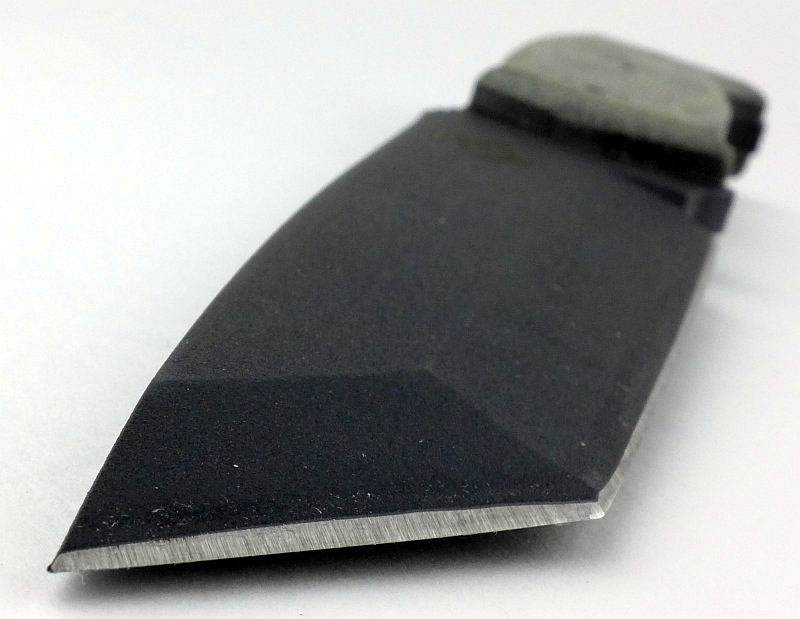
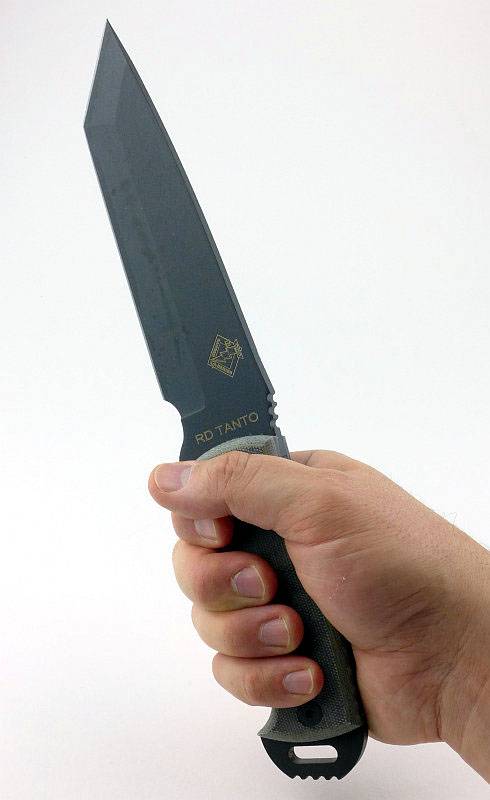
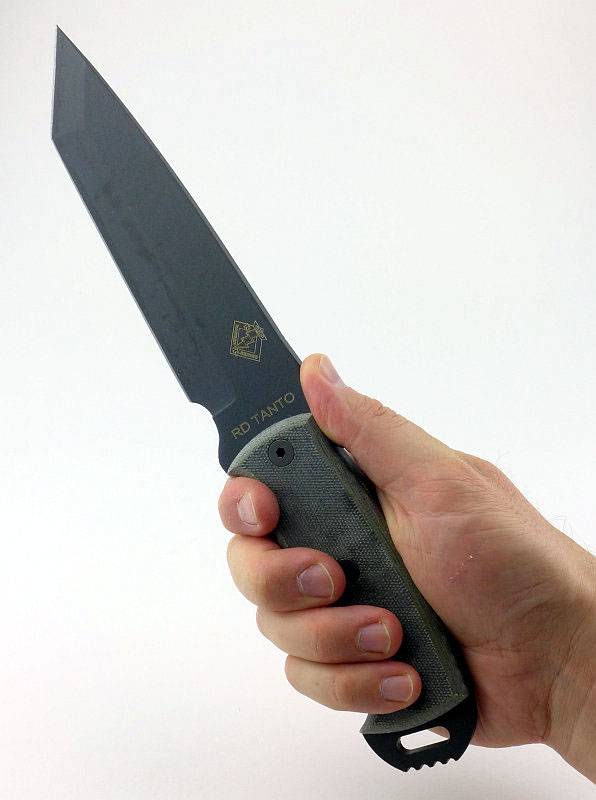
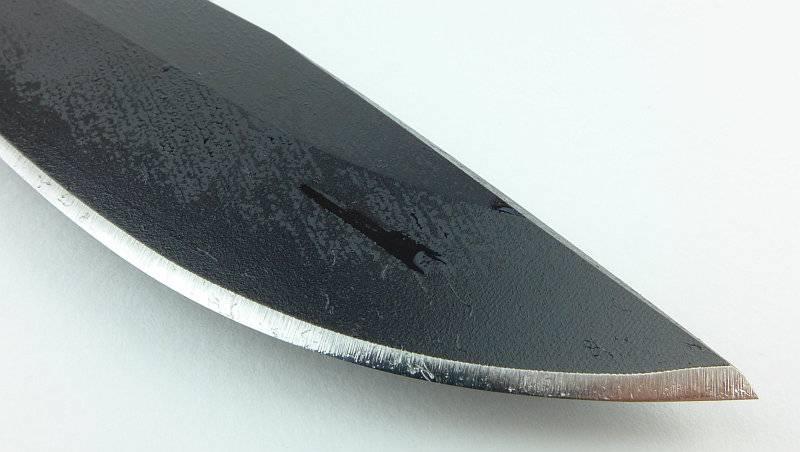
The grind provides a powerful and strong point to the knife.
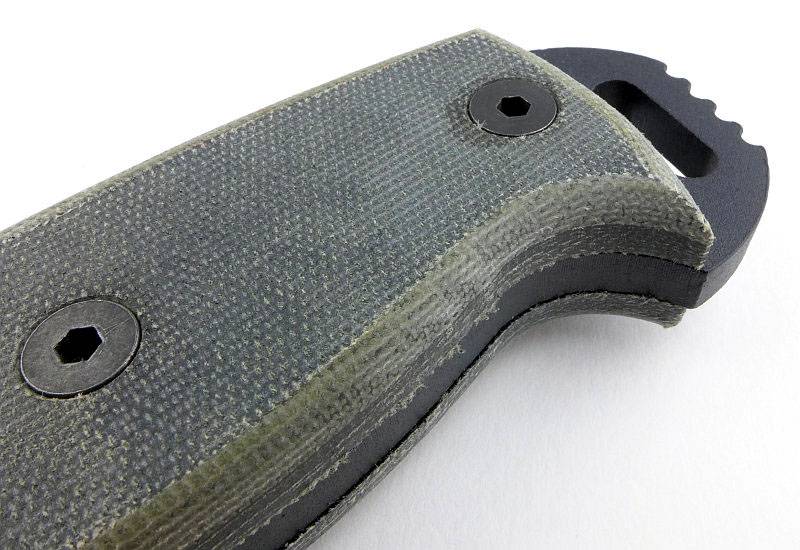
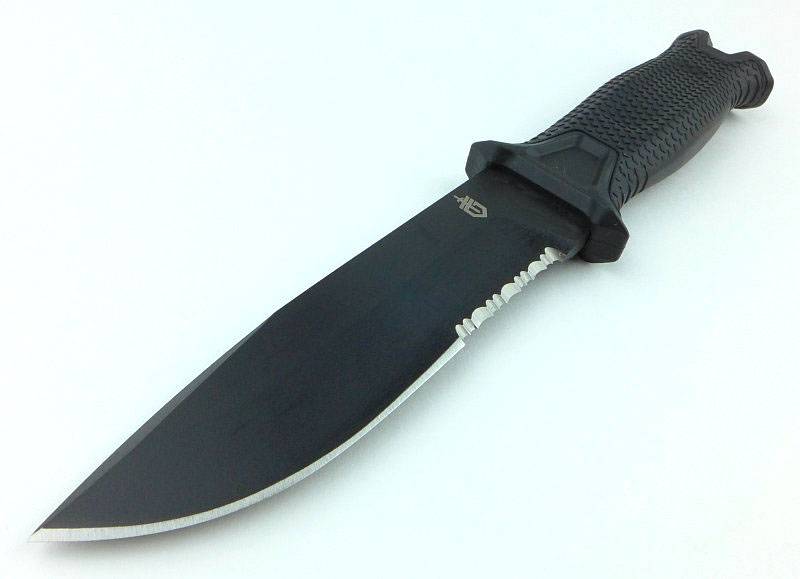
Despite the grip looking quite flat when in the sheath, you can see there is a definite palm swell.
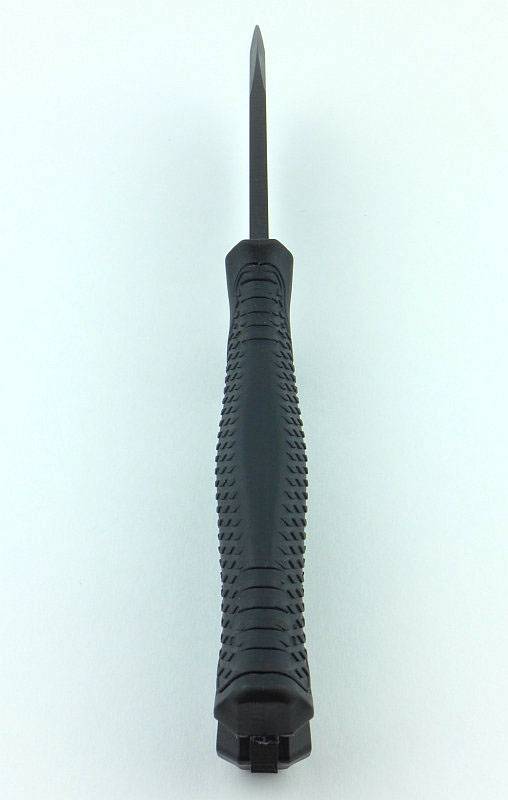
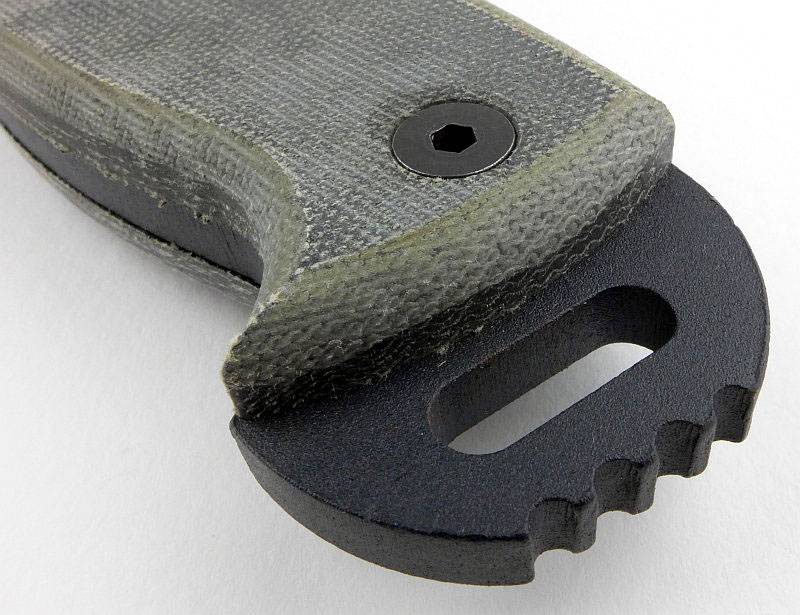
The full tang protrudes from the handle providing a lanyard hole and glass breaking point.
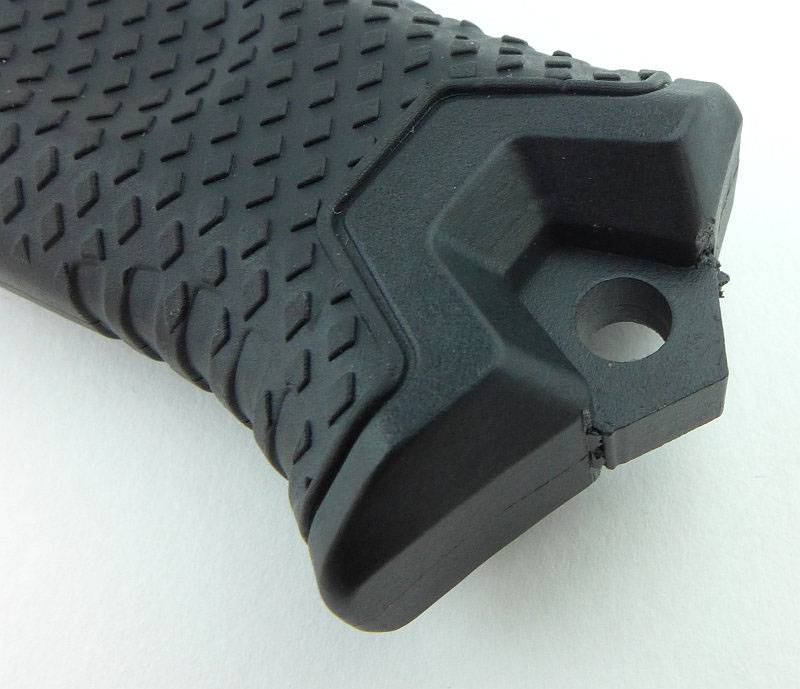
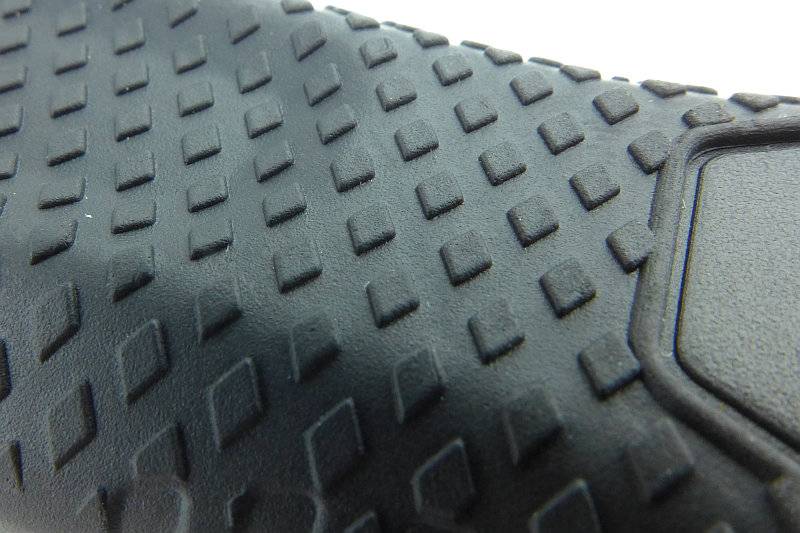
There is a rubber over-mould on the glass-filled nylon handle which has a diamond-shaped raised grip pattern.
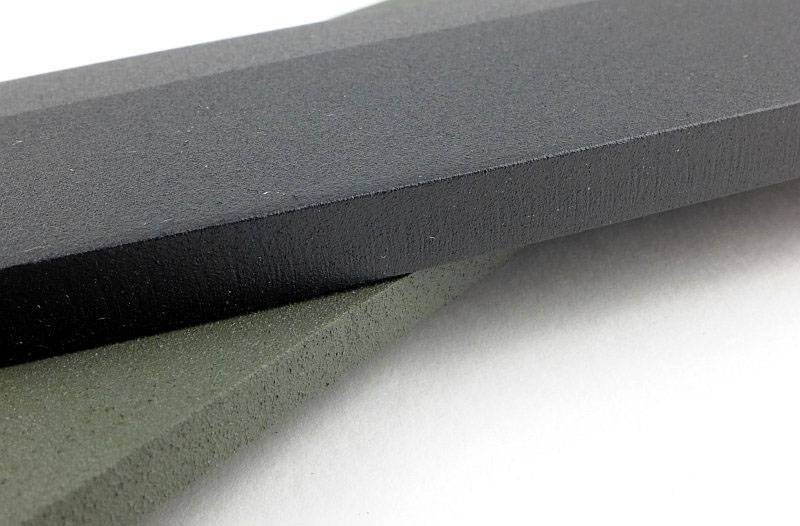
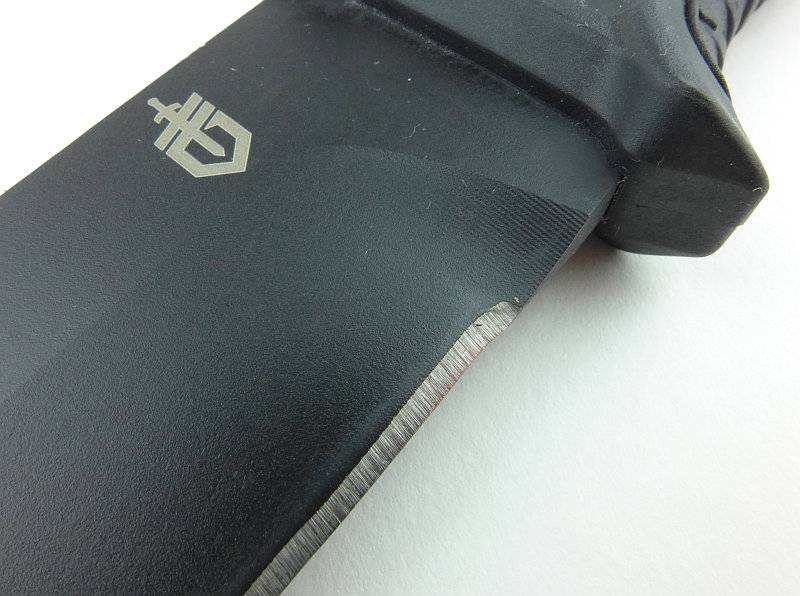
Keeping the blade strength to the maximum the plunge line is a smooth curve transitioning from cutting edge to ricasso.
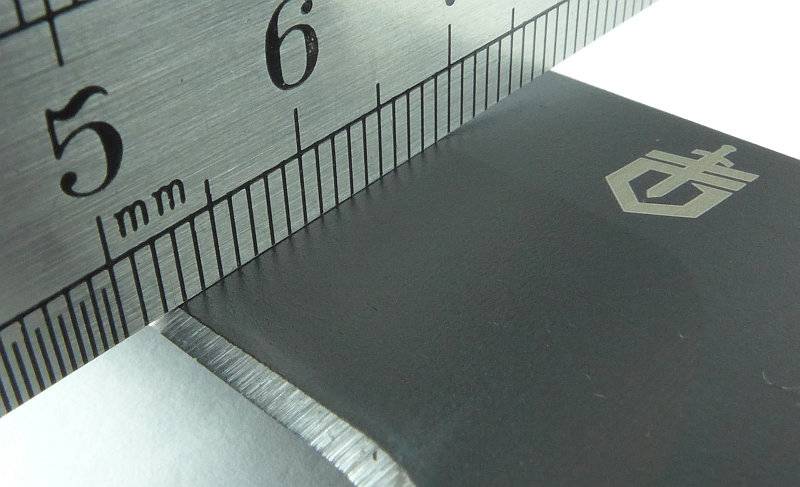
Looking at how the cutting edge terminates for the plain edge version. I shall probably be adding a sharpening choil myself to this one.
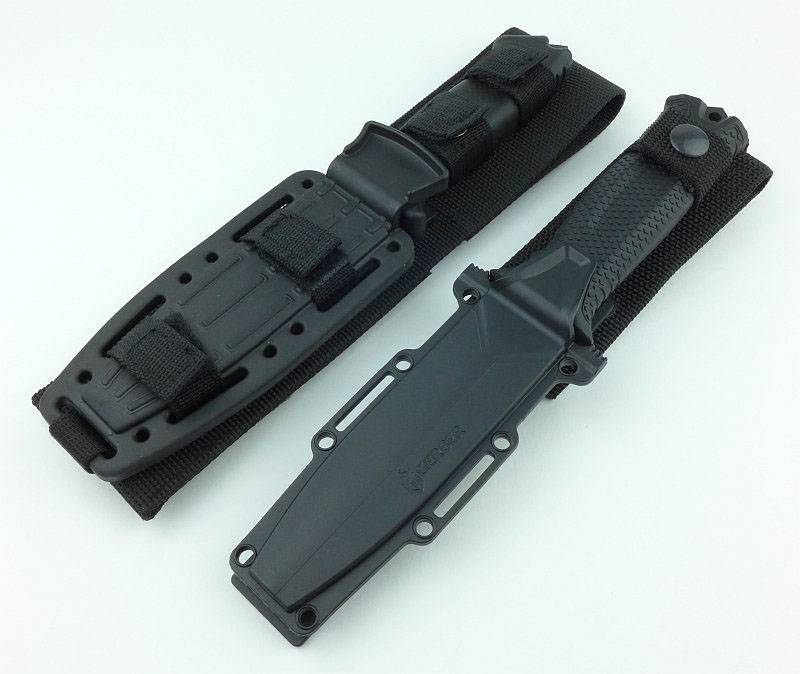
As you would expect, when sheathed there is no visible difference between the plain and part-serrated versions.
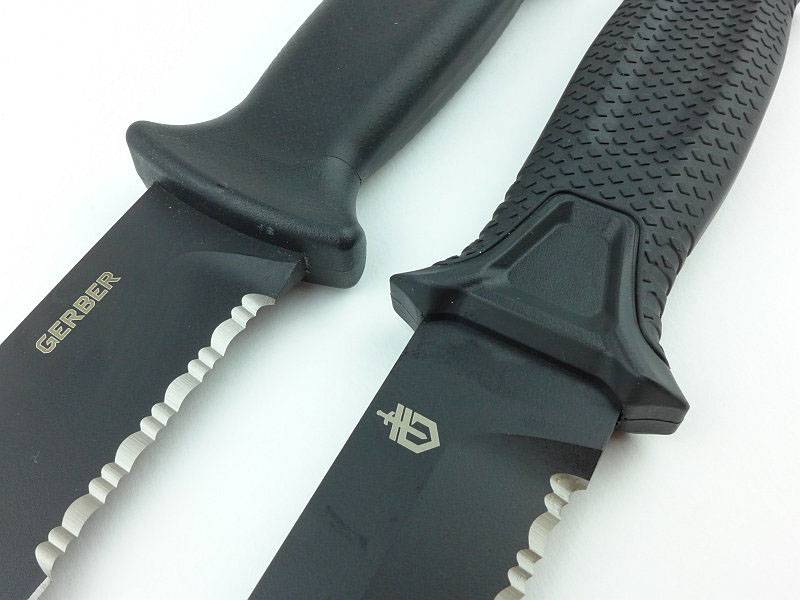
Let’s have a quick look over the difference between them.
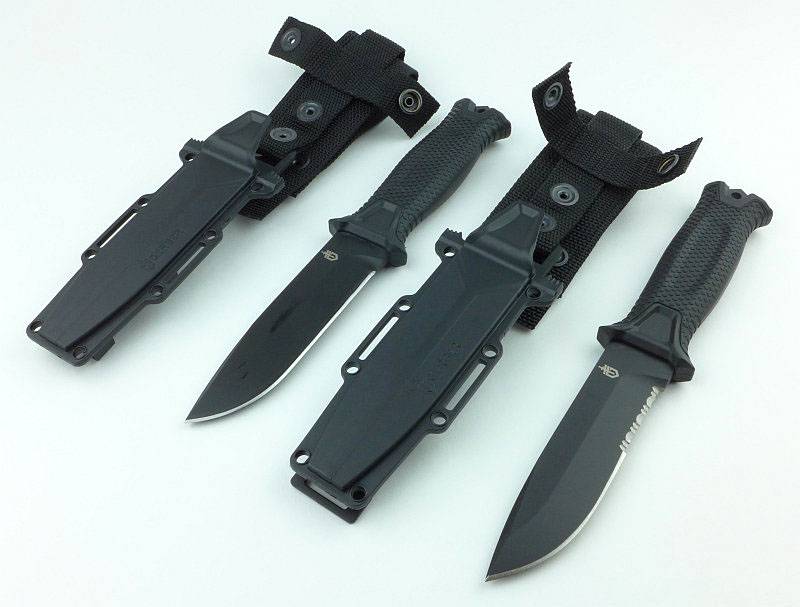
Starting with a simple side-by-side.
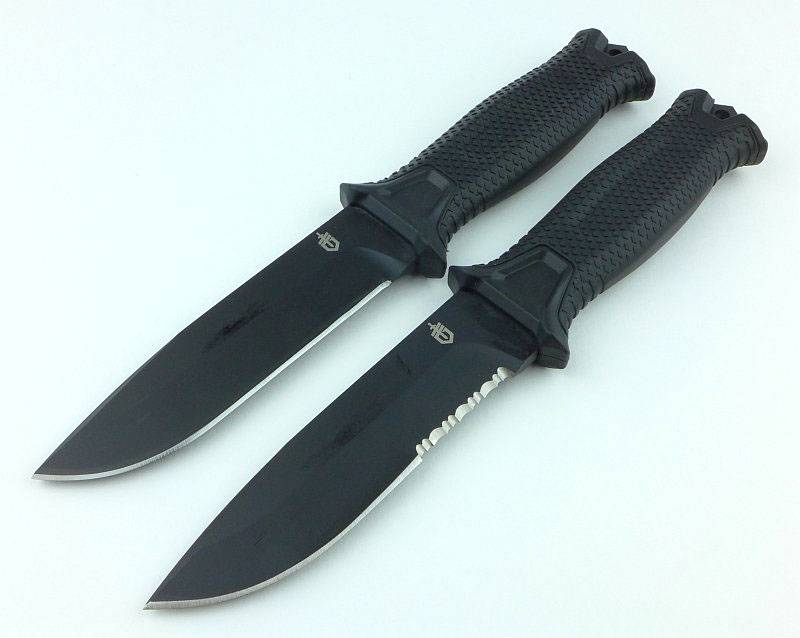
Of course, the blades are made from exactly the same blade blank.
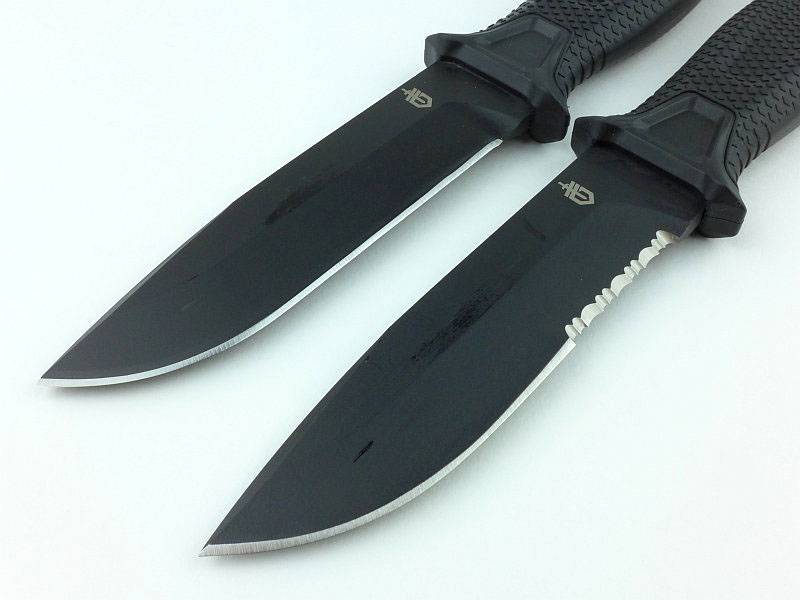
Having that part-serrated edge always seems to make that version look as if it has more ‘belly’ near the front of the blade. This is because the serrations have to be cut quite deeply into the blade due to being a single bevel grind.
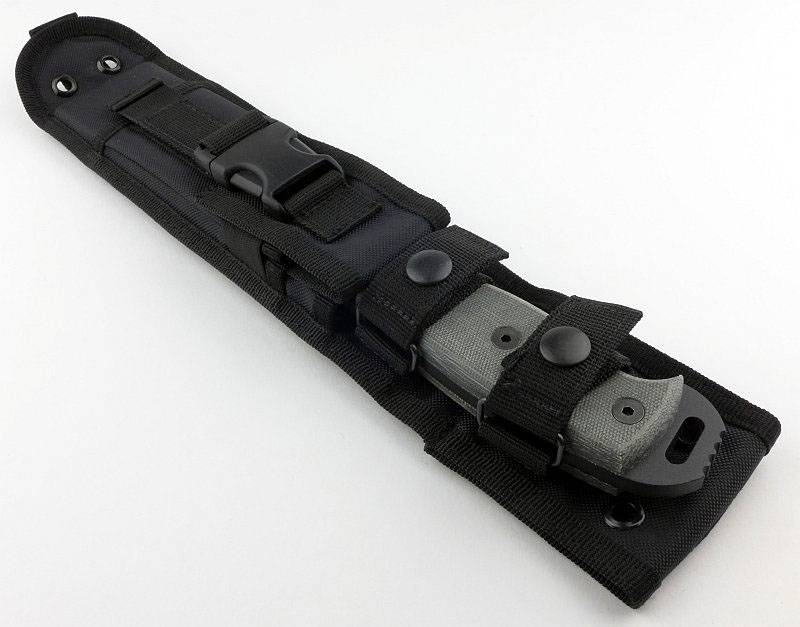
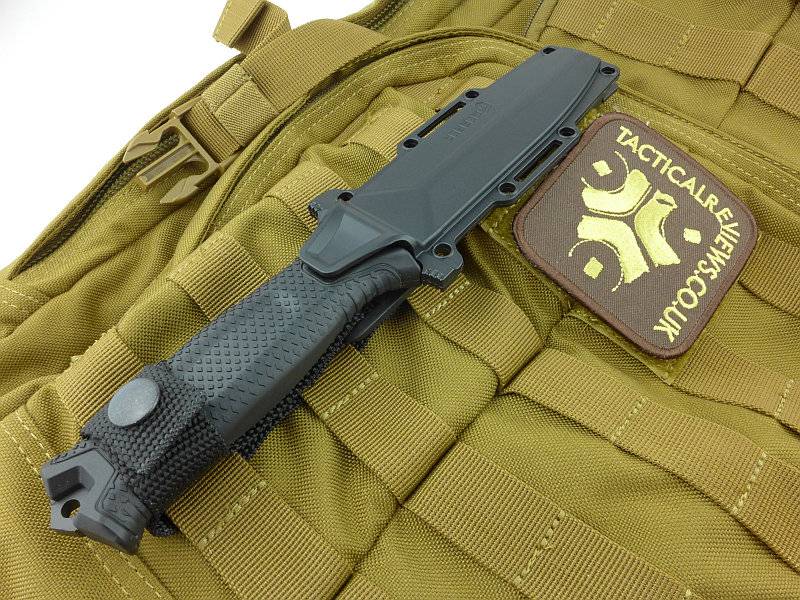
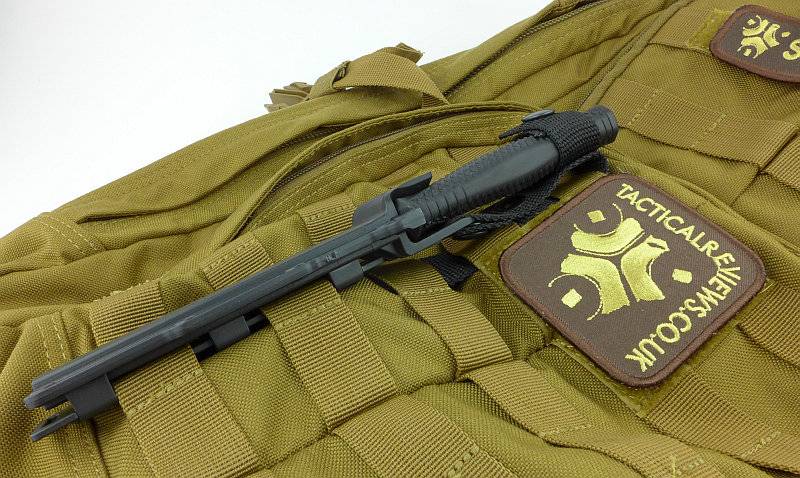
Now we have had a good look over the Strongarm, it is time for that PALS attachment. Thanks to the secure retention system in the sheath, the knife can be happily mounted tip up or down.
When PALS mounting you remove the belt loop and use the hanger strap to keep the handle from flapping. This hanger strap has one press-stud to secure it to the webbing and the rest of the strap needs to be tucked out of the way.
The plastic sheath fits into the PALS webbing like this.
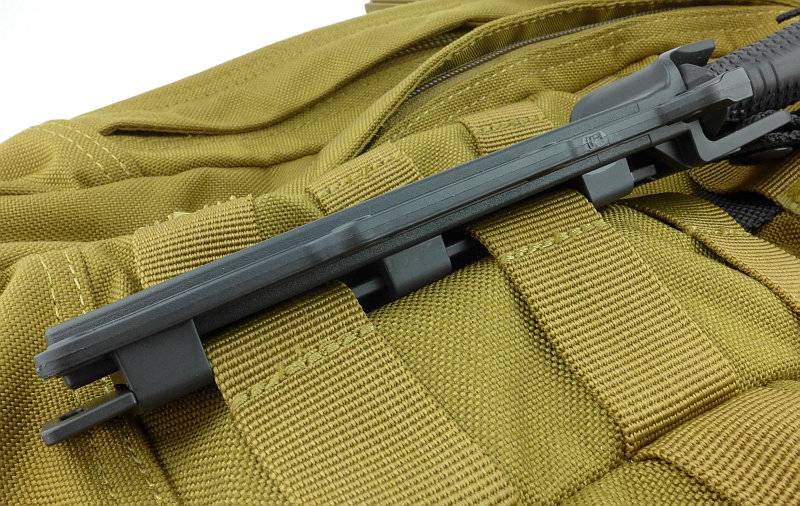
A very neat PALS compatible system and far more compact than the LMF II or Prodigy.
What it is like to use?
I’d like to start this section with a little comparison to its most closely related sibling, the Prodigy. I really like the LMF II and Prodigy, so if there are any comments that sound anti-either of them it is only by way of saying how the Strongarm has improved on them.
The most obvious difference is the size of the sheath and the retention tab. The new retention system is secure, but much easier to use. Overall the force required to remove the knife is slightly less with the Strongarm, but still plenty strong enough to keep the knife in place. There are also two thumb tabs moulded into the sheath to give you a leverage point for bringing the knife out of the sheath under much more control than just pulling it out. The streamlining of the sheath makes a huge difference to the apparent size of the knife when carrying it.
Once the Prodigy and Strongarm are out of their sheaths they are more similar in appearance but with several key differences that we will take a look at.
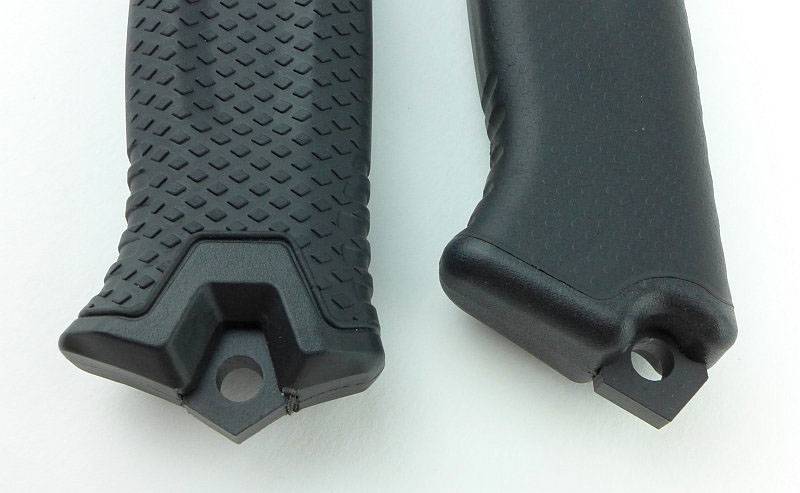
The area of the handle where the retention system holds the knife is quite different. For the older Prodigy, the normal moulded guard is gripped by the sheath, but in the Strongarm a clearly dedicated section of the guard is specifically shaped for the sheath to click into. In this way, instead of the sheath needing to grip the ‘normal’ handle, the new Strongarm has had the retention system designed into the knife handle making it much more precise.
Also of note is the handle texture on the Strongarm; while the Prodigy feels very comfortable and has good grip, the grip pattern of the Strongarm makes it feel rough and like it is positively holding onto you.
The part-serrated portion of the blade on the Strongarm has been reduced. This is most welcome as the serrated part of the Prodigy blade did seem to dominate it.
Two features we can notice here are the position of the striker on the pommel, and the grip length. The striker on the Strongarm is more central than on the Prodigy making it more natural to strike on target. Though the handle itself is the same overall length, the grip hook has been pushed further along the handle effectively making the grip longer giving more room for a gloved hand.
Finishing up in this comparison with an overhead shot which shows how similar the overall dimensions are to the older Prodigy.
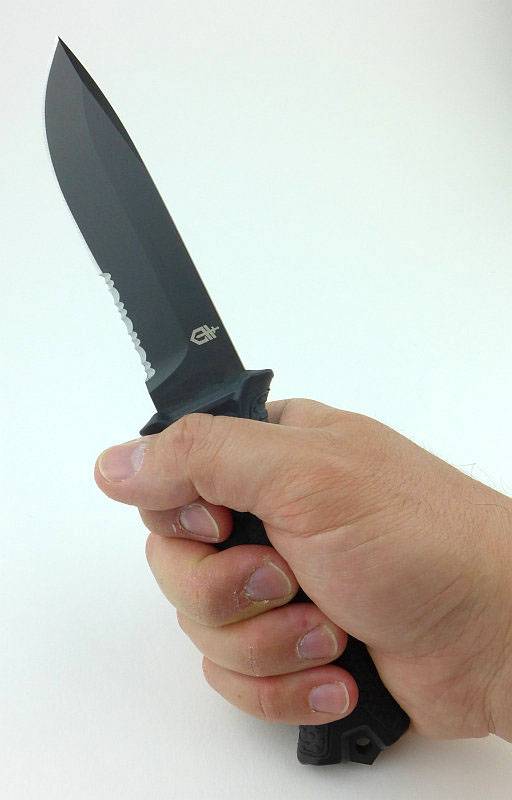
In the Strongarm, Gerber have pitched the size bang-on for an easily carried but still capable survival knife. For reference, I take XL size gloves. Personally I prefer a little more body to the grip, but this does need to work well for the average hand and I can still get a good grip without it feeling too small.
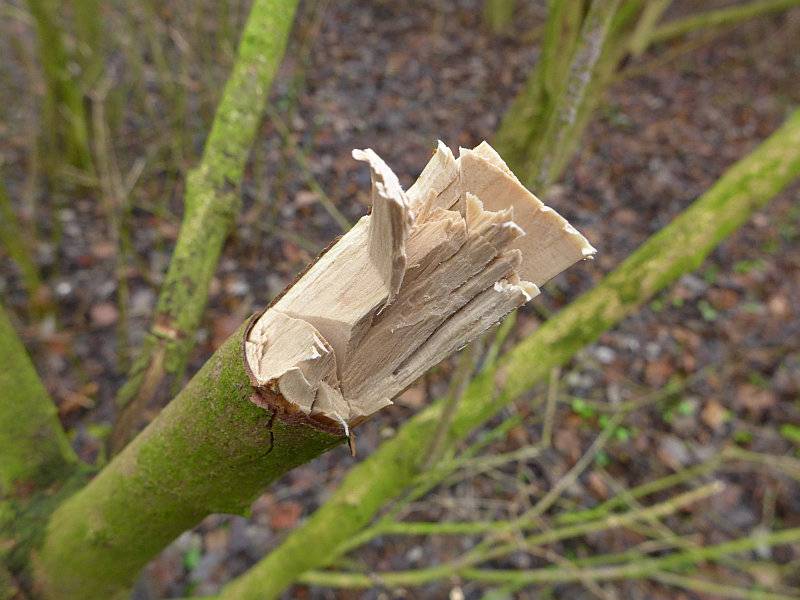
I don’t have the facilities to test the Strongarm in an escape/rescue/breaching scenario so instead have to focus on more of the survival and camping aspects. Both the plain edge and part-serrated version are on test, and personally I favour the plain edge as a general working tool, but do see a place for the part-serrated as a backup tool. One of the reasons I don’t like the part-serrated blade is for the wood preparation and carving round the camp. As shown here the serrations make significant shaping in those power cuts carried out close to the handle. It certainly cuts well, but serrations cuts best when slicing and not so well in push cuts. Also if your uses are for cutting a lot of fibrous material and ropes/cords, then the serrations are going to be a real boon.

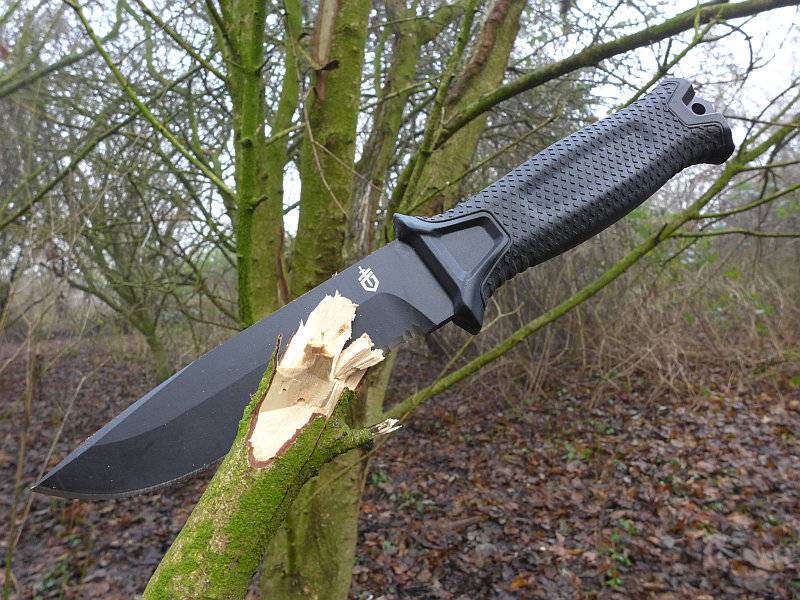
Thanks to the thick blade stock, the Strongarm’s blade has enough weight in it to work on its own hacking into branches. Here is a rather untidy job on some dormant wood and is my first attempt while I was getting a feel for the best grip to use (two or three finger).
So even before you have found yourself a baton, it gets through some smaller branches easily enough. More fatiguing than a bigger heavier knife, but it will do the job.
Having followed the evolution of the Gerber line to the Strongarm, there isn’t a single feature I would undo and want to revert to an earlier version. I still like and use the earlier knives, but the Strongarm is an improvement over them in every way, not least the ease of carry. Remember the ‘best’ survival knife is the one you have on you, so where I might not carry the LMF II, I would carry the Strongarm.
Review Summary
The views expressed in this summary table are from the point of view of the reviewer’s personal use. I am not a member of the armed forces and cannot comment on its use beyond a cutting tool or field/hunting knife.
Something that might be a ‘pro’ for one user can be a ‘con’ for another, so the comments are categorised based on my requirements. You should consider all points and if they could be beneficial to you.
| _______________________________________________ | _______________________________________________ |
| Things I like | What doesn’t work so well for me |
| _______________________________________________ | _______________________________________________ |
| Simple and effective blade retention system. | Retention strap press-stud was initially too stiff and caused fraying of the strap. |
| Part-serrated and Plain Edge versions available. | Blade a little too thick for good food preparation. |
| Multi-mount sheath with belt, horizontal and PALS options. | |
| Full Tang. | |
| Ambidextrous sheath. | |
| Enough weight in the blade to chop. |
Discussing the Review:
Please feel free to add comments to the review, but the ideal place to freely discuss these reviews is on a forum. If you started reading the shorter forum version of the review, but followed the link this full exclusive review, please return to that forum to discuss the review there.
If you read the review entirely on Tactical Reviews, please consider one of the following to join in any discussion.
BladeForums – Knife Reviews (US based Forum for Knife Discussion)
CandlePowerForums – Knife Reviews Section (Largest and Friendliest Flashlight Community Forum)