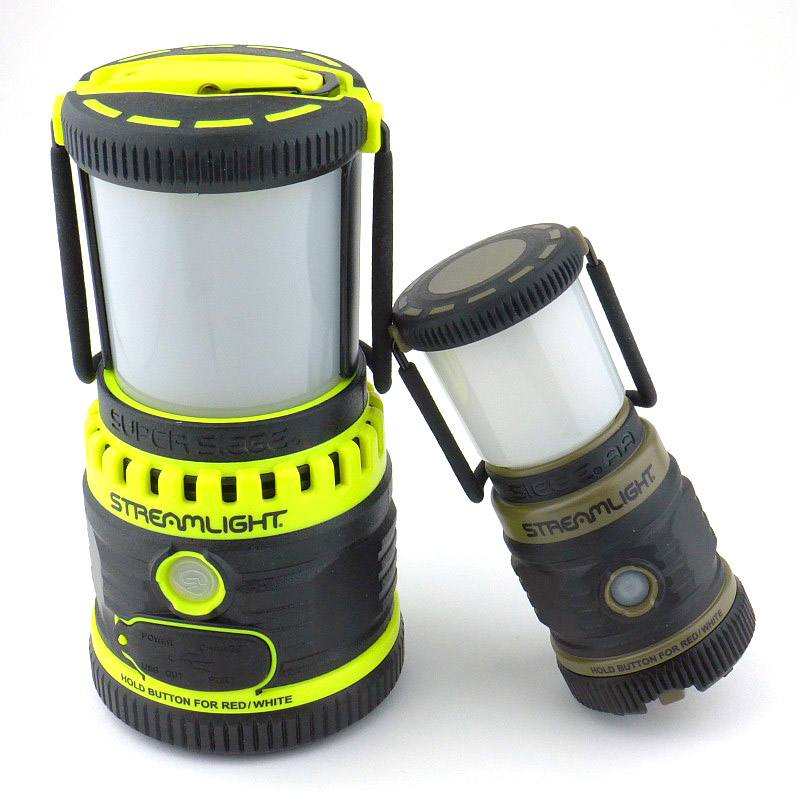
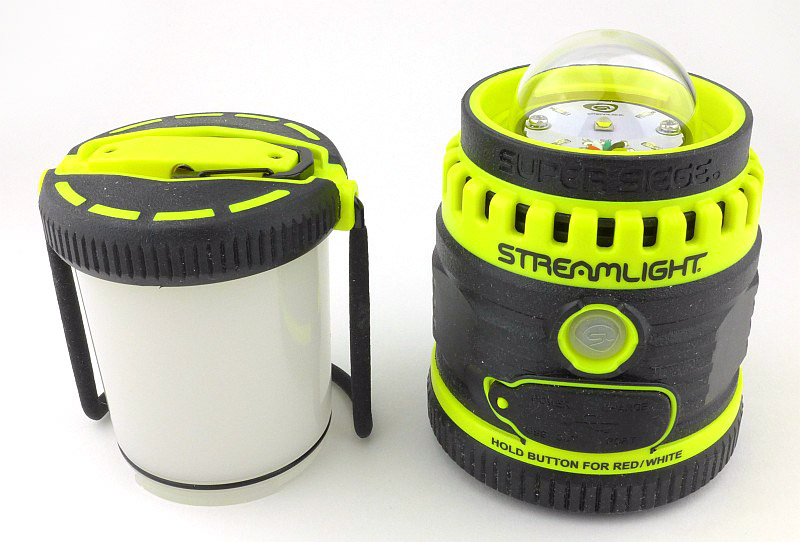
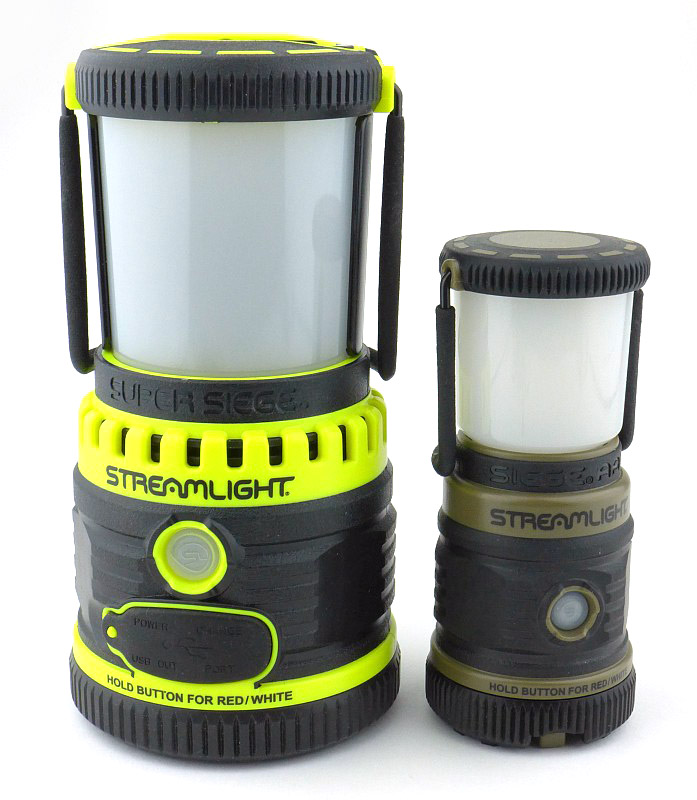
In its first incarnation, the Siege lantern was a full size D-cell powered light, shortly followed by the cute Siege AA (you guessed it, powered by AA-cells). But not yet finished, Streamlight have taken the lantern to another level with the Super Siege, which now features a built-in rechargeable battery and USB power bank function, along with an essential glare-guard for task lighting – it certainly is the Super Siege.
Taking a more detailed look:
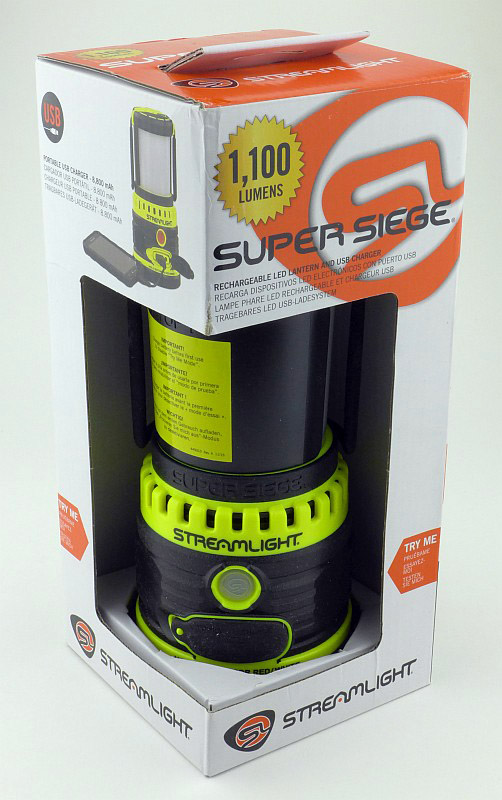
Aimed at attracting people in a retail store, the box is a semi-exposed ‘try-me’ type.
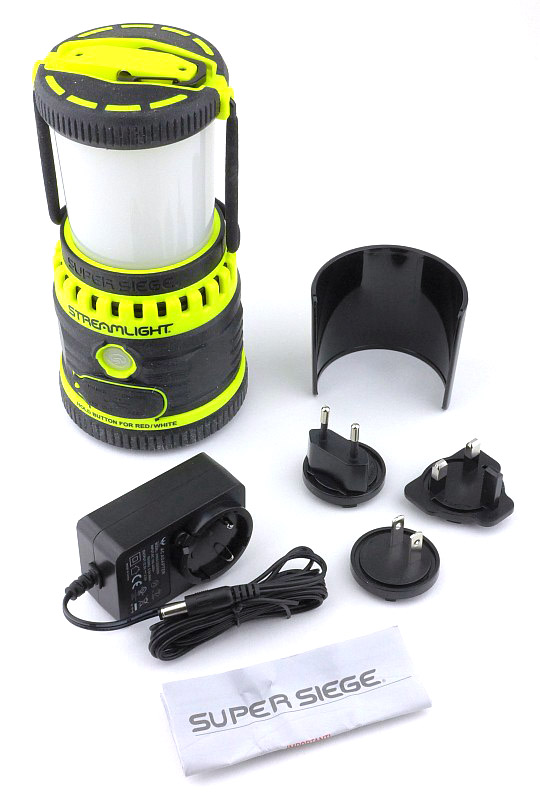
In the box we have the Super Siege, its glare guard, mains power adapter and a set of three plugs for it (US, UK and European), plus the instructions.
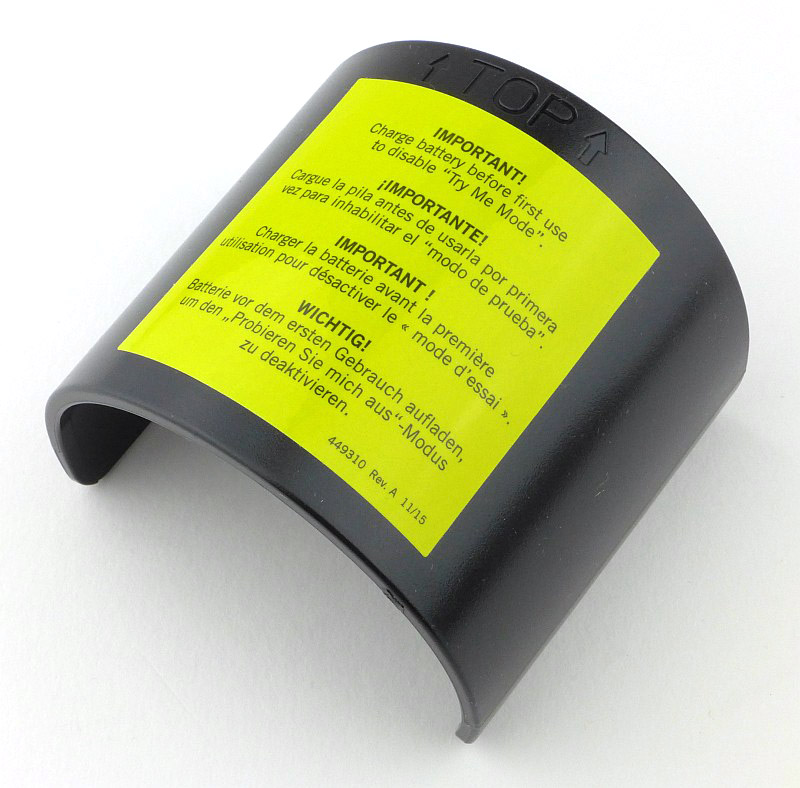
On the glare guard it tells you to give the Super Siege a full charge to disable the ‘try-me’ mode.
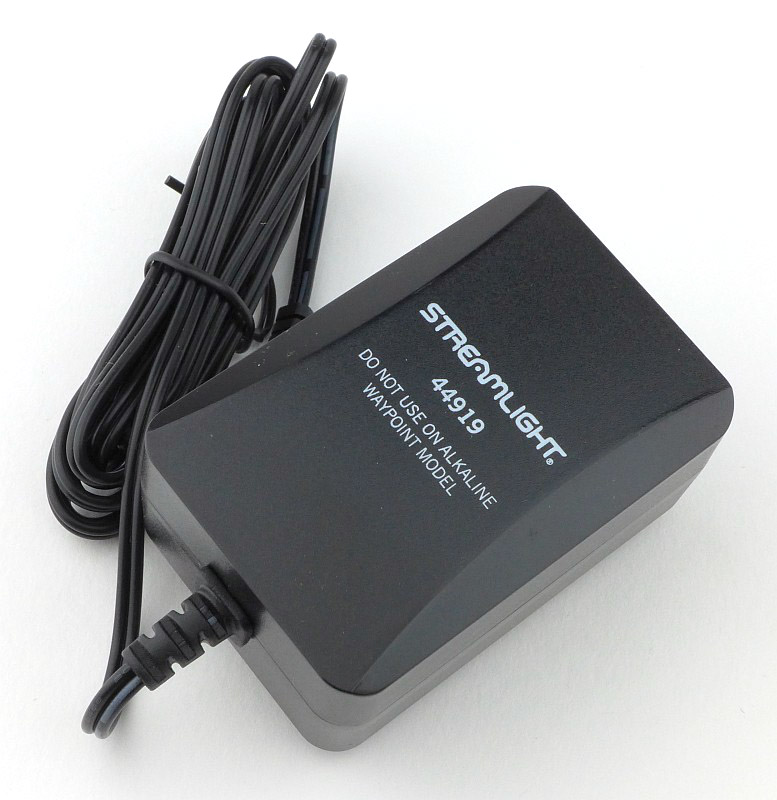
A Streamlight mains power adapter, which presumably also works with other rechargeable models as it tells you not to use it with the Alkaline Waypoint.
I need the UK plug, so here it is.
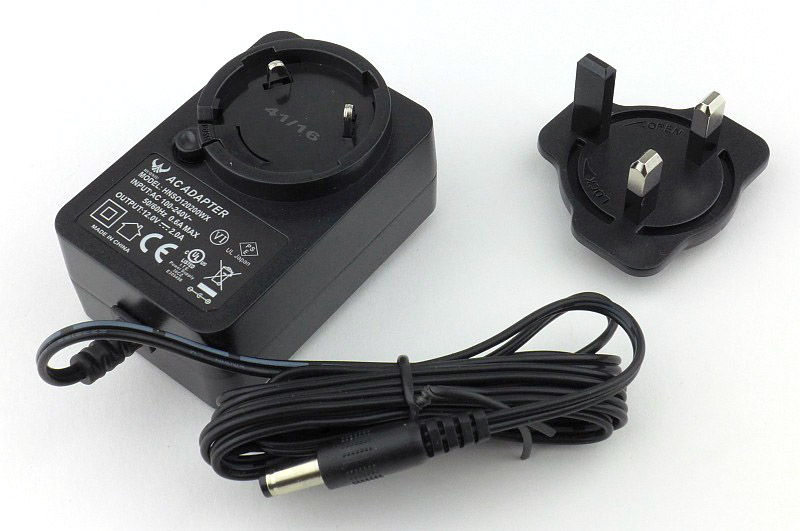
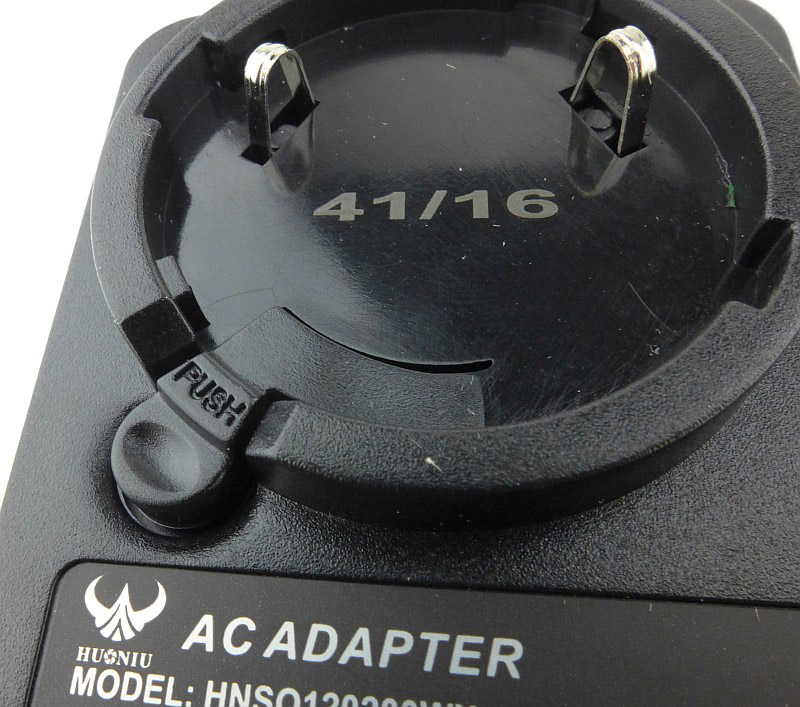
The mains adapter itself has a set of two contacts and a rotary connector for the plug. There is a release lever to allow you to easily swap over the plug type as and when needed.
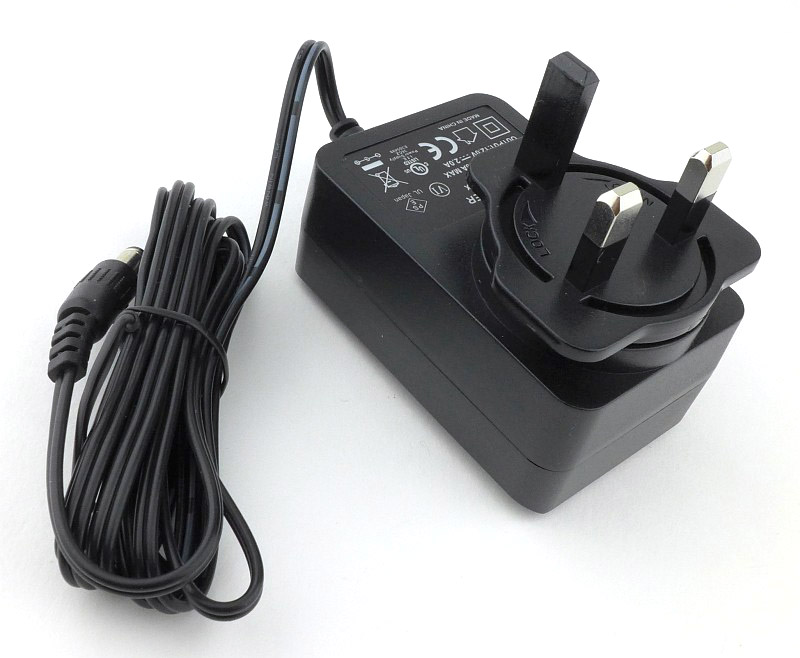
Ready to go with the plug fitted.
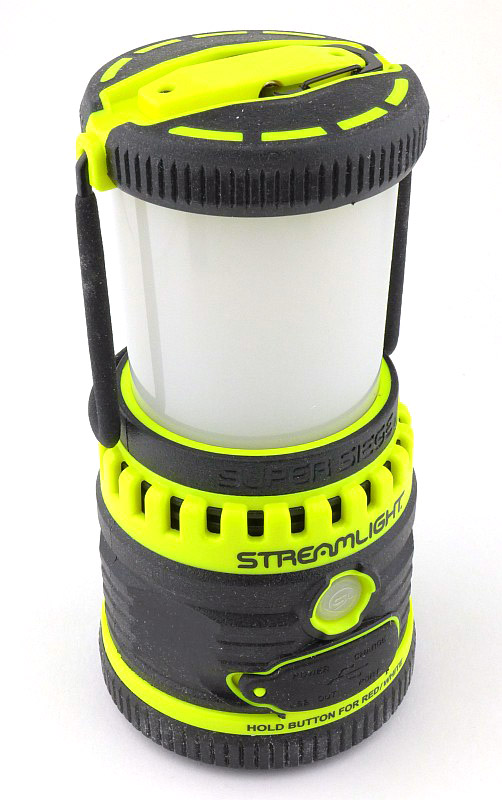
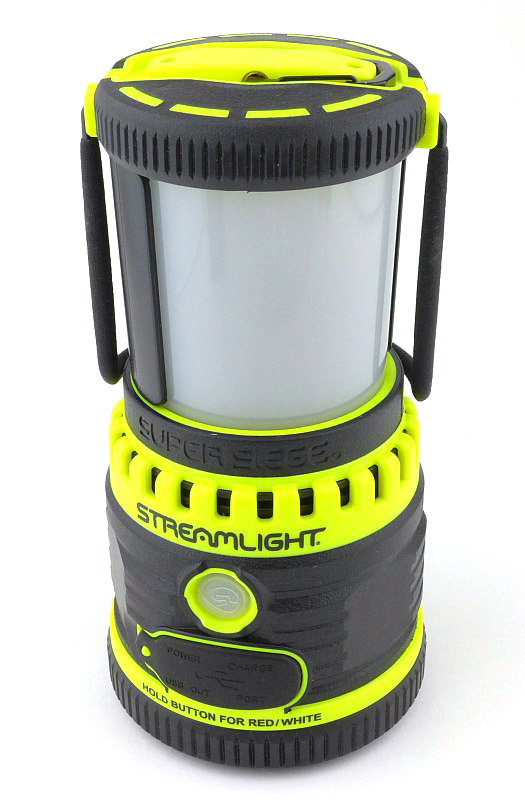
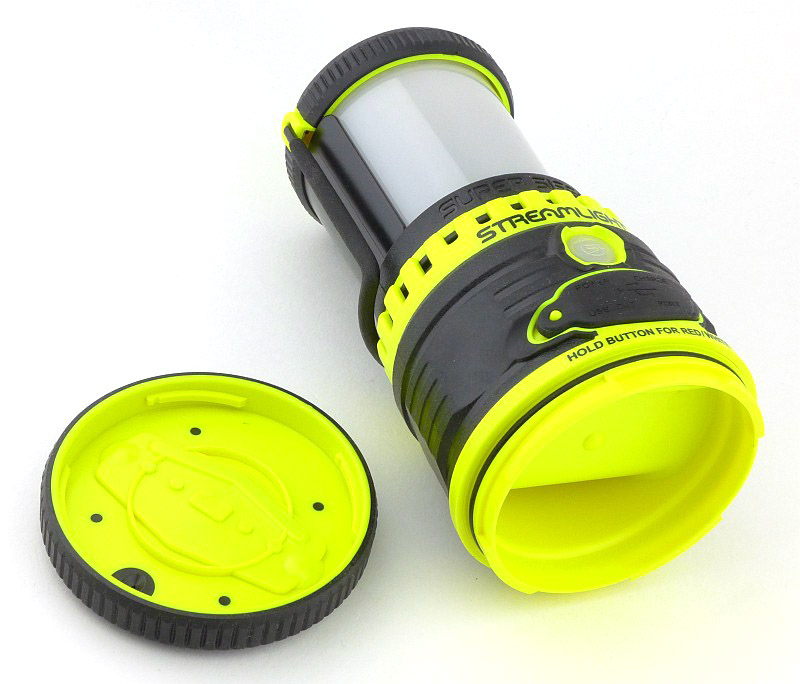
Wrapped round the Super Siege is a large carry handle and hook that lifts up.
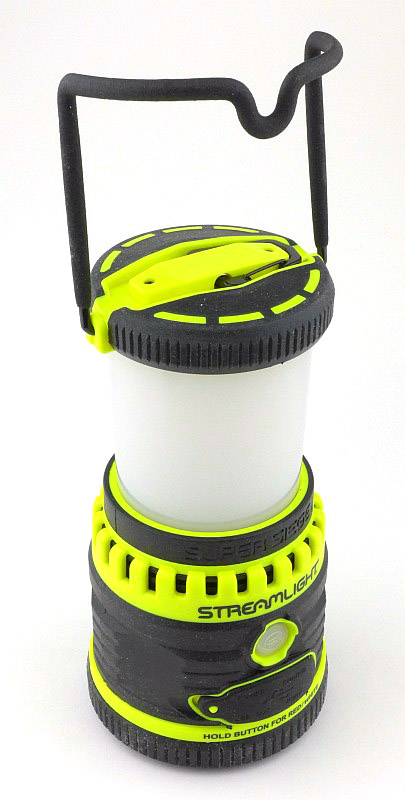
There is also a much smaller hanging clip incorporated into the top. This clip allows for a more secure attachment and keeps the light as high as possible.
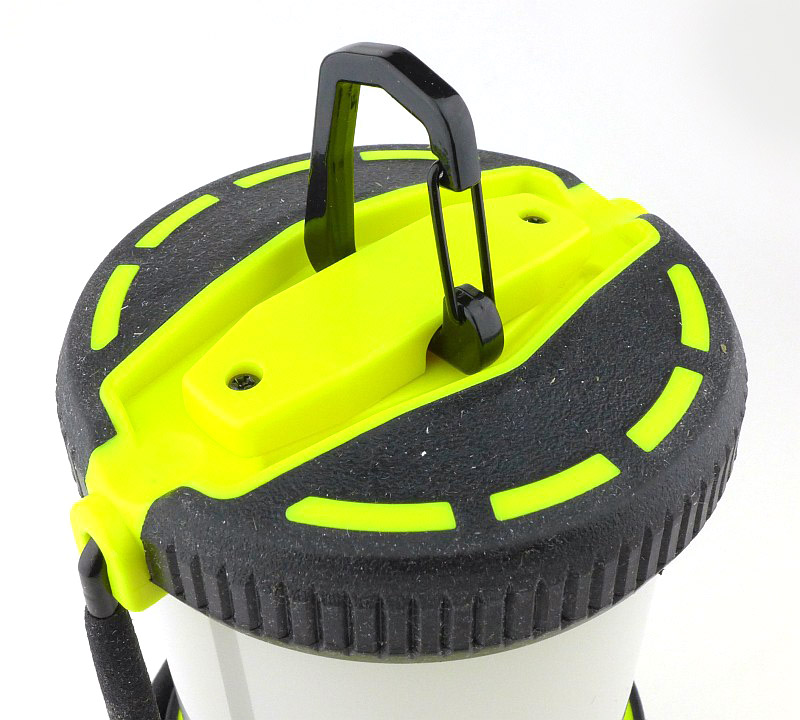
Flipping the lantern over, and there is an identical hanging clip in the bottom.

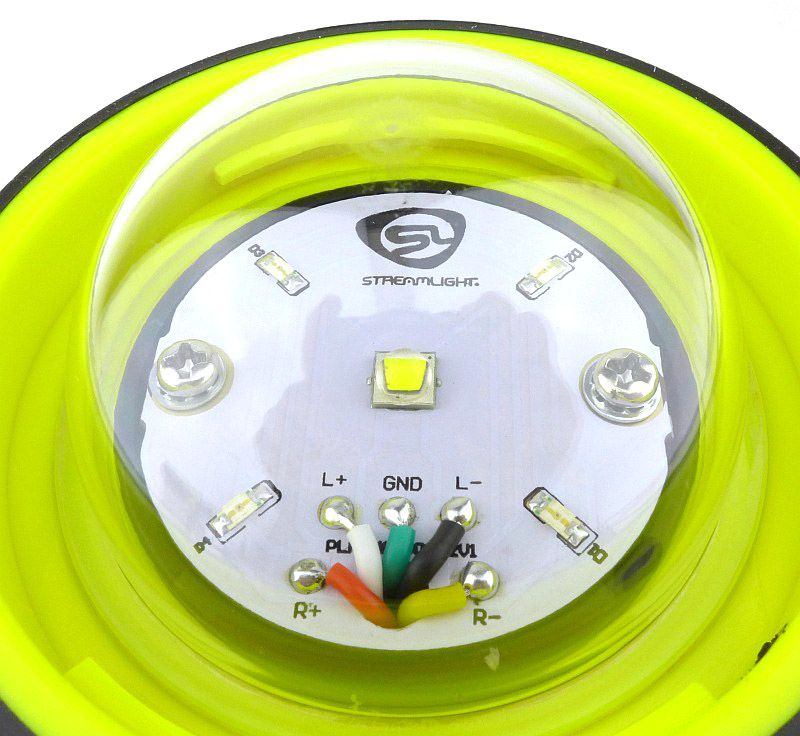
The hanging clip in the bottom makes more sense when you see that the diffuser for the main light can be removed exposing the protective dome over the Super Siege’s LEDs.
In the middle of the LED board is a white XM-L2 LED and round this are four red LEDs.
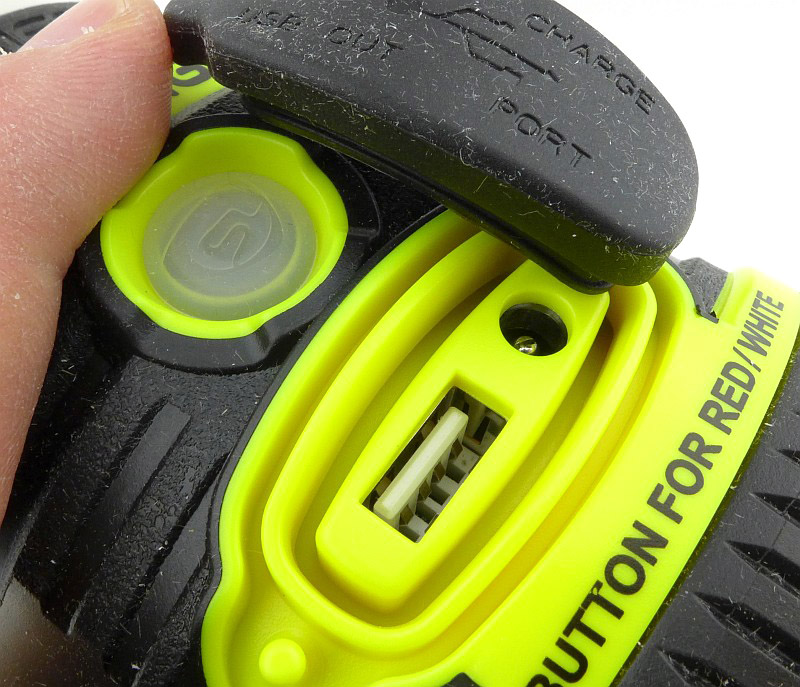
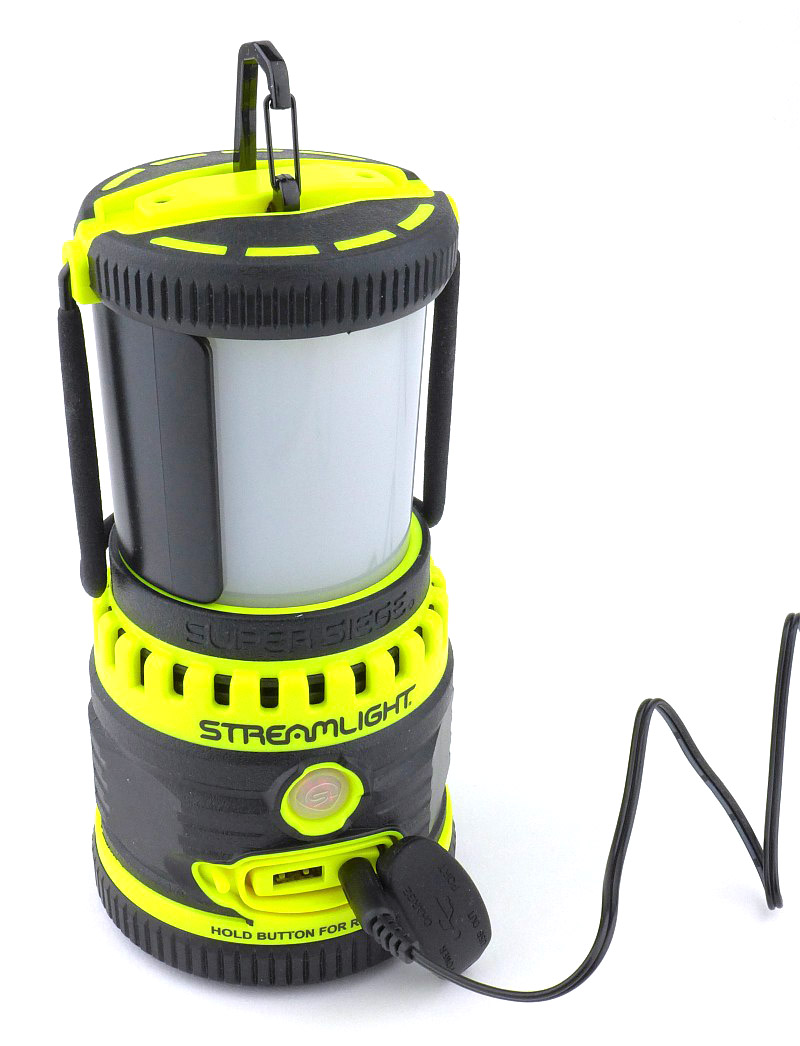
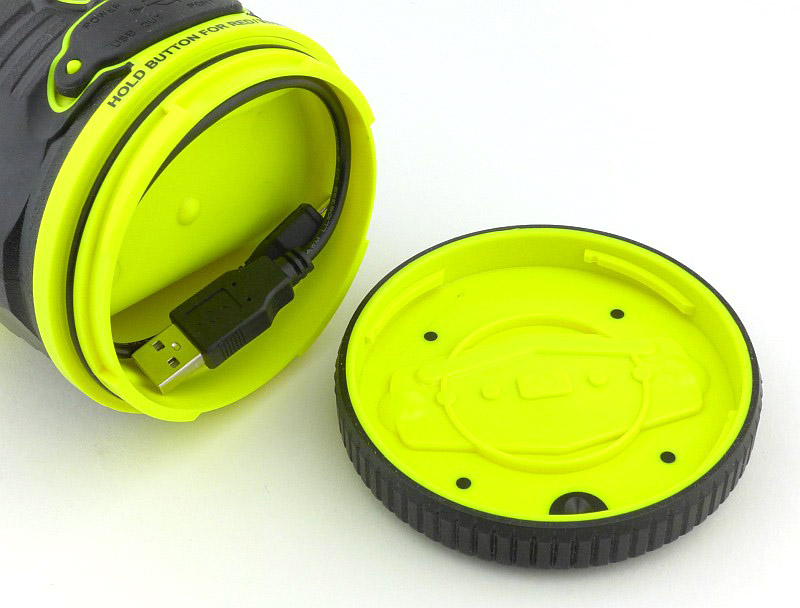
There is a single power switch on the Super Siege which also acts as an indicator light for both charging and using the light. Underneath that switch is a rubber protective cover hiding the charging port and USB power output.

Lifting aside the port cover to show the charging port and USB power output.
Fitting the glare guard to the lantern’s diffuser makes the light output directional, and it covers just over half the diffuser.
To charge the Super Siege, plug in the mains adapter and fit the round DC plug into the socket next to the USB port. Unfortunately the Super Siege cannot be charged from USB power.
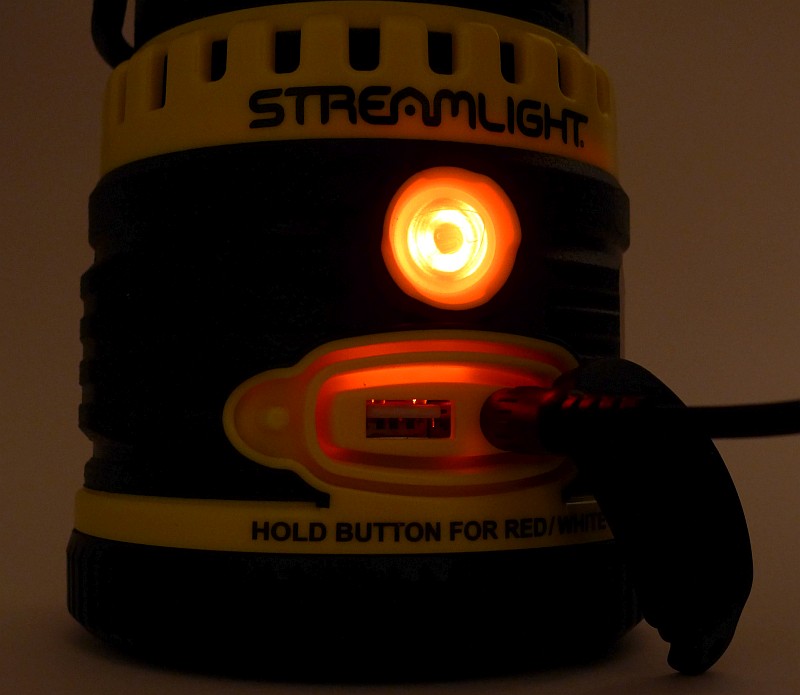
When charging the switch lights up red.
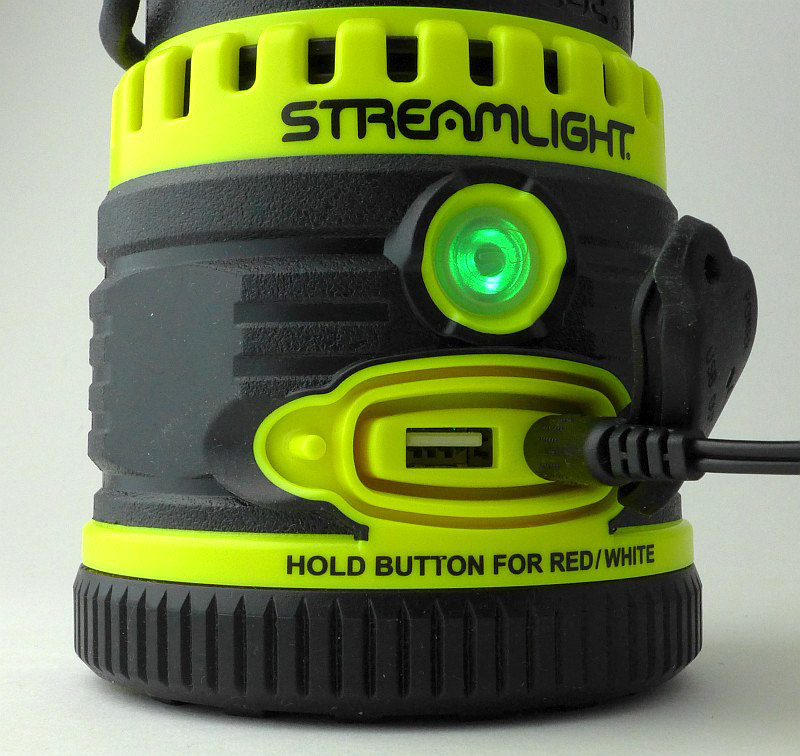
On reaching full charge the switch turns green.
Not to be forgotten is that the base has a concealed storage compartment. Twist off the bottom to access this.
The beam
Please be careful not to judge tint based on images you see on a computer screen. Unless properly calibrated, the screen itself will change the perceived tint.
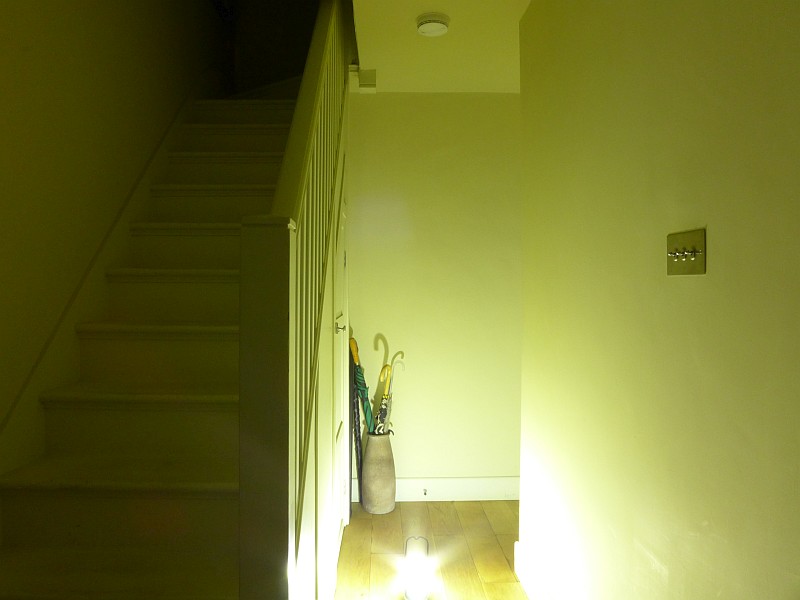
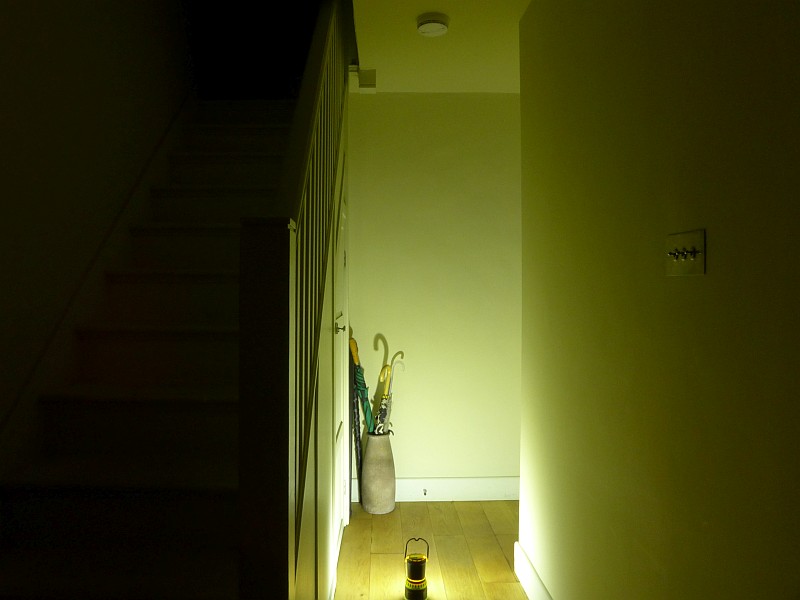
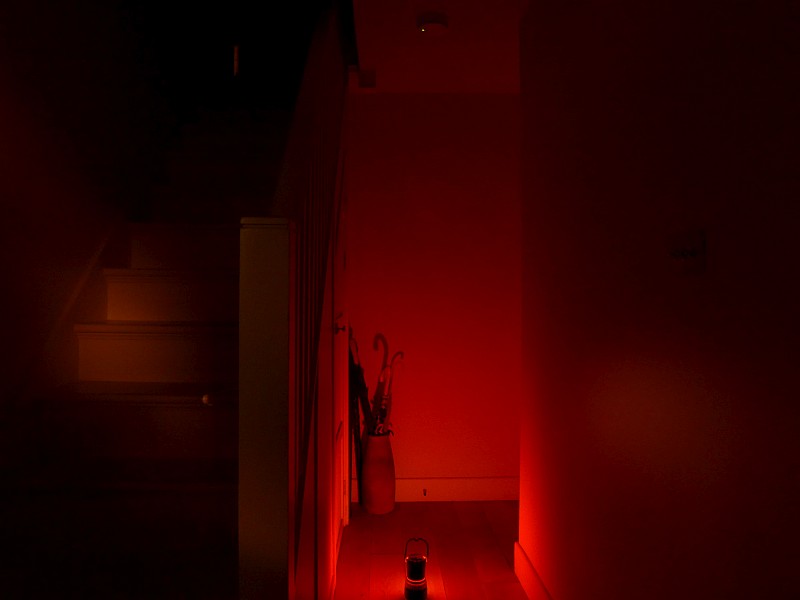
The indoor beamshot is intended to give an idea of the beam shape/quality rather than tint. All beamshots are taken using daylight white balance. The woodwork (stairs and skirting) are painted Farrow & Ball “Off-White”, and the walls are a light sandy colour called ‘String’ again by Farrow & Ball. I don’t actually have a ‘white wall’ in the house to use for this, and the wife won’t have one!
First up here is the White output with the standard 360 degree lantern beam. You can see the excellent wash of light, but also very clearly the thing I hate about lanterns, terrible glare.
Fit the glare guard and now we are talking. Obviously the total output is cut quite drastically, so it might be better in some cases to position something between you and the lantern, or hang it above your head, but if you are using it as a work light, this becomes ideal.
Red light is not as bad for glare, but mainly due to just being much dimmer.

Again the glare guard makes the Super Siege comfortable to use for any task.
Modes and User Interface:
All controlled via the single power switch there are three White Output Modes, Low, Medium, High, and three Red Output Modes, Low, High and SOS.
To turn the Super Siege ON briefly press the power switch. This will turn on to the last used constant output level (White or Red).
To change output level / mode, briefly press the switch again within 1.5 seconds of the last press. This will cycle through the available modes all the way to OFF.
If the Super Siege has been ON a mode for more than two seconds, one brief press of the switch will turn the light OFF.
To change the colour from White to Red, or Red to White, press and hold the switch for two seconds.
The USB Power Bank function will automatically start when a suitable device is connected. During charging the switch will light up to indicate the status of the battery. Green means full power, then the switch turns yellow, then red and finally flashing red when the battery is getting low.
Batteries and output:
The Super Siege runs on its built-in battery.
To measure actual output, I built an integrating sphere. See here for more detail. The sensor registers visible light only (so Infra-Red and Ultra-Violet will not be measured).
Please note, all quoted lumen figures are from a DIY integrating sphere, and according to ANSI standards. Although every effort is made to give as accurate a result as possible, they should be taken as an estimate only. The results can be used to compare outputs in this review and others I have published.
| ___________________________________________ |
________________________________ |
________________________________ |
| Super Siege using built-in cell |
I.S. measured ANSI output Lumens |
PWM frequency or Strobe frequency (Hz) |
| ___________________________________________ |
________________________________ |
________________________________ |
| White High |
1109 |
1000 |
| White Medium |
550 |
256 |
| White Low |
158 |
256 |
| Red High |
7 |
0 |
| Red Low |
2 |
0 |
* Beacon and Strobe output measurements are only estimates as the brief flashes make it difficult to capture the actual output value.
There is parasitic drain but it cannot be measured due to the construction of the light.
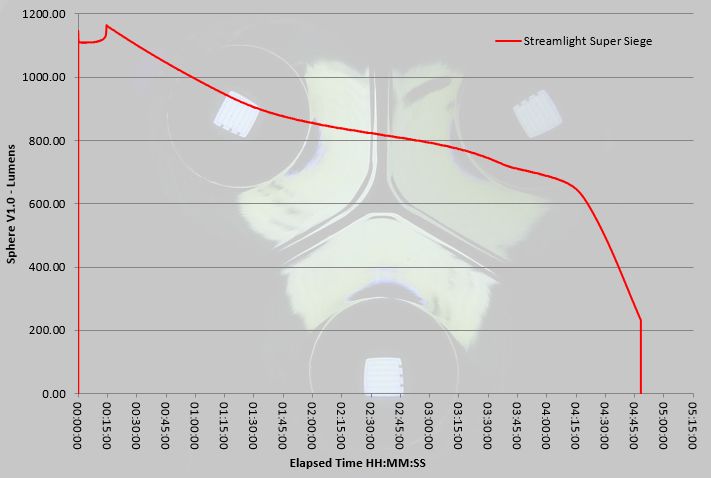
A very impressive performance on High for both the maximum output and the runtime. The specified ANSI output value is achieved, and the output does not drop below 600 lumens for over four hours. Finally, at not far off five hours, the Super Siege runs out and shuts off.
Troubleshooting
This section is included to mention any minor niggles I come across during testing, in case the information helps anyone else.
No issues were encountered during testing.
As per the description of this section, this information is provided in case anyone else finds a similar ‘issue’ that might be fixed in the same way.
The Super Siege in use
Lanterns were the first safe and convenient portable source of light. Although they have undergone many changes, the lantern has retained essentially the same appearance and function of area lighting. Just like the original Siege lantern, the Super Siege is a full size lantern, equivalent to most traditional lanterns. It is for those uses where size and weight are not an issue, if that is a priority, the smaller Siege AA becomes a good bet, but lacks the power and features the full size lantern gives.
The Super Siege uses its technological advantages to make it so much more than a portable area light. One of its first key features is so simple and could easily have been added to any lantern – the glare guard. For me this is one of the most critical features, and where I would normally avoid lanterns due to their glare, now I’m picking the Super Siege for all sorts of jobs.
As well as the full lantern and the task light configuration, the diffuser can also be removed to expose the LED dome cover, so you can run the Super Siege with fully exposed LEDs giving the ultimate in flood light. This however has extreme glare and only really works when hung up overhead. With the diffuser removed, the Super Siege is also much smaller. But beware, if you might need the Super Siege’s ability to float, it will only float with the diffuser fitted as this provides enough trapped air to give it sufficient buoyancy.
There are two aspects of the Super Siege that do not work that well. The switch illumination is very bright, and if using the low red output, the switch glows as brightly as the red LEDs do. This is very distracting and means that if you want a dim red light to maintain your eyes dark adaptation, you will find a bright green light shining out from the switch. This also impacts on the USB powerbank function, but more on the in a moment.
The second aspect, which I’m very disappointed to still see is the use of PWM. Especially in a lantern which floods the entire area with light, on the medium and low output levels, you see very obvious strobing effects when moving…at all. Please Streamlight, can you use current controlled output and not PWM?
The compartment in the base is an odd shape, but is useful for keeping a few things in. If nothing else you can keep a USB cable for charging various devices in this compartment.
And on the subject of the power bank feature, this is very useful in these days of so many devices that can be charged from USB. What you must consider however, is that any power you use to charge a device, be it phone, tablet, e-reader etc, is power you rob from the lantern’s light output. So be careful you don’t find yourself in the dark because you charge your phone up. What is a bit of a pity is that the Super Siege needs a 12V power adapter to charge it when the typical power bank these days is also chargeable via USB.
Using a USB power monitor I’ve run several ‘delivered power’ tests, all of which have been a consistent 25.7Wh from the 8800mAh battery. The theoretical power from a 8800mAh battery would be 32.56Wh, which means 79% of this is being delivered. A 21% loss is reasonable, but this could probably be better, as the brightly lit power switch remains on for the entire time the USB power bank feature is being used. The maximum observed output current for the USB power bank was 1.1A.
During use of the USB power bank, the switch illumination goes from green to yellow quite quickly. Watching the accumulated Wh delivered, the switch goes red after around 15Wh have been output, so there is still 40% battery left once the switch turns red. In fact the flashing red indication starts relatively soon afterwards. If I needed the Super Siege for light, I would definitely stop USB charging once the switch illumination turns red, as you at least know there is 40% left.
Ideal for camping, fishing and to have in a shed/loft or other unlit out-building. Altogether the Super Siege gives you a nice rounded package of features all of which are genuinely useful and not a gimmick.
Review Summary
| _______________________________________________ |
_______________________________________________ |
| Things I like |
What doesn’t work so well for me |
| _______________________________________________ |
_______________________________________________ |
| Powerful 1100lm output. |
Uses PWM on all output levels. |
| USB power bank. |
Using the power bank reduces LED output runtime. |
| White and Red light output modes. |
Needs 12V power adapter to charge. |
| Glare-guard included for task lighting. |
Output cuts out completely when the battery is low. |
| Storage compartment in base. |
|
| Floats (as long as the main diffuser is fitted). |
|
Discussing the Review:
The ideal place to discuss this reviews is on a forum. If you started reading the shorter forum version of the review, but followed the link this full exclusive review, please return to that forum to discuss the review there.
If you read the review entirely on Tactical Reviews, please consider one of the following to join in any discussion.
CandlePowerForums – Flashlight Reviews Section (Largest and Friendliest Flashlight Community Forum)