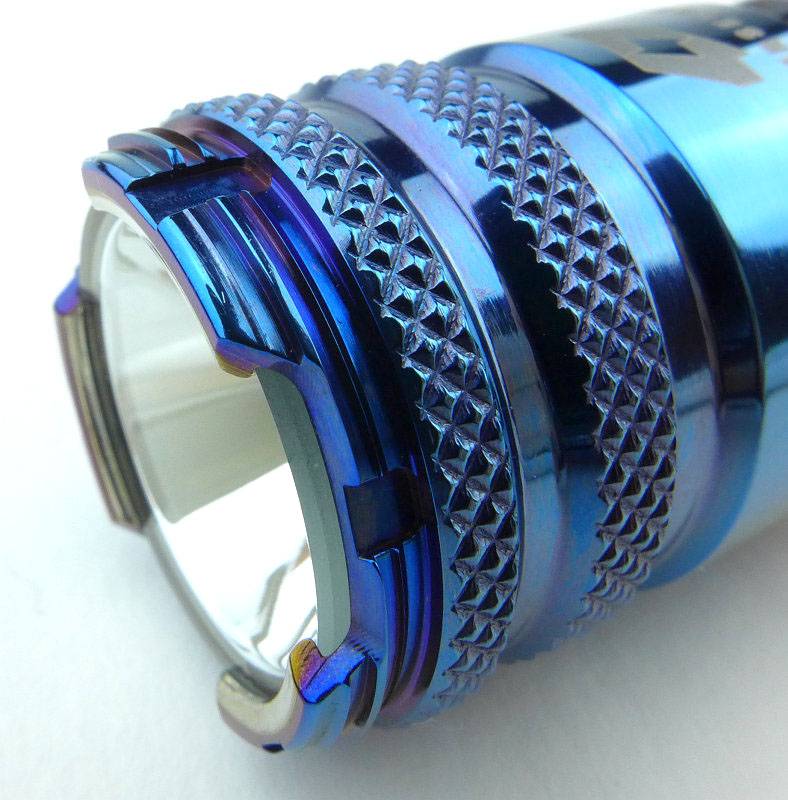
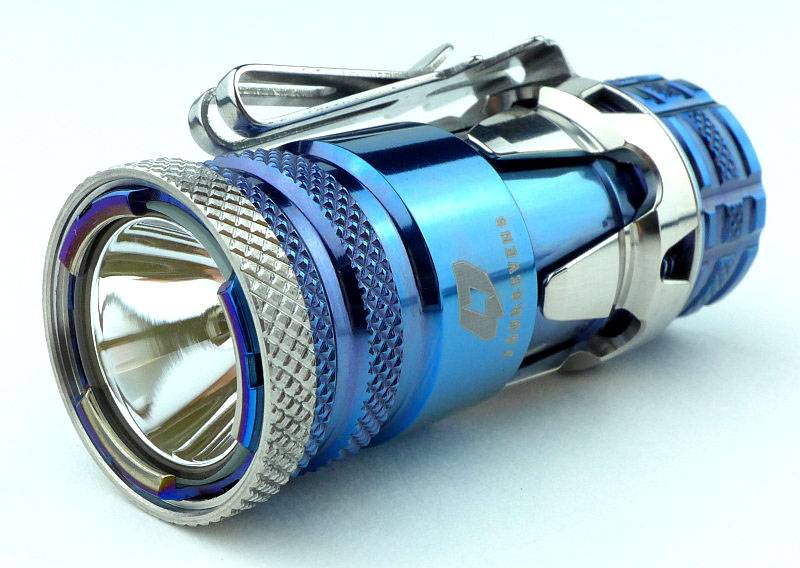
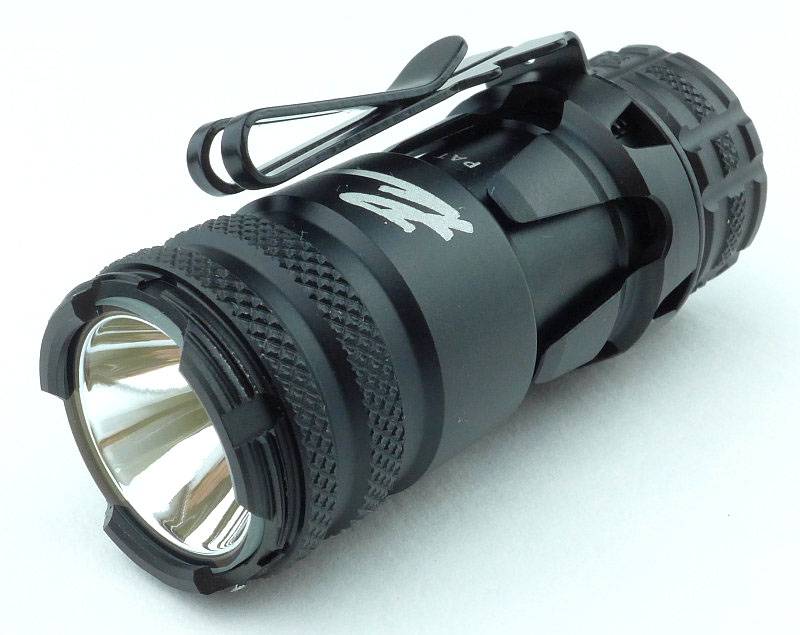
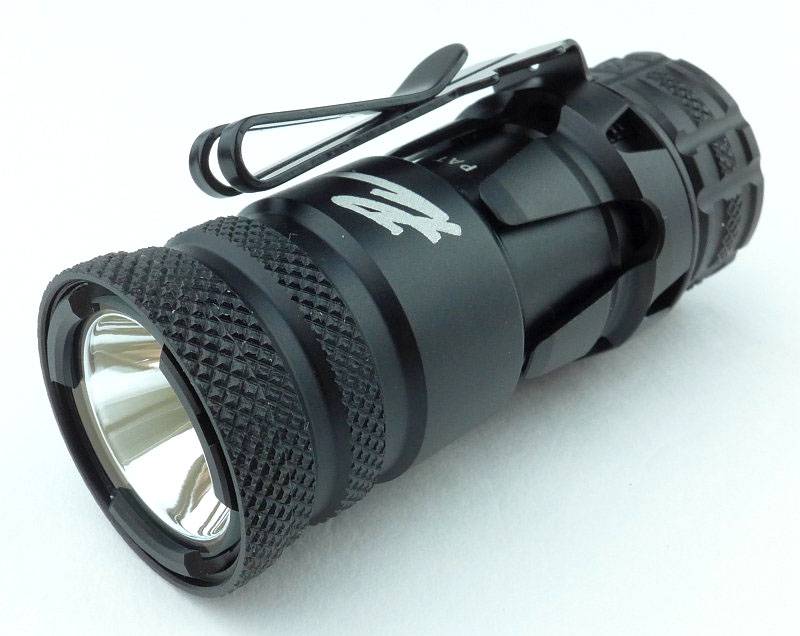
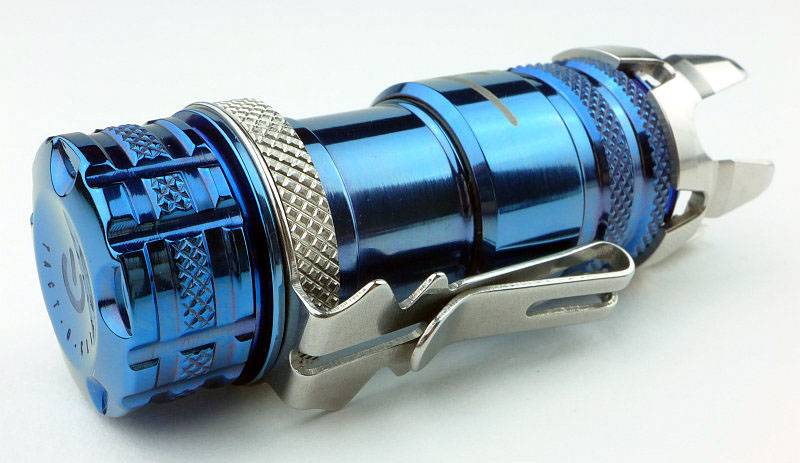
Light Review: FOURSEVENS Preon P1 Copper Limited Edition

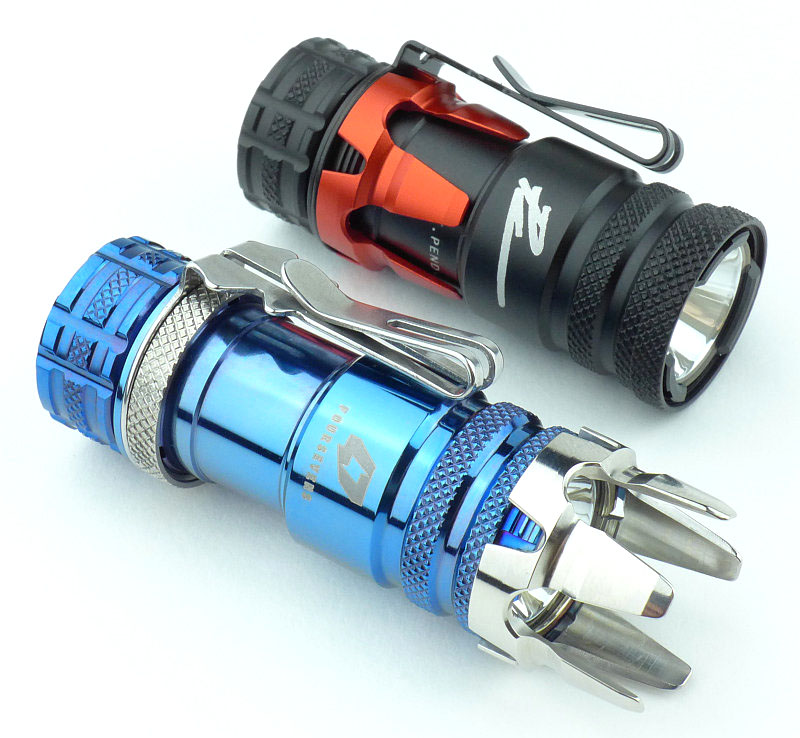
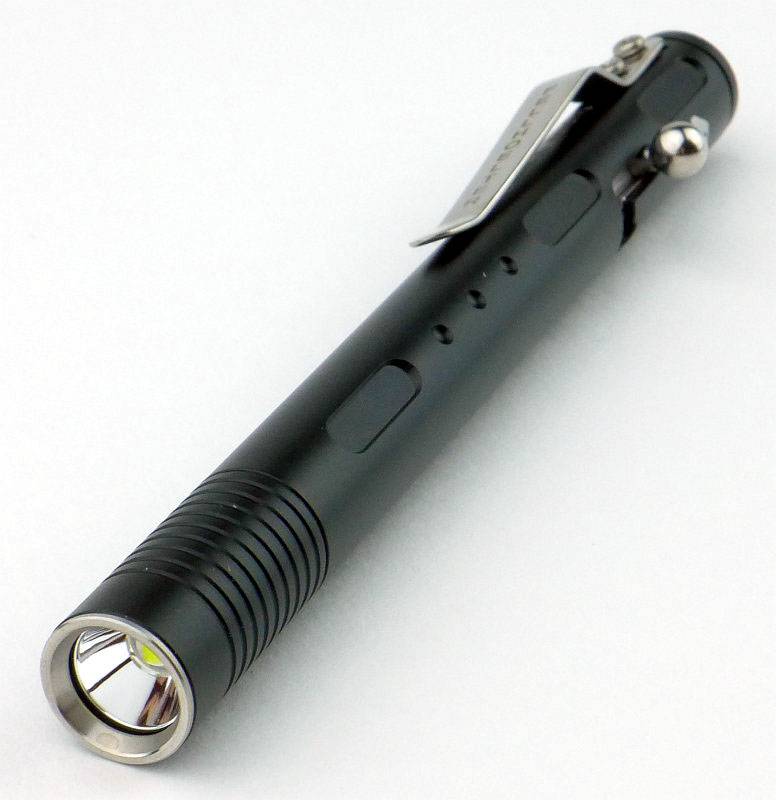
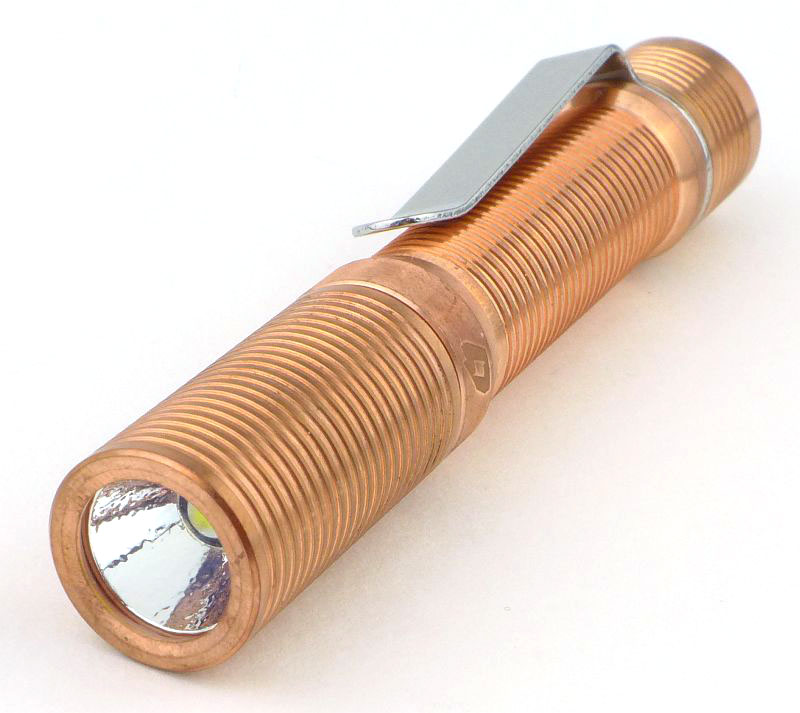
FOURSEVENS’ Preons have been very popular and well regarded AAA powered EDC lights. After their latest reboot (previously reviewed), this is the special edition solid copper version. Grab one while you can here and don’t miss out on the copper goodness.
Taking a more detailed look:

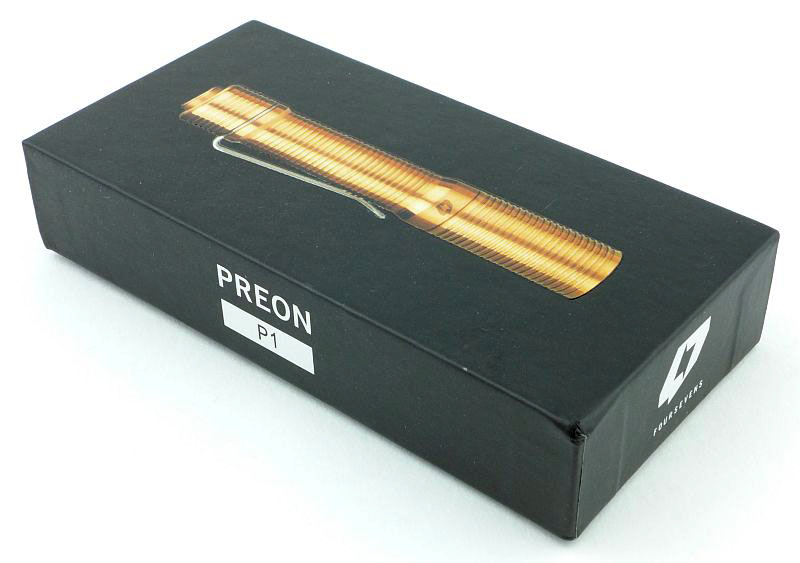
Unlike the standard edition Preons, the Copper version does not come in a clear plastic box, instead it comes in a presentation cardboard box.
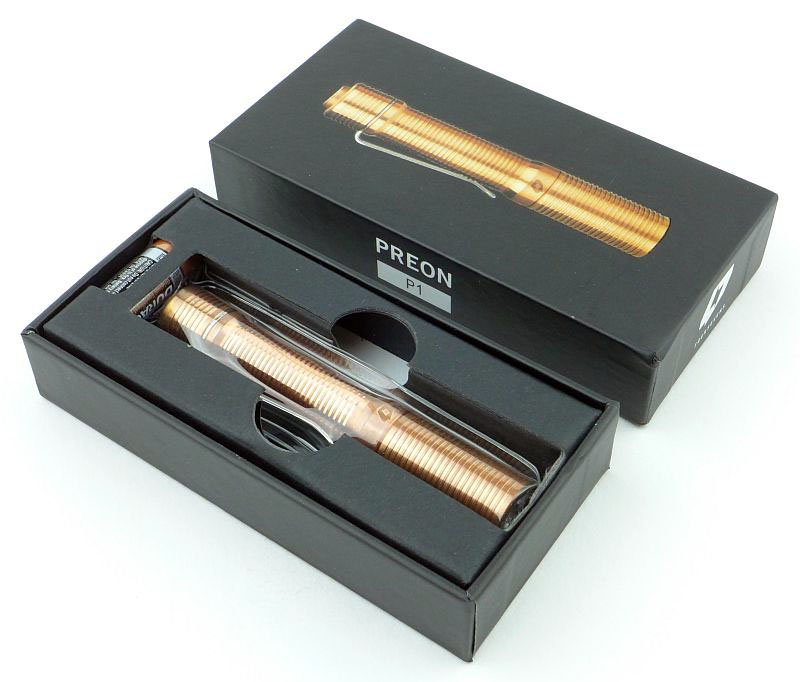
The contents are nicely laid out.
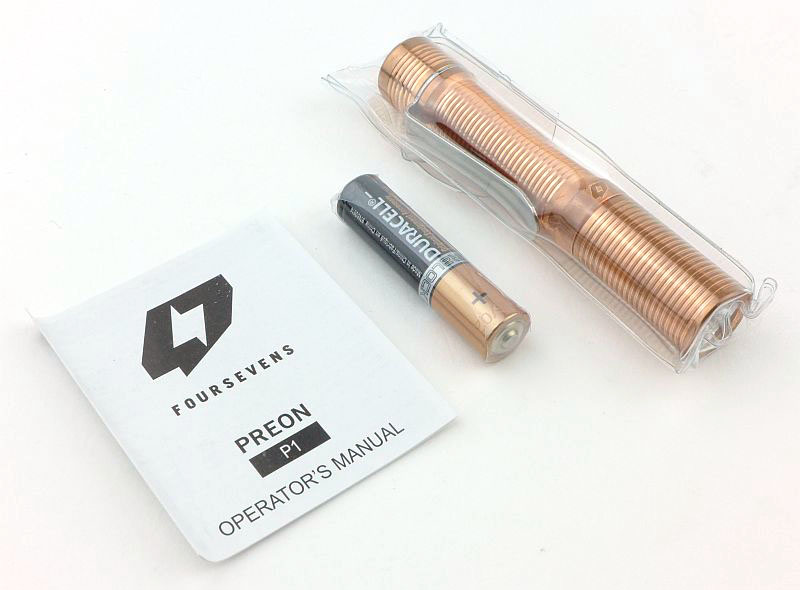
Included are the Copper Preon P1 (in a protective plastic case), a Duracell AAA cell, and the instructions. That plastic protector is to ensure that the Copper P1 arrives while still a Copper colour. The patina and darkening can then develop over time as you use it.
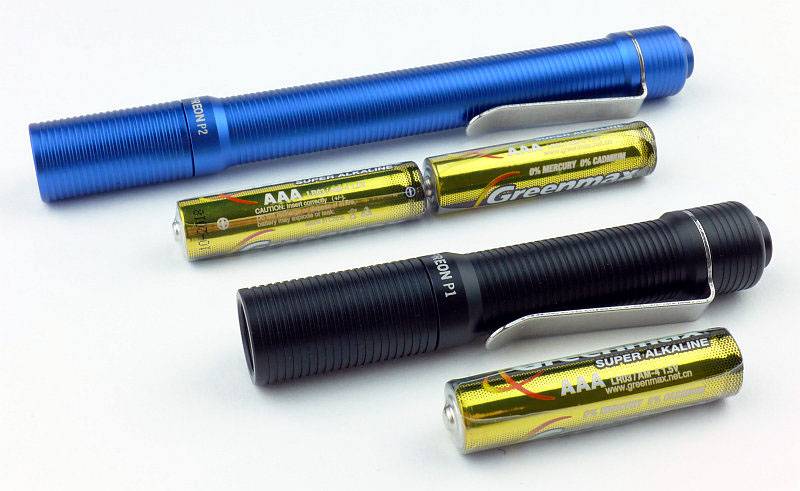
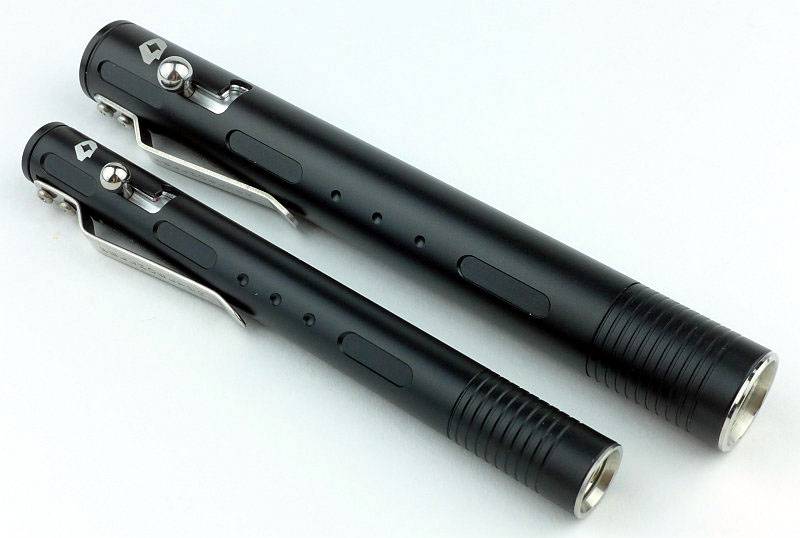
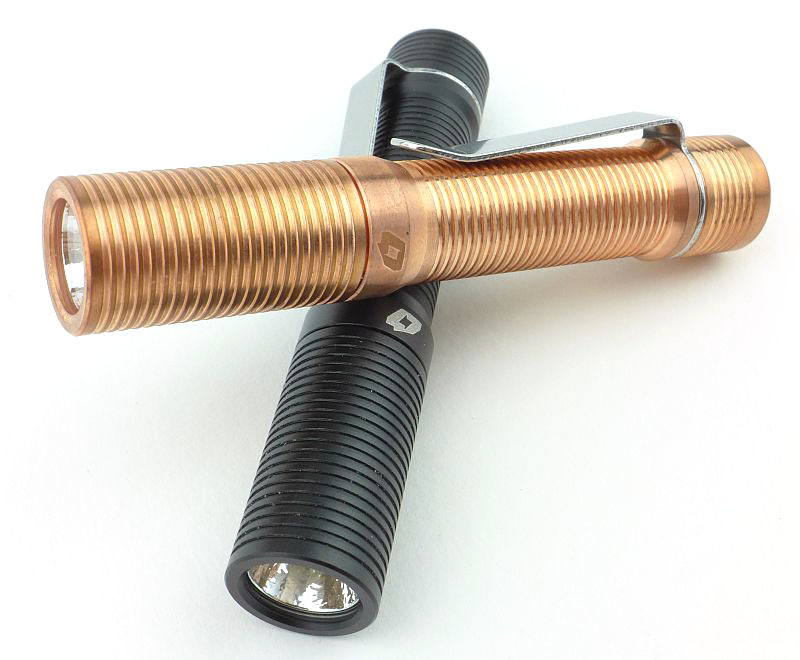
The Copper Preon is exactly the same in design, dimensions and machining as the standard P1, just made of solid Copper instead of aluminium.
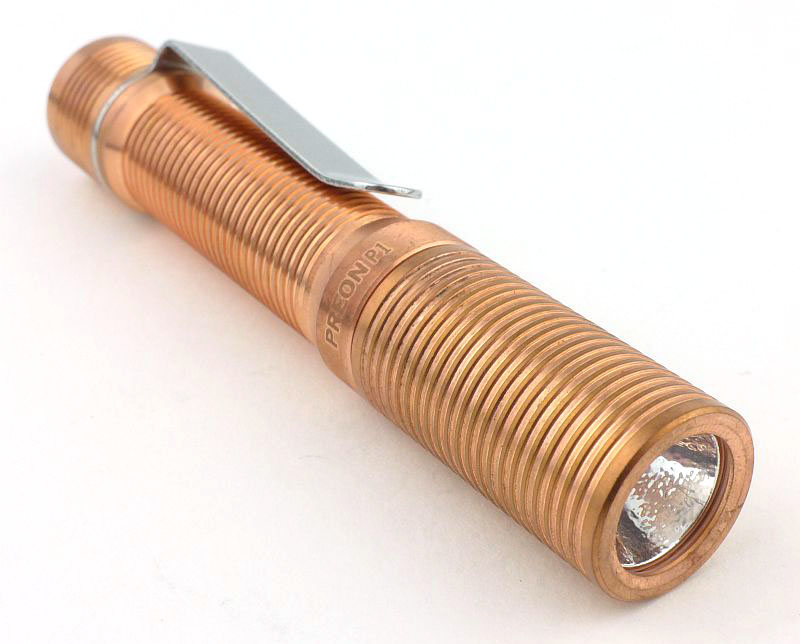
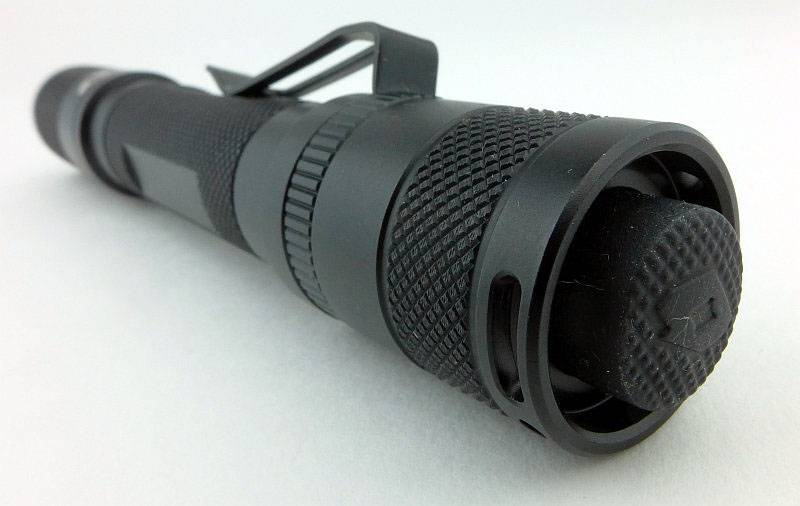
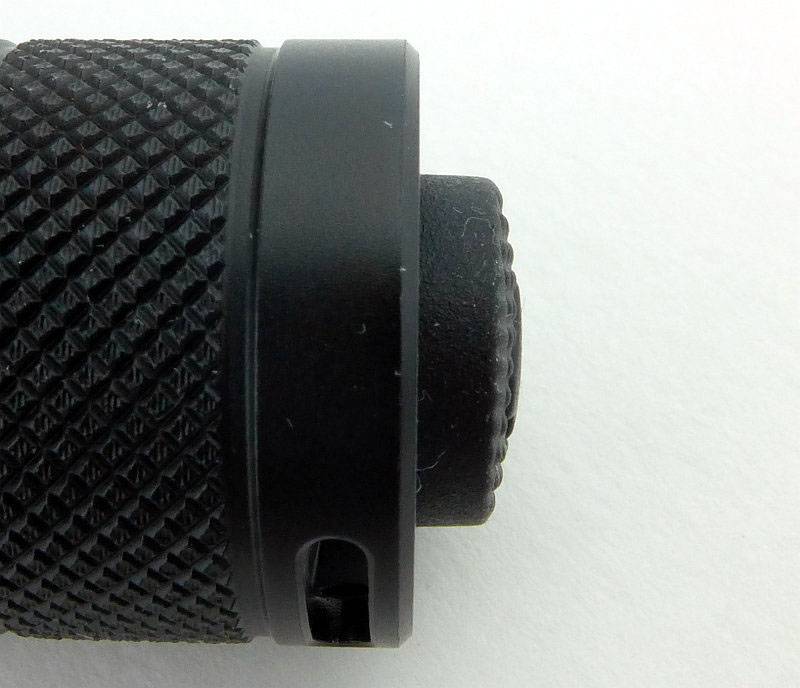
Every part that was aluminium in the standard version is Copper, including the switch button cap.
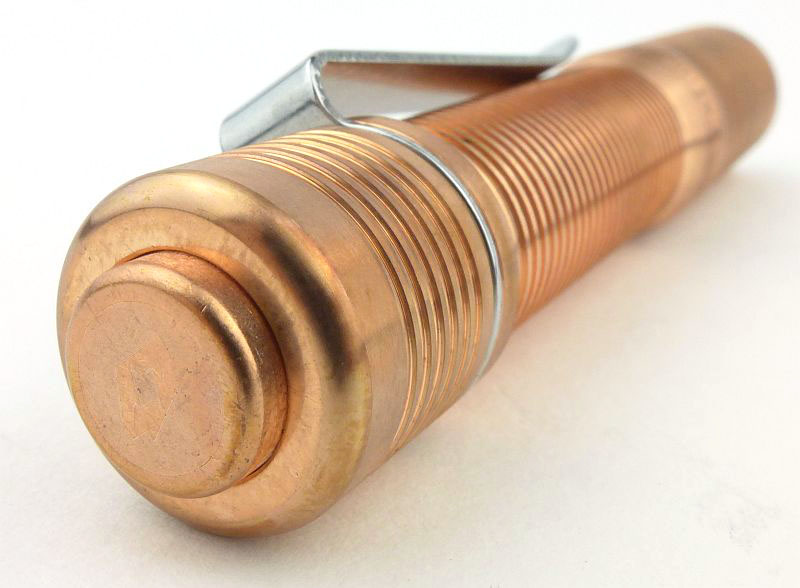
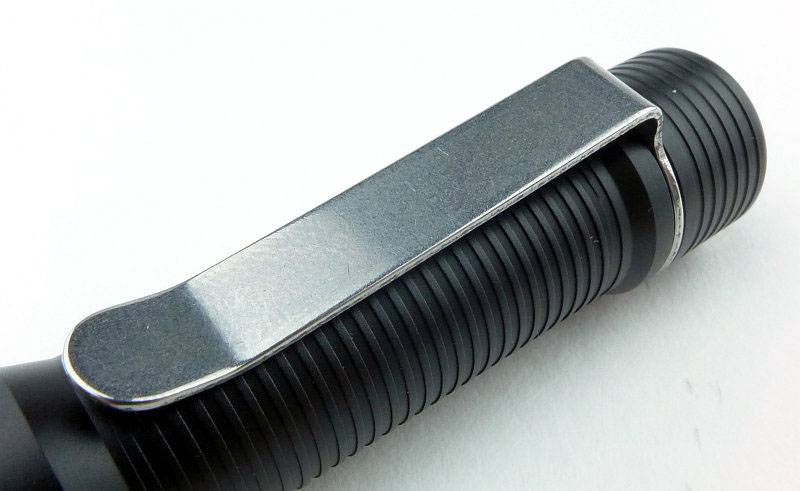
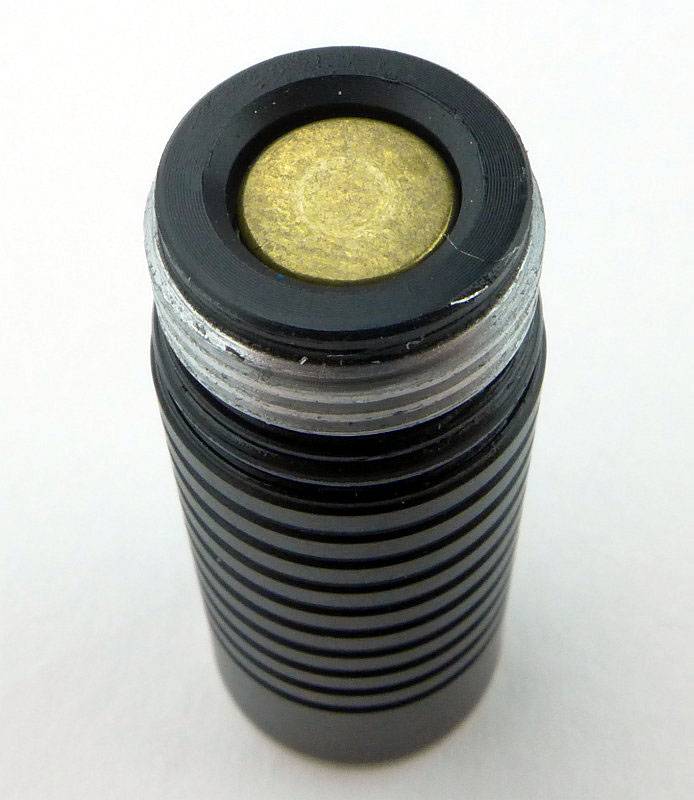
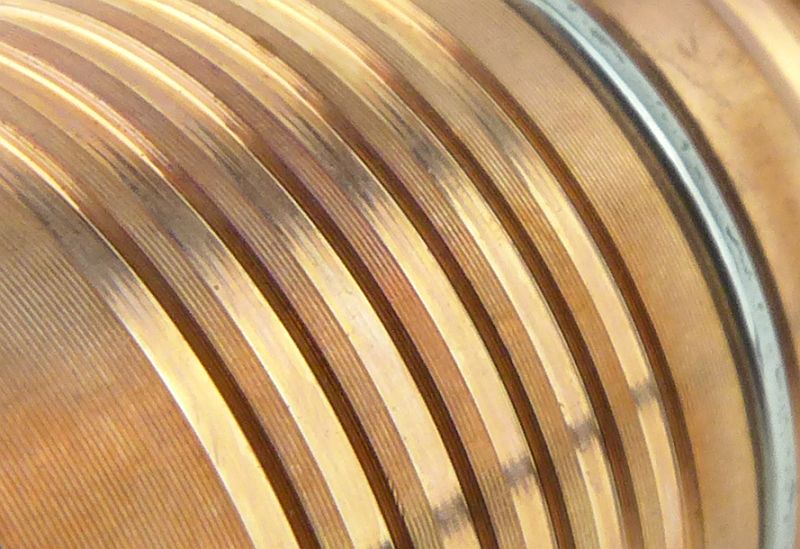
Taking a closer look at the bare Copper machined surface.
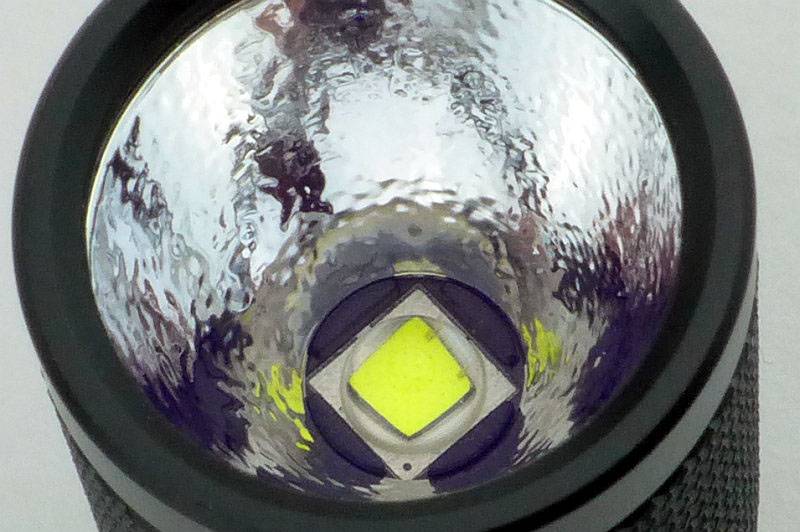
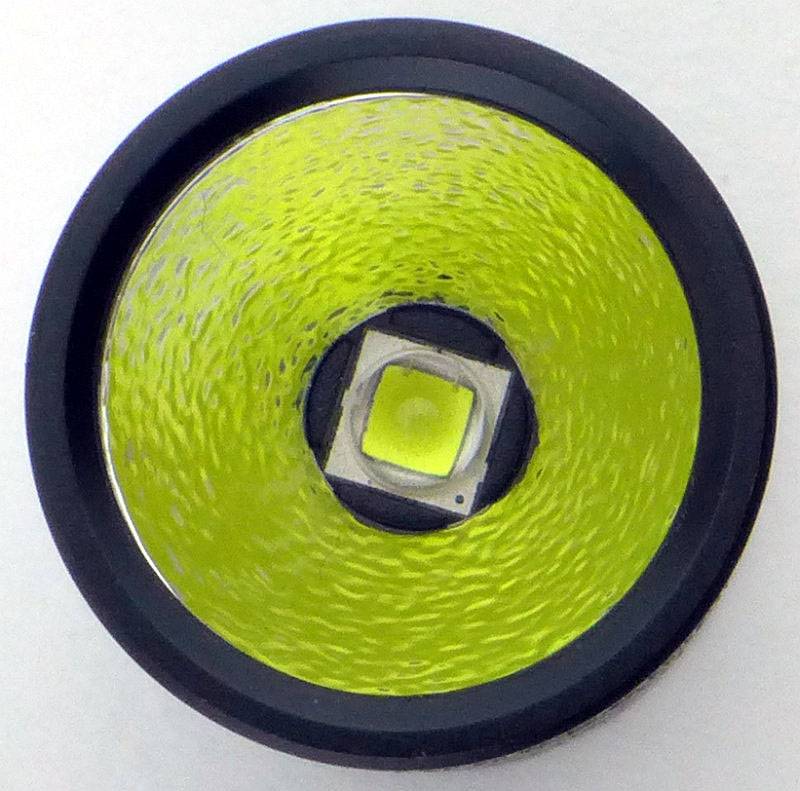
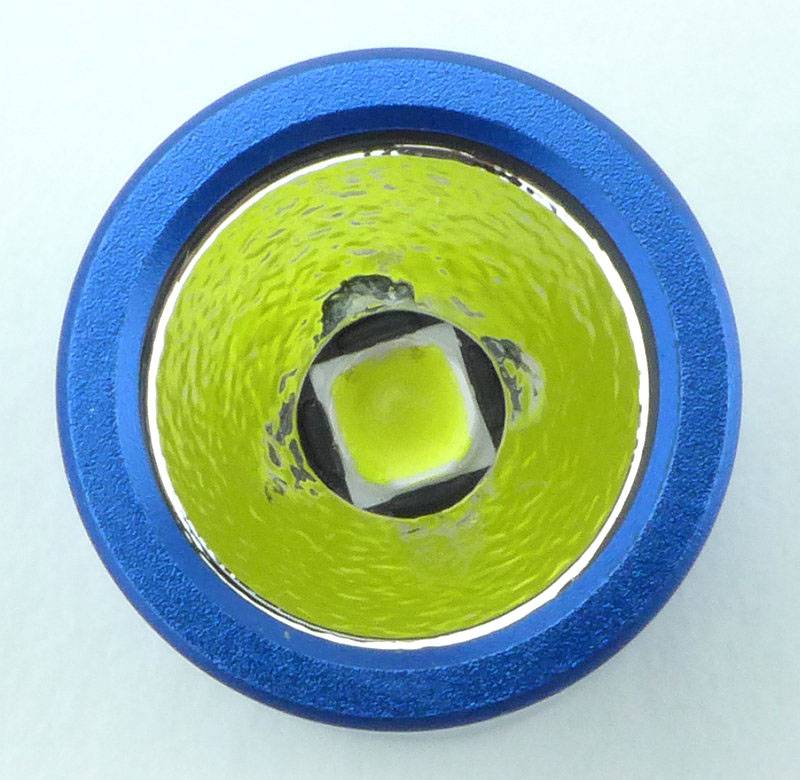
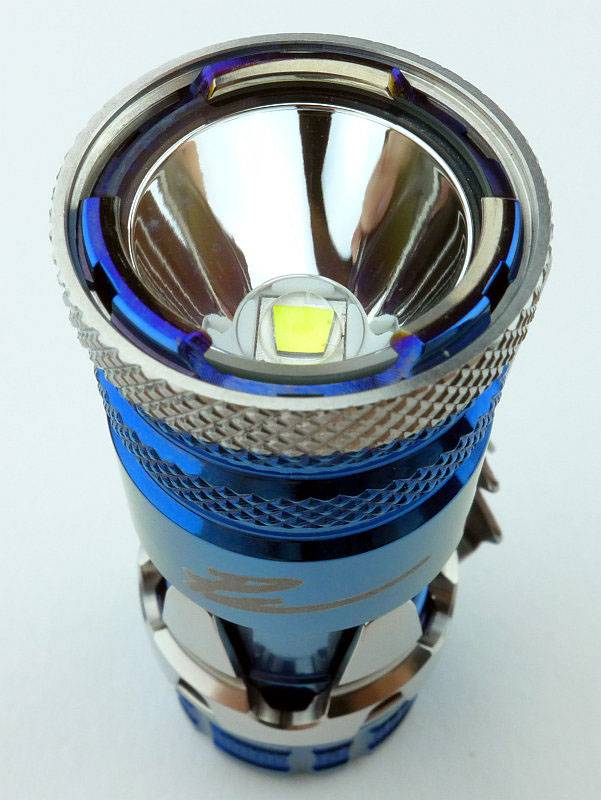
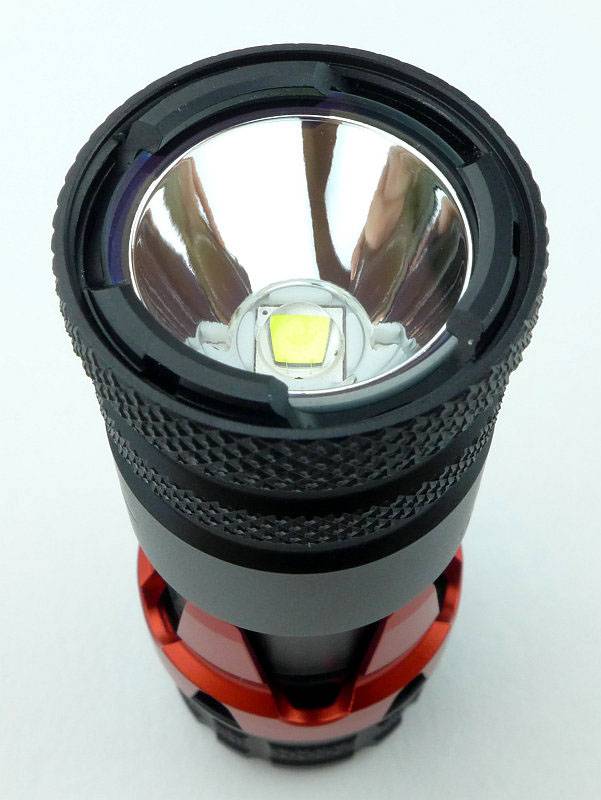
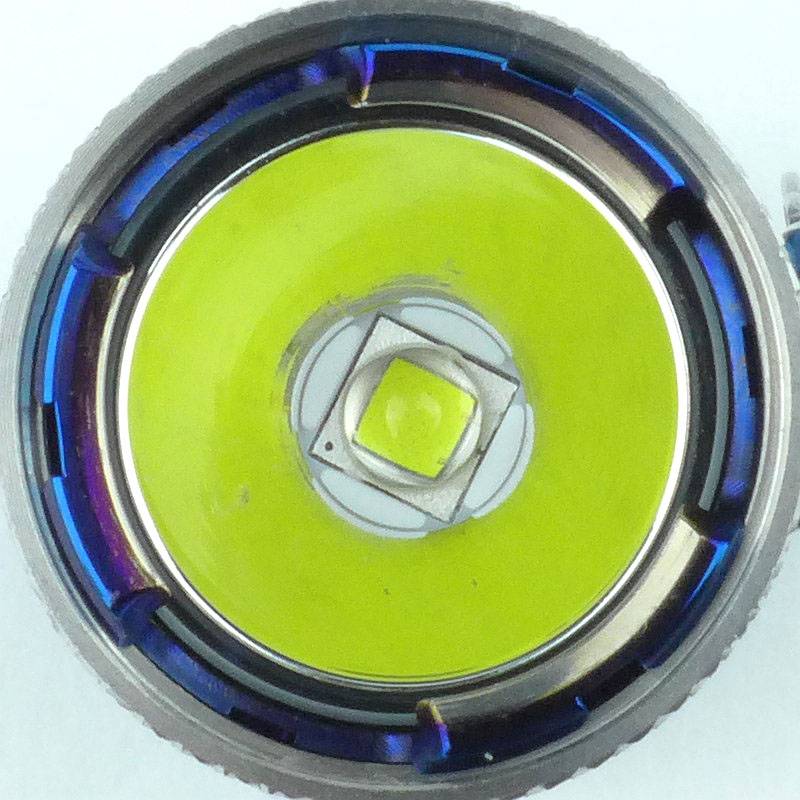
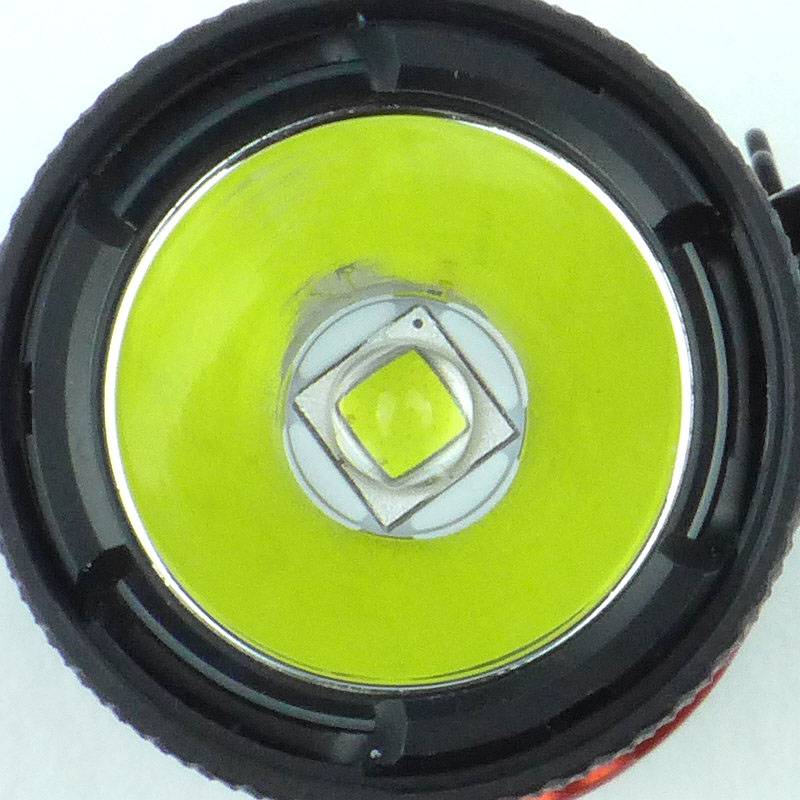
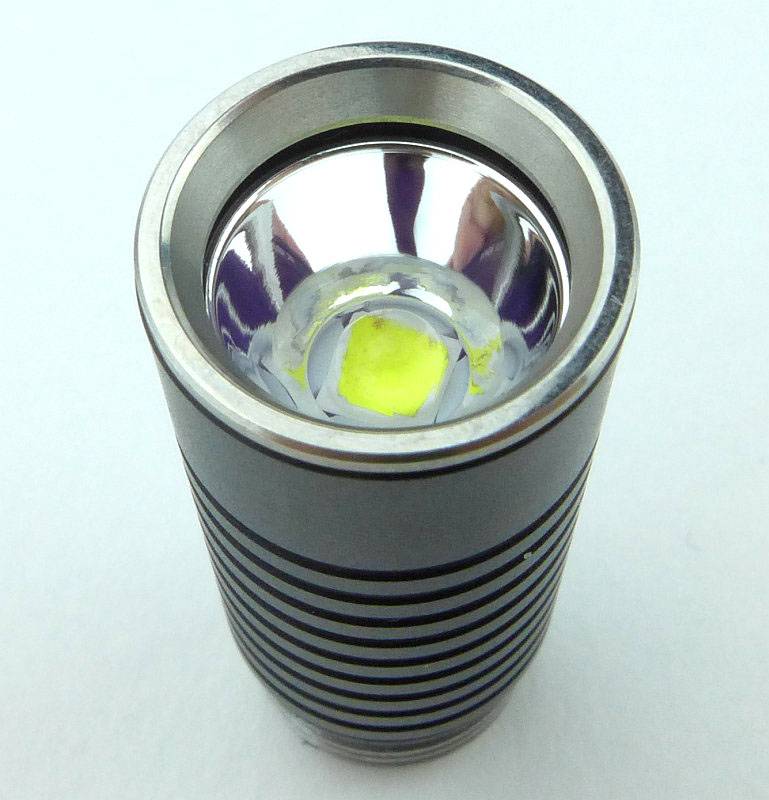
With the small reflector and XP-L LED, the Preon P1 is set for an excellent EDC beam.
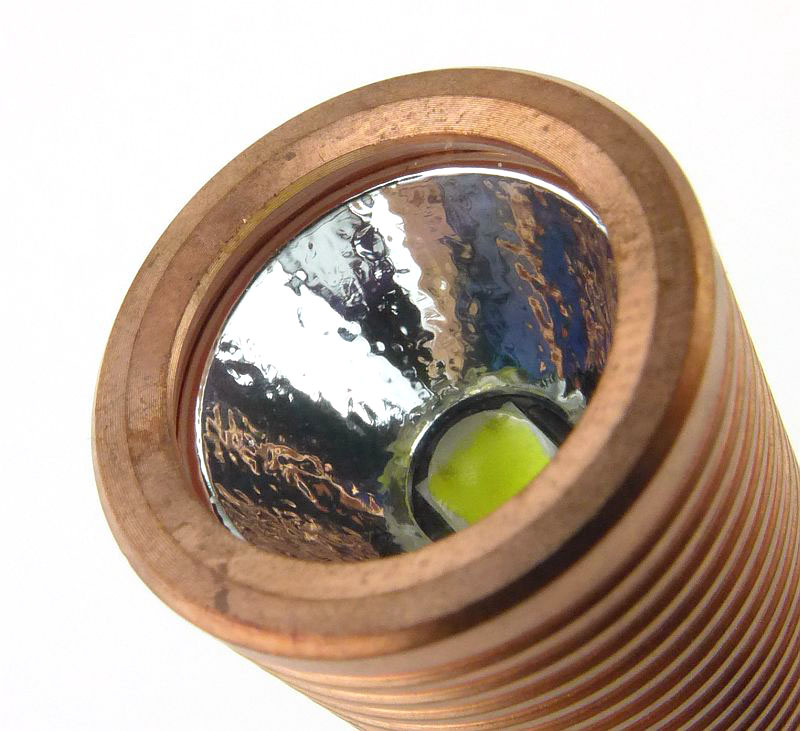
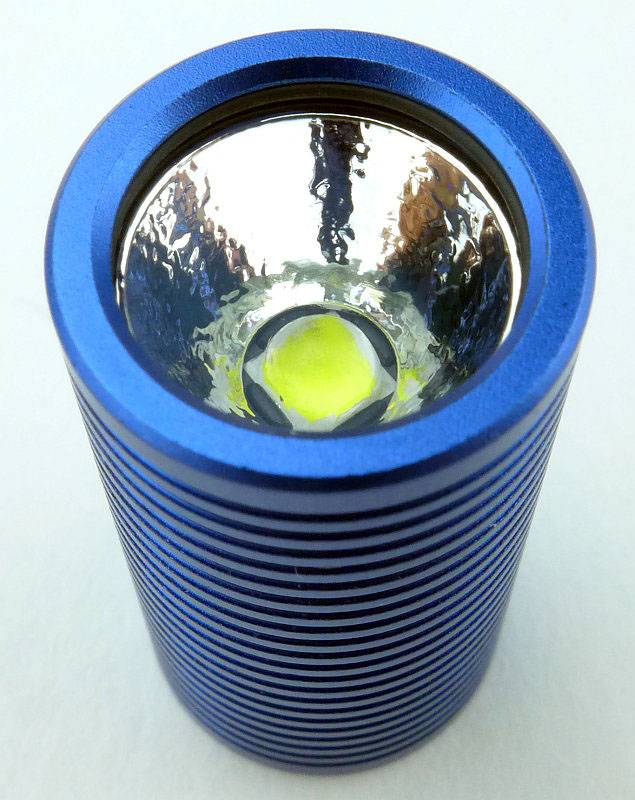
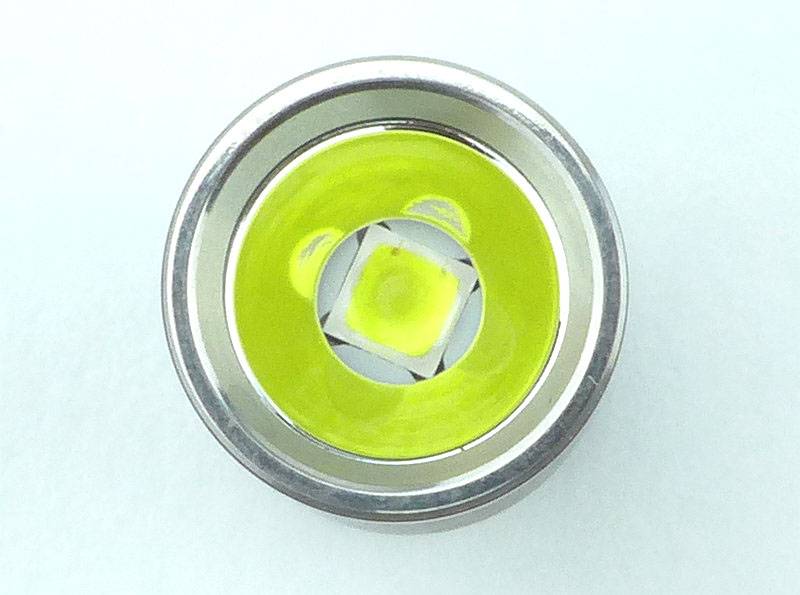
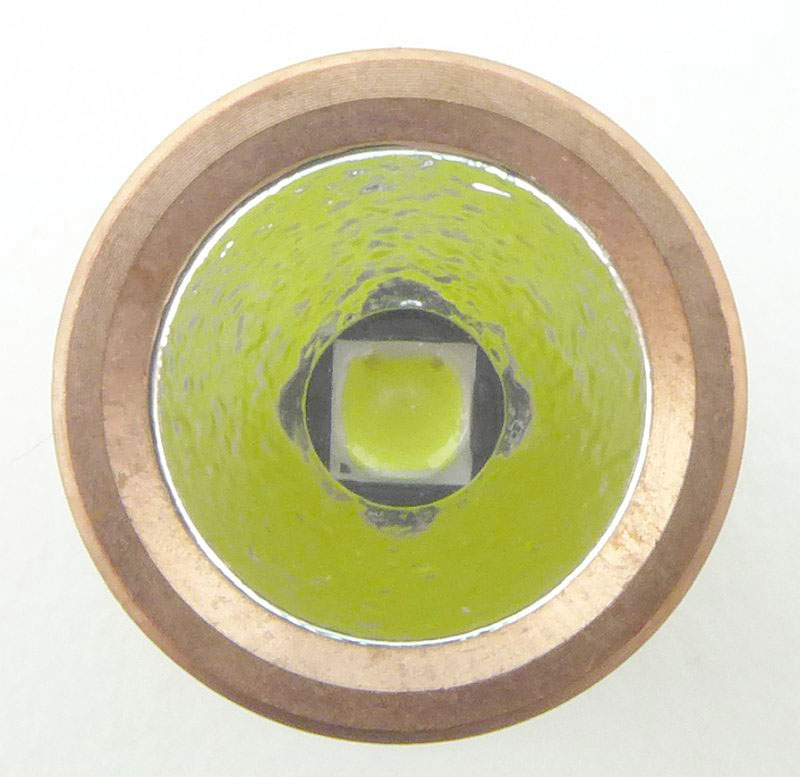
The XP-L LED and textured reflector.
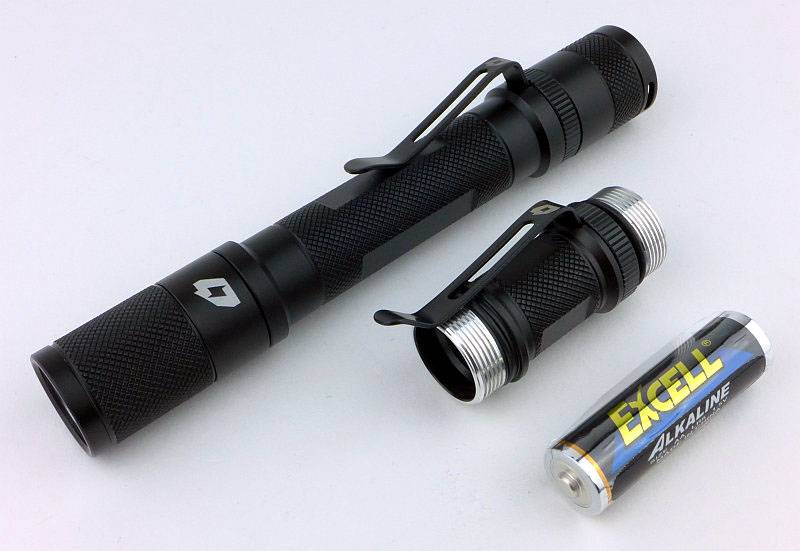
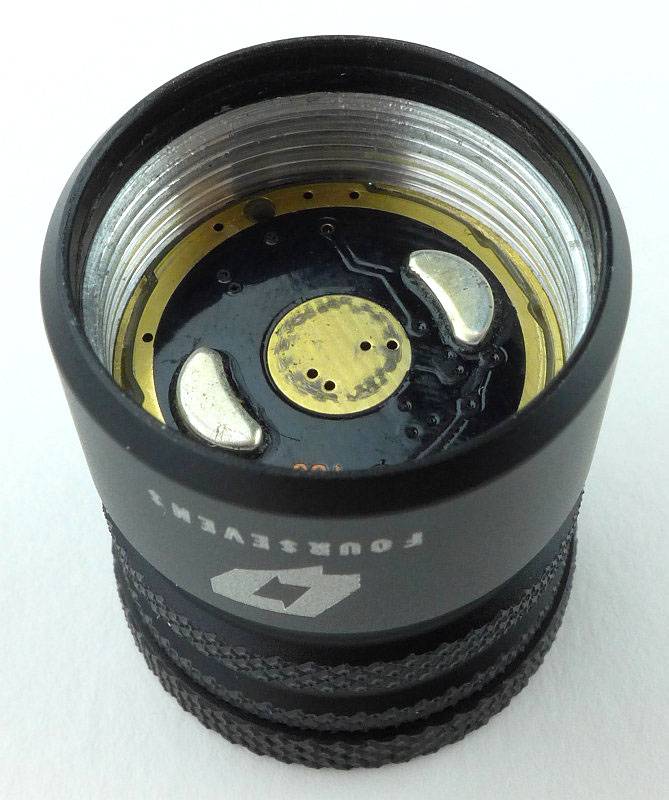
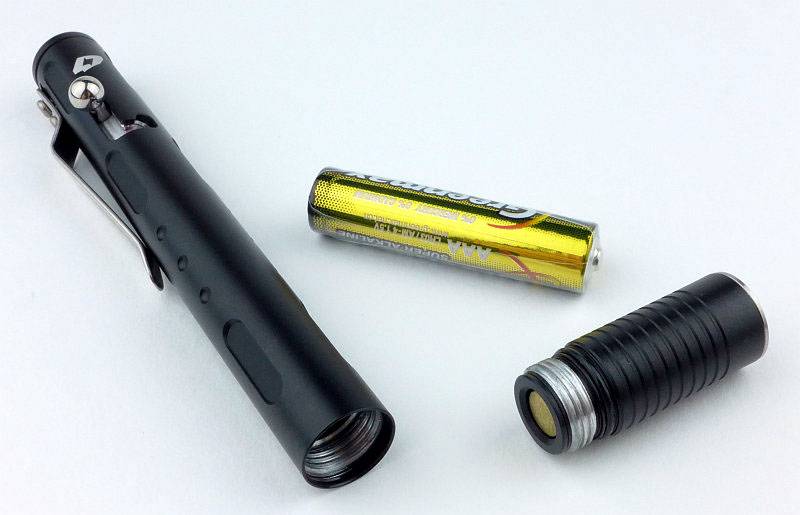
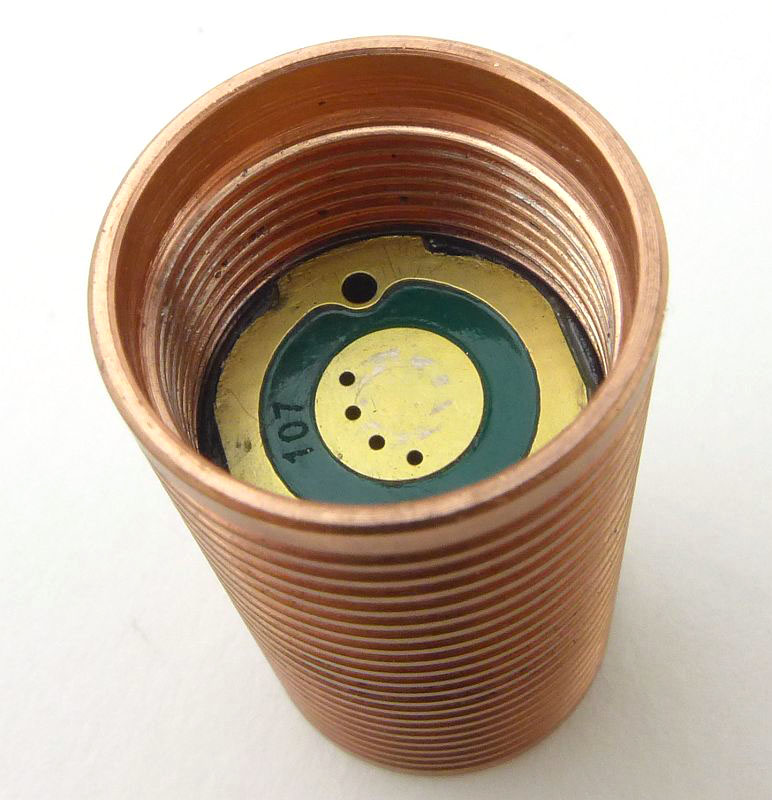
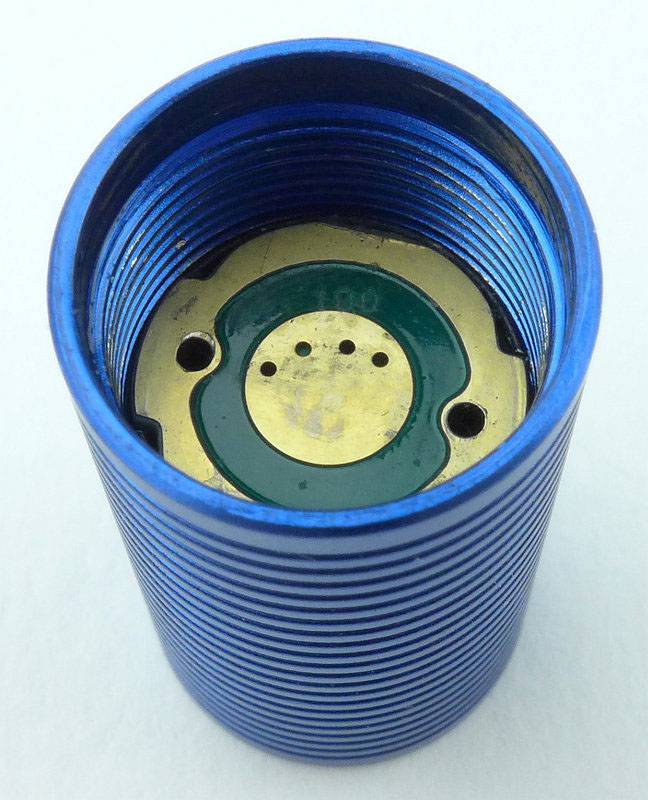
With the head removed (for inserting the battery) the contacts can be seen.
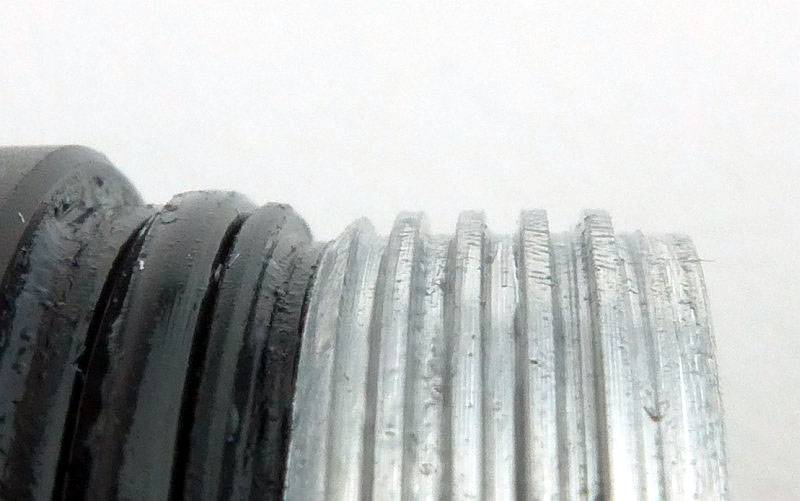
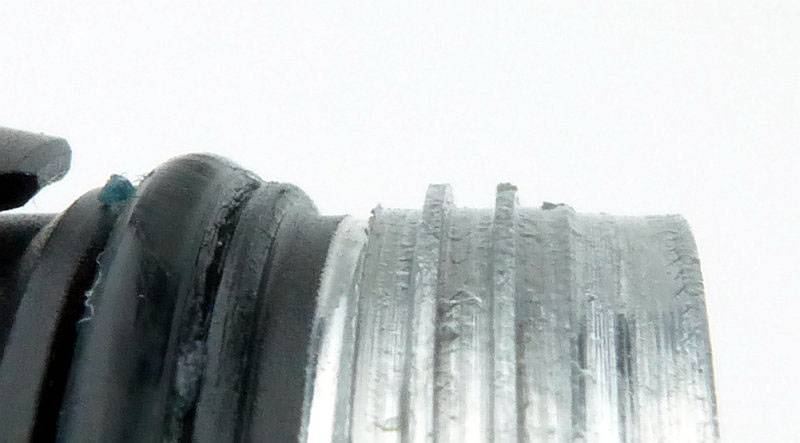
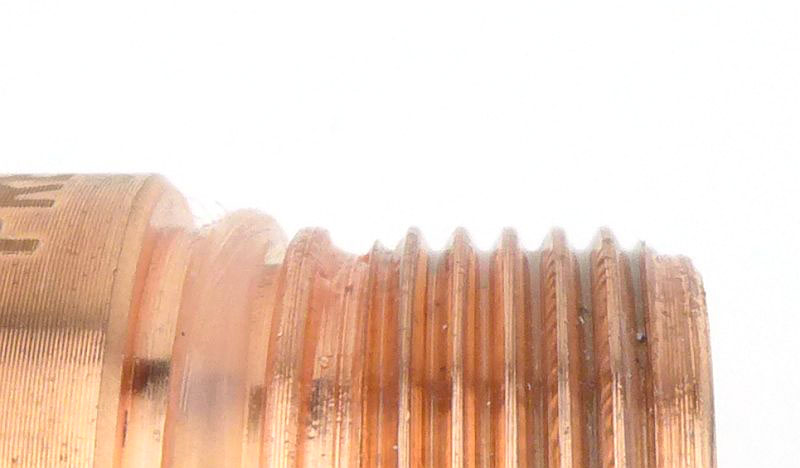
The threads are standard and cleanly cut.
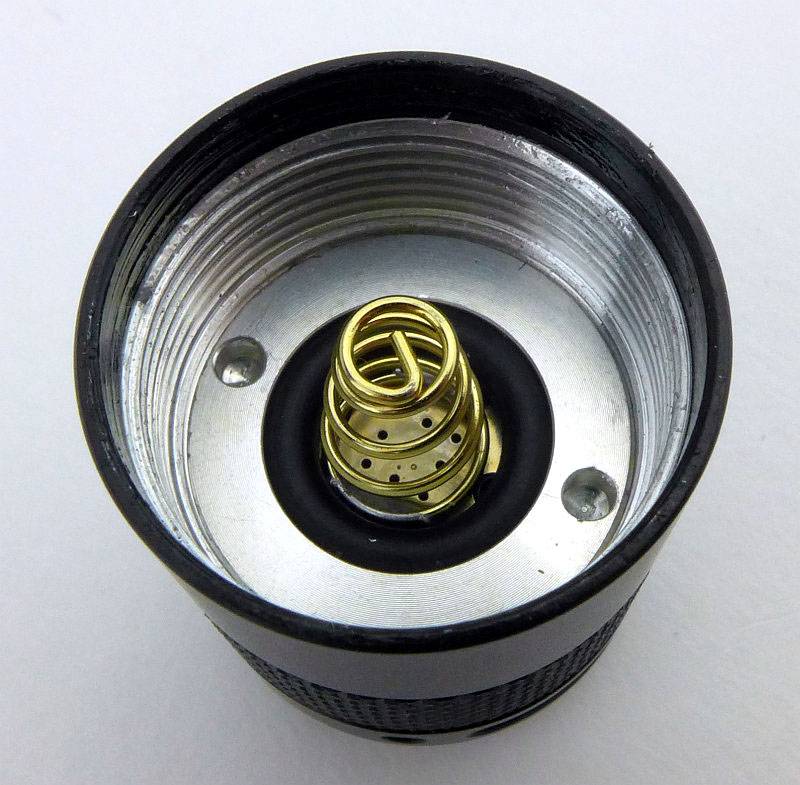
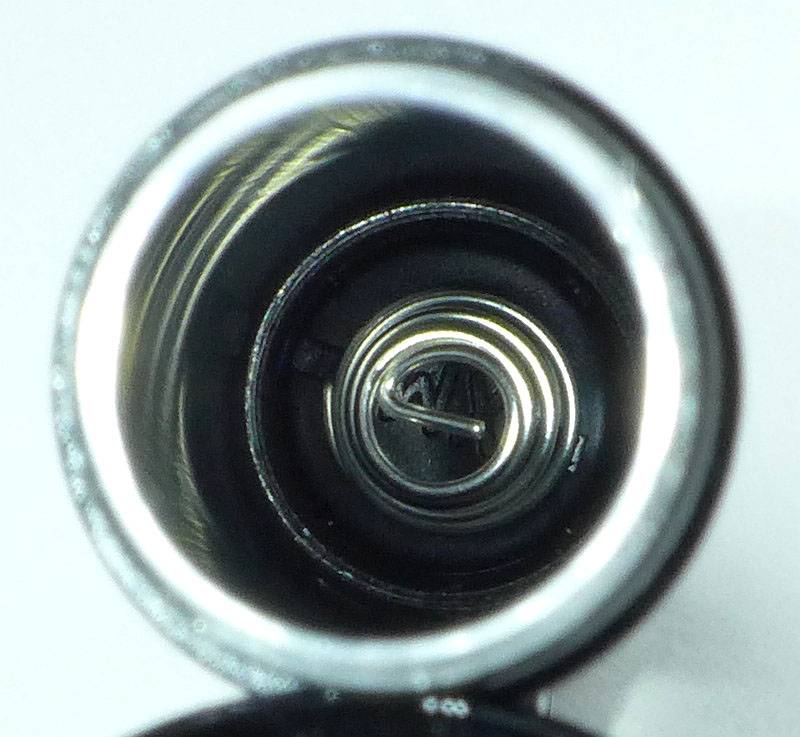
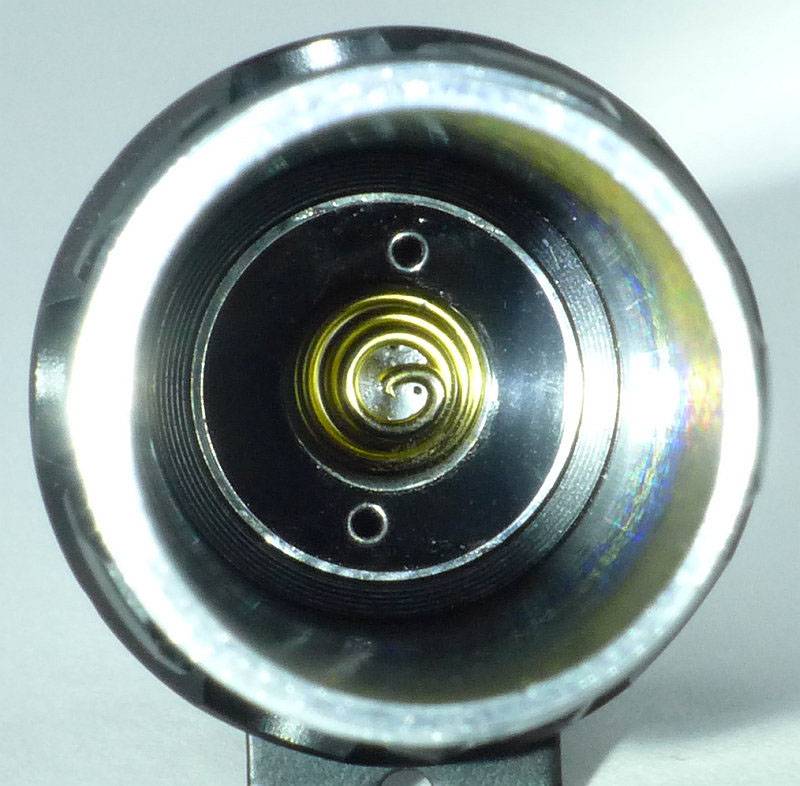
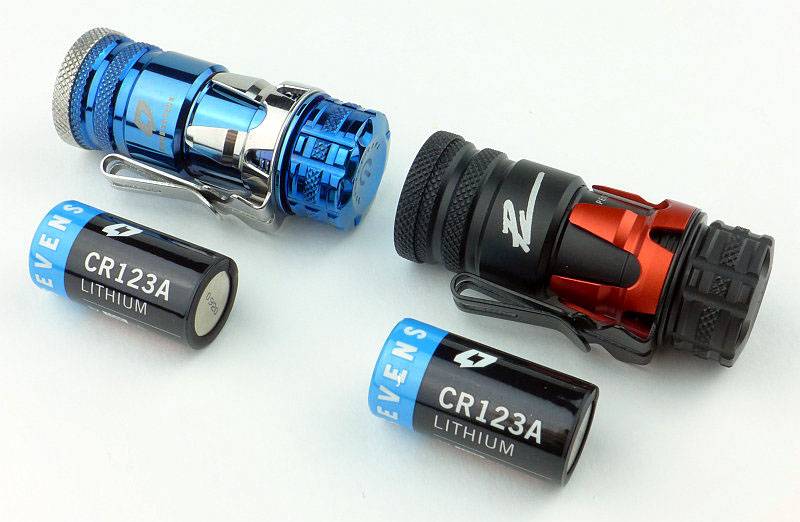
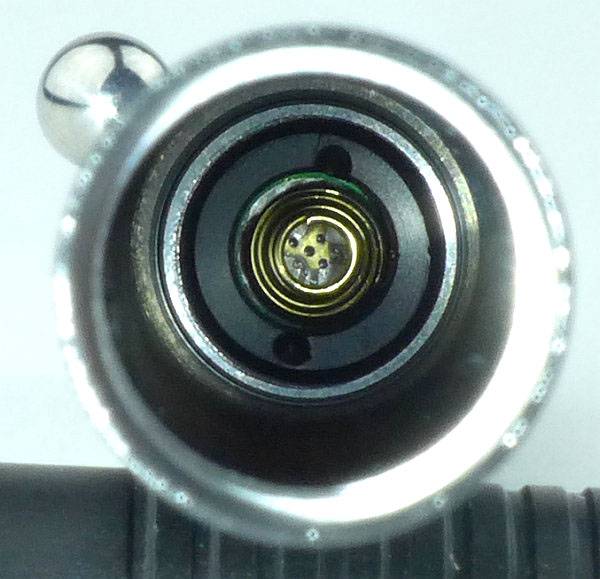
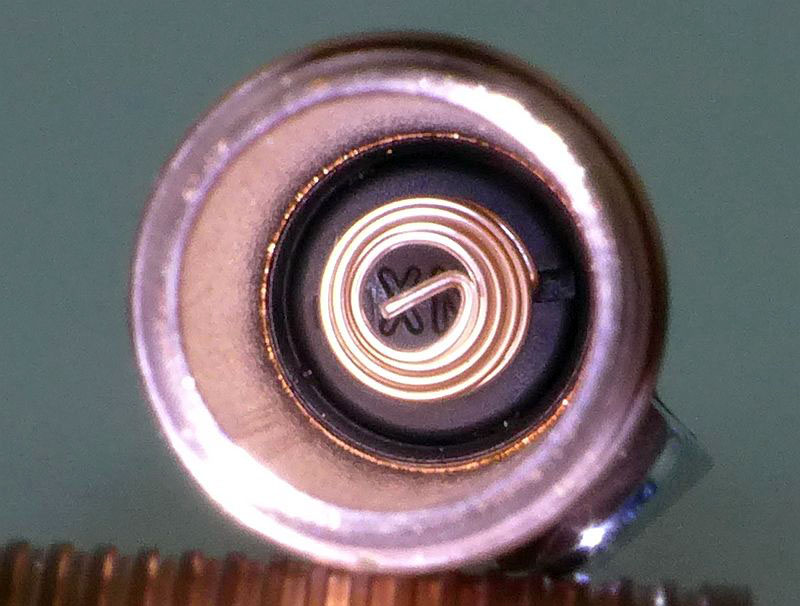
Shining another Preon down the battery tube allows us to see the negative spring contact.
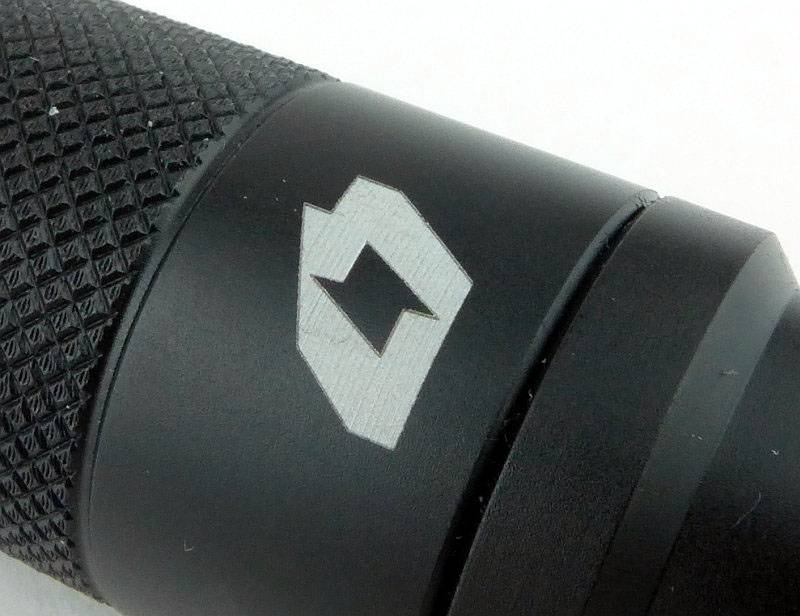
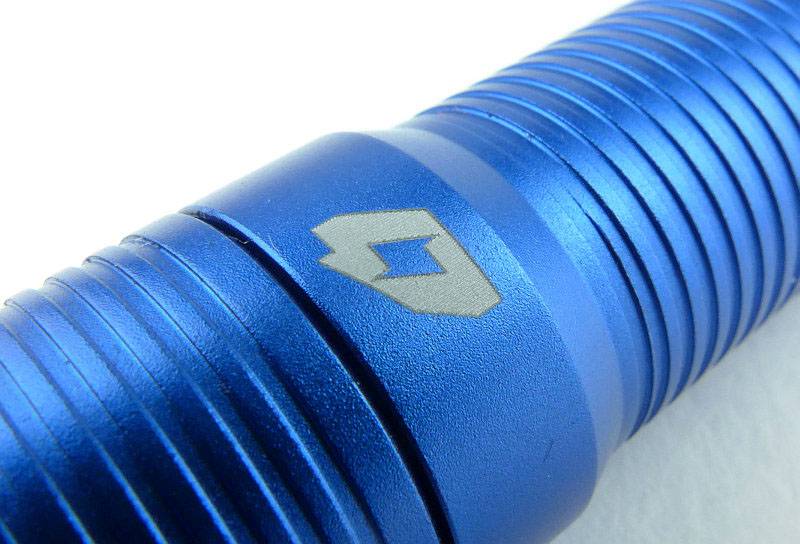
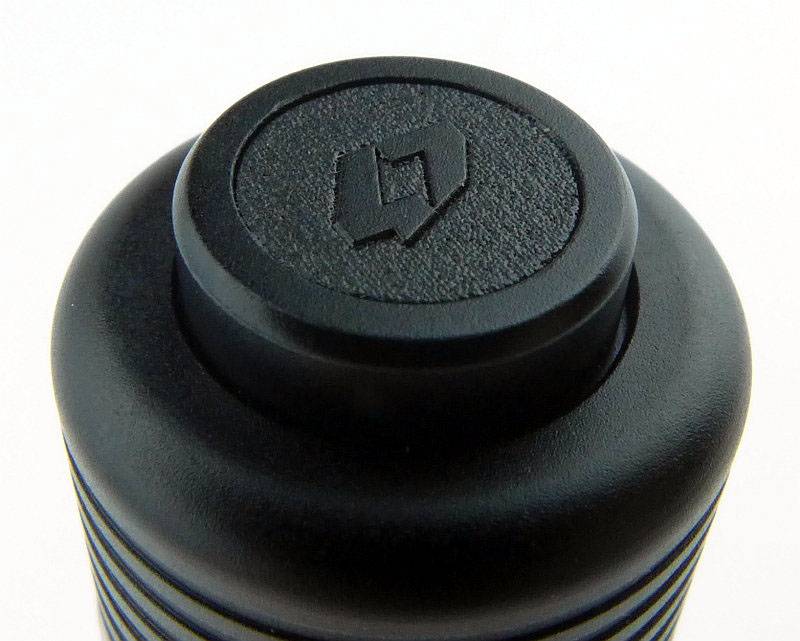
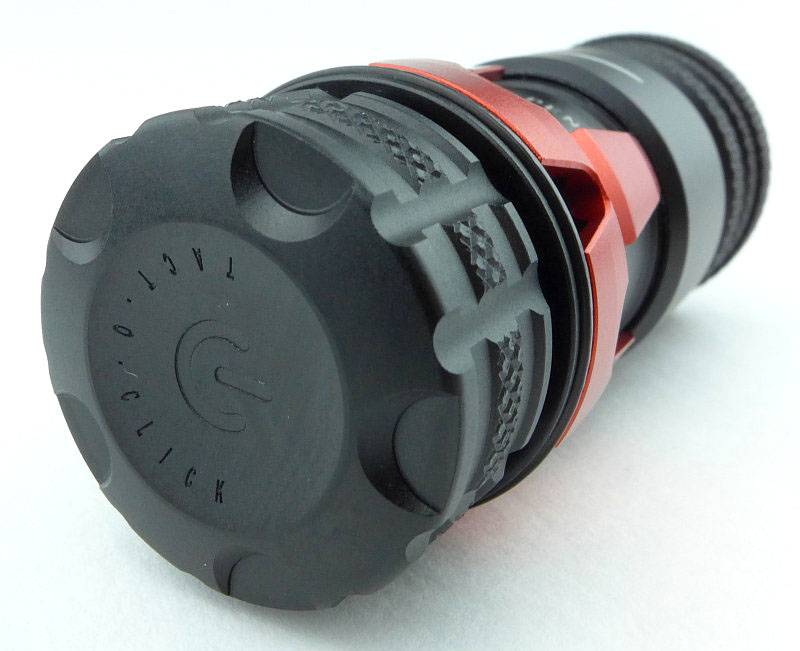
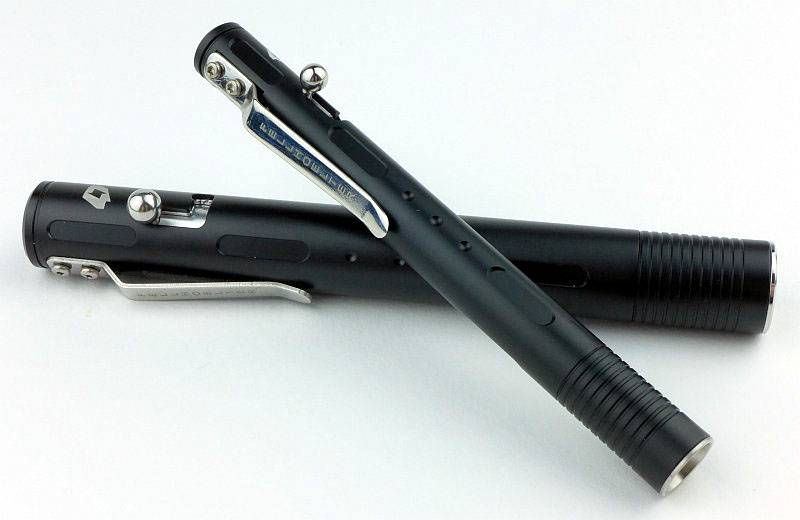
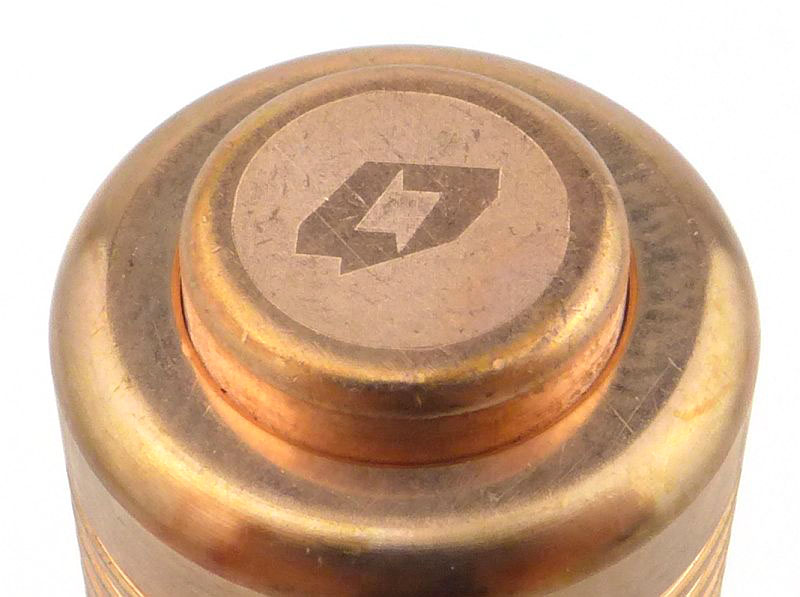
FOURSEVEN’s logo is engraved on the switch button cap.
The beam

Please be careful not to judge tint based on images you see on a computer screen. Unless properly calibrated, the screen itself will change the perceived tint.

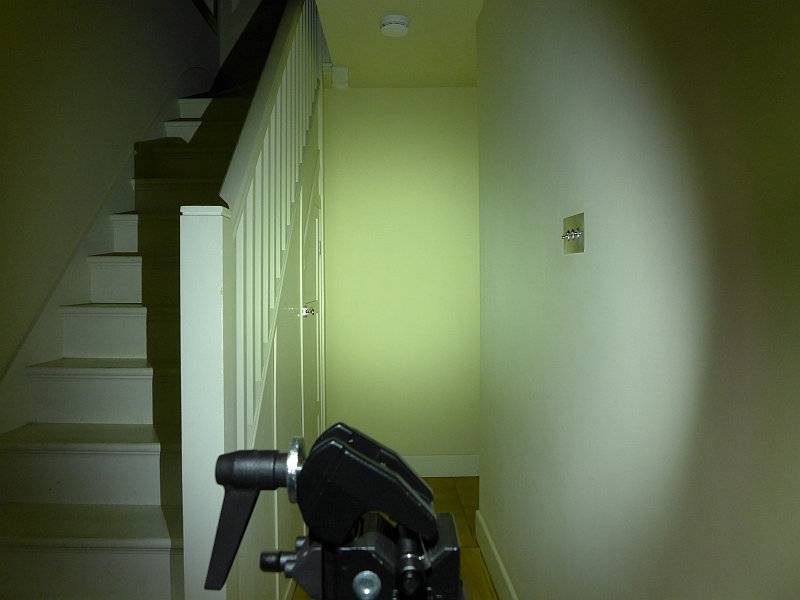
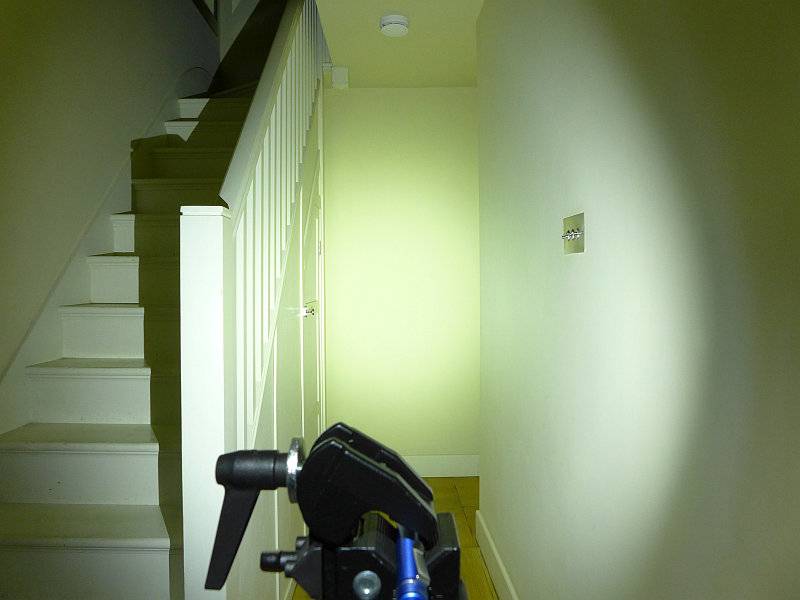
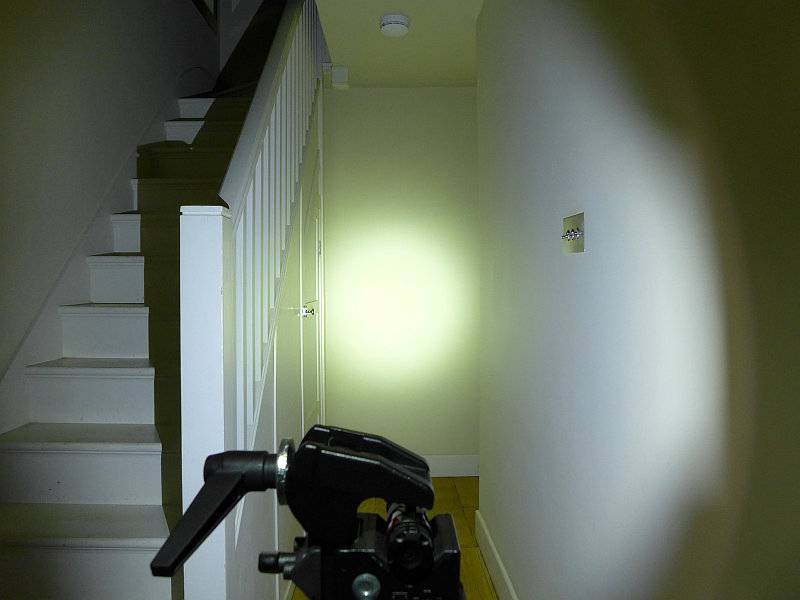
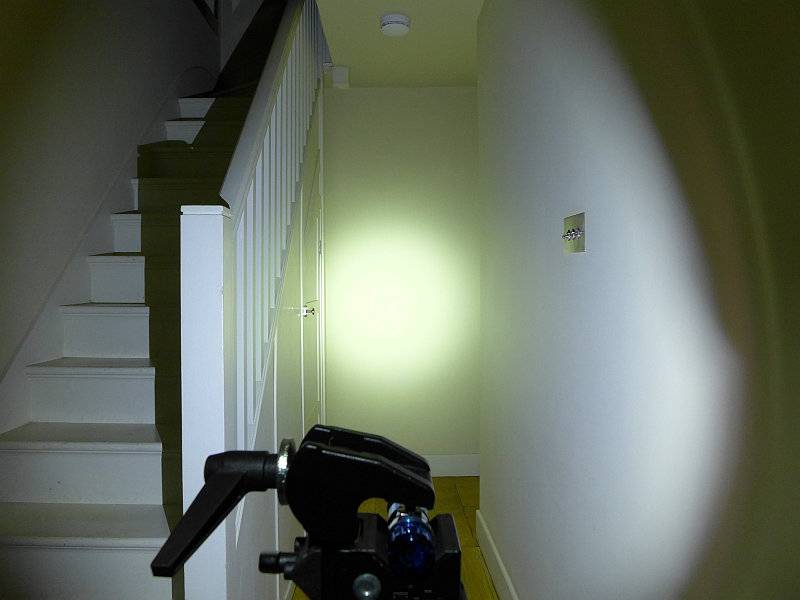
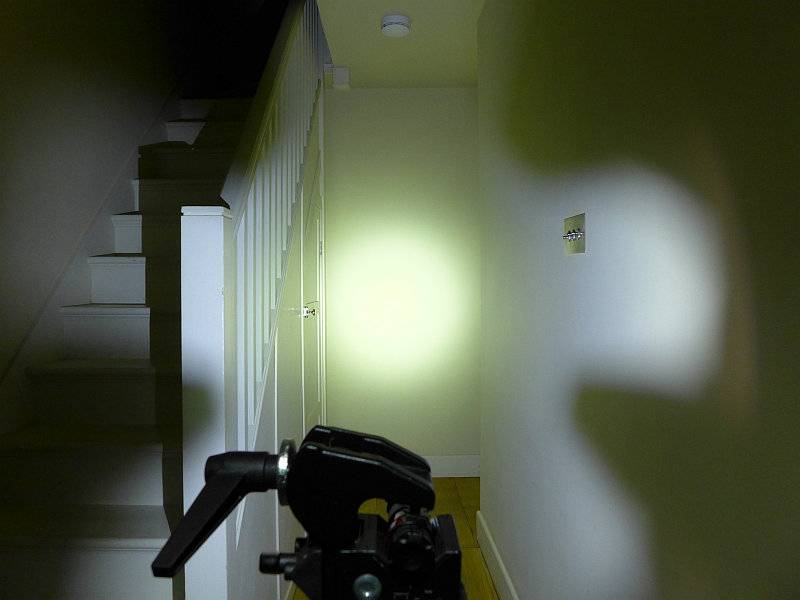
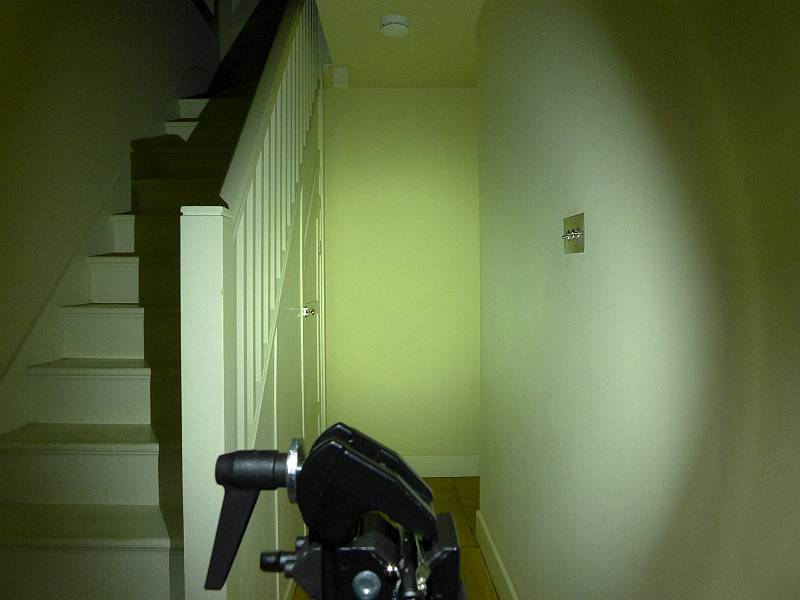
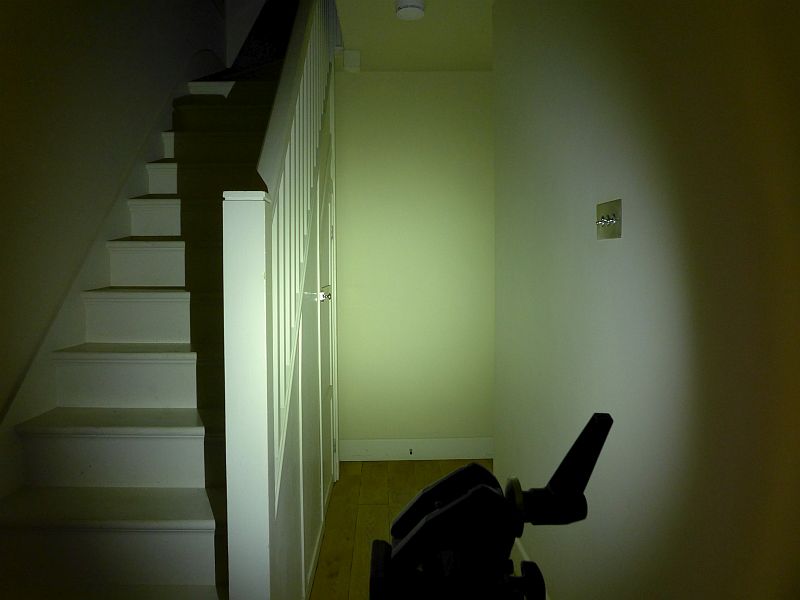
The indoor beamshot is intended to give an idea of the beam shape/quality rather than tint. All beamshots are taken using daylight white balance. The woodwork (stairs and skirting) are painted Farrow & Ball “Off-White”, and the walls are a light sandy colour called ‘String’ again by Farrow & Ball. I don’t actually have a ‘white wall’ in the house to use for this, and the wife won’t have one!

Starting indoors with the P1, it has plenty of power for your close range EDC needs, with a nice wide, soft, hotspot and wide spill.
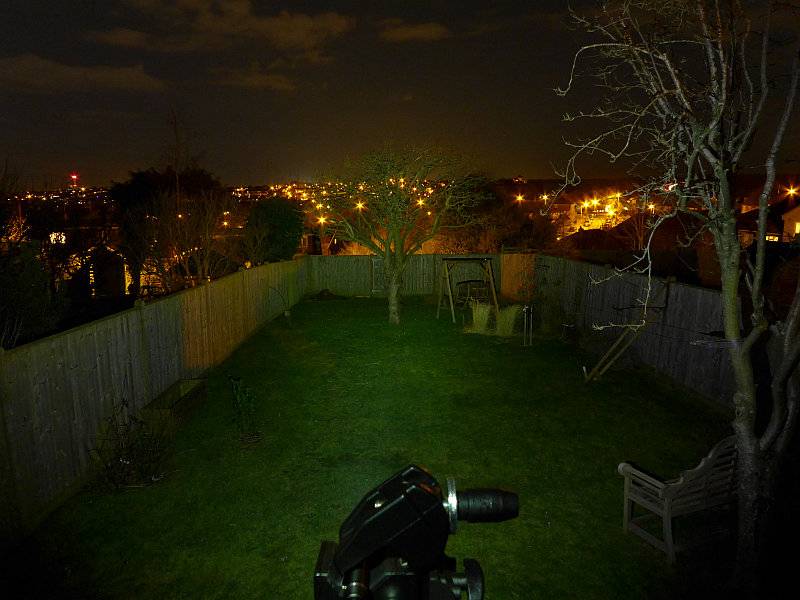
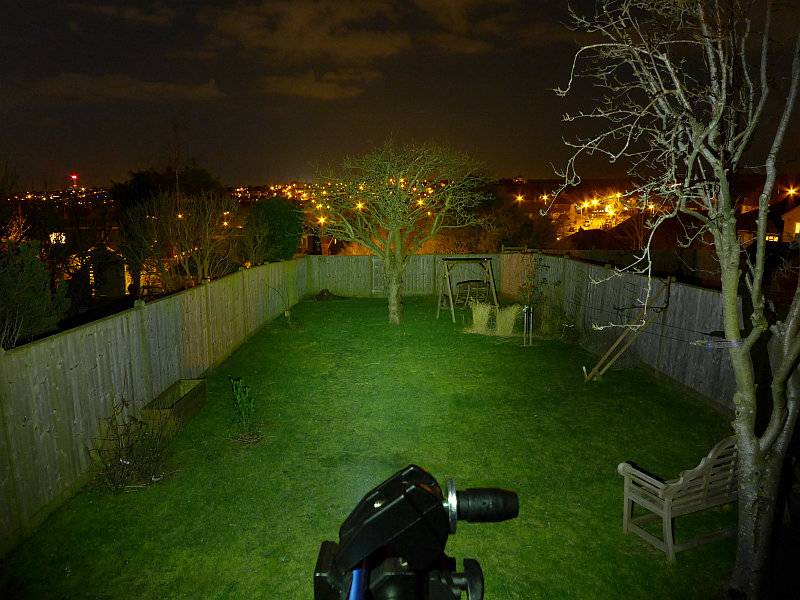
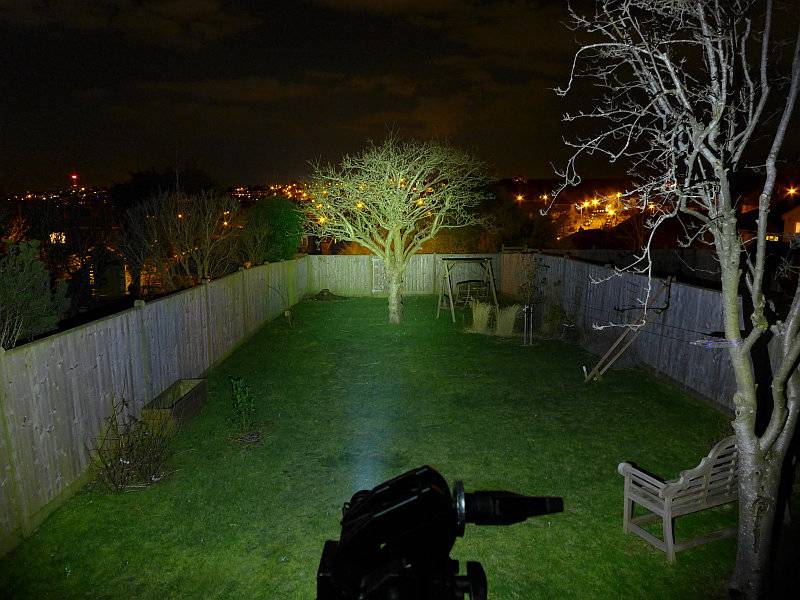
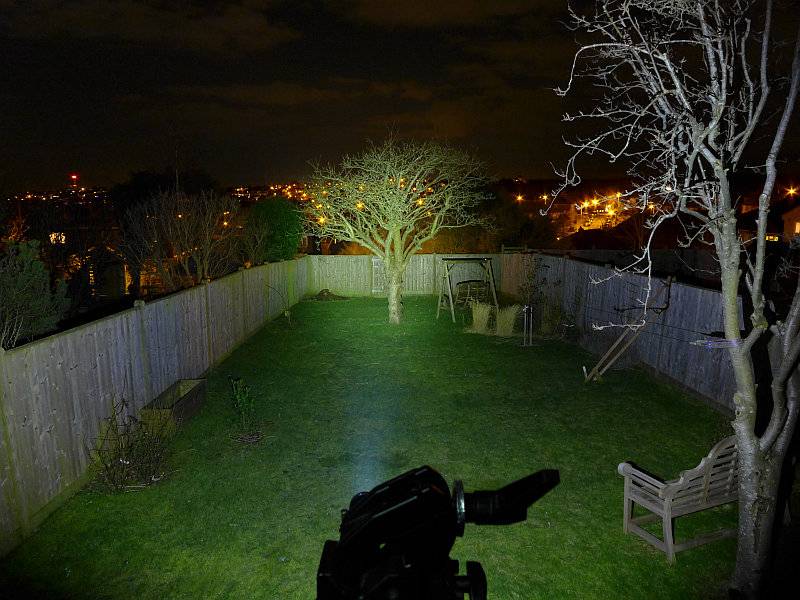
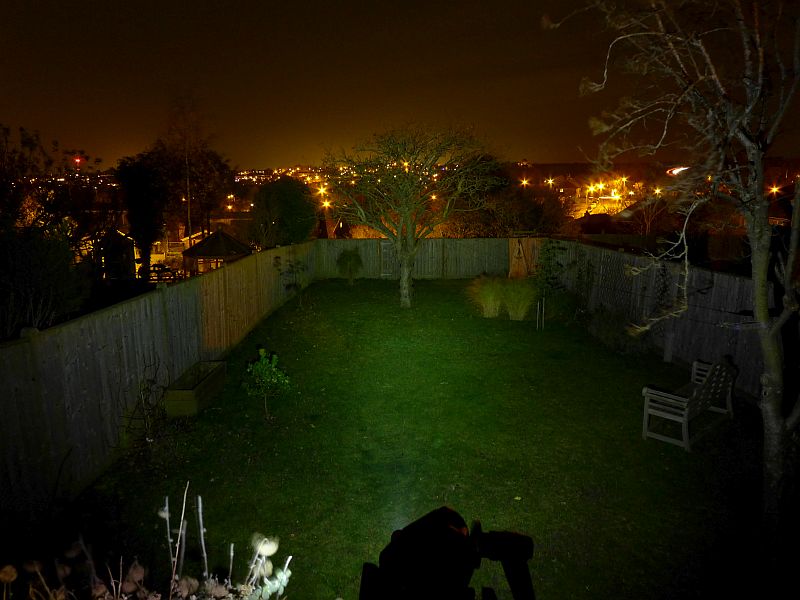
At outdoor ranges the Preon struggles as it is only a single AAA powered light and has a flood orientated beam. These exposures are long to show anything. The P1 doesn’t have much impact.
Modes and User Interface:

Just as with both the standard Preon P1 and P2, the special edition Copper P1 operates in the same way with a forward-clicky switch.
In total, there are 7 output modes which can be used – Low, Medium, High, Strobe, SOS, Beacon (high), Beacon (low).

To fine tune the Preon to your needs, you can set one of 5 possible ‘Configurations’ which have only certain modes available:
Configuration 1: High
Configuration 2: Previous, High, Low
Configuration 3: Previous, High, Strobe
Configuration 4: Previous, Low, Medium, High, Strobe
Configuration 5: Previous, Low, Medium, High, Strobe, SOS, Beacon (high), Beacon (low)

By default, configuration 2 is set. To change configuration, rapidly press the switch 10 times within 2s, holding or clicking the tenth press.
At this point the Preon will flash 1 to 5 times to indicate the selected configuration.
Quickly turn the Preon OFF and ON again to move to the next configuration, and repeat until you have the desired configuration. To memorise the setting, turn the Preon OFF for 5 seconds.

The Preon has a memory of the last mode used. This is relevant only on Configurations 2, 3, 4 and 5.
To change to the next mode in the chosen configuration, turn the Preon OFF and ON again within one second.
As shown in the Configuration list above, when you first turn the Preon ON, you get the ‘previously used’ output mode. When you then change mode, you jump to the start of the set of modes for that Configuration.
For example, if you are set to Configuration 5 and previously used Strobe, when you first turn the Preon ON you get Strobe, and when changing modes the next mode becomes Low, Medium… (In this example you do not go to SOS as the next mode).

Batteries and output:

The Preon P1 runs on AAA Alkaline or NiMh.

To measure actual output, I built an integrating sphere. See here for more detail. The sensor registers visible light only (so Infra-Red and Ultra-Violet will not be measured).

Please note, all quoted lumen figures are from a DIY integrating sphere, and according to ANSI standards. Although every effort is made to give as accurate a result as possible, they should be taken as an estimate only. The results can be used to compare outputs in this review and others I have published.

___________________________________________ ________________________________ ________________________________
Preon P1 Cu using specified cell I.S. measured ANSI output Lumens PWM frequency or Strobe frequency (Hz)
___________________________________________ ________________________________ ________________________________
High 97 1000
Medium 50 1000
Low 7 1000

* Beacon and Strobe output measurements are only estimates as the brief flashes make it difficult to capture the actual output value.

Peak Beam intensity measured 200 lx @1m giving a beam range of 28 m.

There is no parasitic drain.

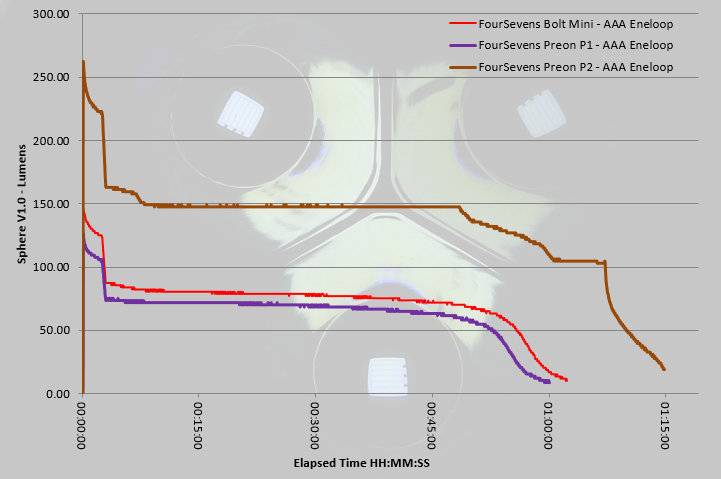
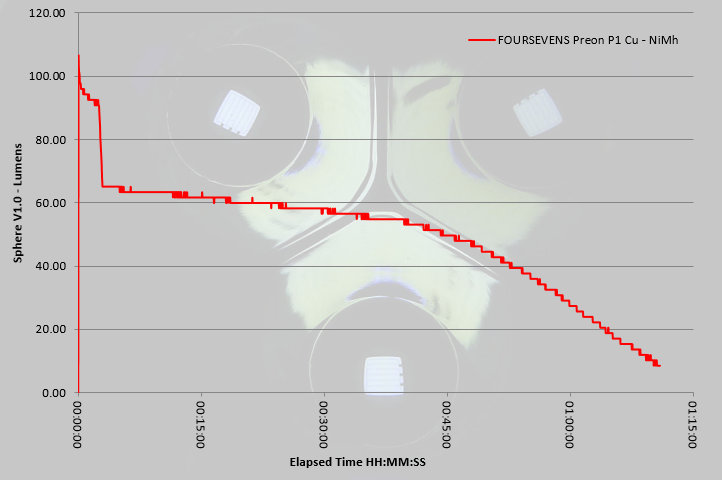
The Preon P1 Cu exhibits the FOURSEVENS ‘Burst Mode’ behaviour. When on maximum output the first three minutes are at a higher output before dropping to a slightly lower level for the remainder of the runtime.
Troubleshooting

This section is included to mention any minor niggles I come across during testing, in case the information helps anyone else.

No issues were encountered during testing.

As per the description of this section, this information is provided in case anyone else finds a similar ‘issue’ that might be fixed in the same way.

The FOURSEVENS Preon P1 Copper in use
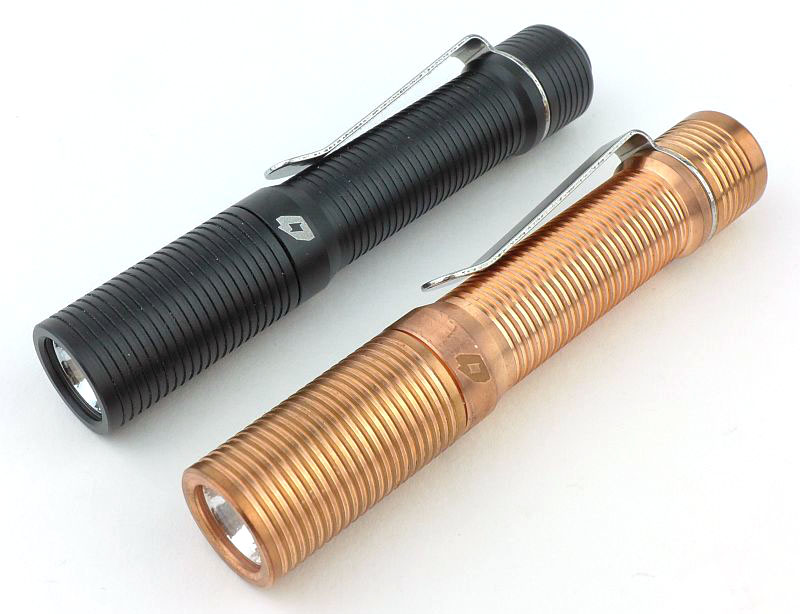
If you have read my other Preon review, then this will be mostly the same as the light is the FOURSEVENS Preon, just in a lovely raw Copper. I’m including the impressions of the current Preon as they are just as relevant to this special edition as the standard ones.

When compared to the previous generation Preons, these new versions are slightly chunkier, and initially I was not entirely convinced, as the point of an AAA light is to be very small. But then I remembered that as much as I love the older Preons they were always a bit slippery. The smooth body wanting to slide around and not giving much of a grip.

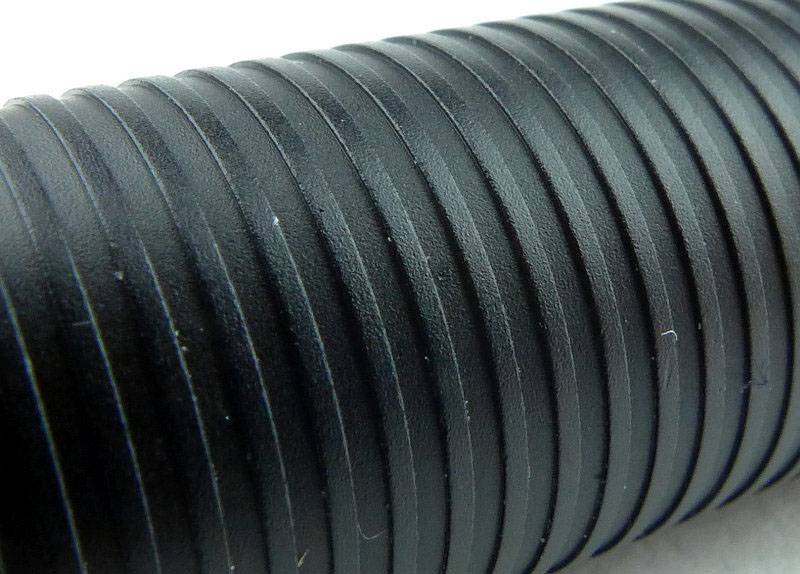
With the new Preons having a grip pattern over the entire length of the light, no longer do you get this slippery feeling. One further observation though, is that these grooves tend to pick up pocket fluff nicely, which does somewhat spoil the look.

Personally I preferred the previous UI where it had no memory, but for some a memory is a requirement as you can pre-select the output you generally use. However, as the memory only affects the mode at switch-on, after which the mode selection goes to the first of the modes in the current Configuration, it only takes one mode change to return to Low.

Unfortunately another aspect has changed in the new version, PWM is rearing its head. The previous Preons had PWM but at 2500Hz and was not noticeable to the naked eye; the new version has PWM at 1000Hz. On High and Medium this has not really been visible, but on Low, I do catch the strobing effect out of the corner of my eye. A minor irritation and not what I would expect of FOURSEVENS. It slightly takes the edge off what could be a great update to this well loved series.

It used to be more common for smaller EDC lights to go with a reverse-clicky switch, but as in earlier versions, the Preon does use a forward-clicky and gives you that immediate response to pressure on the switch.

A great feature that has been added to the Preons is the user-changeable configuration that allows you to limit which output modes can be selected. You don’t get to choose which modes are included in a ‘configuration’ but you can choose one of the five available ‘configurations’ to best suit your needs. This user configuration has great potential and I hope FOURSEVENS expand the number of configurations that can be chosen from.

With the small power source of AAA, the added efficiency of the XP-L (though only around 9%) makes a difference. Thanks to the XP-L having an XM-L2 size die in a smaller package, it is compact enough to be fitted into the Preon’s head and provide a great EDC beam.

The new Preon doesn’t just have a new body design, it has user-configuration and an XP-L LED, and in this special edition version you have a solid Copper body that with age and develop it own unique and attractive patina.

Review Summary

_______________________________________________ _______________________________________________
Things I like What doesn’t work so well for me
_______________________________________________ _______________________________________________
It’s Solid Copper. PWM at 1000Hz giving some strobe effects on low.
XP-L LED in a truly pocket-sized light. Copper marks easily and tarnishes.
User configurable. Copper is heavier.
Great EDC beam.


Discussing the Review:

The ideal place to discuss this reviews is on a forum. If you started reading the shorter forum version of the review, but followed the link this full exclusive review, please return to that forum to discuss the review there.
If you read the review entirely on Tactical Reviews, please consider one of the following to join in any discussion.

CandlePowerForums – Flashlight Reviews Section (Largest and Friendliest Flashlight Community Forum)

EdgeMatters – Sponsored Reviews (UK based Forum for Knife Makers and Collectors)

Light Review: FOURSEVENS Quark Click QK2A-X (2xAA)

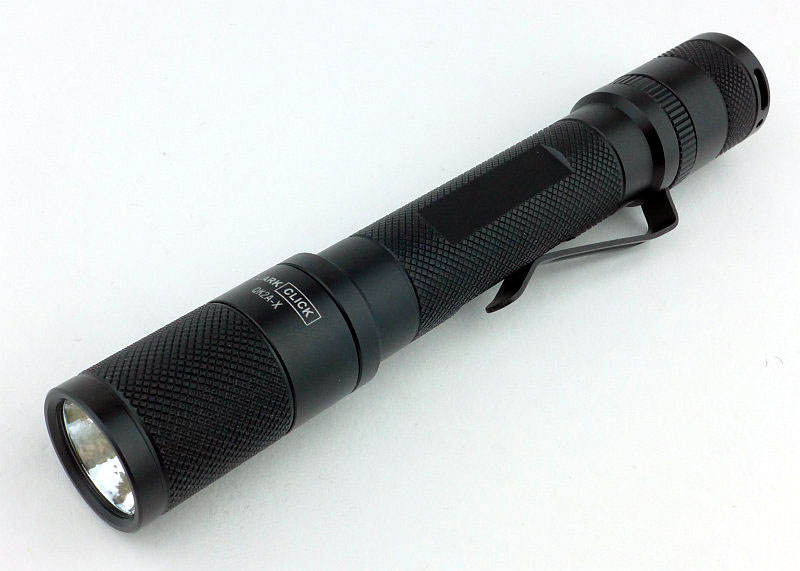
The original Quark models from FOURSEVENS redefined what a light could be, but with redesign forced upon them, FOURSEVENS had to re-imagine the Quark, and the Quark Click was born. This review is of the QK2A-X model (2AA)

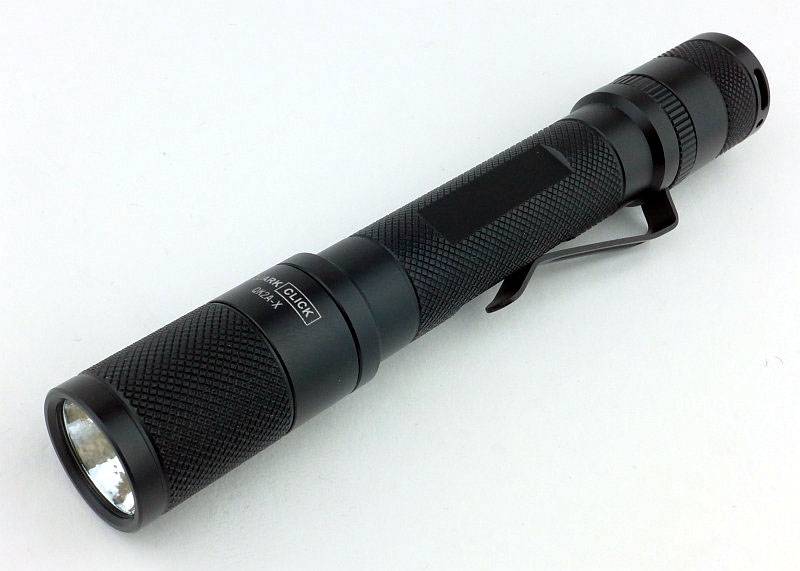
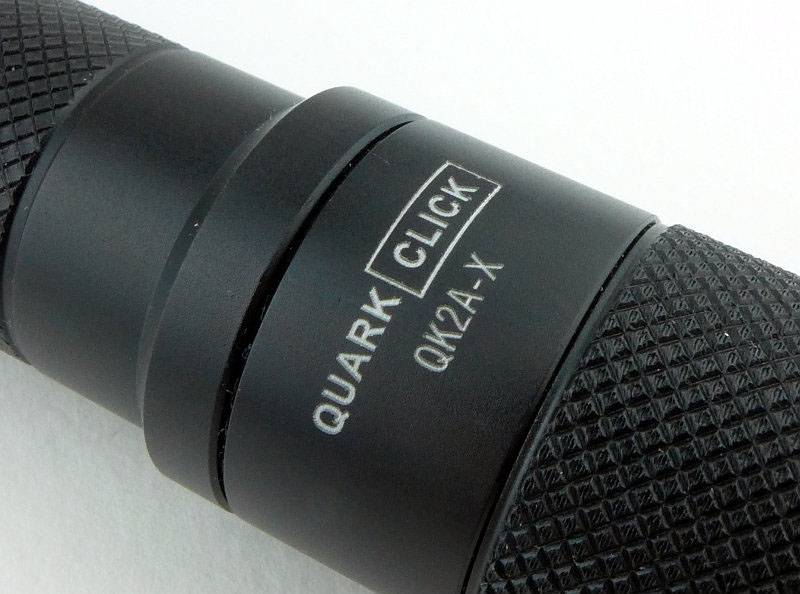
 photo 05 Quark Click engraving P1240116.jpg

Taking a more detailed look:

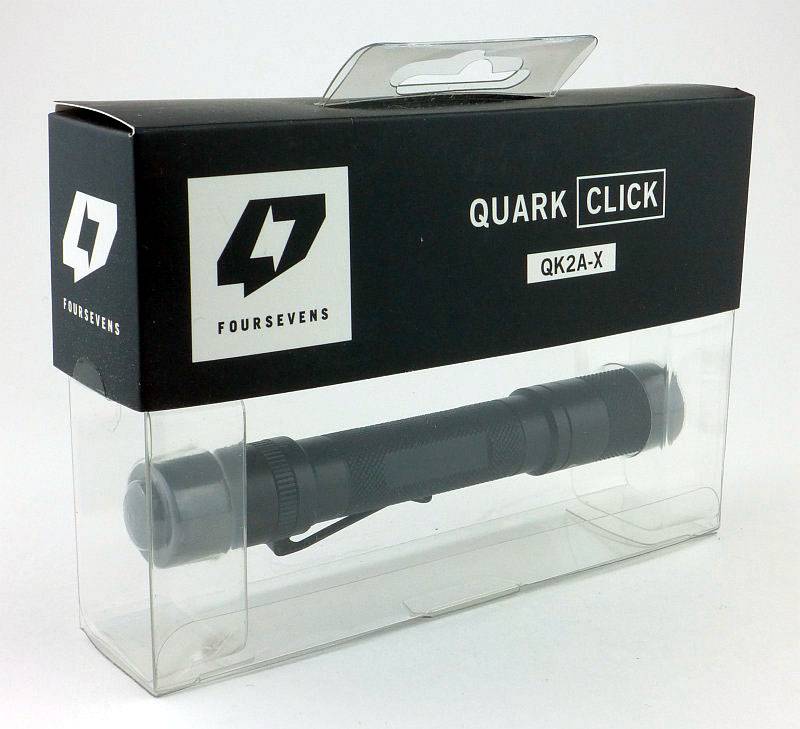
FOURSEVENS packaging presents the Quark Click so you can get an all round view.
 photo 01 Quark Click boxed P1240094.jpg

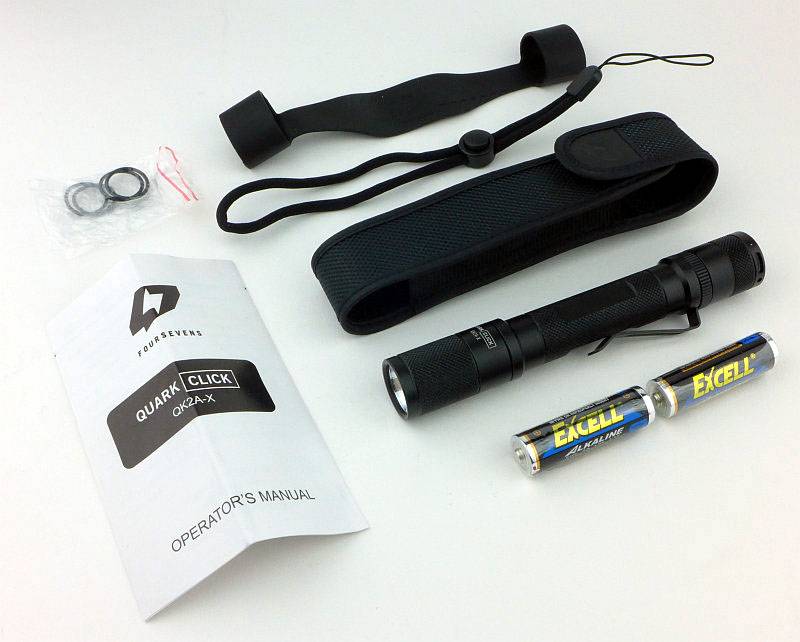
Supplied with the QK2A-X is a holster, hand-grip, lanyard, spare O-rings and 2x AA Alkaline cells.
 photo 02 Quark Click unboxed P1240099.jpg

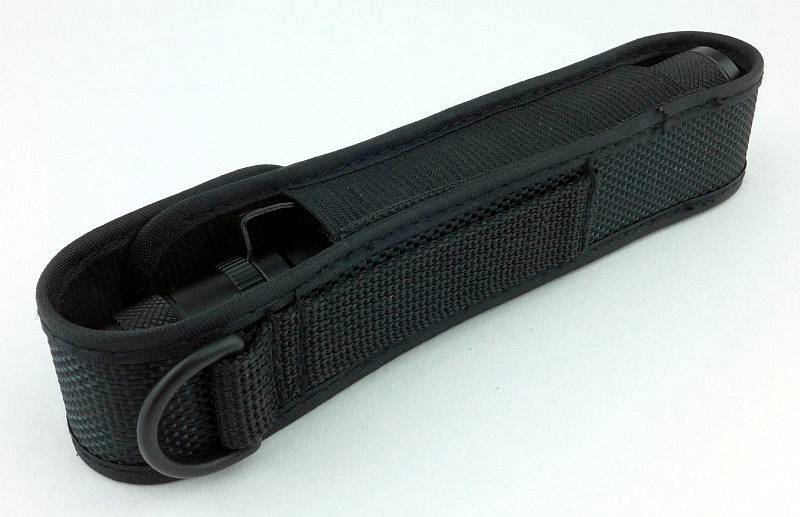
If you already know the Quark holsters, this is the same as all the others I have. The front/back are semi rigid with elasticated sides.
 photo 03 Quark Click holstered P1240107.jpg

On the back is a D-loop and fixed webbing loop.
 photo 04 Quark Click holstered P1240110.jpg

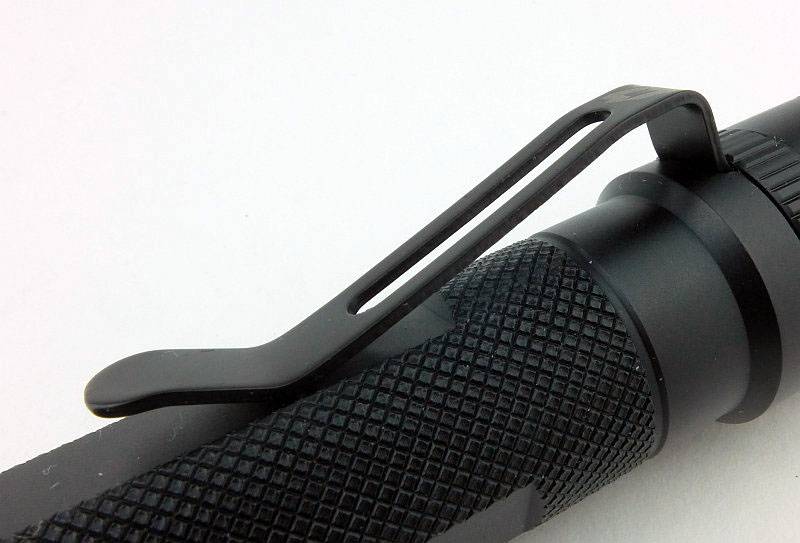
The Quark range have removable steel pocket clips.
 photo 06 Quark Click clip P1240122.jpg

As standard, the Quark Click comes with the ‘Tactical’ forward-clicky switch.
 photo 07 Quark Click rear P1240125.jpg

Being a ‘Tactical’ switch the button protrudes for easy access, so no tail-standing for this one.
 photo 08 Quark Click button P1240128.jpg

The FOURSEVENS logo is laser engraved on the head.
 photo 09 Quark Click engraving logo P1240129.jpg

At the base of the compact textured reflector is a XM-L2 LED.
 photo 10 Quark Click reflector P1240138.jpg

Thanks to the design including a location guide surrounding the LED, the LED is very well aligned with the reflector.
 photo 12 Quark Click LED P1240135.jpg

Taking the head off, and you can see the contacts inside it. These include physical reverse polarity protection.
 photo 11 Quark Click contacts P1240141.jpg

The threads are square and bare metal. They arrive well lubricated.
 photo 13 Quark Click threads P1240146.jpg

Inside the tailcap is a strong spring contact for the negative connection. Due to the use of bare metal threads, the Quark Click cannot be locked-out by unscrewing the tail-cap slightly – instead you must unscrew the head of the Quark Click half a turn.
 photo 14 Quark Click tail contacts P1240150.jpg

And here we have one of the Quarks’ historical features, its lego-ability (change the head, or battery tube, or switch). In this case, simply use a 1xAA long battery tube and this Quark can now use 1xAA or 1×14500 as well as the original 2xAA.
 photo 15 Quark Click 1AA P1240154.jpg

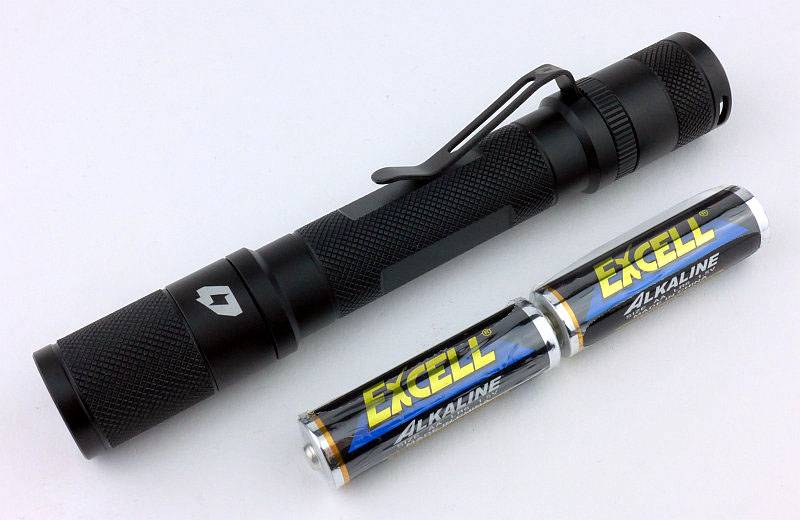
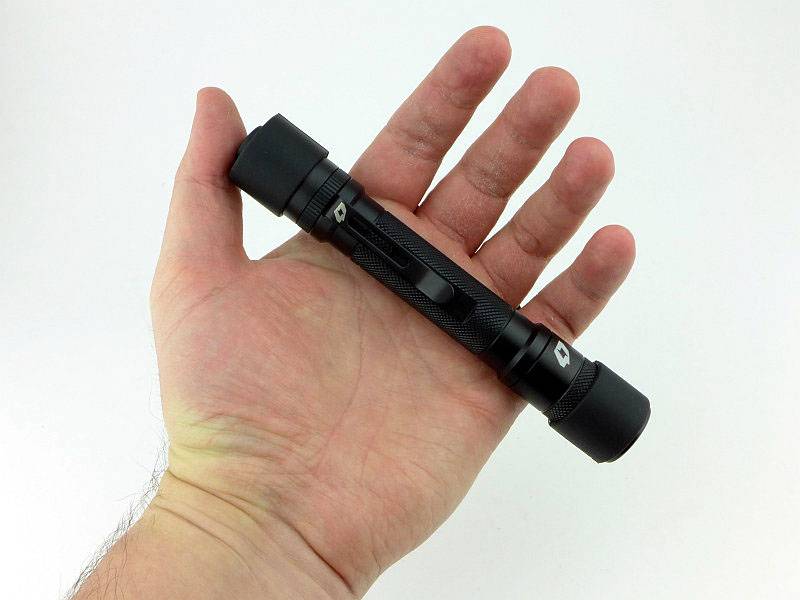
So this is the Quark Click QK2A-X next to 2xAA cells for size reference.
 photo 16 Quark Click size 2AA P1240161.jpg

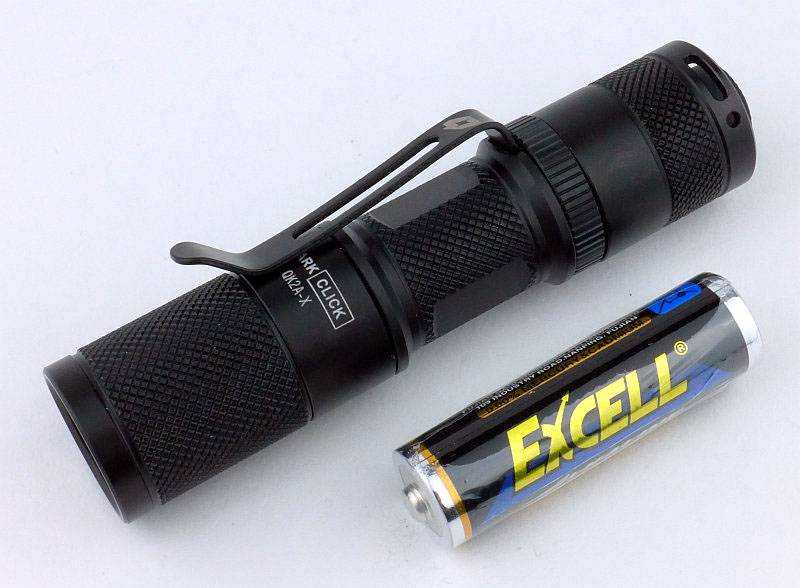
The same head and switch now on a 1xAA battery tube next to1xAA for size reference.
 photo 17 Quark Click size 1AA P1240162.jpg

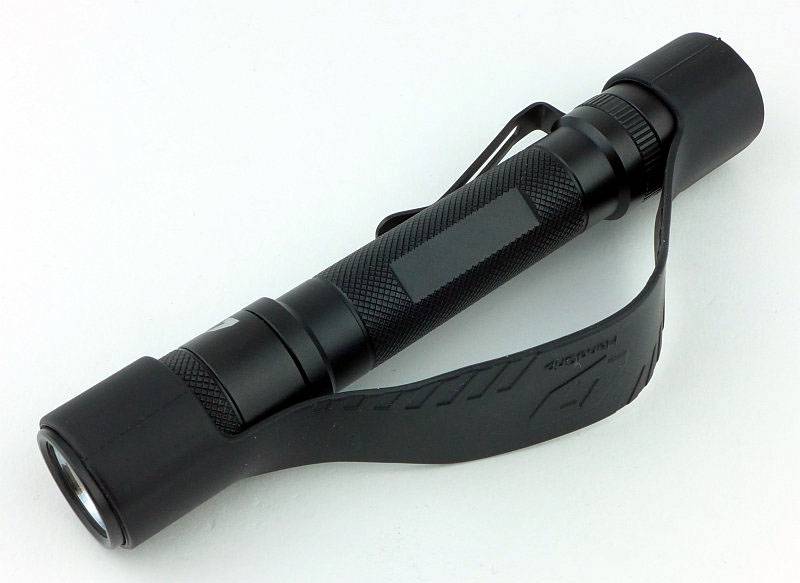
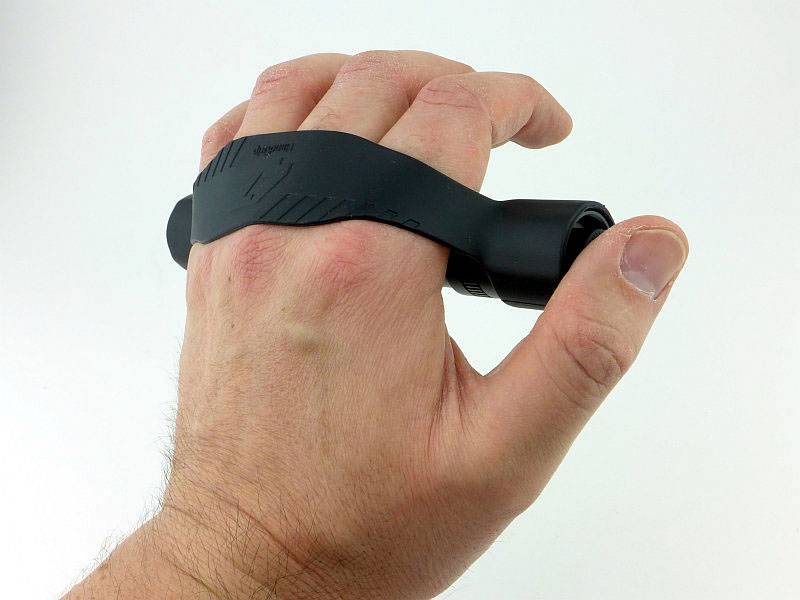
Another feature of FOURSEVENS lights is the inclusion of the hand-grip. Not frequently talked about, this is a very useful accessory. Here it is fitted to the QK2A-X.
 photo 18 Quark Click strap P1240168.jpg

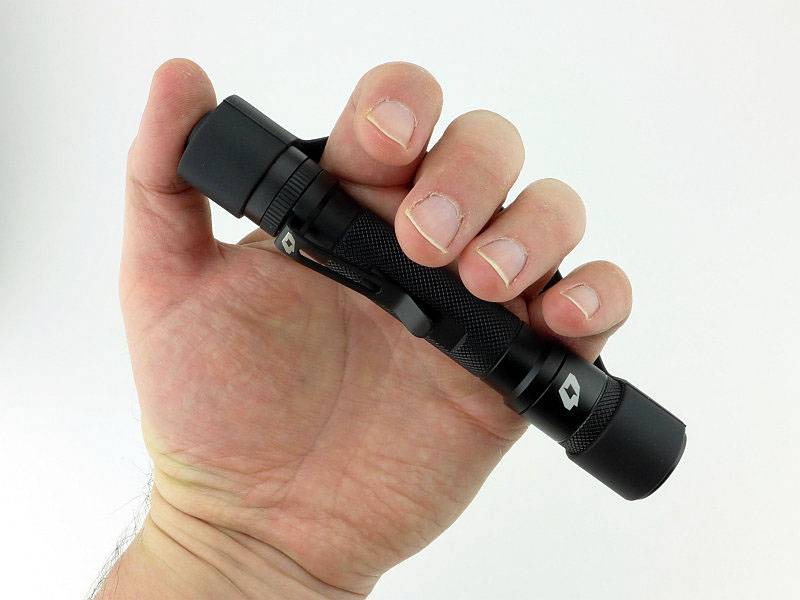
Slipping the hand-grip over your fingers positions the Quark like this.
 photo 19 Quark Click strap in hand P1240176.jpg

You position the hand-grip to wherever it is most comfortable for you. This is where I like it, not quite onto my knuckles.
 photo 20 Quark Click strap in hand P1240174.jpg

No need to hold onto the light as the hand-grip does this for you. You hand is free for other tasks (as long as they fit in with keeping the light where you need it).
 photo 21 Quark Click strap in hand P1240171.jpg

The beam

Please be careful not to judge tint based on images you see on a computer screen. Unless properly calibrated, the screen itself will change the perceived tint.

The indoor beamshot is intended to give an idea of the beam shape/quality rather than tint. All beamshots are taken using daylight white balance. The woodwork (stairs and skirting) are painted Farrow & Ball “Off-White”, and the walls are a light sandy colour called ‘String’ again by Farrow & Ball. I don’t actually have a ‘white wall’ in the house to use for this, and the wife won’t have one!

I’ve always like the Quark beam profile, and the latest Quark Click doesn’t disappoint. Good wide spill, and a hotspot giving good reach make this a great all rounder. If you study the beam close-up on a white wall, it can seem a bit unrefined, but step back and the beam is well diffused and very nice to use.
 photo 22 Quark Click indoor P1240746.jpg

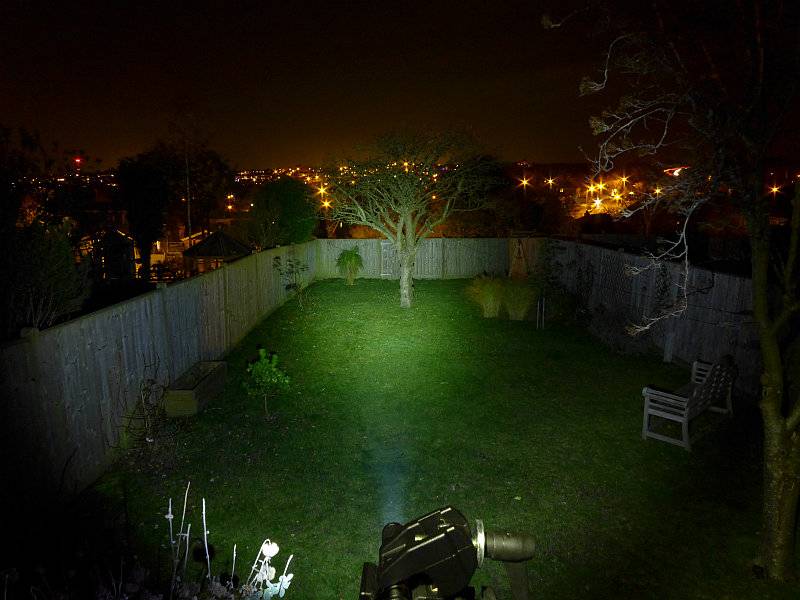
Outdoors and the ultimate brightness of the Quark starts to show its limitations, but that hotspot does give you a reasonable range and the broad spill gives you a wide field of view, even if not the brightest. This is a 2xAA after all.
 photo 23 Quark Click outdoor P1240699.jpg

Modes and User Interface:

In its default configuration the Quark Click has two output modes Low and Max, but the model on test has been reprogrammed to include Moon, Low, Mid and Max/Burst (this customisation was requested as it is offered by FOURSEVENS as standard customisation).

For the default configuration (according to the manual):
To turn ON, either half-press the switch, or fully press it so it clicks.
To toggle between output modes turn the light ON, OFF, then ON again.
The last used mode is memorised if the Quark remains OFF for at least 5 seconds and is used next time you turn it ON.
To turn OFF, release the switch (if half-pressing it), or press it so it clicks and release.

For the customised Quark Click with Moon, Low, Mid, and Max:
To turn on, either half-press the switch, or fully press it so it clicks.
To toggle between output modes turn the light ON, OFF, then ON again – However, you have to cycle through Max, Low three to four times to access the additional modes, so Max, Low, Max, Low, Max, Low, Max, Moon, Low, Mid, Max, Moon……
Now we have another deviation from the standard interface when it comes to memory.
When using the Quark Click in the Max, Low mode selection (before reaching the additional modes) it does not memorise Low, it always starts on Max.
Only if you have selected a mode from the additional mode selection (Moon, Low, Mid, Max) is it memorised. Also it is only memorised if the Quark has been ON that mode for 5s and remains OFF for at least 5 seconds. Then once memorised, as long as there is not a full ON/OFF/ON cycle within 5s, it will remain on that mode.
If you memorise Max mode, the Quark Click returns to the Low/Max mode, and always gives you Max until you carry out the memorisation steps described above.
To turn OFF, release the switch (if half-pressing it), or press it so it clicks and release.

Batteries and output:

The Quark Click QK2A-X in its default configuration runs on 2x AA (Lithium, Alkaline or NiMh). With the additional 1xAA battery tube it will run on 1xAA (Lithium, Alkaline or NiMh) or 1x 14500.

To measure actual output, I built an integrating sphere. See here for more detail. The sensor registers visible light only (so Infra-Red and Ultra-Violet will not be measured).

Please note, all quoted lumen figures are from a DIY integrating sphere, and according to ANSI standards. Although every effort is made to give as accurate a result as possible, they should be taken as an estimate only. The results can be used to compare outputs in this review and others I have published.

___________________________________________ ________________________________ ________________________________
Quark Click QK2A-X using specified cell I.S. measured ANSI output Lumens PWM frequency or Strobe frequency (Hz)
___________________________________________ ________________________________ ________________________________
Max/Burst – 2x AA Eneloop 296 0
Medium – 2x AA Eneloop 26 0
Low – 2x AA Eneloop 3 0
Moon – 2x AA Eneloop Below Threshold 0

* Beacon and Strobe output measurements are only estimates as the brief flashes make it difficult to capture the actual output value.

Peak Beam intensity measured 2500 lx @1m giving a beam range of 100 m.

There is no parasitic drain.

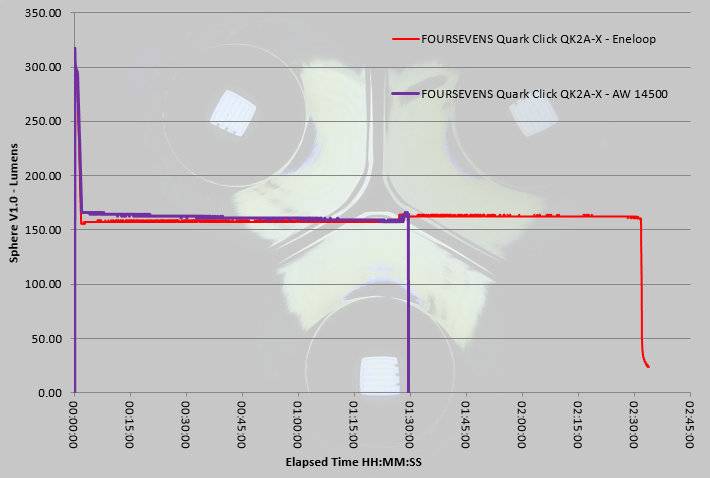
In this runtime graph are the output traces from using 2xAA Eneloop, and an AW protected 14500. Running the QK2A-X head on 3V or 4.2V doesn’t increase the maximum output. Both traces show the Burst mode where the first 30s of output are maximum, before dropping to approximately 50% of this. The output is then very well regulated right up to the point the cells become fully depleted.
With the 14500, there is an absolute cut-off when the protection kicks in (it goes OFF), but the 2xAA trace drops sharply, but doesn’t fully cut out.
 photo FOURSEVENS QK2A-X runtime.jpg

Troubleshooting

This section is included to mention any minor niggles I come across during testing, in case the information helps anyone else.

No issues were encountered during testing.

As per the description of this section, this information is provided in case anyone else finds a similar ‘issue’ that might be fixed in the same way.

The Quark Click QK2A-X in use

Anyone following my reviews will know that I consider the 2xAA form-factor one of the best. The QK2A-X has a slim battery tube with slightly larger head and tail-cap. making it very secure in the hand.

Even if you don’t really use pocket clips, it provides a very useful anti-roll function, so I’d rather leave it in place. As pocket clips go, it also has a generous capacity so is easy to use on thicker pocket edges like on some heavy cargo-pants.

With this one being a customised version, I was scratching my head a little when it wouldn’t memorise the low mode, but as explained in the UI section, you need to get to the additional modes before the memory function kicks in. It can seem a little fiddly as to memorise Moon mode you need to turn the Quark Click on and off 5 or 6 times watching the output to catch the Moon mode (miss it and you have to turn it on and off a further 4 times to get back to Moon). It works, but is not the slickest interface.

In most lights, lock-out is provided by undoing the tail-cap half a turn. It is slightly counter intuitive that the Quark uses the head to lock-out the Quark Click, but then again, this also means you can leave the tail-cap clicked on and then use the head to give you a twisty interface. Great for silent use, and twisting the head is very intuitive. Suddenly I’m liking that design feature much more.

With the interface being an ON/OFF/ON to switch modes, you can’t really use the momentary action for signaling. I’ve always preferred the immediacy of the forward-clicky tail-cap switch, so definitely prefer this to a reverse-clicky.

A little comment about the available levels and the Burst mode – Effectively, you have a combined Burst/High output as a single mode. After the initial 30s of Burst, the output drops to a very useful 150lm which is then maintained. Unfortunately it is not possible to directly enter the 150lm mode as it is always proceeded by the 300lm burst mode. When you look at the ANSI output levels this leaves a ‘hole’ in the available output levels as you have 296lm, then down to 26lm, then 3lm then Moon. Really that 150lm level is needed to fill the hole, and it is there, but you have to get through burst mode first.

Having Moon mode memorised, you will notice the FOURSEVENS pre-flash is present for this mode. This is a very quick flash of a level slightly brighter than Moon mode before it settles into the constant output. It has never caused me a problem and is more a characteristic than anything wrong. With the Moon mode being a true Current Controlled output it is far preferable to some PWM control of this level.

PWM – well I might have just mentioned it, but I’m happy to say there is none present in the Quark Click. None of the modes available in this sample exhibited PWM at any frequency.

A classic, game-changing, lego-able design, rebooted with a simple interface and one that can be operated as a clicky or a twisty.

Review Summary

_______________________________________________ _______________________________________________
Things I like What doesn’t work so well for me
_______________________________________________ _______________________________________________
Excellent All-Rounder beam. Mode memorisation a little laborious in this customised Quark.
Current Controlled output (no PWM). Tail-standing not possible with standard tail-cap.
Lego-able design compatible with all previous Quark models. 150lm output only available after 30s by first using the Burst Mode.
Optional AA and CR123 battery tubes.
Spacious/removable pocket clip provides anti-roll.
Wide input voltage range 0.9-4.2v.
Can be used as a Twisty or Clicky.

 photo 00 Quark Click feature P1240113.jpg


Discussing the Review:

Please feel free to add comments to the review, but the ideal place to freely discuss these reviews is on a forum. If you started reading the shorter forum version of the review, but followed the link this full exclusive review, please return to that forum to discuss the review there.
If you read the review entirely on Tactical Reviews, please consider one of the following to join in any discussion.

CandlePowerForums – Flashlight Reviews Section (Largest and Friendliest Flashlight Community Forum)

EdgeMatters – Sponsored Reviews (UK based Forum for Knife Makers and Collectors)
Light Review: FOURSEVENS Preon P1 and P2

FOURSEVENS’ Preons have been very popular and well regarded AAA powered EDC lights. Being time for a reboot, here are the current updated versions of the Preon P1 and P2.

(And yes, they do have a high efficiency XP-L LED.)
 photo 09 Preon P2 angle LED P1160829.jpg

Taking a more detailed look:

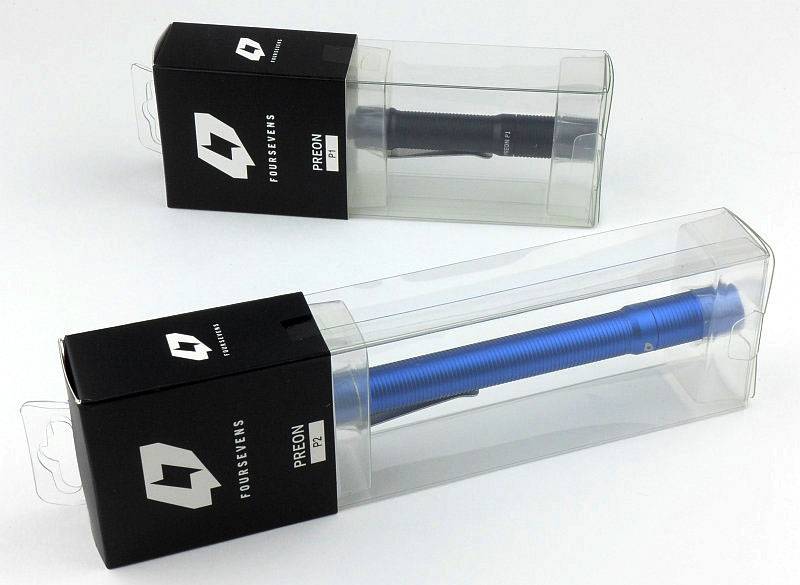
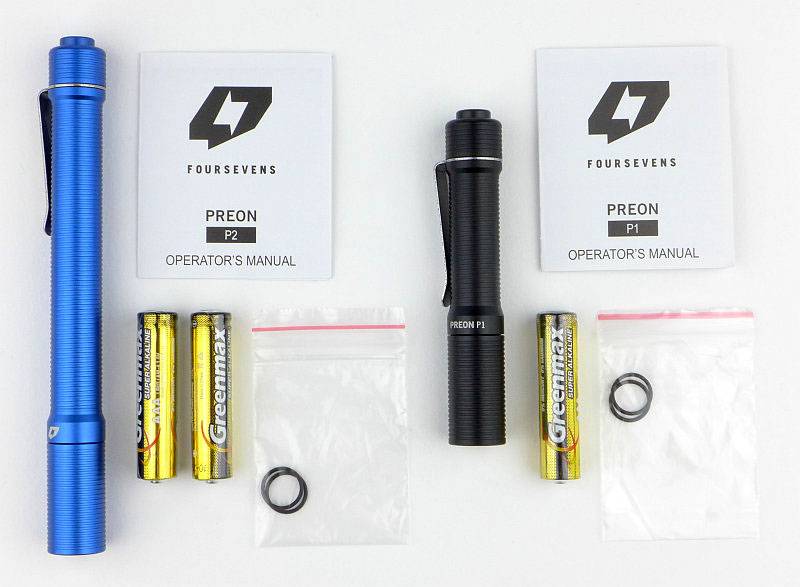
Presentation is great with FOURSEVENS’ standard clear plastic box packaging.
 photo 01 Preon P1P2 boxed P1160796.jpg

Each Preon comes with one set of AAA Alkaline cells, two spare O-rings and the instructions.
 photo 02 Preon P1P2 unboxed P1160798.jpg

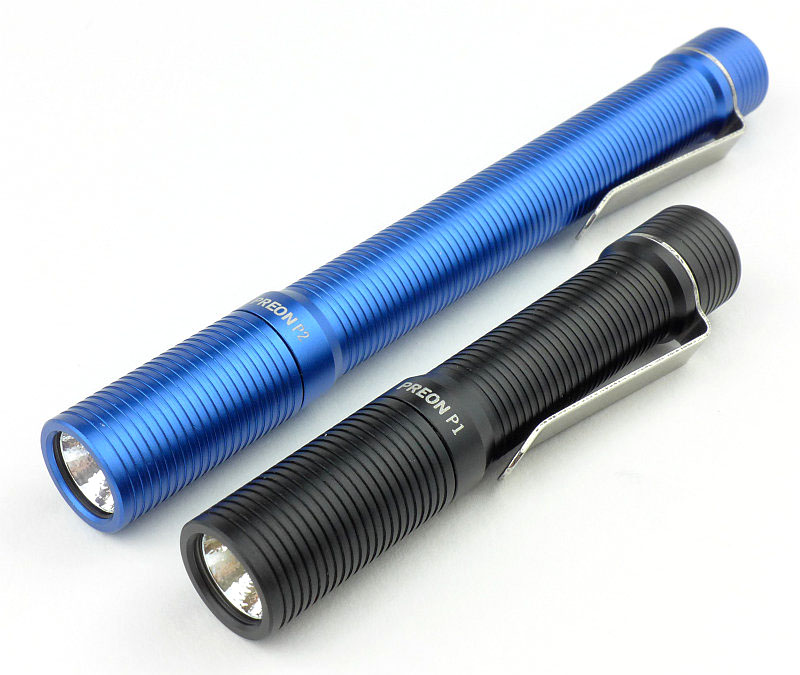
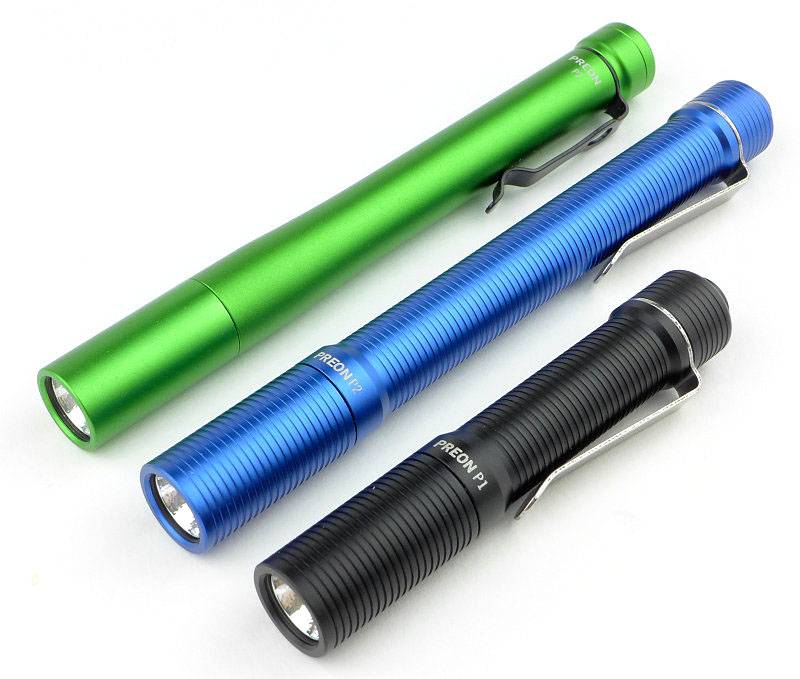
A quick look at the previous generation Preon P2 (in toxic green) with the latest generation Preon P1 and P2.
 photo 04 Preon P1P2 trio angle P1160808.jpg

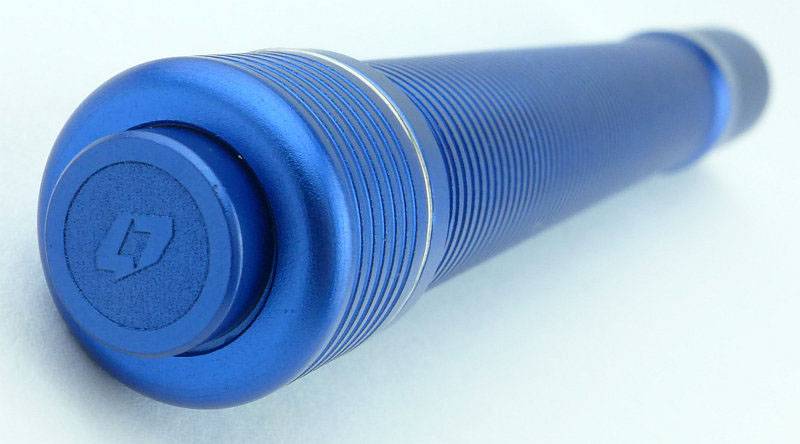
A feature of the Preons is the metal switch button. Prior to anodising, this has been engraved with the FOURSEVENS logo.
 photo 05 Preon P2 switch engraving P1160815.jpg

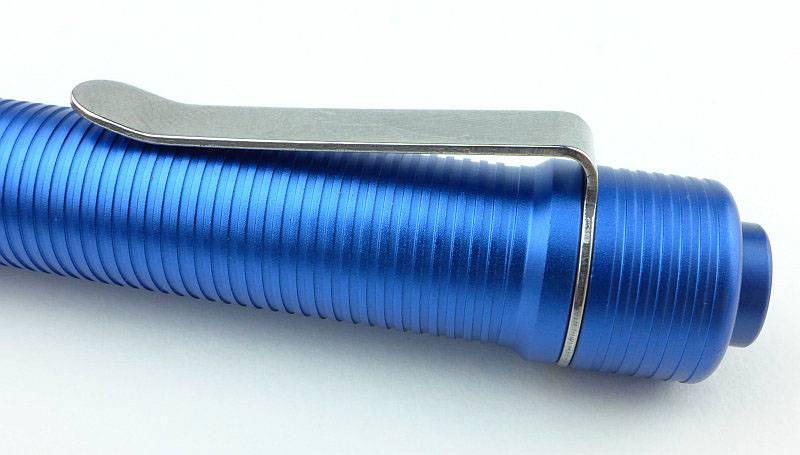
The stainless steel pocket clip is a well finished and has a well-suited tension (not too stiff) to the size and weight.
 photo 06 Preon P2 clip P1160819.jpg

Just above the head of the light the FOURSEVENS logo is laser engraved through the anodising.
 photo 07 Preon P2 engraving P1160821.jpg

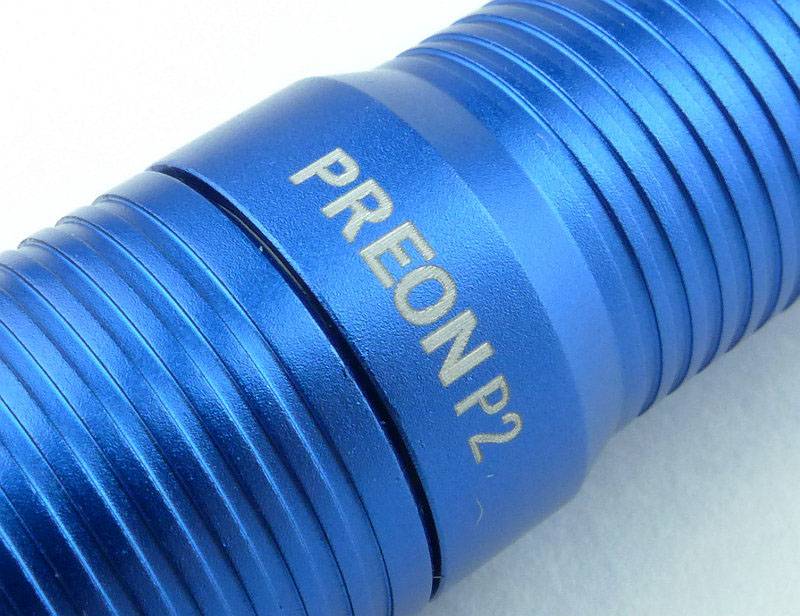
On the opposite side the model is engraved.
 photo 08 Preon P2 engraving2 P1160825.jpg

A view of the contacts inside the head. (This is the same for the P1 so the P1 is not being shown.)
 photo 10 Preon P2 head contact P1160831.jpg

The threads are a standard form, and are well lubricated. (This is the same for the P1 so the P1 is not being shown.)
 photo 11 Preon P2 threads P1160834.jpg

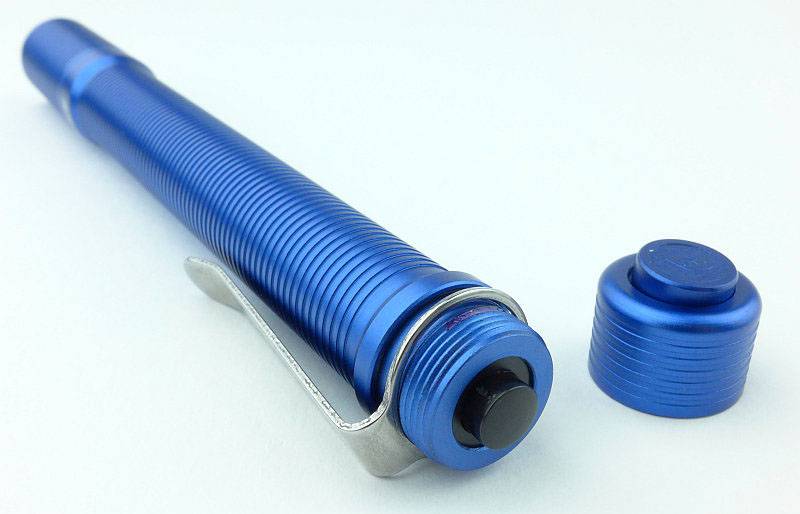
You can unscrew the switch cap and take the clip off, but this does not give access to the battery chamber.
 photo 12 Preon P2 switch cap off P1160837.jpg

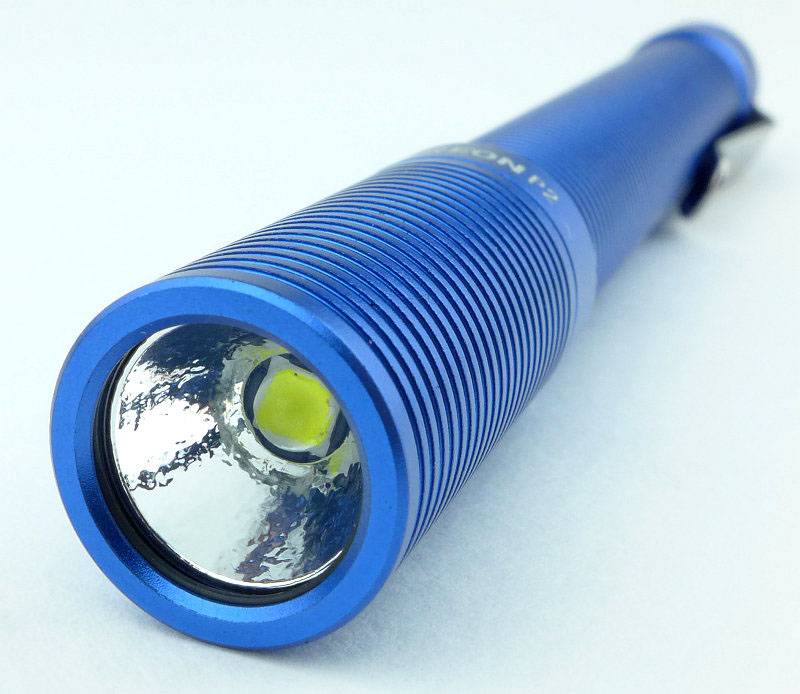
An XP-L LED sits in a small textured reflector.
 photo 13 Preon P2 reflector P1160839.jpg

Looking straight into the small reflector.
 photo 14 Preon P2 LED P1160845.jpg

The clip on the P1 is the same, but here is a view from a different angle.
 photo 15 Preon P1 clip P1160848.jpg

The P1 also has a metal switch cap over a forward-clicky switch.
 photo 16 Preon P1 switch P1160854.jpg

The new Preons feature a fully textured body with grooves for grip along the entire length.
 photo 17 Preon P1 body P1160855.jpg

With it shorter battery tube it is just possible to show the positive contact spring terminal.
 photo 18 Preon P1 negative terminal P1160864.jpg

For scale, each Preon is shown with its AAA cells next to it.
 photo 19 Preon P1P2 size P1160870.jpg

The beam

Please be careful not to judge tint based on images you see on a computer screen. Unless properly calibrated, the screen itself will change the perceived tint.

The indoor beamshot is intended to give an idea of the beam shape/quality rather than tint. All beamshots are taken using daylight white balance. The woodwork (stairs and skirting) are painted Farrow & Ball “Off-White”, and the walls are a light sandy colour called ‘String’ again by Farrow & Ball. I don’t actually have a ‘white wall’ in the house to use for this, and the wife won’t have one!

For this set of beamshots, the exposure has been kept the same for the P1 and P2 to show their relative brightness.

Starting indoors with the P1, it has plenty of power for your close range EDC needs, with a nice wide, soft, hotspot and wide spill.
 photo 20 Preon P1 indoor beam P1170374.jpg

With the P2 it looks the same just brighter, as the P2 has double the output of the P1.
 photo 21 Preon P2 indoor beam P1170370.jpg

At outdoor ranges the Preons struggle as they are only AAA powered and have a flood orientated beam. These exposures are long to show anything. The P1 doesn’t have much impact.
 photo 22 Preon P1 outdoor beam P1170293.jpg

With the same exposure to allow direct comparison, the P2 looks a bit better, but this is a long exposure, so don’t expect too much at this range.
 photo 23 Preon P2 outdoor beam P1170285.jpg

Modes and User Interface:

Both the Preon P1 and P2 operate in the same way with a forward-clicky switch.
In total, there are 7 output modes which can be used – Low, Medium, High, Strobe, SOS, Beacon (high), Beacon (low).

To fine tune the Preon to your needs, you can set one of 5 possible ‘Configurations’ which have only certain modes available:
Configuration 1: High
Configuration 2: Previous, High, Low
Configuration 3: Previous, High, Strobe
Configuration 4: Previous, Low, Medium, High, Strobe
Configuration 5: Previous, Low, Medium, High, Strobe, SOS, Beacon (high), Beacon (low)

By default, configuration 2 is set. To change configuration, rapidly press the switch 10 times within 2s, holding or clicking the tenth press.
At this point the Preon will flash 1 to 5 times to indicate the selected configuration.
Quickly turn the Preon OFF and ON again to move to the next configuration, and repeat until you have the desired configuration. To memorise the setting, turn the Preon OFF for 5 seconds.

The Preon has a memory of the last mode used. This is relevant only on Configurations 2, 3, 4 and 5.
To change to the next mode in the chosen configuration, turn the Preon OFF and ON again within one second.
As shown in the Configuration list above, when you first turn the Preon ON, you get the ‘previously used’ output mode. When you then change mode, you jump to the start of the set of modes for that Configuration.
For example, if you are set to Configuration 5 and previously used Strobe, when you first turn the Preon ON you get Strobe, and when changing modes the next mode becomes Low, Medium… (In this example you do not go to SOS as the next mode).

Batteries and output:

The Preon P1 runs on 1x AAA and the P2 on 2x AAA; either Alkaline of NiMh cells can be used (maximum input voltage 3.0V).

To measure actual output, I built an integrating sphere. See here for more detail. The sensor registers visible light only (so Infra-Red and Ultra-Violet will not be measured).

Please note, all quoted lumen figures are from a DIY integrating sphere, and according to ANSI standards. Although every effort is made to give as accurate a result as possible, they should be taken as an estimate only. The results can be used to compare outputs in this review and others I have published.

___________________________________________ ________________________________ ________________________________
P1/P2 using AAA Eneloop I.S. measured ANSI output Lumens PWM frequency or Strobe frequency (Hz)
___________________________________________ ________________________________ ________________________________
P1 – High 127 1000
P1 – Medium 63 1000
P1 – Low 7 1000
P2 – High 259 950
P2 – Medium 137 950
P2 – Low 33 950

* Beacon and Strobe output measurements are only estimates as the brief flashes make it difficult to capture the actual output value.

Peak Beam intensity for the P1 measured 200 lx @1m giving a beam range of 28 m.
Peak Beam intensity for the P2 measured 600 lx @1m giving a beam range of 49 m.

There is no parasitic drain.

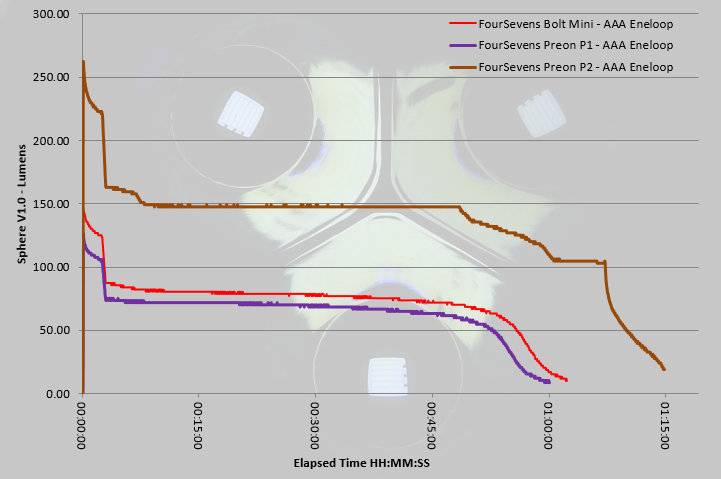
The two Preon models are also shown next to the Bolt-Mini, as this was another FOURSEVENS AAA light I have tested (check index page for this review). Thanks to its two AAA cells, the P2 is the only light to display full regulation in the output. With only one AAA, the P1 is always pushing this limited power source, but runs with a pretty consistent output after the initial drop from the 3 minute ‘burst’ at turn-on.
 photo Foursevens Bolt mini Preon P1 P2 runtime.jpg

Troubleshooting

This section is included to mention any minor niggles I come across during testing, in case the information helps anyone else.

No issues were encountered during testing.

As per the description of this section, this information is provided in case anyone else finds a similar ‘issue’ that might be fixed in the same way.

The Preon P1 and P2 in use

When compared to the previous generation Preons, these new versions are slightly chunkier, and initially I was not entirely convinced, as the point of an AAA light is to be very small. But then I remembered that as much as I love the older P2 shown in the photos, it was always a bit slippery. The smooth body wanting to slide around and not giving much of a grip.

With the new Preons having a grip pattern over the entire length of the light, no longer do you get this slippery feeling. One further observation though, is that these grooves tend to pick up pocket fluff nicely, which does somewhat spoil the look.

Personally I preferred the previous UI where it had no memory, but for some a memory is a requirement as you can pre-select the output you generally use. However, as the memory only affects the mode at switch-on, after which the mode selection goes to the first of the modes in the current Configuration, it only takes one mode change to return to Low (if Low was not the previously used mode). On the P2, the Low is much brighter than it used to be (3lm in the previous version) as it is now 33lm. The P1’s low is still pretty low at 7lm so if you need a lower output the P1 is the way to go.

Unfortunately another aspect has changed in the new version, PWM is rearing its head. The previous P2 had PWM but at 2500Hz and was not noticeable to the naked eye; the new version has PWM at 1000Hz. On High and Medium this has not really been visible, but on Low, I do catch the strobing effect out of the corner of my eye. A minor irritation and not what I would expect of FOURSEVENS. It slightly takes the edge off what could be a great update to this well loved series.

It used to be more common for smaller EDC lights to go with a reverse-clicky switch, but as in earlier versions, the Preon does use a forward-clicky and gives you that immediate response to pressure on the switch.

A great feature that has been added to the Preons is the user-changeable configuration that allows you to limit which output modes can be selected. You don’t get to choose which modes are included in a ‘configuration’ but you can choose one of the five available ‘configurations’ to best suit your needs. This user configuration has great potential and I hope FOURSEVENS expand the number of configurations that can be chosen from including a lower level in the P2, and perhaps configurations with no memory. Remember when choosing your configuration that the new Preon has a memory so starts on the last used mode.

With the small power source of AAA, the added efficiency of the XP-L (though only around 9%) makes a difference. Thanks to the XP-L having an XM-L2 size die in a smaller package, it is compact enough to be fitted into the Preon’s head and provide a great EDC beam.

The new Preon doesn’t just have a new body design, it has user-configuration and an XP-L LED.

Review Summary

_______________________________________________ _______________________________________________
Things I like What doesn’t work so well for me
_______________________________________________ _______________________________________________
XP-L LED in a truly pocket-sized light. PWM at 1000Hz giving some strobe effects on low.
New ‘grippy’ body design. P2’s lowest level is a bit high at 33lm.
User configurable.
Great EDC beam.


Discussing the Review:

Please feel free to add comments to the review, but the ideal place to freely discuss these reviews is on a forum. If you started reading the shorter forum version of the review, but followed the link this full exclusive review, please return to that forum to discuss the review there.
If you read the review entirely on Tactical Reviews, please consider one of the following to join in any discussion.

CandlePowerForums – Flashlight Reviews Section (Largest and Friendliest Flashlight Community Forum)

EdgeMatters – Sponsored Reviews (UK based Forum for Knife Makers and Collectors)
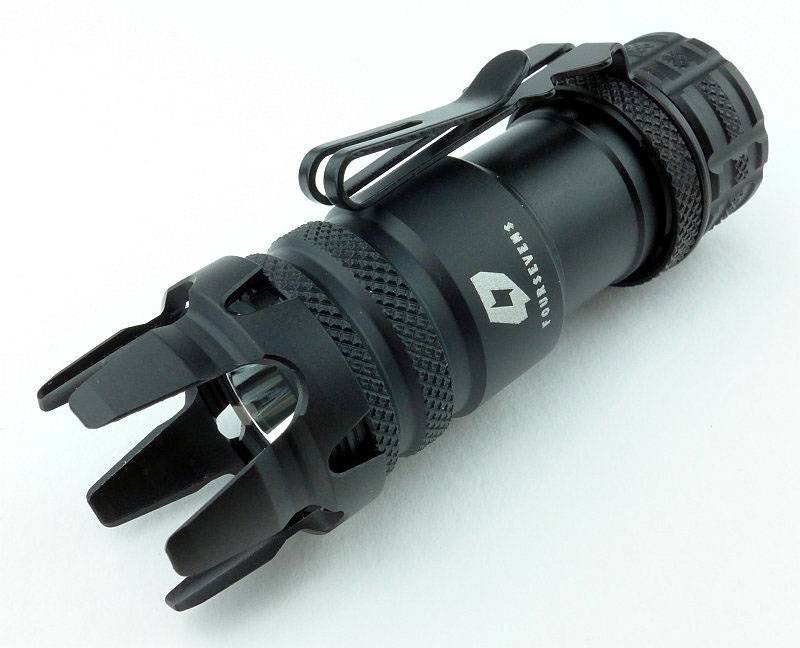
Light Review: FOURSEVENS Knight and Paladin

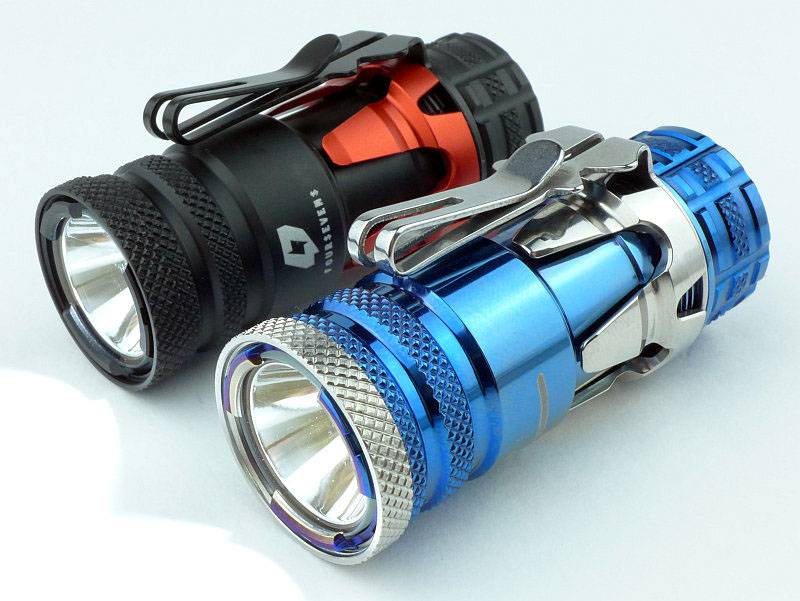
First revealed at SHOT Show 2015, FOURSEVENS have collaborated with PK (Paul Kim aka the Photon King) to produce these two exciting, fun and altogether usable lights – The Knight and Paladin. These are effectively the same light but the Knight is an Aluminium version and the Paladin is Titanium.

 photo 27 KnightPaladin plain P1170178.jpg

Taking a more detailed look:

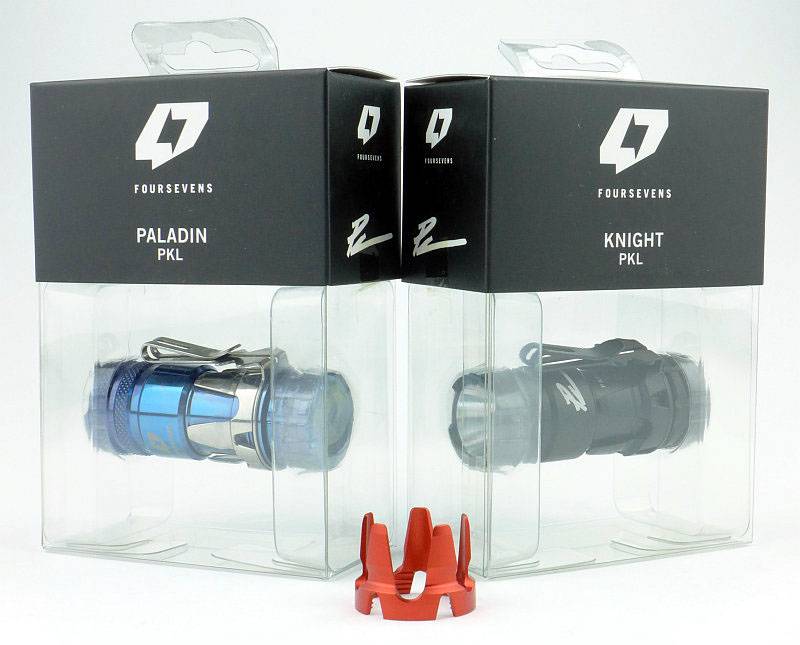
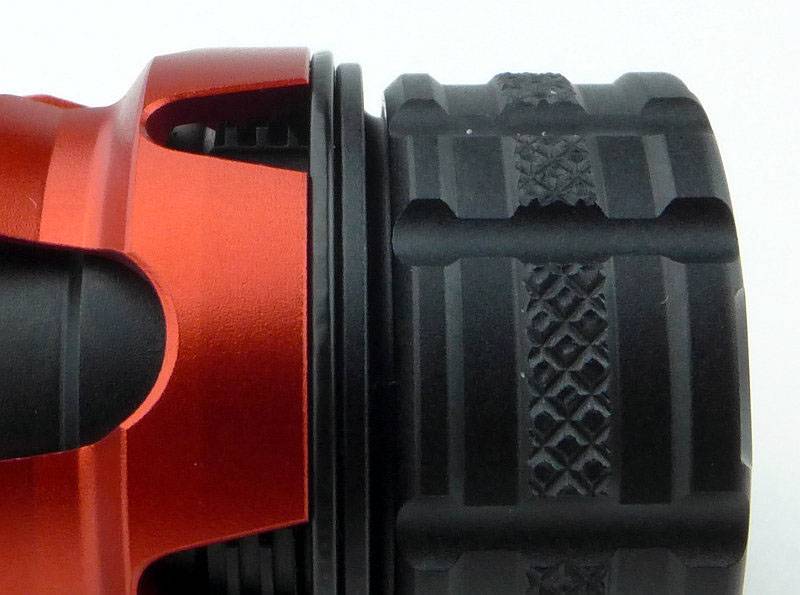
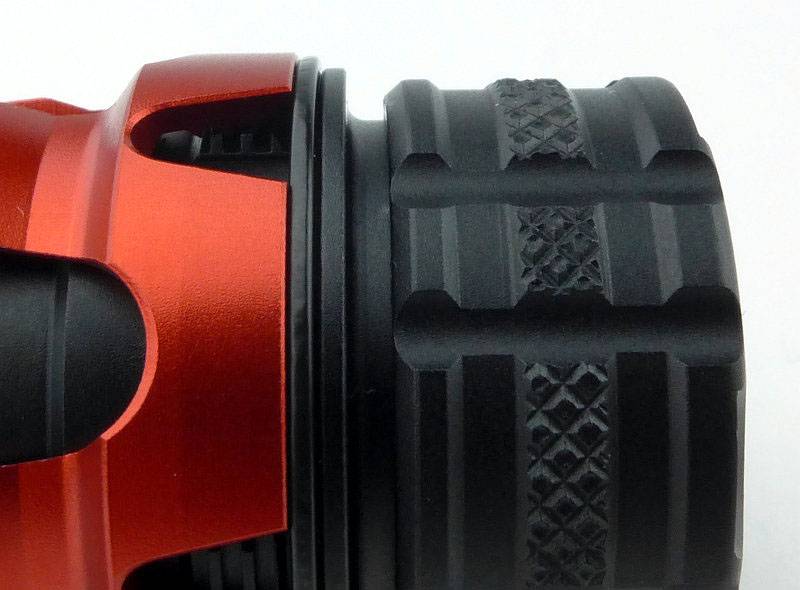
FOURSEVENS’ packaging is ideal for showing off the design. Available separately are two versions of the strike bezel (a red one is shown here).
 photo 01 KnightPaladin Boxed P1170036.jpg

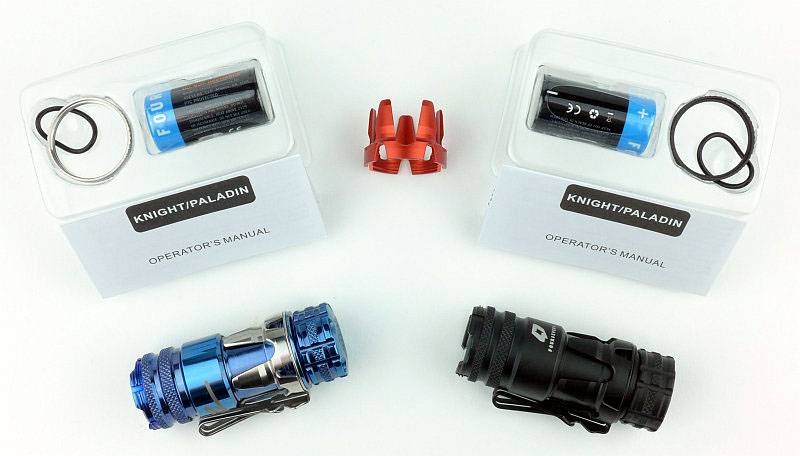
In the box you find the light itself, a spare O-ring, a CR123 cell and the front bezel ring which comes separately and not fitted to the light.
 photo 02 KnightPaladin unBoxed P1170053.jpg

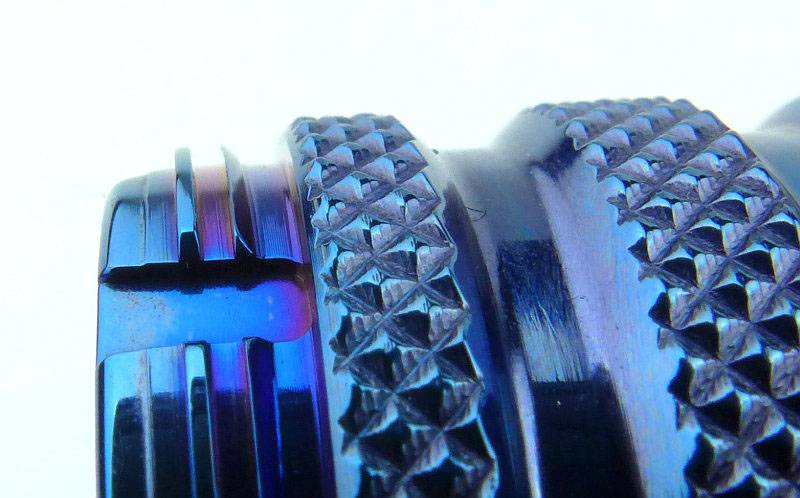
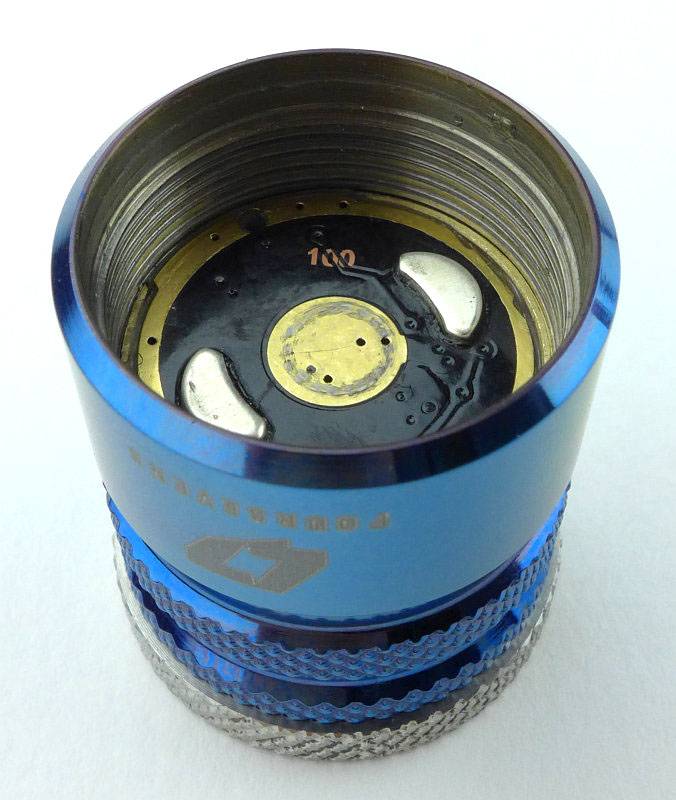
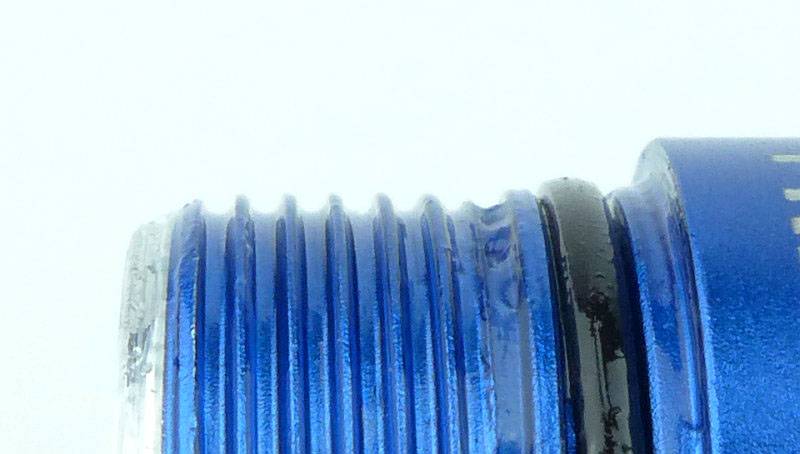
So as it comes out of the package, the front bezel threads are exposed. Here the beautiful blue tones of the Paladin’s PVD finish can be seen clearly.
 photo 03 KnightPaladin bezel thread P1170058.jpg

While we are looking at the front, both these lights use a curious lens holder where the edges of the lens are exposed in three places. Once the bezel ring is in place this becomes less noticeable. Also note the small notches through the bezel threads; these allow the pocket clip to be fitted to the front of the light and held in place by the bezel ring.
 photo 04 KnightPaladin lens edge P1170060.jpg

Fitting the bezel ring completes the initial assembly.
 photo 05 KnightPaladin P angle P1170065.jpg

The same goes for the Knight.
 photo 06 KnightPaladin K angle bezel P1170071.jpg

Being all black, the bezel ring blends in more on the Knight.
 photo 07 KnightPaladin K angle P1170079.jpg

The positive and negative terminals in the head are gold plated. Despite the bare threads, these are not used as an electrical path. Physical reverse polarity protection is also included.
 photo 08 KnightPaladin K head P1170083.jpg

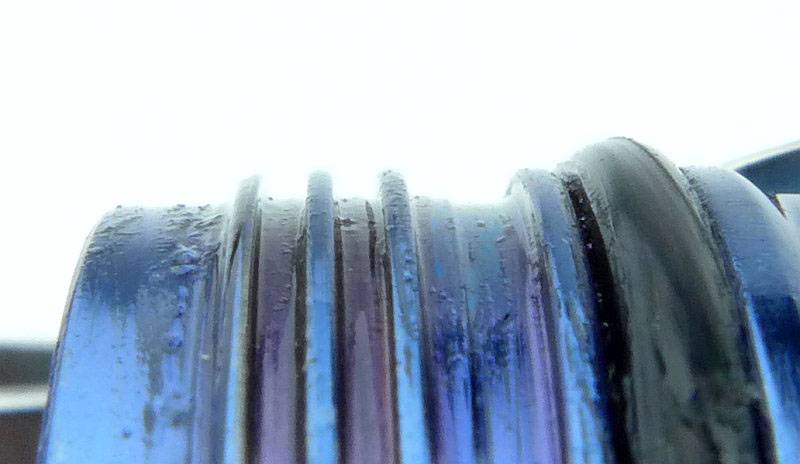
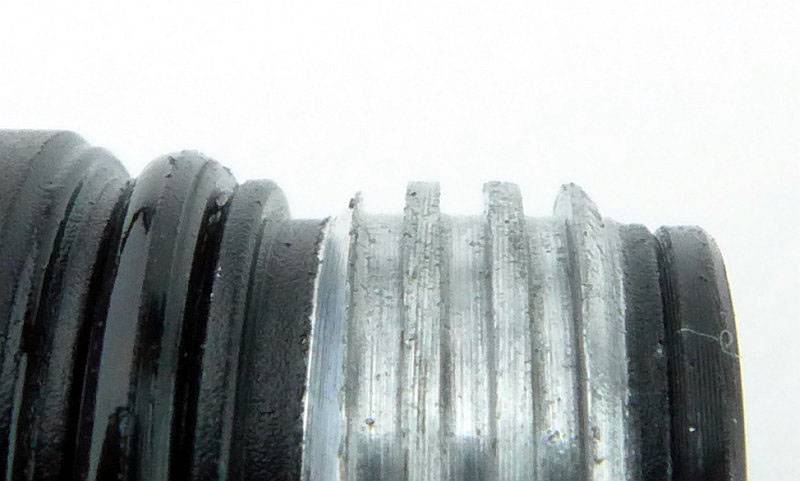
The threads are square cut and of a asymmetrical design with the grooves being much wider. This introduces ‘backlash’ into the threads and I suspect this relates to the special tailcap switch, but more on that later…
 photo 09 KnightPaladin K thread P1170086.jpg

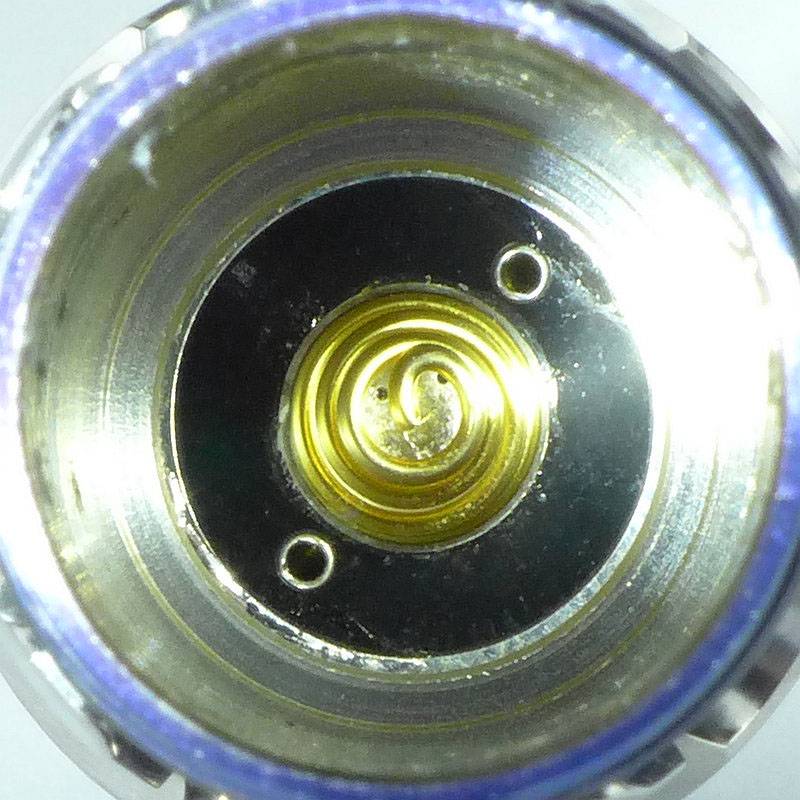
A gold plated spring is used for the negative contact.
 photo 10 KnightPaladin K inside P1170087.jpg

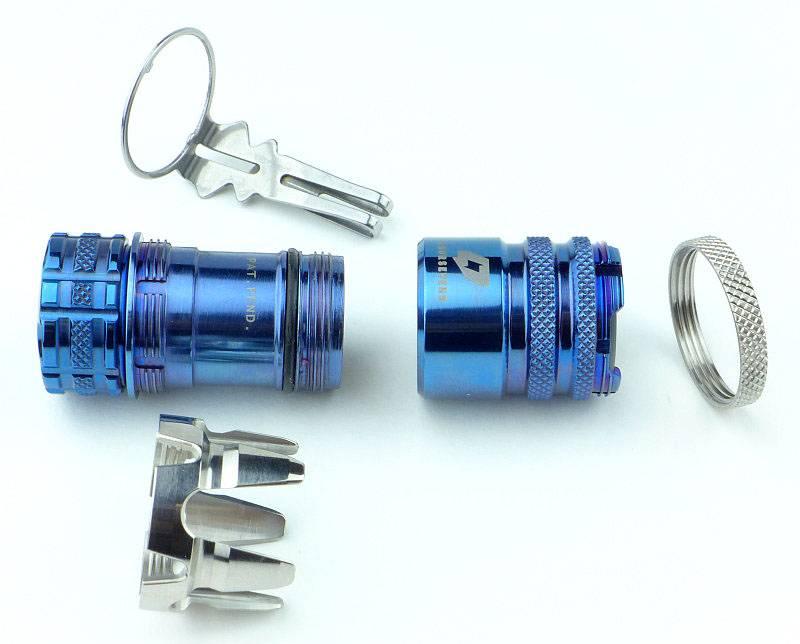
Part of the design of the Knight and Paladin is that the light breaks down into several parts which can be swapped around in a Lego-like way to achieve different configurations.
 photo 11 KnightPaladin K apart P1170094.jpg

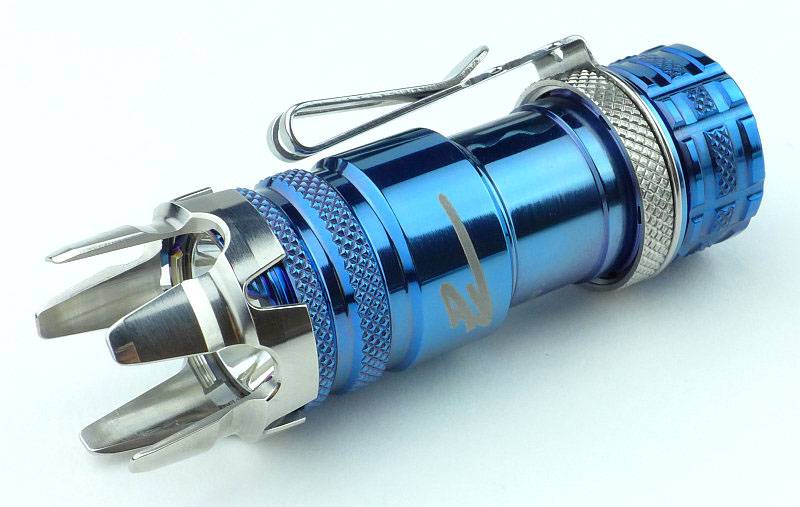
Swapping the bezel ring and the strike bezel components around creates a very different looking light!
 photo 12 KnightPaladin K crown P1170101.jpg

For the Paladin, the internals are the same in the head.
 photo 13 KnightPaladin P head P1170106.jpg

And when looking into the battery tube.
 photo 14 KnightPaladin P inside P1170111.jpg

As on the Knight, the threads are square and thin in profile.
 photo 15 KnightPaladin P thread P1170115.jpg

Taking the Paladin apart.
 photo 16 KnightPaladin P apart P1170118.jpg

Swapping the bezel ring and the strike bezel components and the Paladin too becomes a very different looking light!
 photo 17 KnightPaladin P crown P1170123.jpg

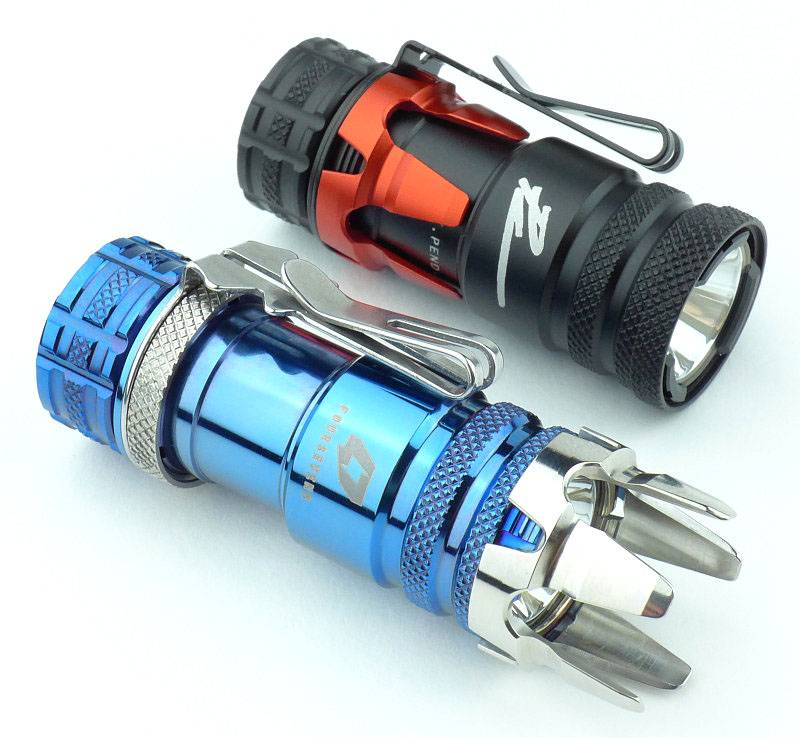
A couple of the options (not showing the clip fitted to the bezel), with the strike bezel on the front and along the battery tube, as well as the optional red strike bezel substituting the original black one on the Knight.
 photo 18 KnightPaladin configurations P1170134.jpg

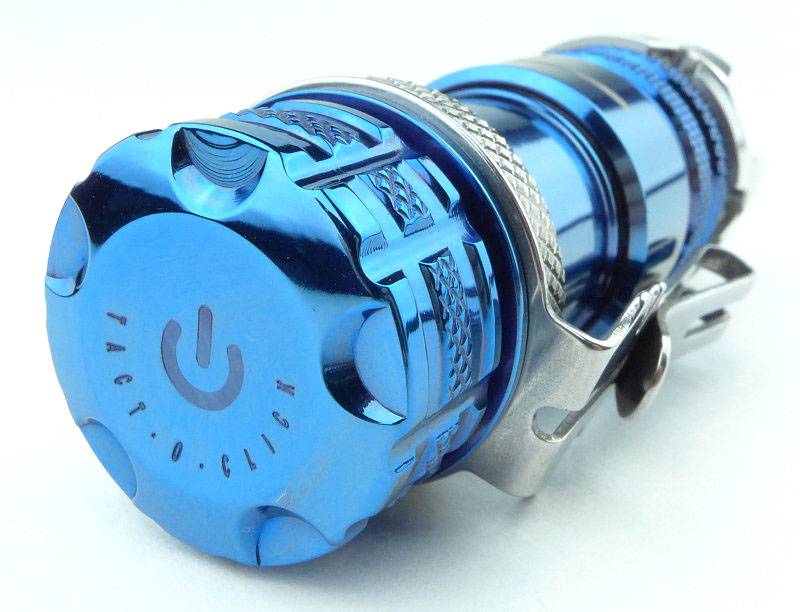
Every part of these lights has had a great deal of attention paid to it. A special Tact-O-Click switch is used (more on that in the UI section).
 photo 19 KnightPaladin P Switch P1170138.jpg

The Paladin especially, deserves to be viewed from every angle to take in all the details.
 photo 23 KnightPaladin P reverse P1170154.jpg

A mid-depth reflector is used.
 photo 24 KnightPaladin P reflector P1170164.jpg

The reflector is the same on both models.
 photo 25 KnightPaladin K reflector P1170167.jpg

With an XM-L2 LED for the emitter.
 photo 25 KnightPaladin P LED P1170172.jpg

And the same again for the Knight.
 photo 26 KnightPaladin K LED P1170176.jpg

Though not the smallest of 1 x CR123 lights (with FOURSEVENS own Mini ML and Atom AL lights being smaller), but they are compact enough to be very easy to carry.
 photo 28 KnightPaladin size P1170190.jpg

The beam

Please be careful not to judge tint based on images you see on a computer screen. Unless properly calibrated, the screen itself will change the perceived tint.

The indoor beamshot is intended to give an idea of the beam shape/quality rather than tint. All beamshots are taken using daylight white balance. The woodwork (stairs and skirting) are painted Farrow & Ball “Off-White”, and the walls are a light sandy colour called ‘String’ again by Farrow & Ball. I don’t actually have a ‘white wall’ in the house to use for this, and the wife won’t have one!

With the Knight’s mid-depth reflector a well defined hotspot is present, but the spill is bright, wide and even until you reach the outer spill, where the lens holder cut-outs become visible.
 photo 30 KnightPaladin K indoor plain P1170343.jpg

Unsurprisingly the Paladin’s beam is the same.
 photo 33 KnightPaladin P indoor plain P1170338.jpg

If you fit the strike bezel to the front, the effect on the beam is just a little noticeable.
 photo 31 KnightPaladin K indoor crown P1170347.jpg

Outdoors (with the Knight) that hotspot gives you some reasonable range, and the bright spill fills in the rest well enough.
 photo 32 KnightPaladin K outdoor P1170267.jpg

Snap! the Paladin’s beam looks the same outdoors.
 photo 34 KnightPaladin P outdoor P1170264.jpg

Modes and User Interface:

A special TACT-O-CLICK switch is used for these lights. It combines a rotary and momentary click-switch into one design. The threads used for the switch have approximately 0.5-1mm play in them, and under this switch cap there is a momentary click switch.
 photo 20 KnightPaladin K Switch P1170143.jpg

If you tighten the switch cap it presses on the switch and turns the light on and keeps it on.
 photo 21 KnightPaladin K SwitchON P1170185.jpg

If you loosen the switch cap about 1/4 of a turn the light will go off, but there is sufficient movement in the switch cap that you can press on it and click the switch to turn the light on. Like this it operates as a non-latching momentary click switch.
Should you click the light on and wish to keep it on, you can then simply keep pressure on the switch and tighten the switch cap.
When loosening the switch cap, at slightly under one full turn, you reach a ‘stop’ where the switch cap is ‘tight’ against that stop. Like this the light is locked out, and pressure on the switch cap will not operate it.
 photo 22 KnightPaladin K SwitchOFF P1170182.jpg

You have two sets of modes available, Regular and Special. The last used mode is remembered if the light is left off for 1s.
Regular: High – Low
Special: Strobe – Medium – SOS – Beacon (High) – Beacon (Low)
To access the special modes you must first cycle through the Regular modes three times within 1.5 seconds
(Last used Regular or Special) – Low/High – High/Low – Low/High – High/Low – Low/High – Strobe – SOS – Medium – Beacon (High) – Beacon (Low) – (back to Low)

If your last used mode was a Special mode, then it counts as a regular mode when you count the clicks to access the special modes (the same number of clicks is used to access each special mode whatever mode was last used).

From OFF this becomes:

Strobe – 6 clicks
SOS – 7 clicks
Medium – 8 clicks
Beacon (High) – 9 clicks
Beacon (Low) – 10 clicks

Batteries and output:

Both the Knight and Paladin run on CR123 and RCR123.

To measure actual output, I built an integrating sphere. See here for more detail. The sensor registers visible light only (so Infra-Red and Ultra-Violet will not be measured).

Please note, all quoted lumen figures are from a DIY integrating sphere, and according to ANSI standards. Although every effort is made to give as accurate a result as possible, they should be taken as an estimate only. The results can be used to compare outputs in this review and others I have published.

___________________________________________ ________________________________ ________________________________
Knight/Paladin using specified cell I.S. measured ANSI output Lumens PWM frequency or Strobe frequency (Hz)
___________________________________________ ________________________________ ________________________________
Knight – High – CR123 449 0
Knight – Low – CR123 22 0
Knight – High – AW RCR123 585 0
Knight – Low – AW RCR123 22 0
Paladin – High – CR123 443 0
Paladin – Low – CR123 26 0
Paladin – High – AW RCR123 582 0
Paladin – Low – AW RCR123 26 0

* Beacon and Strobe output measurements are only estimates as the brief flashes make it difficult to capture the actual output value.

Peak Beam intensity of the Knight measured 3800 lx @1m giving a beam range of 123 m.
Peak Beam intensity of the Paladin measured 3600 lx @1m giving a beam range of 120 m.

There is no parasitic drain.

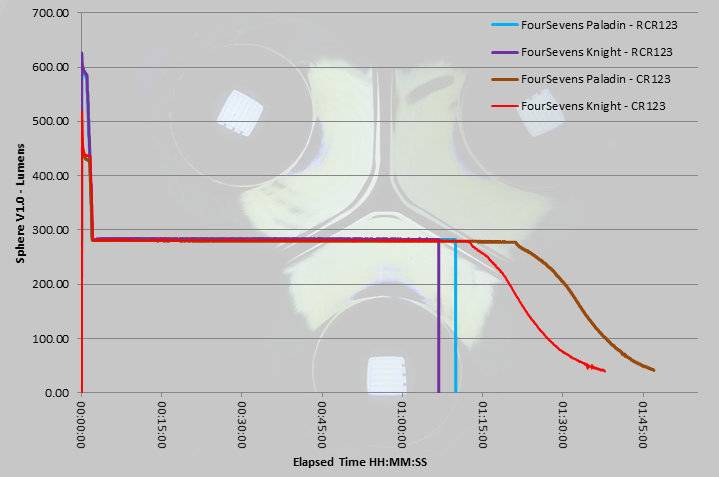
The main part of the runtime is almost identical for both lights and both CR123 and RCR123. RCR123 give a higher ‘burst’ part of the output (the initial 3 minutes of higher output). When using RCR123, these lights do not change their voltage response for the tailing off of the output; the result is that when using RCR123 the output will suddenly cut out when the protection activates.
 photo FourSevens Knight Paladin Runtime.jpg

Troubleshooting

This section is included to mention any minor niggles I come across during testing, in case the information helps anyone else.

No issues were encountered during testing.

As per the description of this section, this information is provided in case anyone else finds a similar ‘issue’ that might be fixed in the same way.

The Knight and Paladin in use

Nothing in the design of these lights has just ‘happened’, everything is designed for function or aesthetics.

Take the pocket clip for example. It is a double-action clip so will clip on in either direction without being turned around. Each ‘side’ of the clip will accommodate thicker or thinner material (thicker next to the body and thinner on the outer part). The two points sticking out sideways either side of the clip provide grip on the pocket and also grip for the user when unscrewing the battery tube. The groove cut into each end of the clip allows a lanyard to be threaded through. Finally inside the clip ring which fits over the body of the light are two tabs which fit into corresponding notches on the body or bezel to prevent it rotating. Details.
 photo 23 KnightPaladin P reverse P1170154.jpg

Also highly functional is the TACT-O-CLICK switch. Once you have got used to the ideal positions for the switch cap to click (1/4 turn undone from the fully ON position) or lockout (3/4 turn from fully ON), and swapping between these (so from lock-out to click is a half turn), the UI comes to life and the click or twist of the switch cap just fits the task at hand.

Personally I find the strike bezel to be more of a decorative item than anything practical, due to the length of the crenellations (not to mention the short overall length of the light). They are too long to be strong enough on the aluminium versions, and even the stainless steel strike bezel will bend if used with any real force (as you would if defending yourself). They are also too long to leave fitted all the time as they just stick into things. So are you really going to take the light apart to swap the bezel ring for the strike bezel ‘if’ you feel threatened? Not likely. BUT, who cares?! They Look great! (And you have an executive toy to play with.)

Ignoring the Special modes, the two Regular modes have covered what I need almost entirely. Those two light levels of 25lm and 450lm, though seemingly a long way apart, work perfectly with the beam profile. For my indoor, round-the-house use, the 22lm setting is ideal, especially as it is backed up by the 450lm. Using the Tact-O-Click switch in the momentary press-and-hold approach, with the two modes you can quickly bump it up or down depending on the distance you are looking at. I’ve not personally ever felt the need for the Medium mode (or Strobe or SOS), but have dipped into the Beacon modes for marking a location. What would improve it for me is adding a moonlight mode into the Special modes.

The timing for the mode changes works really well and I’ve not changed mode by mistake so far. Speaking of the Tact-O-Click switch again, the ability to lock the output on while you are using it as a momentary switch, is useful and can be achieved one handed. Also, by simply backing the switch cap off a bit you lock out the light means the lockout is a specific feature of the light and doesn’t require loosening any other parts. Like this, when you come to turn it on, you just twist it on as normal without having to remember to tighten the tailcap first.

A true fusion of function and aesthetics, even if not every feature is entirely practical.

Review Summary

_______________________________________________ _______________________________________________
Things I like What doesn’t work so well for me
_______________________________________________ _______________________________________________
Tact-O-Click switch (twist/click interface combined). Strike Bezel too long.
Can use CR123 or RCR123 Activates protection circuit when using RCR123.
Excellent all-rounder beam profile. No Moon mode.
Mode-change timing works very well. Strike Bezel strongly affects the beam shape.
Well chosen ‘Regular’ Modes.
Lego-like changes in a single light.


Discussing the Review:

Please feel free to add comments to the review, but the ideal place to freely discuss these reviews is on a forum. If you started reading the shorter forum version of the review, but followed the link this full exclusive review, please return to that forum to discuss the review there.
If you read the review entirely on Tactical Reviews, please consider one of the following to join in any discussion.

CandlePowerForums – Flashlight Reviews Section (Largest and Friendliest Flashlight Community Forum)

EdgeMatters – Sponsored Reviews (UK based Forum for Knife Makers and Collectors)
Light Review: FOURSEVENS Bolt-Mini

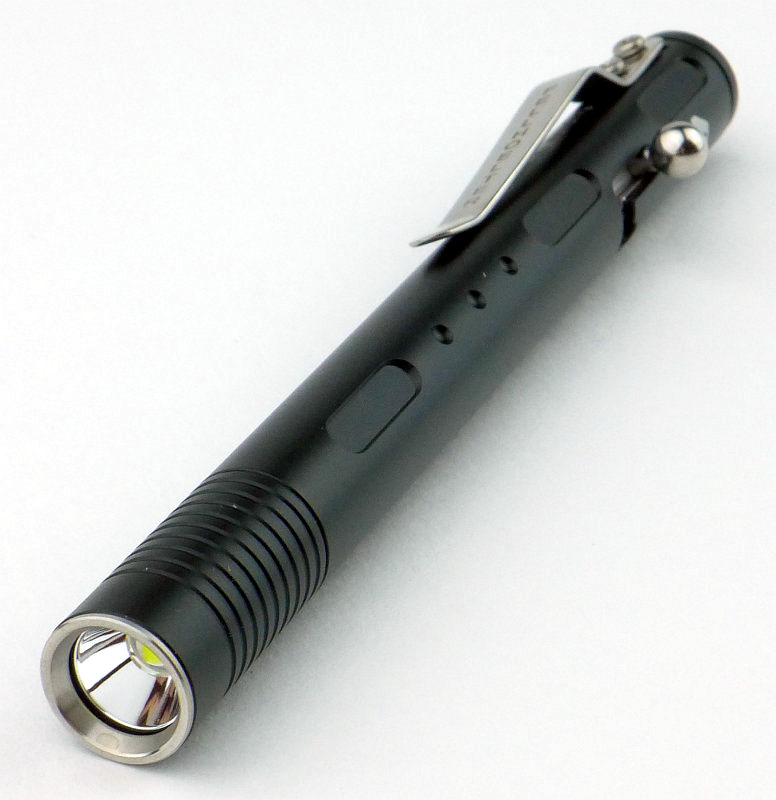
Following on from the uncompromising design of the original Bolt-Action BLR2 from FOURSEVENS (check the Light Reviews Index for a review of this light), there has been demand for a smaller version running on a common cell. Enter the new AAA powered Bolt-Mini from Foursevens.

 photo 04-BoltMini angle2 P1160890.jpg

FOURSEVENS’ original Bolt-Action light is the product of a three-way collaboration; FOURSEVENS partnering with Fellhoelter (designers of the Bolt-Action pen) and Tuff-Writer. Incorporating the unique bolt-action mechanism into a light required thinking out-of-the-box. Consideration of the overall size, performance and power options, all led to the final specifications of the BLR2 Bolt-Action flashlight, but some of those choices were criticised.

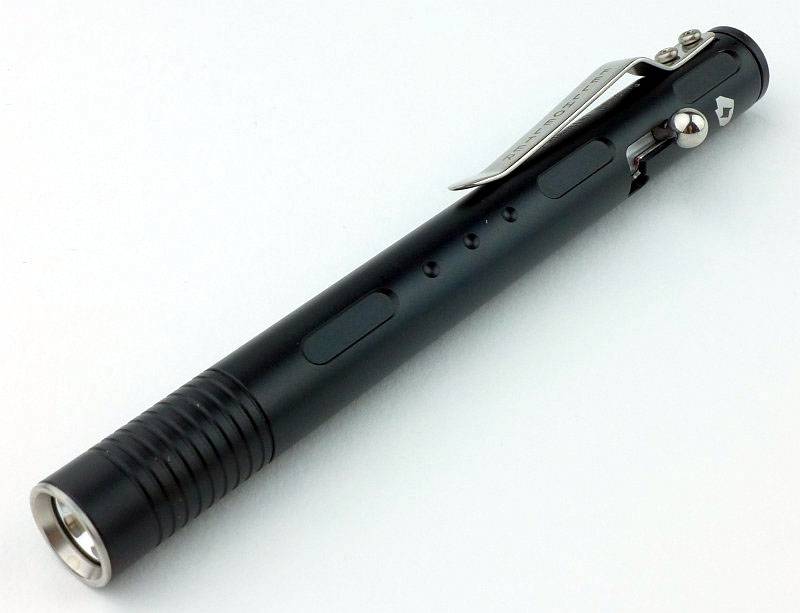
With the new Bolt-Mini, we have a much more pen-sized Bolt-Action light more in keeping with the Bolt-Action Pen.

Taking a more detailed look:

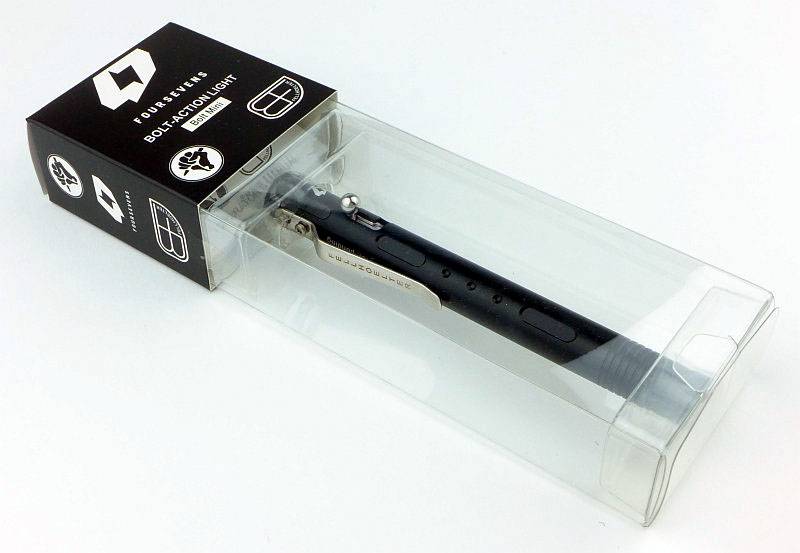
FOURSEVENS’ packaging shows off the light nicely.
 photo 01-BoltMini boxed P1160873.jpg

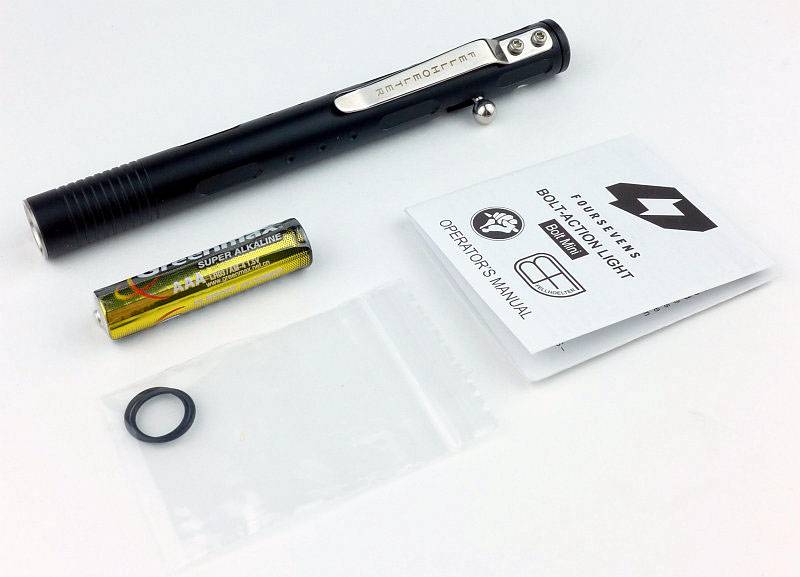
As well as the Bolt-Mini, two spare O-rings, an Alkaline AAA and the instructions are included.
 photo 02-BoltMini unboxed P1160883.jpg

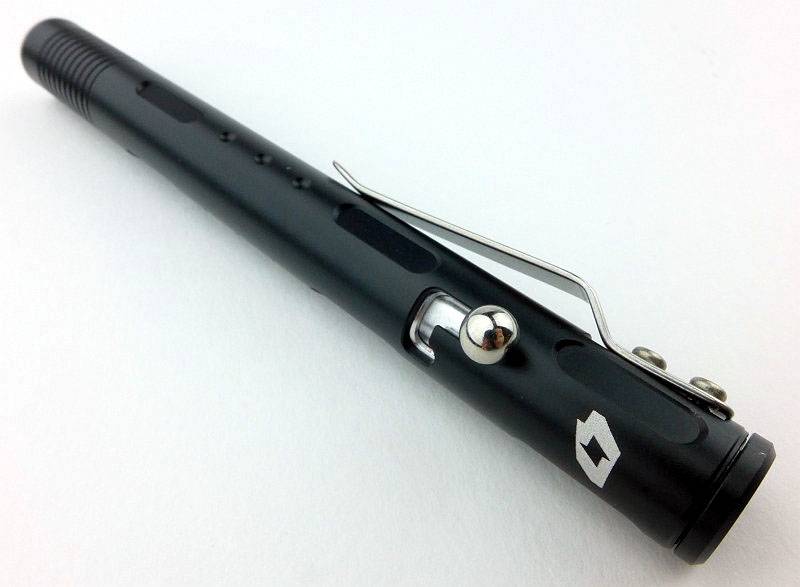
A very sleek looking light.
 photo 03-BoltMini angle P1160886.jpg

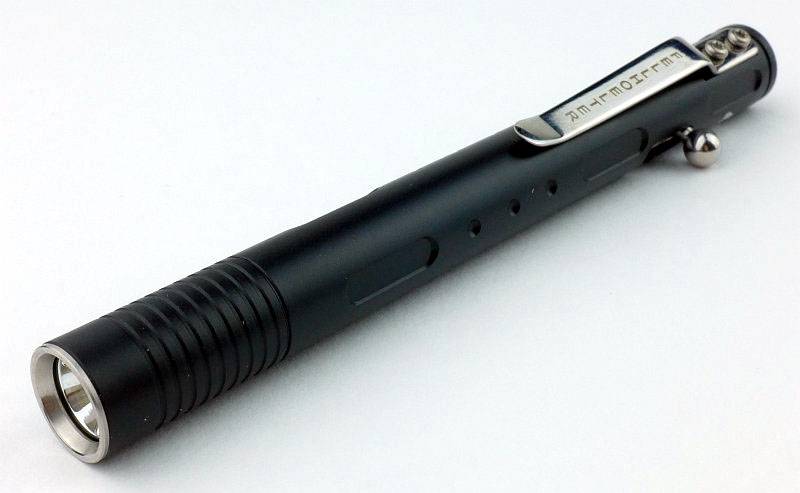
Our first real look at the bolt, as well as the side view of the pocket clip. If you look closely you can see that the top of the pocket clip isn’t quite sitting in the cut out where it is screwed onto the body. This doesn’t affect the function, though it will have increased the clip tension slightly.
 photo 06-BoltMini reverse angle P1160894.jpg

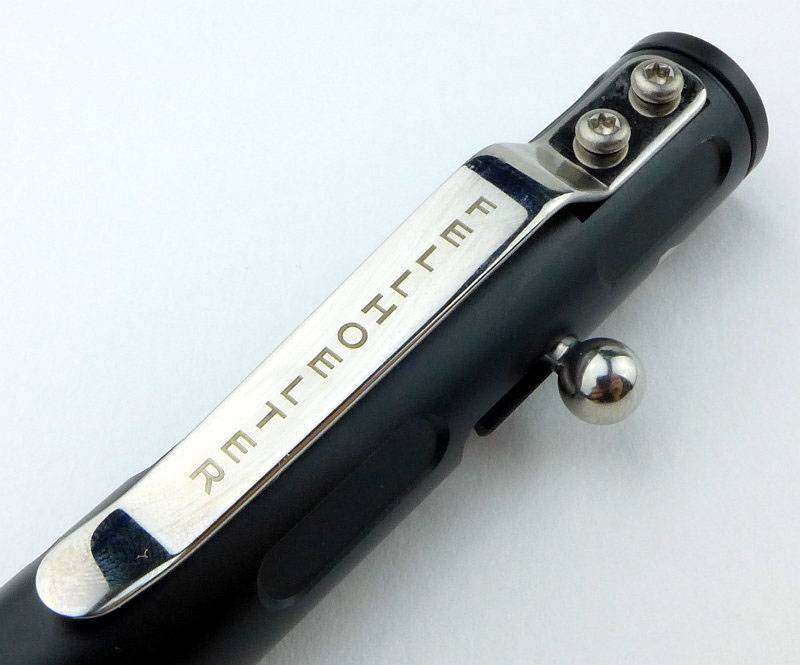
The stainless steel clip is held in place with two screws and has ‘Fellhoelter’ inscribed on it.
 photo 07-BoltMini clip P1160897.jpg

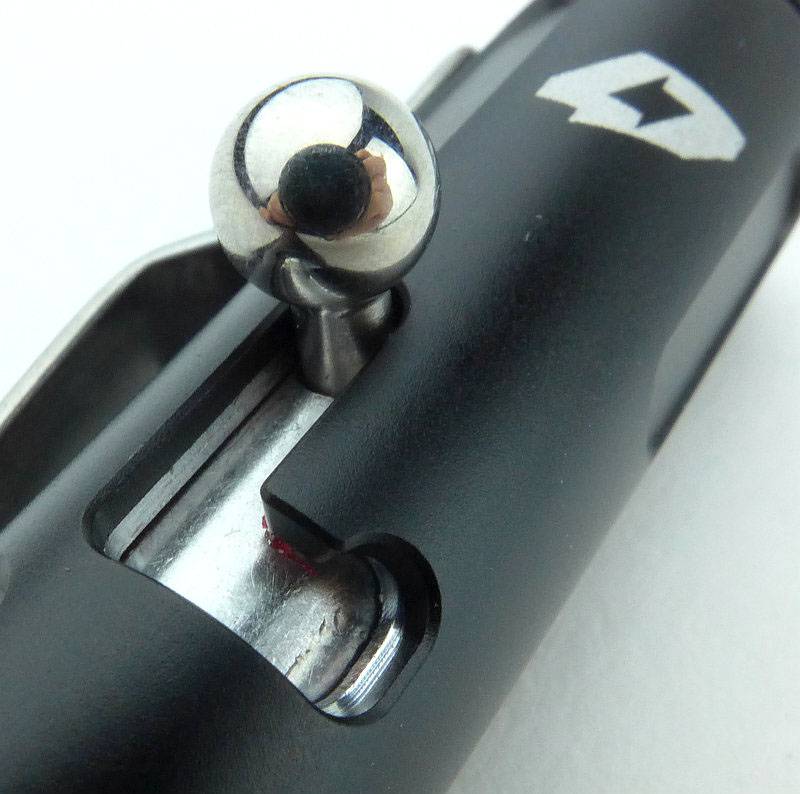
A much closer look at the bolt in the OFF position.
 photo 08-BoltMini bolt off P1160904.jpg

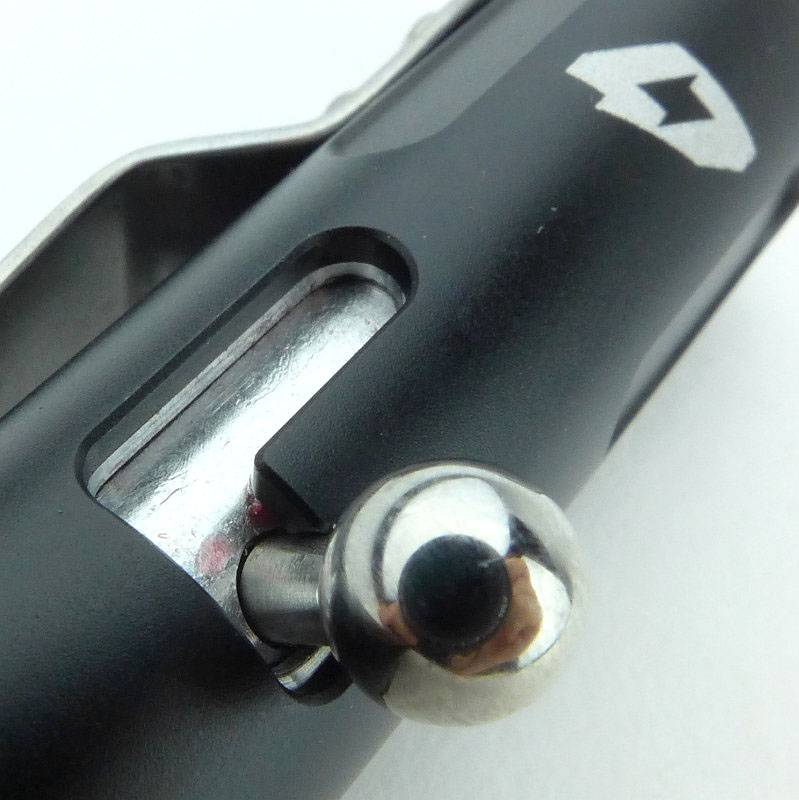
And in the ON position.
 photo 09-BoltMini bolt on P1160907.jpg

To open the Bolt-Mini, the head unscrews.
 photo 12-BoltMini head off P1160920.jpg

It has square cut threads.
 photo 13-BoltMini threads P1160923.jpg

Peering inside you can see the spring terminal for the negative contact.
 photo 14-BoltMini inside P1160924.jpg

Even in this compact light, an XP-L is used with a compact reflector.
 photo 17-BoltMini reflector P1160937.jpg

Looking straight at the XP-L LED.
 photo 18-BoltMini LED P1160942.jpg

Showing the disassembled Bolt-Mini with its AAA cell.
 photo 15-BoltMini apart P1160929.jpg

Comparing the Bolt-Mini to the original Bolt-Action you can see it is much slimmer.
 photo 10-BoltMini bolts P1160911.jpg

Using the AAA cell makes it a much more pocketable pen-light.
 photo 11-BoltMini bolts2 P1160913.jpg

Another comparison with each Bolt-Light’s power source shown as well.
 photo 16-BoltMini bolts with cells P1160932.jpg

The beam

Please be careful not to judge tint based on images you see on a computer screen. Unless properly calibrated, the screen itself will change the perceived tint.

The indoor beamshot is intended to give an idea of the beam shape/quality rather than tint. All beamshots are taken using daylight white balance. The woodwork (stairs and skirting) are painted Farrow & Ball “Off-White”, and the walls are a light sandy colour called ‘String’ again by Farrow & Ball. I don’t actually have a ‘white wall’ in the house to use for this, and the wife won’t have one!

The small reflector and large LED make for a lovely broad beam great for all close range and indoor use. An outdoor beamshot is not shown as the floody beam was too diffuse to show properly.
 photo 19-BoltMini indoor beam P1170367.jpg

Modes and User Interface:

So it is all about this – the Bolt
 photo 08-BoltMini bolt off P1160904.jpg

Operation is simple. Slide the bolt forward and near the end of the travel the light comes on. Quickly releasing and sliding the bolt changes mode, and once you have the output you want, you simply rotate the bolt to lock it on.
 photo 09-BoltMini bolt on P1160907.jpg

Flicking the spring loaded handle sideways knocks it out of the locked position and turns it off.

The Bolt-Mini has 5 configurations with different sets of modes.
Configuration 1: High (factory default)
Configuration 2: ‘Previous’ – High – Low
Configuration 3: ‘Previous’ – High – Strobe
Configuration 4: ‘Previous’ – Low – Medium – High – Strobe
Configuration 5: ‘Previous’ – Low – Medium – High – Strobe – SOS – Beacon (High) – Beacon (Low)

In normal operation (starting from OFF), the Bolt-Mini (if left off for 5-6s) will come onto the ‘Previous’ or last-used mode, then, if cycling through the modes, it will start at the first mode in the configuration mode set.
– ‘Previous’ can be any mode.
– ‘Previous’ only occurs once the first time when cycling rapidly through these modes.
– If the ‘Previous’ mode is the first mode in the current mode set, it will not be repeated. For example if you last used Low in configuration 5, when you turn it on you will get Low, then Medium (not Low then Low).

So, from off, this means on repeated switching of the Bolt in Configuration 5 you get:
‘Previous’ – Low – Medium – High – Strobe – SOS – Beacon (High) – Beacon (Low) – Low – Medium – High – Strobe – SOS – Beacon (High) – Beacon (Low) etc
Once you have the desired mode, simply hold and rotate the bolt to lock it in that mode.

Changing configuration:
To change the configuration you need to turn the light ON and OFF 10 times within 2s. On the 10th activation hold the bolt in the ON position without locking it in place. The Bolt-Mini will flash between 1 and 5 times to indicate the current configuration. Quickly turn the light OFF and ON again to change to the next configuration and repeat until you have the one you want. Turn the light OFF for 5s to confirm the setting.

Batteries and output:

The Bolt-Mini runs on one AAA Alkaline or NiMh.

To measure actual output, I built an integrating sphere. See here for more detail. The sensor registers visible light only (so Infra-Red and Ultra-Violet will not be measured).

Please note, all quoted lumen figures are from a DIY integrating sphere, and according to ANSI standards. Although every effort is made to give as accurate a result as possible, they should be taken as an estimate only. The results can be used to compare outputs in this review and others I have published.

___________________________________________ ________________________________ ________________________________
Bolt-Mini using AAA Eneloop I.S. measured ANSI output Lumens PWM frequency or Strobe frequency (Hz)
___________________________________________ ________________________________ ________________________________
High 142 950
Medium 68 950
Low 7 950
Strobe Not Measured 8
Beacon High Not Measured 0.07
Beacon Low Not Measured 0.07

* Beacon and Strobe output measurements are only estimates as the brief flashes make it difficult to capture the actual output value.

Peak Beam intensity measured 200 lx @1m giving a beam range of 28 m.

As I’m also testing the Preon P1 and P2, I’ve put all three output traces together to allow the AAA lights to be compared. Like the P1, the Bolt-Mini runs on only a single AAA. You can clearly see the ‘Burst’ mode operating, with the initial part of the trace being at 100% output, and then dropping to around 70% after 3 minutes.

Troubleshooting

This section is included to mention any minor niggles I come across during testing, in case the information helps anyone else.

No issues were encountered during testing.

As per the description of this section, this information is provided in case anyone else finds a similar ‘issue’ that might be fixed in the same way.

The Bolt-Mini in use

When I first heard about the Bolt-Action light I was very sceptical. What was the point? Well actually it is very usable. The bolt-action makes for a great momentary interface and locking on or off is extremely intuitive.

The original Bolt-Action is more powerful and the bolt has an easier action, but it is bigger than a pen, so becomes more noticeable to EDC. Still a great light though (and remember I found it would run on a 14500 as well as the officially supported 2xCR2). However, the Bolt-Mini takes this design into a new league altogether as it now sits in a pocket and alongside pens without standing out.

Unfortunately the action feels quite a bit stiffer and the smaller ball on the lever can dig in a bit on repeated use, making it less comfortable to use than its bigger brother, but you forgive that for the smaller size and with it being much easier to feed with a normal AAA.

Having to wait around 6s from turning it off to turning it back on again if you want to avoid mode changes is a little frustrating. I’d prefer that a much more rapid on/off cycle was needed to change mode.

The ‘Previous’ mode memory is useful, as is the fact that the next mode will then be the first of the current configuration’s mode set. With the interface working in this way, I have chosen configuration 5 (with the most modes), as in general use I never have to cycle through the flashing modes unless I want to use them.

So, some might say that this is a very large single AAA light, and compared to most 1xAAA lights it is much longer. But, and this is an important ‘but’, this is a pen sized EDC light with a unique and satisfying ‘bolt’ interface,… and it happens to use a single AAA for power. Don’t think of it in a simple direct comparison to other single AAA lights, but instead for its distinctive character.

With FOURSEVENS usually not using PWM, I was a little disappointed to find it was utilised in the Low, Medium and High modes, and at 950Hz is on the edge of being noticed. I have high sensitivity to PWM and have found that 1000Hz is the point where the effects start to become less and less noticeable. It means that most of the time I don’t see any effects, but occasionally do. Any effects are most noticeable in Low (as the width of the PWM peaks is the narrowest), much less in Medium and pretty much gone in High.

Generally I don’t like pocket clips as they can be very abrasive and destructive. On the Bolt-Mini, the clip is a polished finish and the tube it sits against is smooth, so it slides on and off a pocket lip nicely. There is plenty of tension in the clip to keep it secure, but as seen early in the review, the pocket clip isn’t quite sitting in the cut-out where it is screwed to the body and this has increased the clip tension. If the clip were sitting flat as it should, the tension will be slightly less.

Another advantage to the bolt-action switch is that you can operate it completely silently. Having previously selected Low, you have a silent operation light to keep by your bed. The Low mode isn’t a moon mode, but again, thanks to the design, you can turn the Bolt-Mini on with the head tucked into your hand or wrist and control how much light can be seen.

The original Bolt-Action light is an interesting concept, if perhaps targeted more at the enthusiast (needing specialist cells), but the Bolt-Mini opens this concept to all. The smaller size is much easier to carry and taking the humble AAA makes it easy to feed. FOURSEVENS have listened to their customers and made the bolt-action design accessible to all.

Review Summary

_______________________________________________ _______________________________________________
Things I like What doesn’t work so well for me
_______________________________________________ _______________________________________________
Bolt-Action switch interface. The Switch action is stiffer than the original Bolt-Action light.
User selectable configuration. Pocket clip isn’t fitted properly.
Excellent close range beam. Occasionally noticeable PWM.
XP-L LED.
AAA power.


Discussing the Review:

Please feel free to add comments to the review, but the ideal place to freely discuss these reviews is on a forum. If you started reading the shorter forum version of the review, but followed the link this full exclusive review, please return to that forum to discuss the review there.
If you read the review entirely on Tactical Reviews, please consider one of the following to join in any discussion.

CandlePowerForums – Flashlight Reviews Section (Largest and Friendliest Flashlight Community Forum)

EdgeMatters – Sponsored Reviews (UK based Forum for Knife Makers and Collectors)