Light Review: Fenix HM65R Headlamp

With the HM65R, Fenix have fitted in so much, but have kept this headlamp small and light enough that you don’t have to think twice about taking it with you on any adventure (or even just taking out the rubbish).
The 18650 li-ion cell used to be the ‘enthusiast’s choice’, being unfamiliar to many users, even more so when strapped to your forehead – not any longer. The Fenix HM65R comes with a high capacity 3500mAh 18650 cell, and there is a built in USB-C charging port. The ONLY thing you need is a USB charger of some kind to open the door to this powerful and capable light.
Join me in this review of the Fenix HM65R to take a look at all the details and how it performs.

What is in the box?:
For maximum stability the HM65R has a top strap, and the full head strap comes assembled and neatly tucked away in the packaging.


A good look round the HM65R – Things to look out for here are:
I’m splitting this detailed set of photos into two galleries for a more manageable tour of the HM65R. The HM65R is almost ready to go out of the packaging, but first you need to remove a small insulator that keeps the battery from running down or the HM65R from being turned on accidentally. From the appearance of the threads of the battery tube, you can see that this is made of magnesium, a material chosen by Fenix to shave off a few more grams of weight.


Taking in more details:
First up in this gallery are the twin lenses – the larger spot emitter with clear lens, and the smaller flood emitter with honeycomb type diffuser lens.
For a more stable fit to your head, the inside of the front part of the headband strap has a grippy strip. Flipping the HM65R forwards gives access to the USB-C charging port and shows the angle adjustment mechanism.


The beam:

Please be careful not to judge tint based on images you see on a computer screen. Unless properly calibrated, the screen itself will change the perceived tint.

The indoor beamshot is intended to give an idea of the beam shape/quality rather than tint. All beamshots are taken using daylight white balance. The woodwork (stairs and skirting) are painted Farrow & Ball “Off-White”, and the walls are a light sandy colour called ‘String’ again by Farrow & Ball. I don’t actually have a ‘white wall’ in the house to use for this, and my wife won’t have one!

For both indoor and outdoor beamshots, the individual spot and flood beams are shown, then (as both can be turned on at the same time) the combined beam. Each of the photos in the set of three is at the same exposure and white balance.


Batteries and output:

The HM65R runs on a supplied 3500mAh 18650 Fenix li-ion cell.

Please note, all quoted lumen figures are from a DIY integrating sphere, and according to ANSI standards. Although every effort is made to give as accurate a result as possible, they should be taken as an estimate only. The results can be used to compare outputs in this review and others I have published.

Take note of the very good (low) parasitic drain measurement.

Also shown in this gallery is a charging graph for the built in USB-C charging. Although USB-C is capable of up to 3A, the HM65R seems to top-out at about 1.4A when charging.


The HM65R in use:

Straight off the bat, the HM65R makes itself a success with the stable and comfortable head strap (with top strap), and the choice of spot or flood beams (or both combined). Then, in using the high capacity 18650, you get a great runtime and powerful output (yet without too much weight), and the built in USB-C charging means you actually don’t need anything else – The HM65R is a complete kit.

There is one thing missing for me though, and that is a very low output. Even 9 lm, and even with this being on the flood beam, it is still too bright for dark adapted eyes. Frequently when I’m using headlamps, I will have dark adapted eyes (waking from sleep, or when I don’t want to disturb others); if only Fenix could squeeze in that lower mode, a sub 1 lm mode for both spot and flood output, it would make the HM65R a fantastic all-rounder.

If you want to go full blast, then your wish is the HM65R’s command – perfect visibility.


It is very helpful having the quick charge level gauge, with just a click letting you see if you will want to top up the battery.

Having used many Fenix headlamps over the years, and many competitors headlamps too, the HM65R definitely goes down as a choice for Pro users. I use the term ‘Pro’ to indicate this is a serious tool, capable of hard work, versatile and something worth investing in.

Review Summary
The views expressed in this summary table are from the point of view of the reviewer’s personal use. I am not a member of the armed forces and cannot comment on its use beyond that covered in the review.

Something that might be a ‘pro’ for one user can be a ‘con’ for another, so the comments are categorised based on my requirements. You should consider all points and if they could be beneficial to you.

_______________________________________________
What doesn’t work so well for me
_______________________________________________

Lacking a sub-lumen output level.
USB-C charging limited to 1.4A.

_______________________________________________
Things I like
_______________________________________________

Independently switch-able Spot and Flood beams.
Stable and comfortable head mount with top strap.
High capacity 18650 cell included.
Built in USB-C charging.
Very low (negligible) parasitic drain.
Nearly 1400 lm combined beam output.
Light weight.

Light Review: Nextorch T53 Hunting Kit

NEXTORCH have been working on LED swapping lights for some time, lights that maintain full beam quality; the Dual-Light models were the first of these that I used (like the P5G, P5R etc.). This Light Review is for the T53 hunting light set, that not only has a LED swapping triple colour output mechanism, but also a mount and remote switch.
The crucial difference with NEXTORCH’s lights and their LED swapping mechanism being there is no compromise of the reflector or beam. Typically, multiple LED light have the LEDs set into fixed, off-centre, positions in the reflector, compromising the beam. Instead the T53’s chosen LED sits at the reflector’s focal point, and is completely swapped for another LED positioned exactly at the reflector’s focal point… keep reading for all the details.

What is in the box?:

A first look at what the T53 set includes, which is all well presented in the box. Everything you need to use it is included.


A good look round the T53 Set – Things to look out for here are:

The images take you through the major components and the details of each of these. Starting with the clamp-mount to hold the T53 in various positions on the gun of your choice. It uses a cam-lever to lock into place. The mount also has a couple of small rail mount section so you can add extra accessories. A nice remote switch has both latching and momentary buttons on it, plus hook/loop straps for fitting to the gun.
There is a small socket in the tail of the T53 which takes either the charging cable or remote switch. With the appropriate plug in place, it can be rotated to lock it in the socket.


Taking a more detailed look at the LED switching:

This is the magic of the T53 (and other NEXTORCH LED swapping lights). The LED at the focal point of the reflector can be completely swapped for another by rotating the dial on the side of the light’s head.


The beam

Please be careful not to judge tint based on images you see on a computer screen. Unless properly calibrated, the screen itself will change the perceived tint.

The indoor beamshot is intended to give an idea of the beam shape/quality rather than tint. All beamshots are taken using daylight white balance. The woodwork (stairs and skirting) are painted Farrow & Ball “Off-White”, and the walls are a light sandy colour called ‘String’ again by Farrow & Ball. I don’t actually have a ‘white wall’ in the house to use for this, and my wife won’t have one!

In this gallery all exposure settings for the set of indoor or outdoor shots are the same.


Batteries and output:

The T53 runs on a supplied 2600mAh 18650 cell.

To measure actual output, I built an integrating sphere. See here for more detail. The sensor registers visible light only (so Infra-Red and Ultra-Violet will not be measured).

Please note, all quoted lumen figures are from a DIY integrating sphere, and according to ANSI standards. Although every effort is made to give as accurate a result as possible, they should be taken as an estimate only. The results can be used to compare outputs in this review and others I have published.

There is parasitic drain – this is included in the table of measurements.

Included in the gallery are the USB charging trace, a table of measured results, and the runtime trace for maximum white output (plus zoomed-in graph for the start).


The T53 Set in use

Let’s start with the T53 on its own. NEXTORCH lights always have a nice solid feel, and the T53 is built a little bigger to accommodate the LED swapping mechanism. Just as a single 18650 powered light, it is a little chunky and heavier than if it were only a single LED light. The tail-switch is not what I would term ‘tactical’ as it does not stand proud, making it a struggle to press far enough in to latch on if wearing gloves. This is not an issue at all in normal use, and certainly not a factor when moving to the remote switch.

Charging can be carried out internally using the supplied cable, and when doing so, in this example charged to a healthy 4.18V. Although not quite to 100% capacity, I much prefer this slight lower than 4.20V level as it is better for the life of the cell.

Before moving onto the gun mounting, a quick note on the tail-switch. This functions the same whether the remote switch is connected or not, in fact the two switches overlay their functions.
The tail-switch, if half-pressed, first turns on on high. If double-tapped you get strobe. However if you fully press to click it on, a subsequent half-press changes to low output.
The remote-switch, has a latching switch and a momentary switch. Either switch only gives access to high however many times you tap, you only get high.
Now, for example, if you had the tail-switch strobing, and then use the remote switch it changes to high, and once you turn the remote switch off it goes back to strobe. This is how they overlap each other.

In the next gallery the T53 is mounted onto a Chiappa Little Badger. More often than not, lights like the T53 are described as scope mounted. This is a personal bugbear as I dislike the way the spill light illuminates the gun and this creates a gap in the beam. So I will always, if possible, mount the light to the front of the gun to ensure none of the beam hits the gun. Here I’ve been able to fit the mount to the SAK sound moderator – it fitted, but was getting near the limit.

When fitting the mount, the design makes it very quick and simple to secure. The main adjustment is with the central screw and once snug, locking down the cam latch clamps it nice and tight.

Thanks to the hook/loop straps the remote switch fitted on easily, but larger stocks might prove too large for the straps.

The galley includes actual through-scope views.


For hunting use, I never looked back once I started using coloured lights, the difference is literally like night and day. There is also a massive difference between filters fitted to white lights, and pure colour LEDs, both in quality and brightness. I have no need to change colours on one outing as the gun is chosen for the quarry, and the colour to match the quarry. In theory I then don’t need the ability to change colour in one light. That said, it means the one light is suitable for all setups, and you won’t bring the wrong one.

Target illumination is very good with all colours, and something I found very useful was the ability to set the low output with the tail-switch and ramp it up to high as needed with the remote switch, then back to low again.

This is a very accomplished package from NEXTORCH.

Review Summary

The views expressed in this summary table are from the point of view of the reviewer’s personal use. I am not a member of the armed forces and cannot comment on its use beyond that covered in the review.

Something that might be a ‘pro’ for one user can be a ‘con’ for another, so the comments are categorised based on my requirements. You should consider all points and if they could be beneficial to you.

I’m trying something slightly different and starting with what doesn’t work so well, so I can finish on a more positive note

_______________________________________________
What doesn’t work so well for me
_______________________________________________

Tail-switch a little too recessed.
Remote switch straps may be too short for some guns.

_______________________________________________
Things I like
_______________________________________________

LED ‘swapping’ mechanism.
Three colour output, Red, Green and White.
Perfect beam for all colours.
Bright ‘through-scope’ view.
Built in USB charging (needing supplied cable).
Remote switch has momentary and latching switches.
Mount clamp is very secure.
Full kit provided, nothing else required (apart from a gun).


Discussing the Review:

The ideal place to discuss this review is on the Tactical Reviews Facebook Page
Please visit there and start/join the conversation.

Light Review: Surefire E2D Defender and Stiletto

With Surefire, your main expectations might be high quality build and performance, so read on to see if these lights keep up with Surefire’s standards. In this review are two quite different models; the latest update of the classic Defender E2D (in this case the two-mode ‘Ultra’) and the EDC-optimised pocket-friendly USB-chargeable multi-mode, programmable Stiletto.

What are we looking at?:

Though this review is all about the two headline lights, as well as primary cells I’ve been able to test the Surefire rechargeable cells for the Defender.


Moving onto the main feature let’s get into the details of these two.


Taking a more detailed look at the Stiletto:

The Stiletto is a new style of light, taking on more of the form of a pocket knife and slipping into your pocket in the same way, and with a clip to hold it in place. To achieve this narrow profile it has a built-in battery and USB charging, allowing the shape to not be compromised by replaceable batteries.


Taking a more detailed look at the Defender E2D Ultra:

The Defender E2D is a classic Surefire model, bit it has moved with the times. Starting life as a incandescent bulb light with lens/reflector, it has grown to use LED and TIR optics. This latest version has raised the output to 1000lm+. It is mainly the head of the light that has changed in appearance compared to the earlier models you might know.


Surefire’s rechargeable CR123 option:

Surefire have been a little behind other manufacturers with regard to taking up rechargeable batteries. In years past, dedicated Surefire owners have had to find their own way, often going to the lengths of getting their battery tubes bored out to take 18650 cells plus a few other methods.
In this case, the cells themselves are not Surefire branded, instead Surefire have chosen K2 Energy’s Lithium Phosphate cells.


The beam

Please be careful not to judge tint based on images you see on a computer screen. Unless properly calibrated, the screen itself will change the perceived tint.

The indoor beamshot is intended to give an idea of the beam shape/quality rather than tint. All beamshots are taken using daylight white balance. The woodwork (stairs and skirting) are painted Farrow & Ball “Off-White”, and the walls are a light sandy colour called ‘String’ again by Farrow & Ball. I don’t actually have a ‘white wall’ in the house to use for this, and my wife won’t have one!

The character of each beam is really very different. Starting with the Defender and it’s mix of smooth hot-spot and spill beam giving a very useful all-round capability. The spill beam is surprisingly wide, so much so you can see the bezel crenellation shaping in the outer edge of the beam.

The Stiletto has a Surefire ‘MaxVision beam’; I’ve come across a few variations of this, but in essence they have all been quite wide and evenly lit to give you ease of vision at close to mid ranges. You will notice in the direct comparison that the Defender’s beam is actually wider than the Stiletto’s. This is even more noticeable in the outdoor beam-shots. The Stiletto however lacks the hot-spot and provides nicely even lighting.


Batteries and output:

To measure actual output, I built an integrating sphere. See here for more detail. The sensor registers visible light only (so Infra-Red and Ultra-Violet will not be measured).

Please note, all quoted lumen figures are from a DIY integrating sphere, and according to ANSI standards. Although every effort is made to give as accurate a result as possible, they should be taken as an estimate only. The results can be used to compare outputs in this review and others I have published.

This is a table of measured results. PWM frequencies are recorded by an oscilloscope, and in some cases are clear and in others are more like superimposed noise. It only appeared that the Defender’s High beam when using the RCR123 cells showed any PWM. This is possibly due to power supply pulsing with the different voltage of the RCR123 cells which were able to produce a higher maximum output than on CR123.

In the runtime graphs, first check the start of the run and you can see how the RCR123 cells are capable of keeping that peak output from the Defender until the programmed slope-off of the output after 60s. However skip onto the full runtime and you can see the RCR123 cells run out after thirty minutes, but the CR123s go on a lot longer and with much more warning they are getting low. For ‘duty’ use you will still want to use CR123s, but the RCR123s give great guilt-free lumens.

Performance is solid from the Stiletto and output is more than good enough for EDC; 45 minutes of 500lm-plus output is impressive.


The Defender E2D Ultra and Stiletto in use

Though by no means a lesser light, there is perhaps slightly less to say about the Defender E2D, so I shall start with that. For me the ‘Ultra’ version is absolutely the one to have. The output levels are so opposite with a 9lm Low and a 1000lm+ High, these might seem too at odds to work well, but they do. If I could add one thing to the Defender E2D it would be a way to user program the Low to be the first mode, but without this the High-Low mode order ensures it lives up to its name.

Thanks to the beam shape and hot-spot, the 9lm mode does a great job for those daily needs of a bit of light. It hits the right balance of being low enough for complete darkness but not so low it is useless for anything but pitch black.

I have many 1000lm+ lights and many into the 5000lm+ level, yet the Defender seems to manage to appear brighter than similar output lights. I have never been left wanting by the Defender (running on the RCR123) with its solid performance and beam profile.

The slim body allows easy cigar gripping and general operation is what you expect from a tail-switch light.


And the Stiletto, this is a very different concept and is very different to use. It’s flat profile and large pocket clip make it one of the easiest lights I’ve used to pocket carry. Ergonomics are a really strong point with the Stiletto. In general use you will find the main side-switch falls nicely under your thumb. Side-switches are far superior to tail switches for EDC tasks, and make it more comfortable to hold the light for extended periods with a low arm position.

But of course, the Stiletto also has a tactical tail switch so you have the option of the high tactical grip with direct access to High. This leads me to the set of images in the gallery as I personally found the tail switch (which is quite stiff) gave me a few issues with grip and the Stiletto sliding forward. I had to use two methods to keep it stable; one was to hook my little finger just round the front of the aluminium head, and the other was to ensure I had the Stiletto rotated so I was gripping onto its width and not onto the flats. (check the gallery for examples) It has been fatiguing to use the tail-switch for longer periods, but with the streamlined shaping this is unavoidable.


The Stiletto’s main power switch is one of three areas on the rubber side panel; I am mentioning this to describe something else to be aware of. To the left of the main switch is a programming switch, this has not caused any issues in general use. However, the USB charging port cover is something to be aware of as I have often found myself trying to turn it on by pressing this part as it is quite ‘button-like’. It is very easy to do this, especially if wearing gloves, so just needs a little awareness and grip adjustment to correct.

‘Programming switch’ – yes the Stiletto can be programmed, with each switch independently programmed into one of two modes. I definitely prefer the default mode and I’d only change if I were mainly going to use the Stiletto in High. Programming is very easy – you hold the programming switch down until the indicator shows blue and then press either the main-switch or tail-switch to toggle it between modes. This programming switch also activates the emergency strobe.

Having three levels and the ability to swap the order from L-H or H-L is very useful. The most used mode for me was the Low, followed by Medium. High was too powerful for most of my EDC uses, but great to have for quick blasts.

The previous gallery has two in-use photos on a pathway to compare these two lights. In the earlier beam-shot gallery you could see the effect of the even circle of light the Stiletto emits. Once you get outdoors and don’t have light bouncing round to fill in the areas beyond the outer edge of the beam – the tunnel vision effect becomes more pronounced. You can see with both the Defender and Stiletto aimed in the same way, the Defender view is complete where the Stiletto’s beam leaves you blind beyond the narrower circle of the beam. Using the Stiletto in unlit areas required more beam movement and scanning to see where your feet are going.

Review Summary

The views expressed in this summary table are from the point of view of the reviewer’s personal use. I am not a member of the armed forces and cannot comment on its use beyond that covered in the review.

Something that might be a ‘pro’ for one user can be a ‘con’ for another, so the comments are categorised based on my requirements. You should consider all points and if they could be beneficial to you.

I’m trying something slightly different and starting with what doesn’t work so well, so I can finish on a more positive note

_______________________________________________
What doesn’t work so well for me
_______________________________________________

Defender E2D Ultra – no direct access to Low.
Stiletto – tail-switch a bit too stiff to hold-on in tactical mode.
Stiletto – beam profile can cause tunnel vision in unlit outdoor areas.

_______________________________________________
Things I like
_______________________________________________

Defender E2D Ultra – Powerful output (that seems more than it is).
Defender E2D Ultra – Great beam profile.
Defender E2D Ultra – Excellent neutral beam colour.
Defender E2D Ultra – High and Low level.
Defender E2D Ultra – Lockout.
Defender E2D Ultra – Slim and easy to carry.
Defender E2D Ultra – Super quality build.
Stiletto – Very ‘pocket friendly’ shape.
Stiletto – Choice of modes.
Stiletto – Two switches, side and tail.
Stiletto – Programmable modes for switches.
Stiletto – USB chargeable.
Stiletto – Fuel gauge indicator.
Backed by Surefire’s guarantee.


Discussing the Review:

The ideal place to discuss this review is on the Tactical Reviews Facebook Page
Please visit there and start/join the conversation.

As well as the Tactical Reviews Facebook Page, please consider visiting one of the following to start/join in any discussion.

CandlePowerForums – Flashlight Reviews Section (Largest and Friendliest Flashlight Community Forum)

Light Review: Rovyvon A5, A8 and Angel Eyes E300S

Quite literally a ‘highlight’ from IWA 2019 are these lights from Rovyvon, so I was excited to get these on test and see what they could really do. In this review I’ll be comparing the Rovyvon A5 keychain light with two of the same size A8 variants, plus the E300S ‘Angel Eyes’, a larger but still EDC sized right-angle light. There is lots to see, especially with all the extra functions crammed into the A5 and A8 models!

I got this test group from Heinnie Haynes – if you don’t know this online shop you should do.

Taking a look at the A5 and A8:

The A5, and A8 models are all presented in the same way, so this is a quick look at the first one I unpacked.


More of the details of the A5 and A8 models.


Taking a look at the E300S Angel Eyes:

Unpacking the Rovyvon Angel Eyes.


The details of the Rovyvon Angel Eyes.


The beam

Please be careful not to judge tint based on images you see on a computer screen. Unless properly calibrated, the screen itself will change the perceived tint.

The indoor beamshot is intended to give an idea of the beam shape/quality rather than tint. All beamshots are taken using daylight white balance. The woodwork (stairs and skirting) are painted Farrow & Ball “Off-White”, and the walls are a light sandy colour called ‘String’ again by Farrow & Ball. I don’t actually have a ‘white wall’ in the house to use for this, and my wife won’t have one!

Here they all are, the different models, and different modes. Check the image caption for the notes.


Batteries and output:

These lights run on built-in cells.

To measure actual output, I built an integrating sphere. See here for more detail. The sensor registers visible light only (so Infra-Red and Ultra-Violet will not be measured).

Please note, all quoted lumen figures are from a DIY integrating sphere, and according to ANSI standards. Although every effort is made to give as accurate a result as possible, they should be taken as an estimate only. The results can be used to compare outputs in this review and others I have published.

First up here are the A5 and A8 models and each measurable output. The value measured for UV will be a combination of visible blue light that is output or fluorescence of the test instrument and cannot be taken as a true UV measurement. ‘Max at Turn On’ is NOT an ANSI measurement, but a maximum value when switching on. (‘Below T’ means the output was below the threshold that could be measured.)

Then the E300S Angel Eyes. ‘Turn On’ is NOT an ANSI measurement, but a maximum value when switching on. Moon mode is not really 0lm, it is just below the threshold that could be measured.


Runtime and Charging Time:

In this gallery are charging traces recorded from a USB power monitor, plus the recorded output traces from an Integrating Sphere. Take your time here there is a lot of information.


The Rovyvon lights in use:

I’d had a good play with these lights at IWA, but there is still that frustration waiting for the first charge to complete – all blue – all good to go!

Before I go on, this photo summarises why these lights are so good, and that is their versatility. The A5 and A8 models are all multi colour, multi-function and super compact, and the E300S is very functional and powerful.

Staying on that line of thought, two of the models in this review have UV, and one is GITD. A small gallery to show these features in action.


The timing of this review means I have actually been carrying these daily for several months now. Electronic switches means there is always a chance that parasitic drain (standby circuit power) will deplete the battery, but there has been absolutely no sign of that.

One tiny light which has several functions, definitely makes itself very useful. UV is one of my favourite secondary functions for which I normally have to carry another light. Checking bank notes and looking for elusive little lost objects can be transformed with UV light. The extra colours of light available on the A5 and A8’s secondary side outputs all fit well with other needs; you being seen, marker lights, warnings, gentle night lighting or reading, the list goes on. What do you find most useful?

It is always challenging to design easy to use controls for multiple functions, especially with only a single button (or two with the E300S), and the Rovyvon lights use a variety of press-and-hold or multi-clicks. Depending on your current dexterity (which tends to vary when cold/tired/etc), you can easily get this wrong. The worst case result is getting maximum output when you didn’t want it. This is not a criticism of the Rovyvon lights, but only a consequence of the multi-function / single button interface.

However, with the A5/A8 and E300S there is a conflict in the user interface. To get the lowest level on the A5/A8 you double click, but the E300S requires a press-and-hold. So use the E300S, and when you pick up an A8, and press-and-hold expecting to moon mode, instead you get full blast. As these are both Rovyvon lights I would have hoped for some consistency in the UI across models to prevent this accidental blinding.

PWM (pulse width modulation – strobing the output to achieve lower levels) is a bugbear of mine. Any movement becomes flickery or stuttering. Unfortunately all the Rovyvon lights use this. The E300S uses a sufficiently high frequency that it does not present as a problem, but the A5 and A8, on all lower level outputs, have very obvious flickering whenever moving. If everything is static, then this isn’t visible, but if you are walking along or scanning a space you will see flickering. There are sometimes design limitations that force the use of PWM, as the circuitry needed for constant output tends to be larger, so the small size of these light might be the reason for this compromise. I hope Rovyvon find a way to get rid of the PWM (or at least increase the frequency) as these lights would be outstanding if they didn’t flicker.

Level spacing on the A5/A8 is good, but on the E300S there is much too large a step up from the lowest level to the next one, going from ~1lm to 70lm. It really needs a 5-10lm step.

With such high outputs available from a very small light, the overall runtime at these high levels is pretty low (A5/A8), so if you like using them on full blast, you’ll be recharging quite often, but if you mainly use the lower levels or side light functions, EDC use will be covered for a very reasonable time. USB recharging makes them very easy to top up.

The clear plastic bodies are light and strong with the added benefit of showing the neat internals. They have stood up to every day keychain use along with inevitable drops, bumps and rubbing against keys.

All the details are refined and functional with great clips, carry options and spares.

Review Summary

_______________________________________________
Things I like
_______________________________________________

Multiple LEDs and output options.
Compact and lightweight.
Robust construction.
USB charging.
Excellent fit and finish.
Fully fitted out with accessories.

_______________________________________________
What doesn’t work so well for me
_______________________________________________

PWM – flickering is always a problem.
IP65 rated, so not actually waterproof.
Level spacing on E300S has too large a jump between the lowest levels.


Discussing the Review:

The ideal place to discuss this reviews is on a forum. If you started reading the shorter forum version of the review, but followed the link this full exclusive review, please return to that forum to discuss the review there.
If you read the review entirely on Tactical Reviews, please consider one of the following to join in, or start, a discussion.

CandlePowerForums – Flashlight Reviews Section (Largest and Friendliest Flashlight Community Forum)

Light Review: Armytek Prime Pro – PART 3 – The Results

In ‘Part Three’ we get to see how these lights really perform, what the beams look like, their output figures and insights into what they are really like to use. – This is Part Three of a group review of four models of Armytek’s ‘Prime Pro’ range of lights (plus the Armytek Uni C2 charger). When embarking upon this review I had not expected to generate quite so much content, so have had to split the review into three parts to make it more manageable. You will find links to these as each part becomes available.

Index:

Each title here will become an active link once it has been published.
Part One – A Detailed look at the Prime Pro Magnet USB C1 and C2.
Part Two – A Detailed look at the Prime Pro A1, A2 and Uni C2 Charger.
Part Three – Beamshots, Technical Testing and What they are like to use.

The beam

Please be careful not to judge tint based on images you see on a computer screen. Unless properly calibrated, the screen itself will change the perceived tint.

The indoor beamshot is intended to give an idea of the beam shape/quality rather than tint. All beamshots are taken using daylight white balance. The woodwork (stairs and skirting) are painted Farrow & Ball “Off-White”, and the walls are a light sandy colour called ‘String’ again by Farrow & Ball. I don’t actually have a ‘white wall’ in the house to use for this, and my wife won’t have one!

There are a couple of key things to mention before you dive in and look at the beamshots. It is possible to make lights look very bright or very dim, regardless of their actual output, by adjusting exposure. So when you look at these don’t be swayed by the ‘apparent brightness’ instead concentrate on the beam quality. the intention is to show how the beam looks, not how bright it is. that is shown definitively in the next section.

This gallery also contains firefly comparison beamshots, and uses the original Predator V1.2 as a reference. These Prime Pro lights have Excellent firefly output.


Batteries and output:

To measure actual output, I built an integrating sphere. See here for more detail. The sensor registers visible light only (so Infra-Red and Ultra-Violet will not be measured).

Please note, all quoted lumen figures are from a DIY integrating sphere, and according to ANSI standards. Although every effort is made to give as accurate a result as possible, they should be taken as an estimate only. The results can be used to compare outputs in this review and others I have published.

The runtime graphs contain a lot of detail. One clear aspect of the control systems of these lights is that they maintain a constant output level as long as they can before stepping down to another level.

The gallery also contains the tables of output figures. Note that when I have ‘0’ for the output on firefly modes, this is actually below the threshold of measurement for the equipment I have and is clearly not actually 0. The Prime Pro A1 is measured with AA and 14500.


* Beacon and Strobe output measurements are only estimates as the brief flashes make it difficult to capture the actual output value.

Charging results were a little bit unexpected for a couple of reasons. When checking the cells in the C1 and C2 after the included chargers indicated a full charge gave the following measurements:
C2 – 4.13V
C1 – 4.06V
Both seem low, but when checking these cells with a ZTS loading tester they both indicated 100% charge.
The C1 and C2 USB chargers are interchangeable so I tried them both on the C1.
With the charger that came with the C2, after a full charge the result was:
C1 – 4.15V
Using the Uni C2 charger the cells measured 4.16V once taken off the charger.

There is parasitic drain but is incredibly low in all models. The following list the drain in uA and how many years it would take to drain the cell(s).
Armytek Prime C1 Pro – 1×18350 – 2.8uA – 36.67 years
Armytek Prime C2 Pro – 1×18650 – 6.5uA – 56.16 years
Armytek Prime A1 Pro – 1xAA – 3.9uA – 55.58 years
Armytek Prime A1 Pro – 1×14500 – 3.8uA – 22.52 years
Armytek Prime A2 Pro – 2xAA 2S1P – 2.3uA – 94.24 years

The Prime Pro models in use:

I don’t want to come across biased, but I really do love these Armytek Prime Pro lights! If you give me a side-switch, choice of warm or cool output, no-PWM and properly-low firefly/moon modes, you will make me happy. So for these lights that is ‘check’, ‘check’, ‘check’, ‘check’ – bingo.

In terms of form-factor, AA lights have always been a favourite of mine. Now, with the NiMh cell becoming a preferred option for power (thanks to LSD cell technology, high output current, and inherent safety), with the added benefit of easy to find backup cells, the Prime Pro A1 and A2 become solid choices.

For that extra level of output power (thanks to li-ion power) and in-light charging convenience, the C1 and C2 step up.

To see how each of these compares in size, this is the full line-up together and then individual profile photos. Bear in mind for those individual shots that the head is the same diameter in each.


Normally I tend not to use the clips on lights, and often don’t fit them at all. All of these Prime Pro models seemed to be particularly ‘rolly’, wanting to find the lowest point of anywhere I put them down by rolling to it. So in this case, the clip has proven essential to stop them going wandering off and I’ve fitted it to all four lights. Although I am not particularly using the clip for clipping it to anything, as well as preventing them rolling, having the clip also provides indexing to make getting onto the switch quicker, and has been perfectly comfortable to have on the light. In this case I’d thoroughly recommend fitting the clip.

You can certainly get smaller EDC lights, but both the C1 and A1 are perfectly acceptable sizes to carry and not being too small, are comfortable and easy to use. For EDC, the C2 is pushing things a bit for me, and the A2 is for a larger bag. In terms of handling though, the A2 is a winner with the universally good handling 2xAA form-factor.

All these lights have an illuminated switch, and this illumination provides battery level information and a location function for the C1 and C2. For me the only time this switch illumination has slightly interfered is with the firefly modes. The instructions say the switch does not flash in firefly modes, but actually it does flash a couple of times when you first switch it on, and the flashes are about as bright as the firefly output itself. So when using these lights with dark adapted eyes, I find the need to keep the switch fully covered with my thumb for the first 10s or so until the switch flashes stop.

The programmability of these lights means you can change whether the location function is on or not (for the C1 and C2). When on, this uses the switch flashes all the time whether the light is on or not, allowing you to find it in a dark place. It does also mean that these switch flashes keep going all the time even in Firefly mode so the previous paragraph becomes more significant for firefly mode users. With Armytek’s low current circuit design you can leave this on permanently and not worry about draining the battery.

Also including a real Tactical monetary mode really adds another dimension. Make sure you correctly pre-select the mode you want to use, as in Tactical mode you can’t change level. Then to activate, from OFF, unscrew the tailcap slightly, press and hold the switch, and tighten the tailcap – you are now in Tactical mode. To get out of Tactical mode is not done the same way – you have to press and hold the switch (so it comes ON), then loosen the tailcap, then let go of the switch. Now when you tighten the tailcap again it will come ON, but be back in normal mode. If you don’t remember the difference of turning this mode on and off you can get stuck in Tactical mode.


A quick word on the in-light charging and the Uni C2 charger. In all cases the li-ion cell has not been taken up to a ‘full’ 4.20V, yet the discharge results have been good. For the health of the cells themselves it is actually good to not take them to an absolute 100% each time. So for every day use and frequent topping up, the Uni C2 won’t overwork your cells. Its memory means that if charging LiFePO4 cells and a power cut were to happen, it will safely continue the charging cycle for these cells – this is a detail often not included.

Magnetic abilities are a mixed bag for me. I’ve never been keen on the metal-to-metal contact these magnetic holding systems tend to use, plus their tendency to grab onto anything magnetic in bags and pockets. There are times a magnet holding your light is massively helpful though, so with the A1 and A2, their removable magnet is the perfect solution as you have a choice – thank you Armytek! With the C1 and C2 models on test here, you don’t have that choice due to the charger; but if you like magnetic tails on your lights then it is ideal.

With their feature packed user interface, you get great versatility. However, despite the single side-switch, these are not lights to give to non-technical people. With the variety of input clicks and wide variation in output levels, I can see those who are unfamiliar with multi-mode lights getting in a muddle.

Armytek’s interfaces are cleverly designed to give you great flexibility and functionality, I certainly appreciate the attention to detail.

Review Summary

_______________________________________________
Things I like
_______________________________________________

Side Switch.
True ‘Firefly’ low level output.
Warm or Cool tint versions.
No PWM.
Great UI with plenty of modes.
A1 and A2 have a removable magnet.
C1 and C2 have in-light USB charging.

_______________________________________________
What doesn’t work so well for me
_______________________________________________

Completely round design, so tend to roll if the clip is not fitted.
Proprietary USB charger.
Charger termination voltage seems a little low.


Discussing the Review:

The ideal place to discuss this reviews is on a forum. If you started reading the shorter forum version of the review, but followed the link this full exclusive review, please return to that forum to discuss the review there.
If you read the review entirely on Tactical Reviews, please consider one of the following to join in, or start, a discussion.

CandlePowerForums – Flashlight Reviews Section (Largest and Friendliest Flashlight Community Forum)

Light Review: Armytek Prime Pro – PART 2 – A1 / A2 / Uni C2

In ‘Part Two’ we will be taking a first look at the Prime Pro A1 and A2, plus the Uni C2 Charger. – This is Part Two of a group review of four models of Armytek’s ‘Prime Pro’ range of lights (also included with the Prime Pro lights was the Armytek Uni C2 charger). When embarking upon this review I had not expected to generate quite so much content, so have had to split the review into three parts to make it more manageable. You will find links to these as each part becomes available.

Index:

Each title here will become an active link once it has been published.
Part One – A Detailed look at the Prime Pro Magnet USB C1 and C2.
Part Two – A Detailed look at the Prime Pro A1, A2 and Uni C2 Charger.
Part Three – Beamshots, Technical Testing and What they are like to use.

Taking a more detailed look at the A1:

As we go through the details of each light, for some there will be common features. In this case I may only show that feature for one of the models. In this part we have the A1 and A2 which are very similar as really the only difference is the cell and length of the battery tube. If you think a detail has been overlooked, check the similar model for that detail.


Taking a more detailed look at the A2:


Taking a look at the Uni C2 charger:

Rechargeable cells are the provider of ‘guilt free lumens’ so I hope you will be using them whenever possible. The Uni C2 is Armytek’s complimentary multi-chemistry auto charger, and is a perfect match for these lights and with its long list of supported cells, most of your other lights too.


Modes and User Interface:

This section is common across Part One and Two of the review to allow you to compare functions easily. It contains extracts from Armytek’s instruction manuals. Check the Armytek website for downloads of the full versions of these.


That is the end of Part Two.


Discussing the Review:

The ideal place to discuss this reviews is on a forum. If you started reading the shorter forum version of the review, but followed the link this full exclusive review, please return to that forum to discuss the review there.
If you read the review entirely on Tactical Reviews, please consider one of the following to join in, or start, a discussion.

CandlePowerForums – Flashlight Reviews Section (Largest and Friendliest Flashlight Community Forum)

Light Review: Armytek Prime Pro – PART 1 – C1 / C2 USB Magnet

Armytek have always impressed me with how much functionality they manage to pack into the control systems of their lights. (I still keep a Predator V1.2 with S-tek driver in my bedside table drawer). This group review is of four models of their ‘Prime Pro’ range of lights (also included with the Prime Pro lights was the Armytek Uni C2 charger). When embarking upon this review I had not expected to generate quite so much content, so have had to split the review into three parts to make it more manageable. You will find links to these as each part becomes available.

In ‘Part One’ we will be taking a first look at the Prime Pro Magnet USB rechargeable models, the C1 and C2.

Index:

Each title here will become an active link once it has been published.
Part One – A Detailed look at the Prime Pro Magnet USB C1 and C2.
Part Two – A Detailed look at the Prime Pro A1, A2 and Uni C2 Charger.
Part Three – Beamshots, Technical Testing and What they are like to use.

Taking a more detailed look at the C1:

As we go through the details of each light, for some there will be common features. In this case I may only show that feature for one of the models. In this part we have the C1 and C2 which are very similar as really the only difference is the cell and length of the battery tube. If you think a detail has been overlooked, check the similar model for that detail.


Taking a more detailed look at the C2:


Modes and User Interface:

This section is common across Part One and Two of the review to allow you to compare functions easily. It contains extracts from Armytek’s instruction manuals. Check the Armytek website for downloads of the full versions of these.


That is the end of Part One. Keep an eye out for Part Two – A Detailed look at the Prime Pro A1, A2 and Uni C2 Charger.


Discussing the Review:

The ideal place to discuss this reviews is on a forum. If you started reading the shorter forum version of the review, but followed the link this full exclusive review, please return to that forum to discuss the review there.
If you read the review entirely on Tactical Reviews, please consider one of the following to join in, or start, a discussion.

CandlePowerForums – Flashlight Reviews Section (Largest and Friendliest Flashlight Community Forum)

CLASSIC Light Review: ArmyTek Predator G2 V2.0 and Predator X V2.0 dual Review

This review of the ArmyTek Predator G2 V2.0 and Predator X V2.0 lights is a classic from 2013, and is part of the Classic Series of reviews to be published on Tactical Reviews. The original versions of the Classic Series Reviews used a well known image host who will be cutting off the visiblity of 3rd party hosted images at the end of 2018.

As consumers, and as flashlight enthusiasts, we are spoiled for choice as there many excellent lights on the market. There are a fewer number of outstanding lights, and in my opinion the ArmyTek Predator V2.0 (in whichever version you prefer) is outstanding.

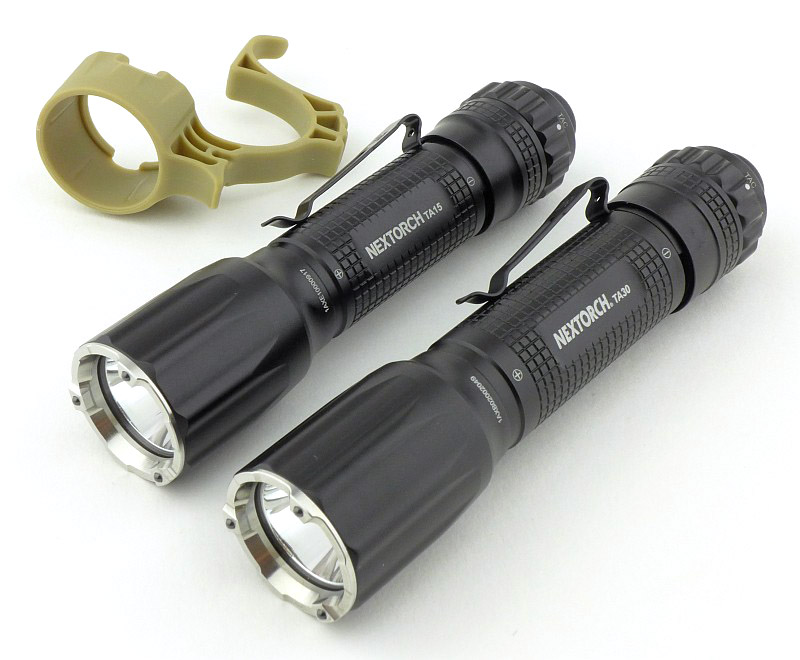
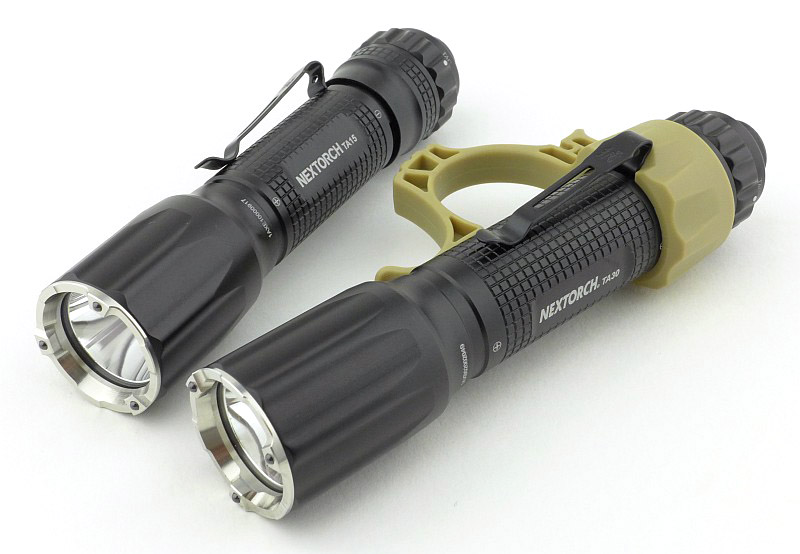
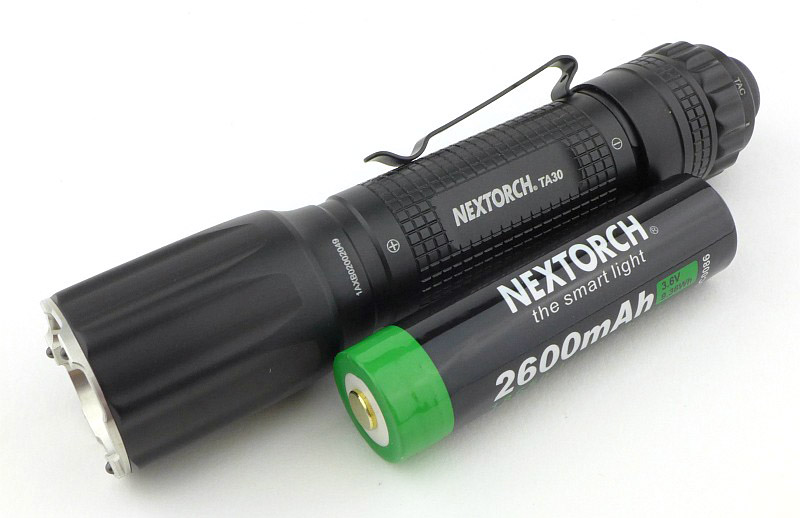
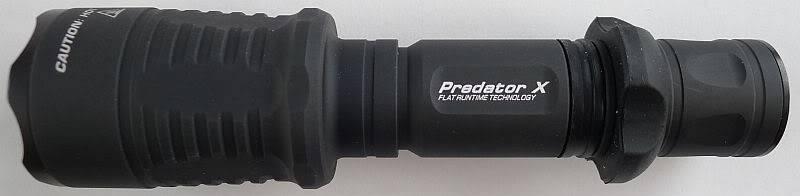
In this review I have two versions of the ArmyTek Predator V2.0 on test, the Predator G2 (fitted with the XP-G2 R5 LED) and the Predator X (fitted with an XM-L U2).

Initial Impressions:

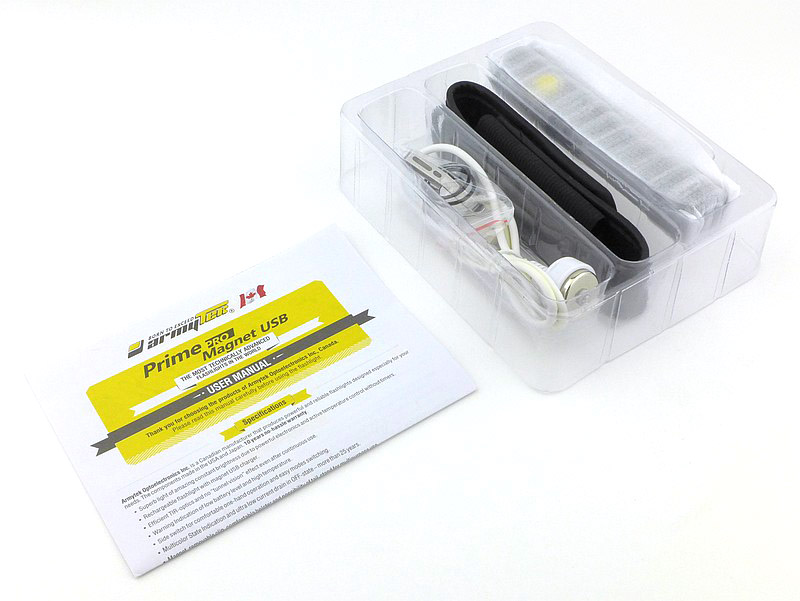
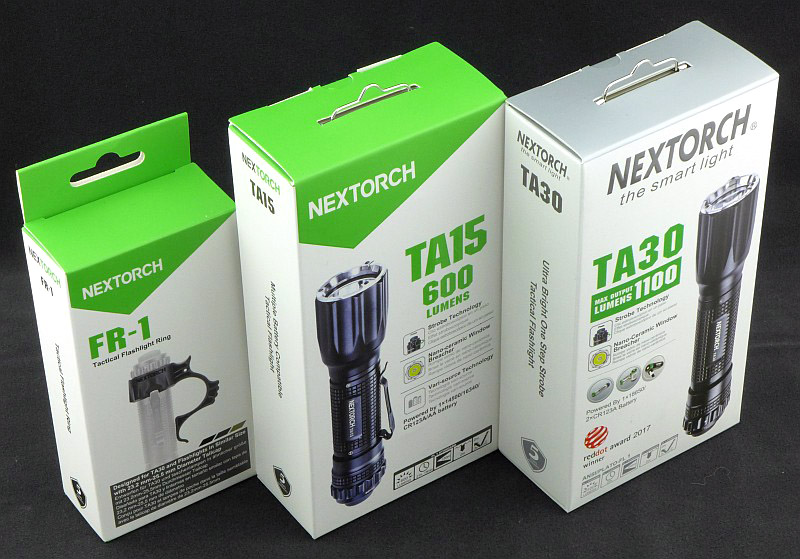
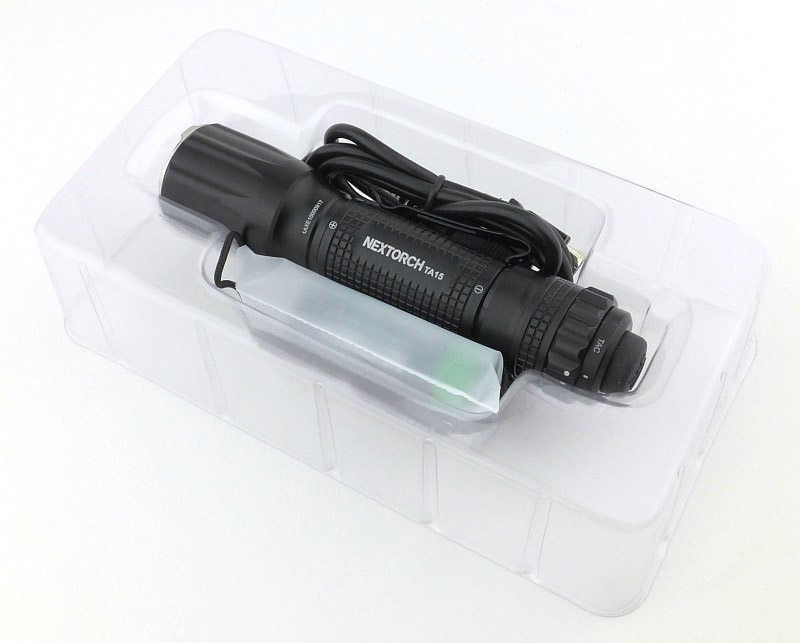
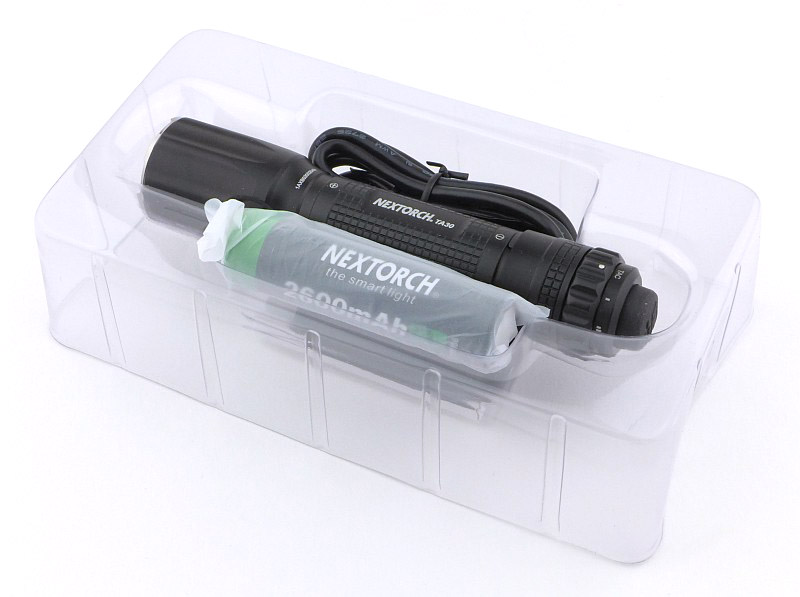
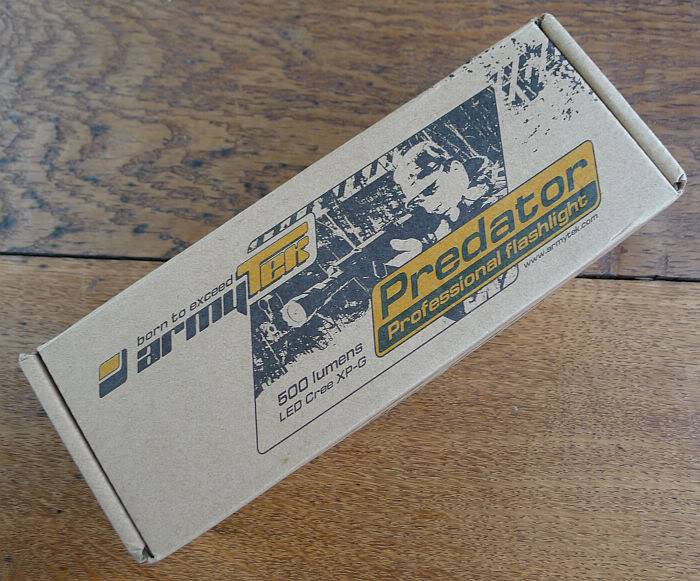
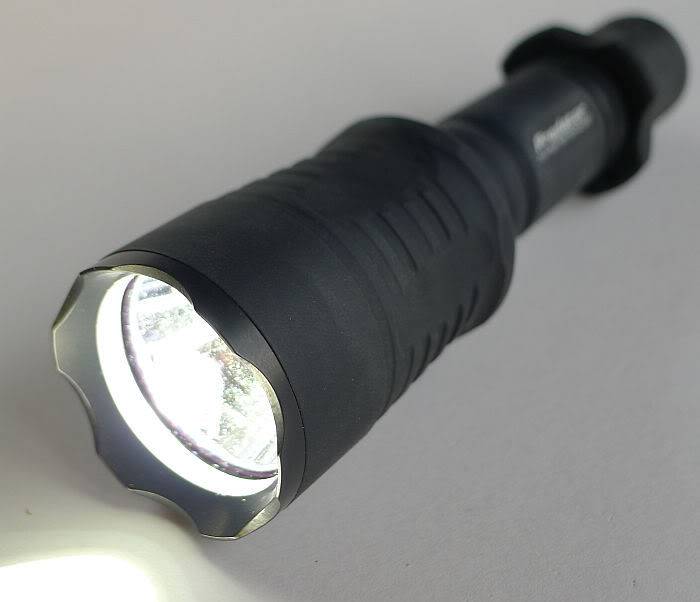
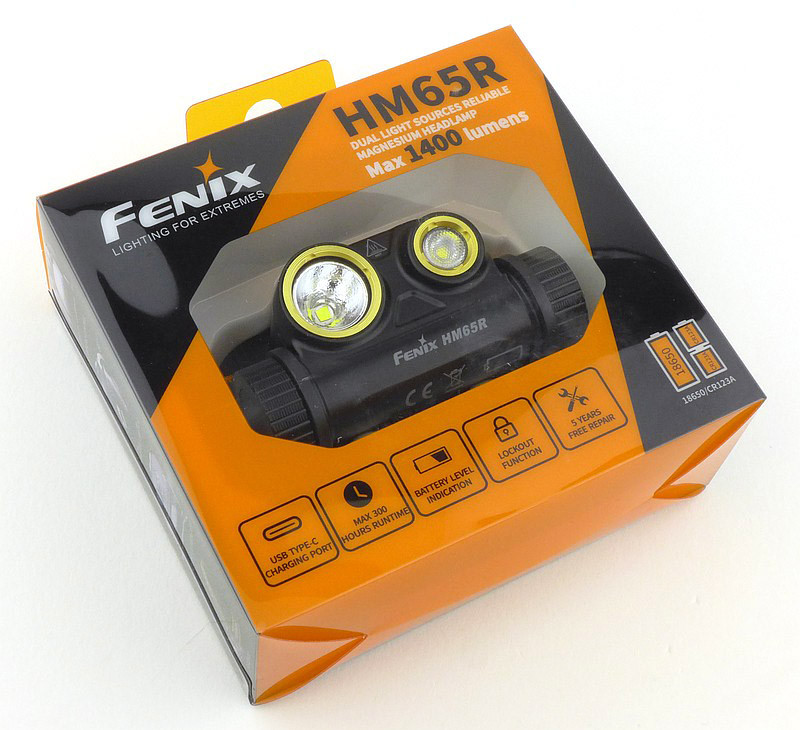
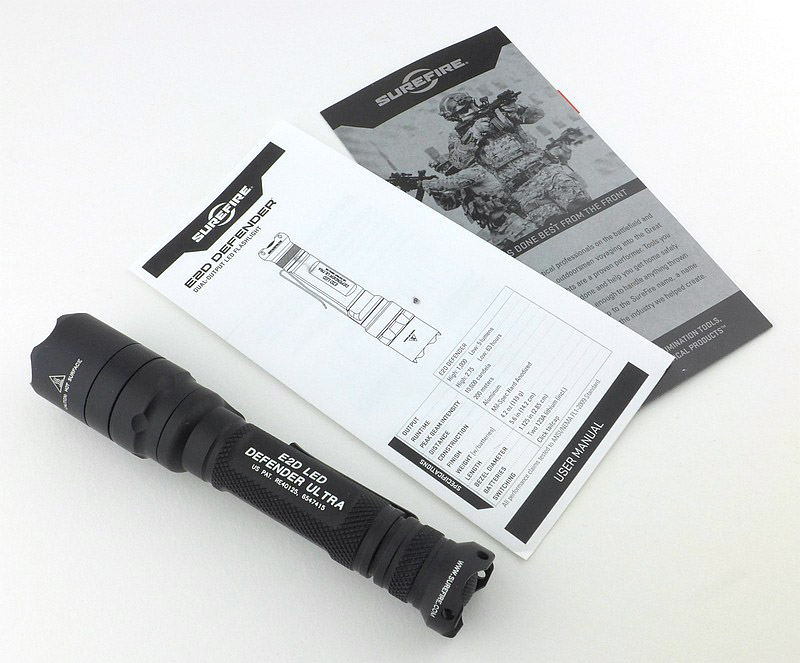
The ArmyTek Predator arrives in simple packaging that belies its incredible versatility.

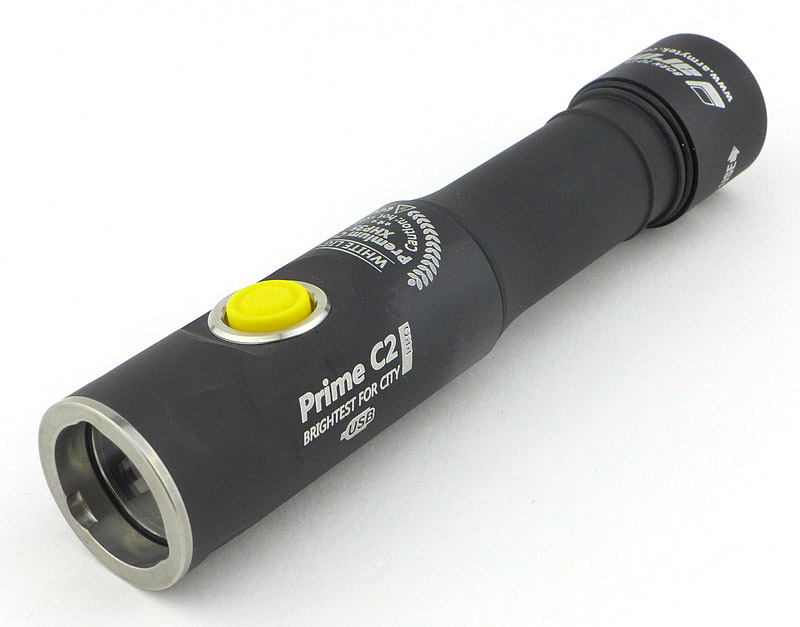
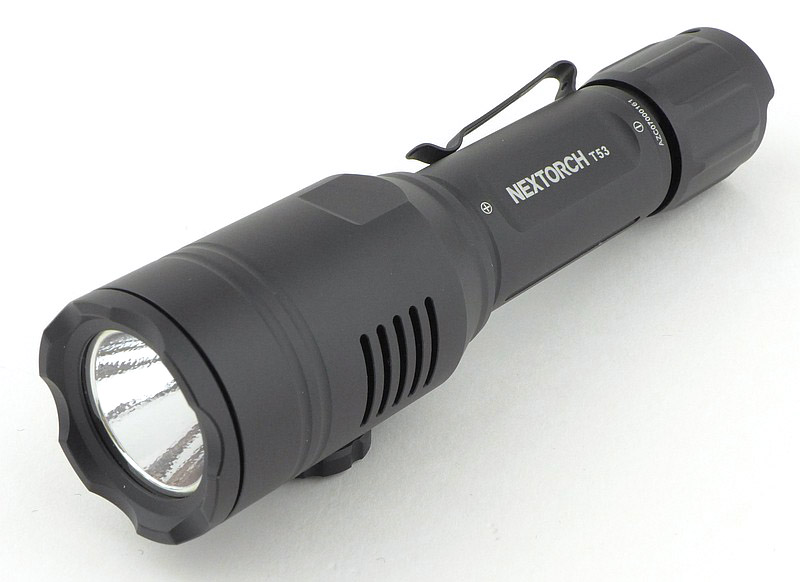
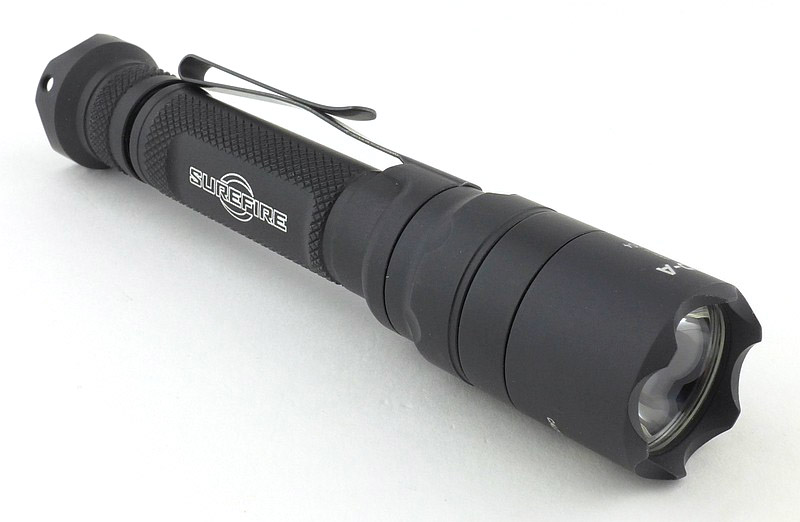
The V2.0 still sports the matt anodised surface of the original Predator. This feels different to standard smooth anodising and gives the Predator a covert appearance. The finish seems to make the Predator feel less cold to touch and has good grip.

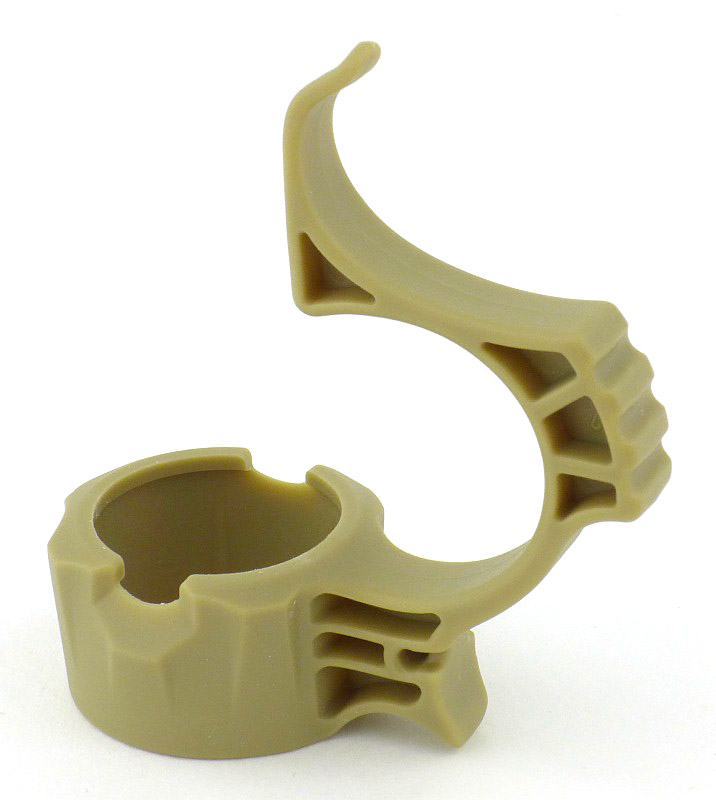
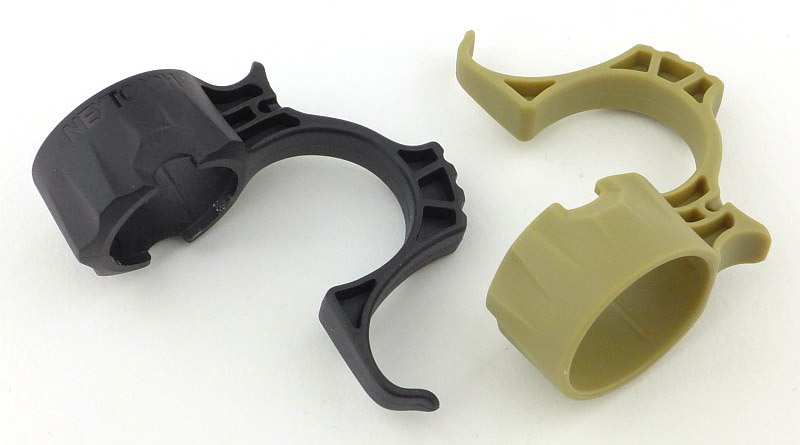
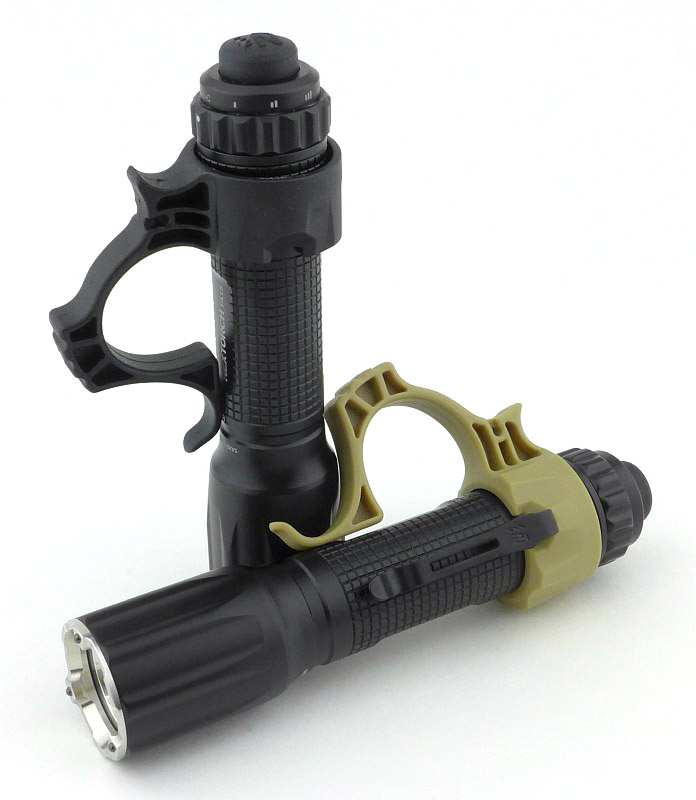
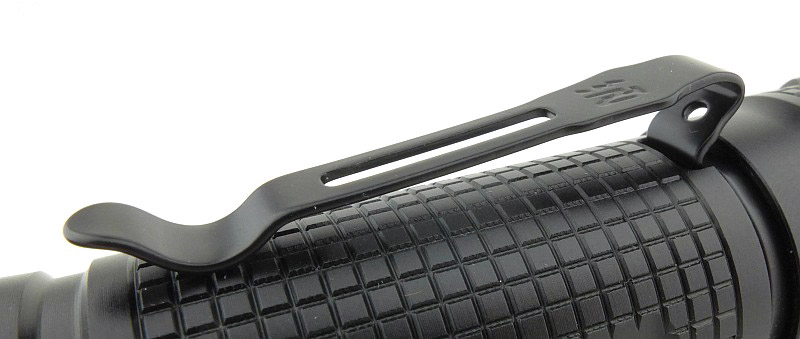
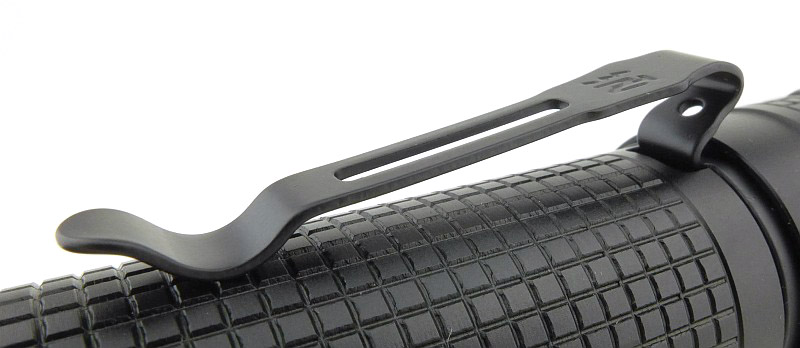
Compared to the Predator V1.2, the V2.0 has a new removable silicon rubber tactical grip ring, updated removable pocket clip, slightly larger diameter head/reflector (about 5mm bigger), is slightly shorter overall (about 6mm shorter) and has an updated selection of emitters. Initially slightly dubious about a rubber grip ring, this is very comfortable and secure to hold.

In designing the Predator, ArmyTek have managed to make what appears to be an incredibly robust and a truly military-grade light.

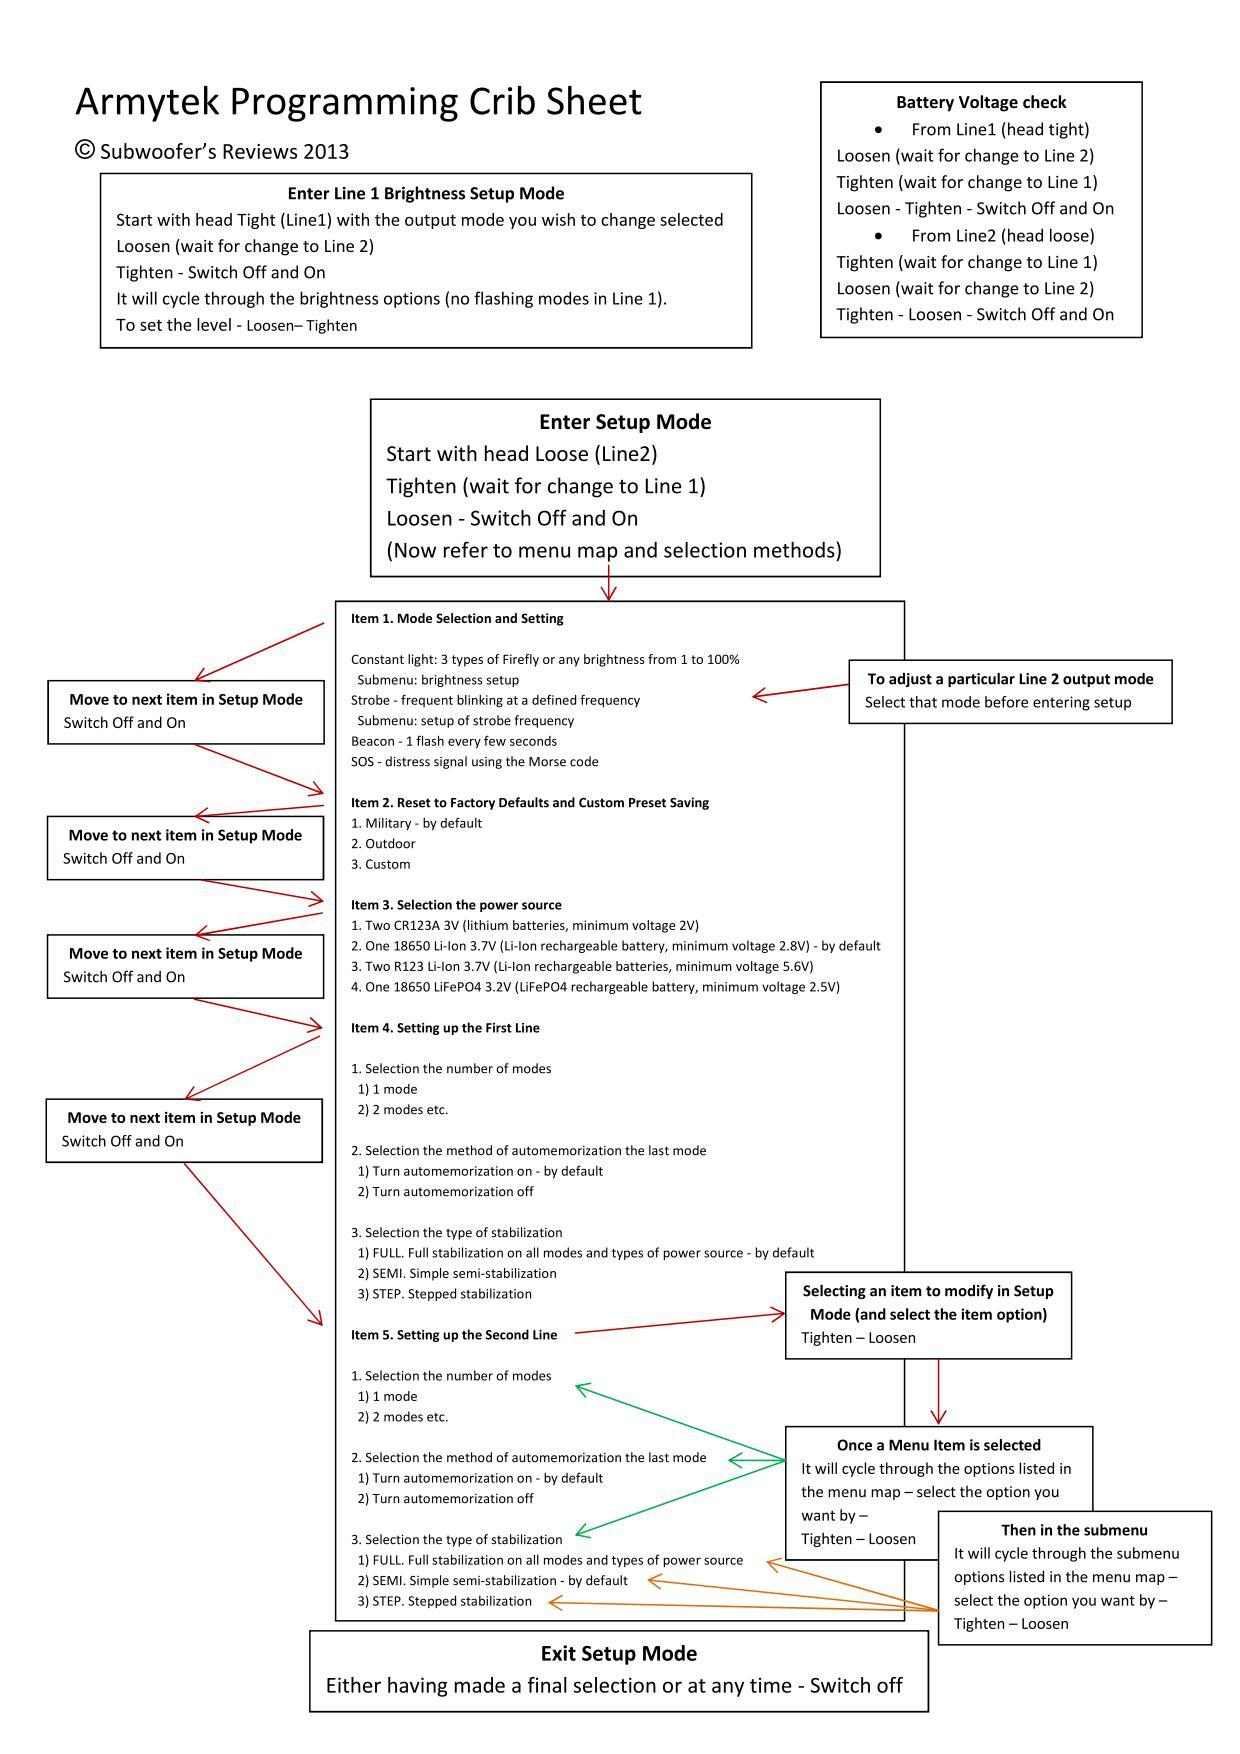
When you pick up the instruction sheet, your jaw might drop when you see just what the Predator is capable of, but DON’T PANIC, as you can use the Predator in its default configuration. If you are feeling a little more adventurous it doesn’t take too long to get into programming it. (Plus I’ve put together a Predator Programming Crib Sheet which will hopefully help make it simpler to do – more on that in the User Interface section)
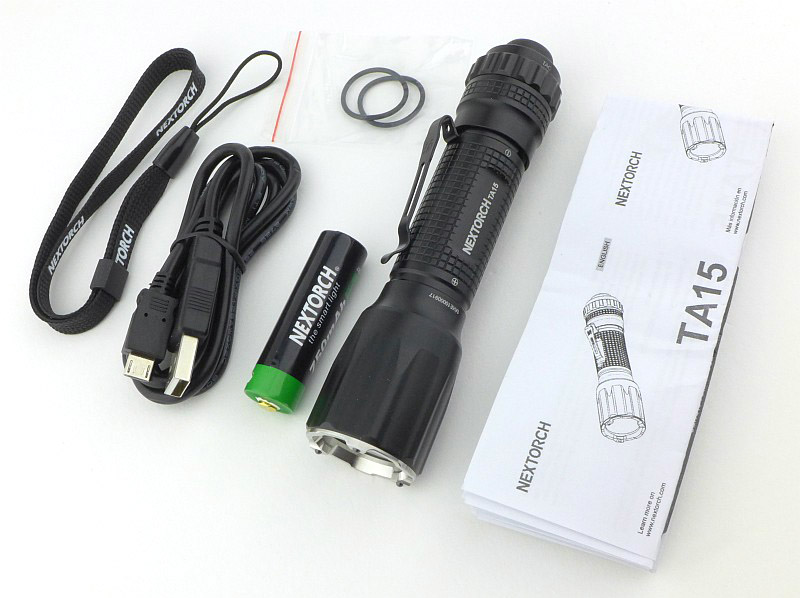
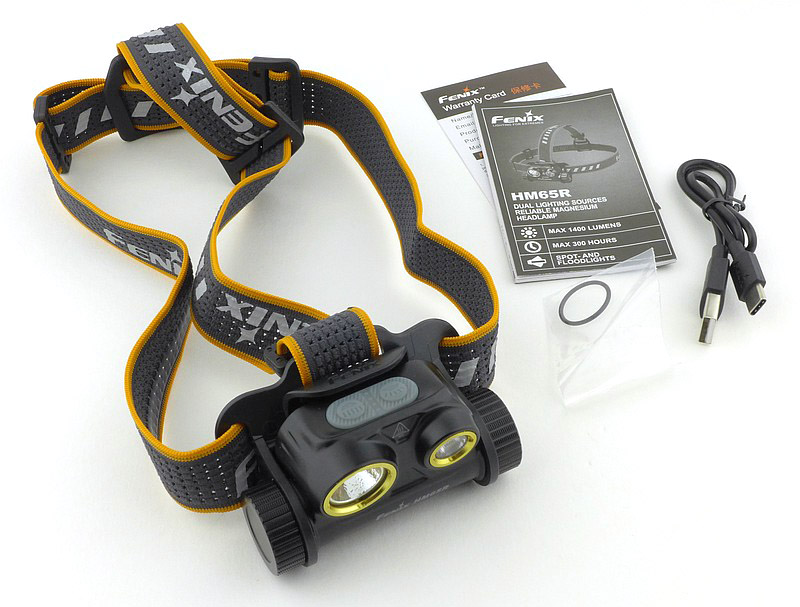
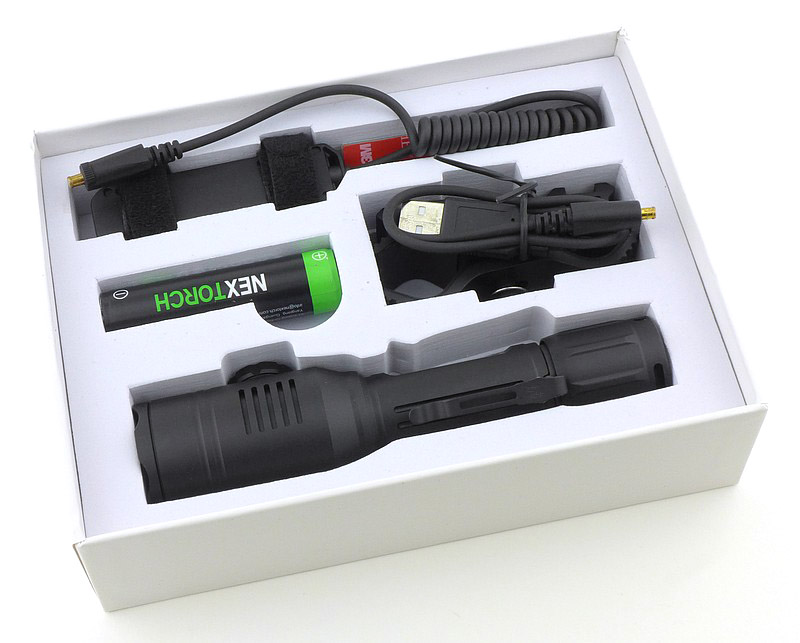
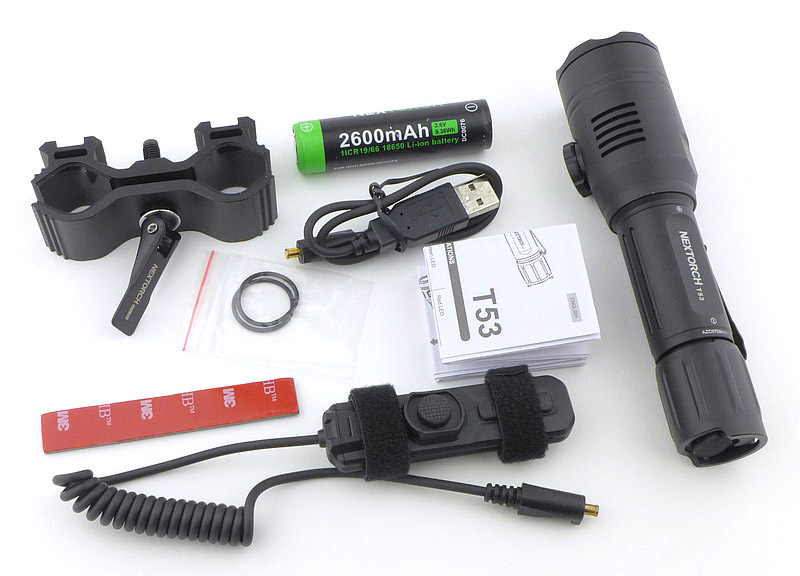
What is in the box:

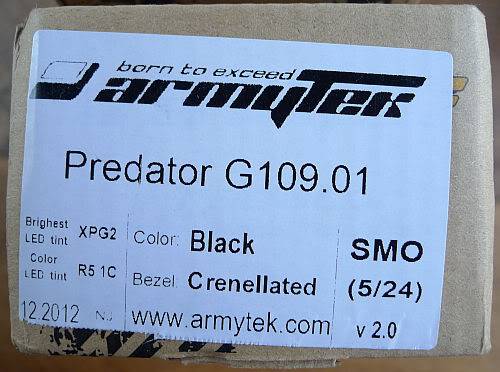
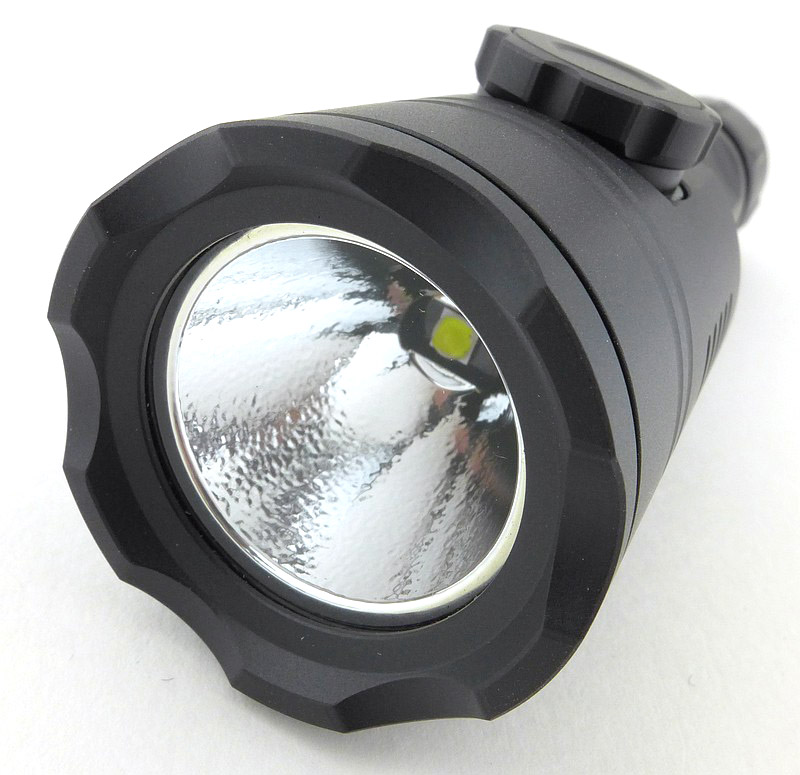
The two versions of the Predator v2.0 on test are the XP-G2 R5 (1C tint) Smooth Reflector with 5º hotspot and 24º spill

And the XM-L U2 (1C tint) Smooth Reflector with 8º hotspot and 55º spill.

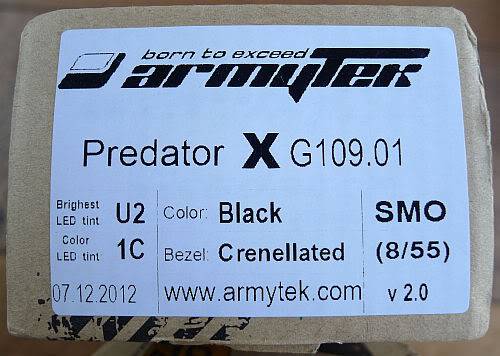
Both arrived in identical boxes (just the labels shown above on the end of the box being different).

And both look the same inside.

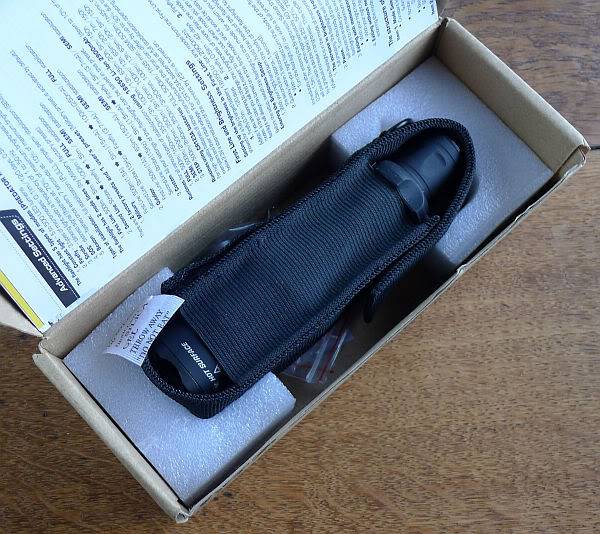
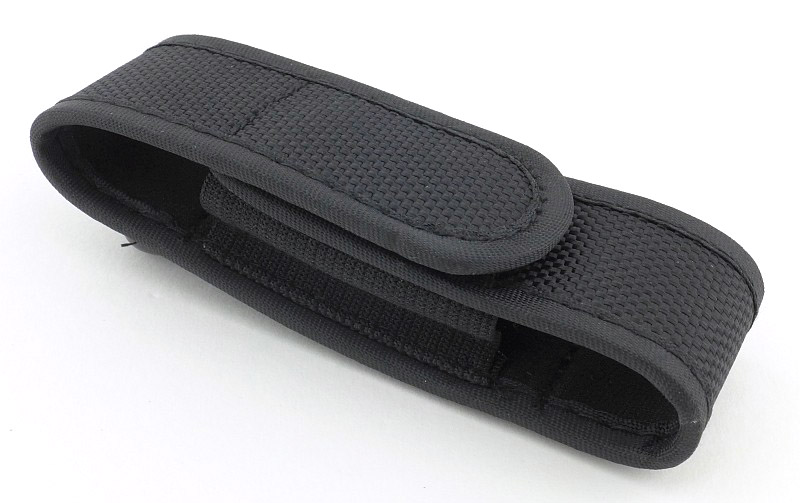
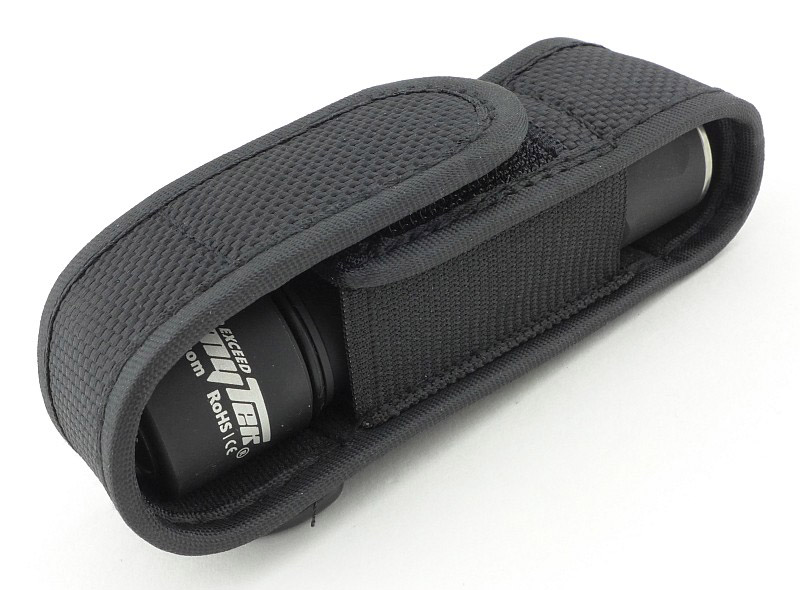
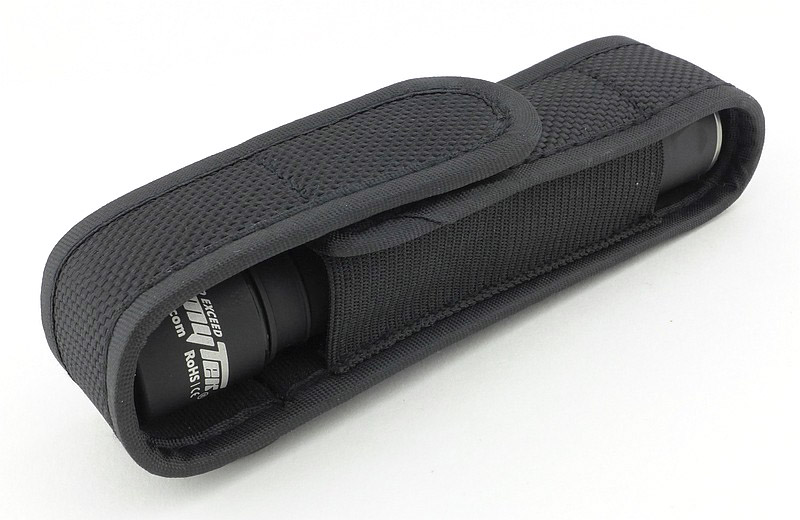
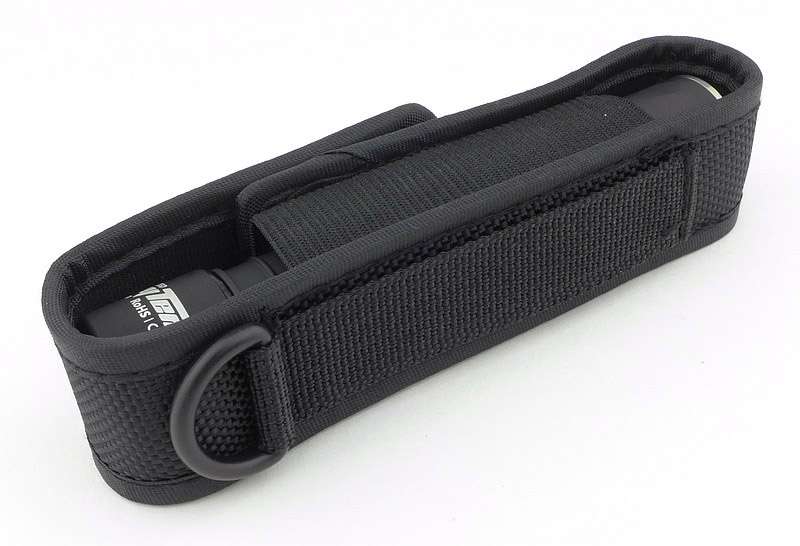
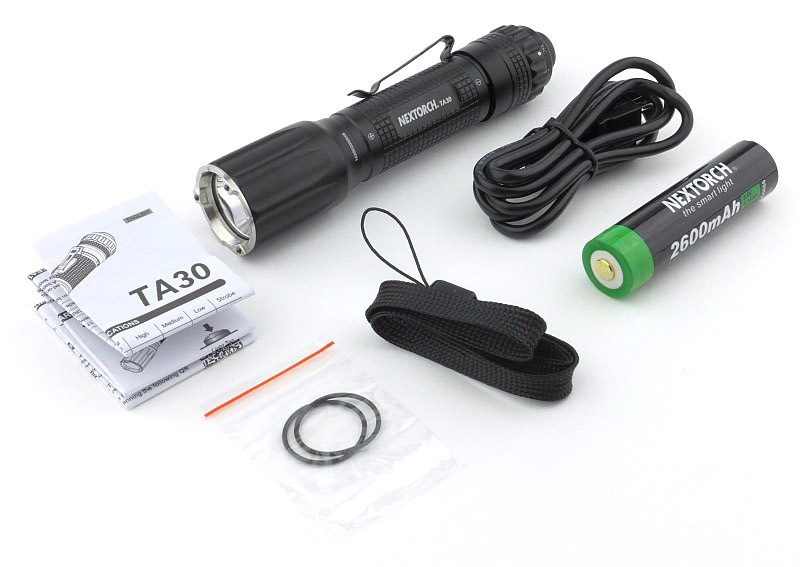
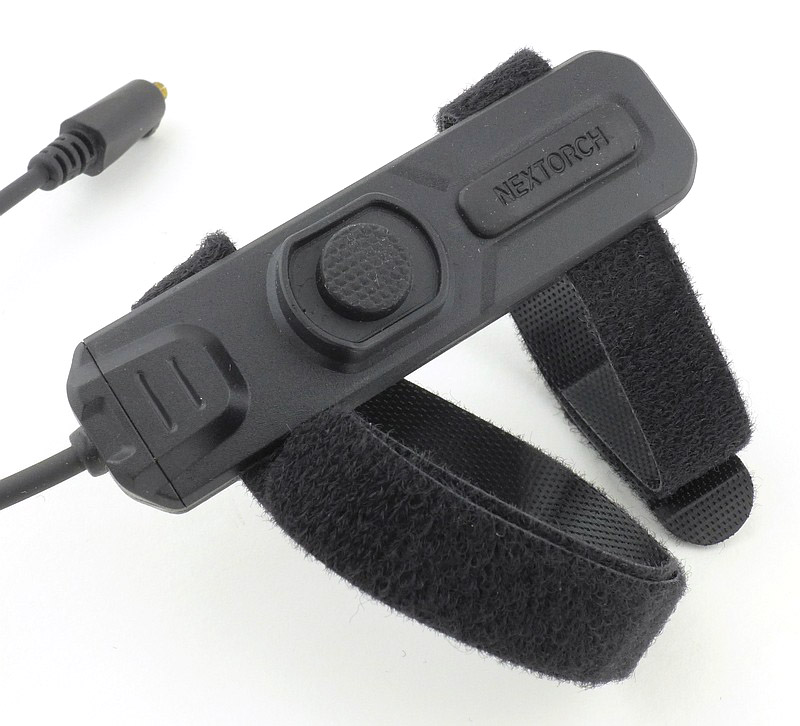
Each Predator comes with a bezel-down holster, lanyard, pocket clip, two spare o-rings, spare switch boot, and a rubber blanking ring to use if you remove the tactical grip ring. (as both are the same I’ve only shown the Predator X)

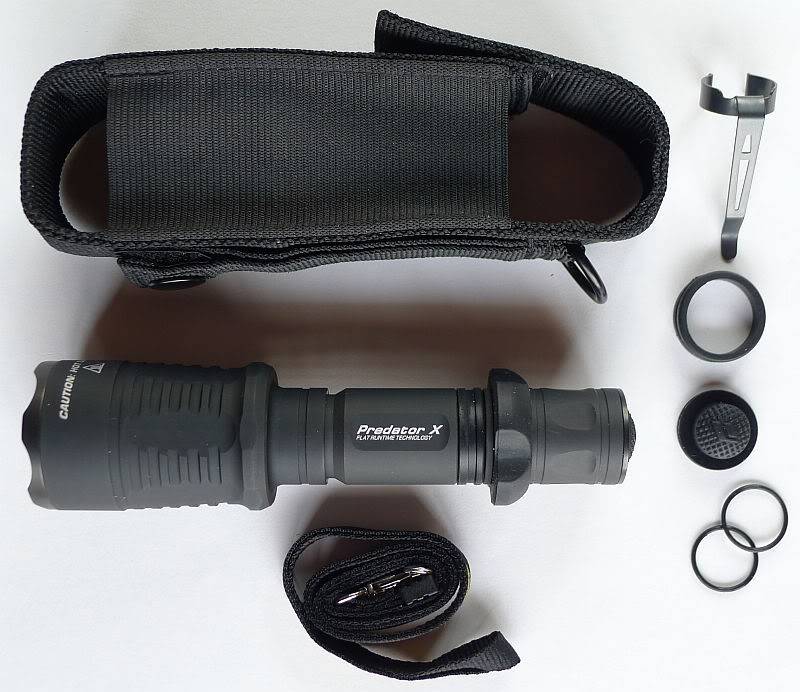
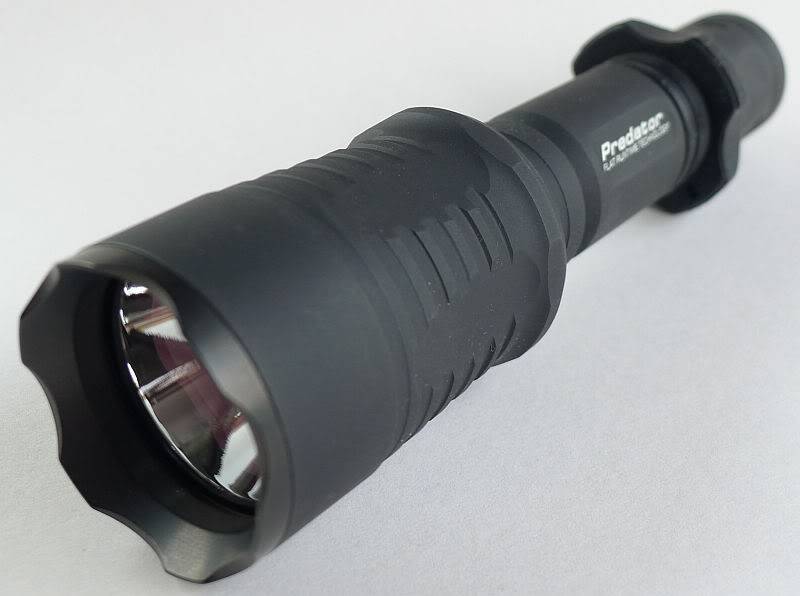
This is the Predator X with XM-L U2.

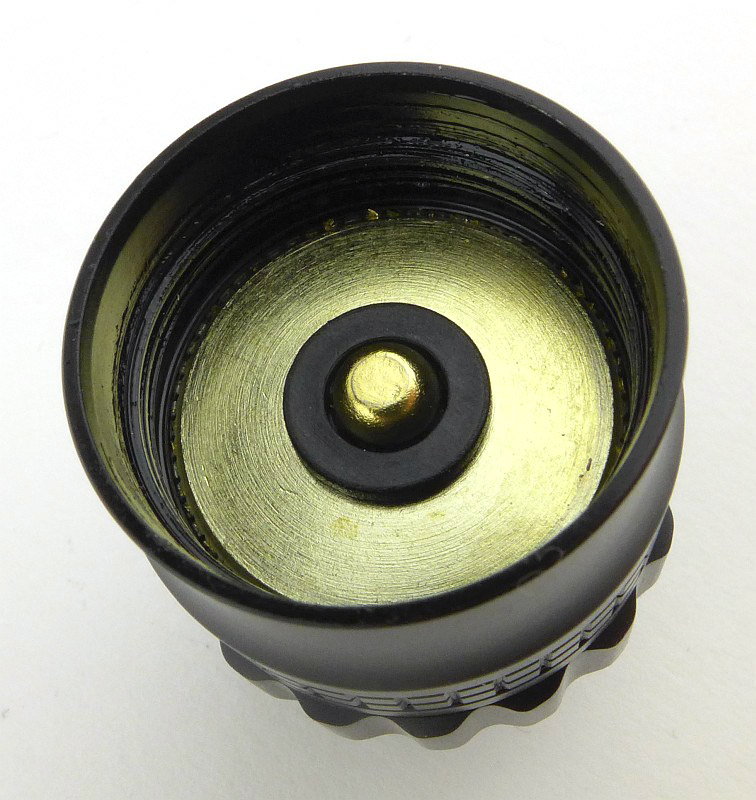
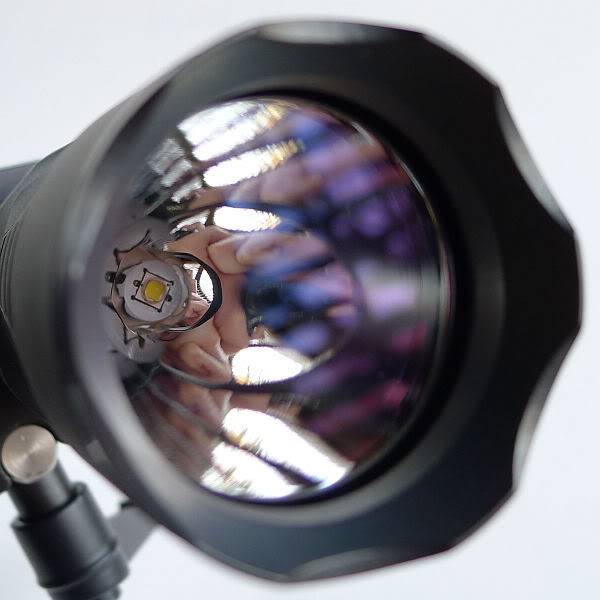
Taking a closer look and looking inside:

When taking a closer look, most aspects of the body design are identical, so will only be shown once. The LEDs and reflectors will be shown for the G2 and X models

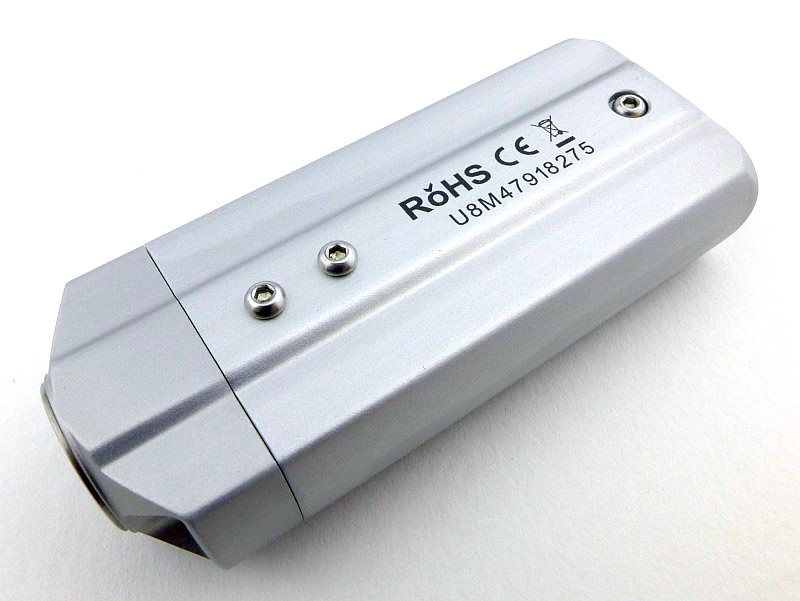
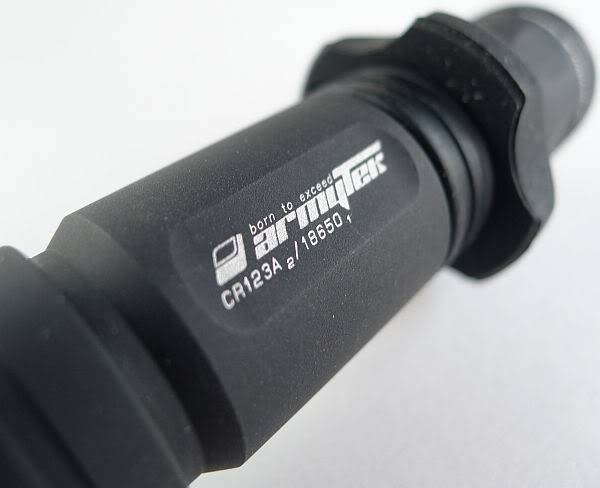
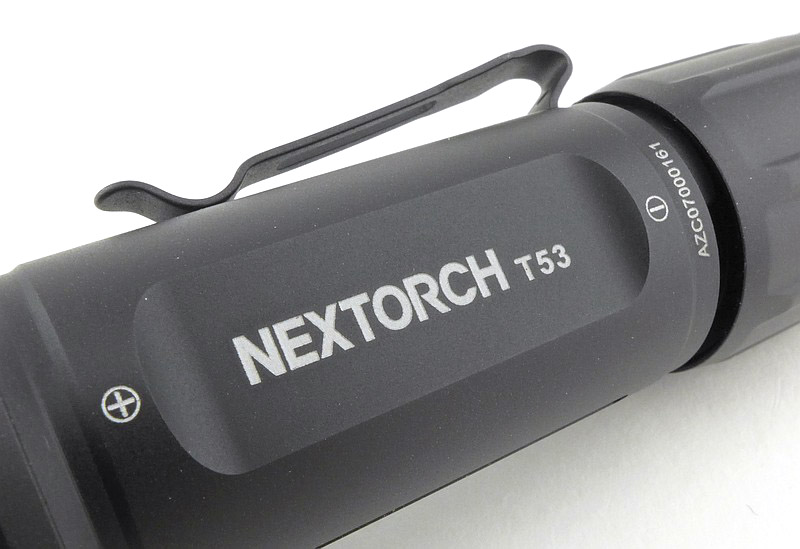
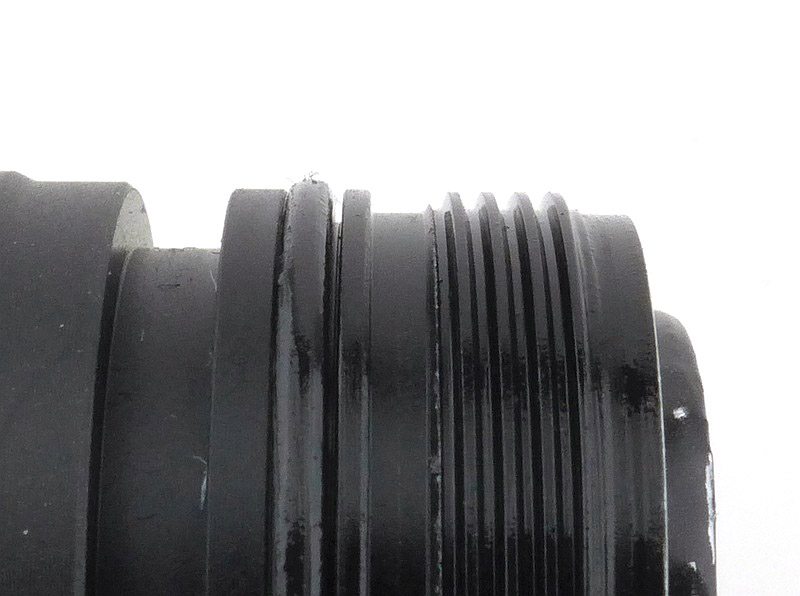
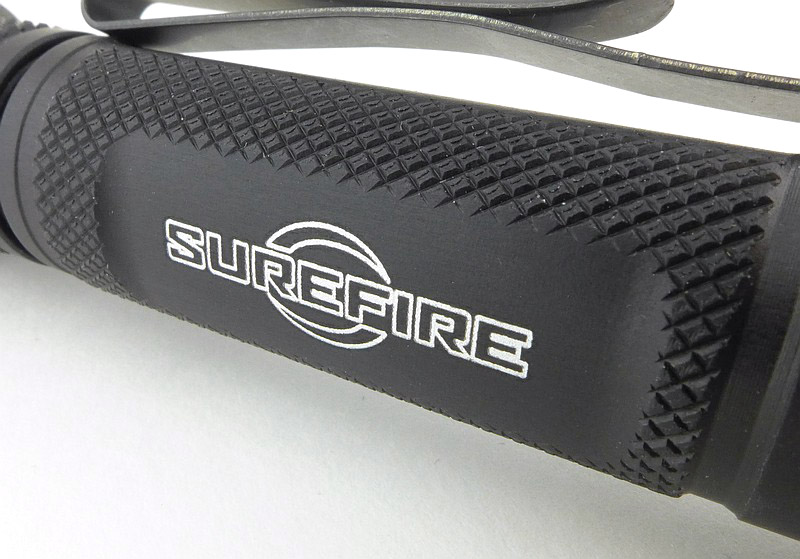
The side of the battery tube has two flat areas with the logo and model.

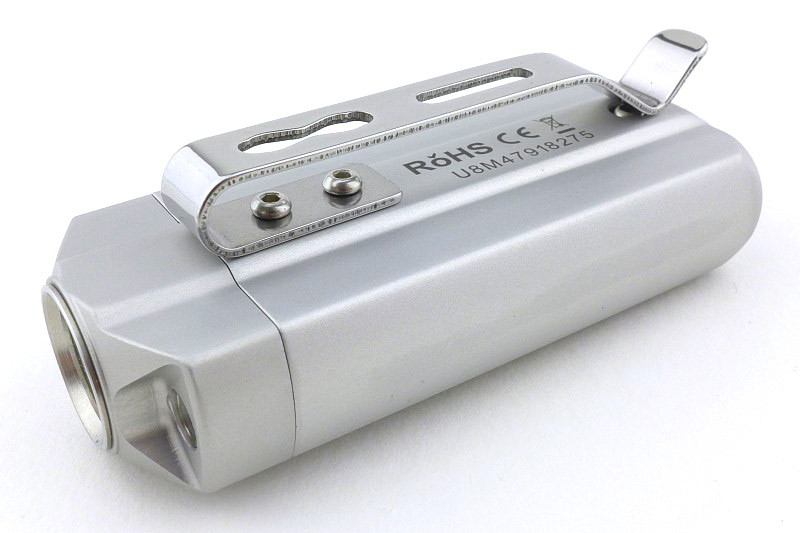
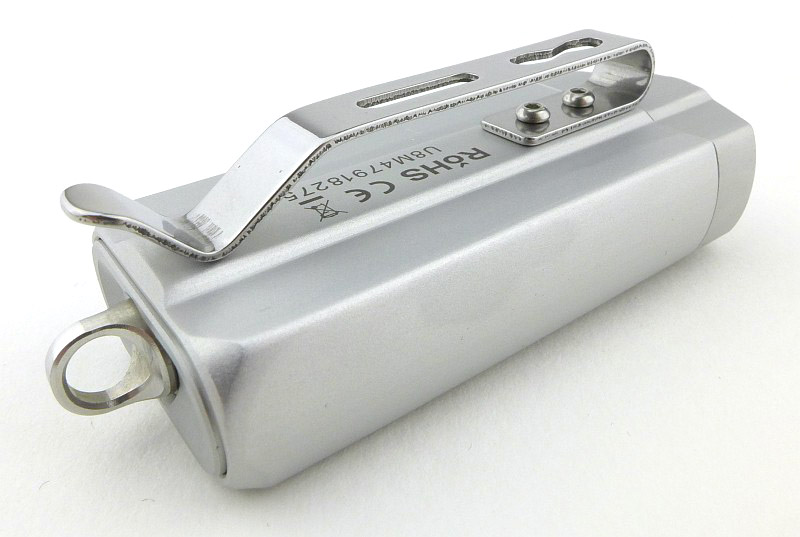
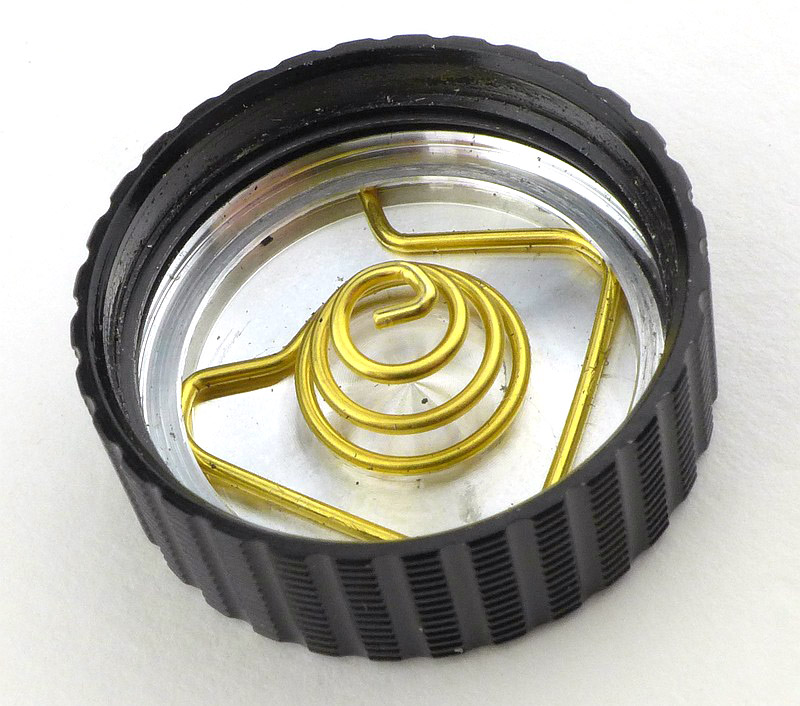
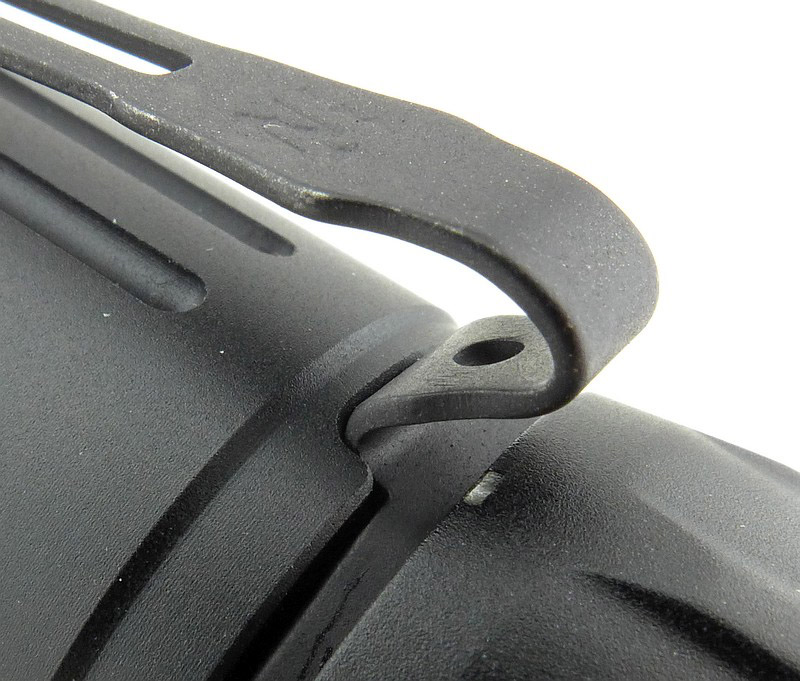
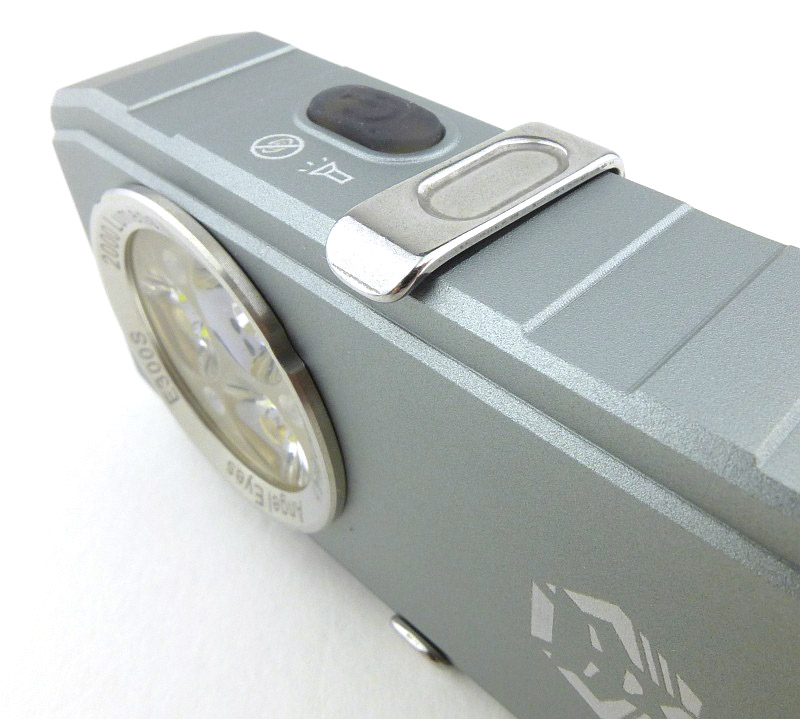
The Predator V2.0 now has a removable silicon rubber tactical grip ring which has a hole for fixing a lanyard through.

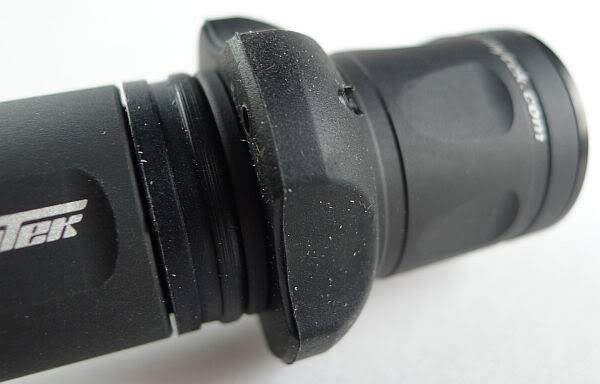
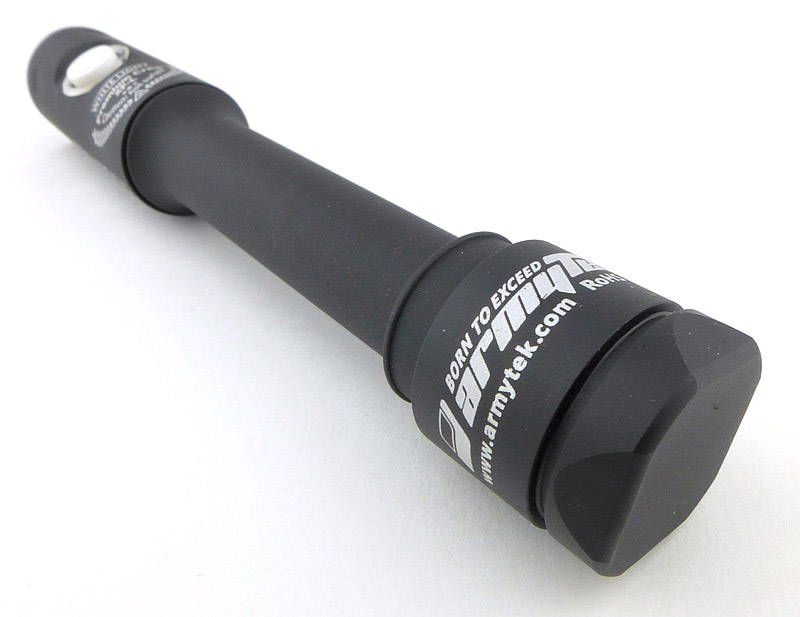
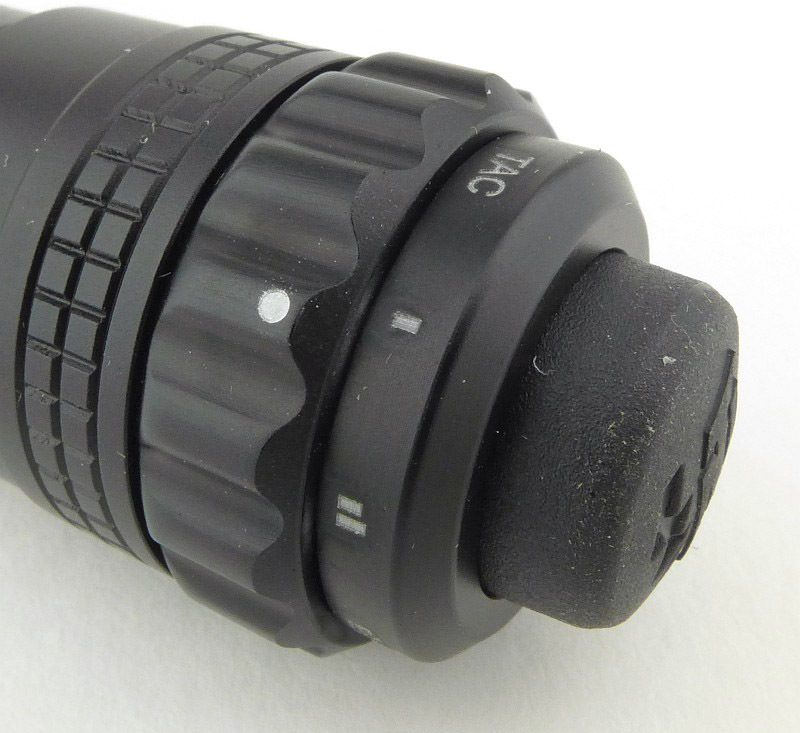
The head of the light has anti-roll flats (which combined with the grip ring keep it stable on a flat surface).

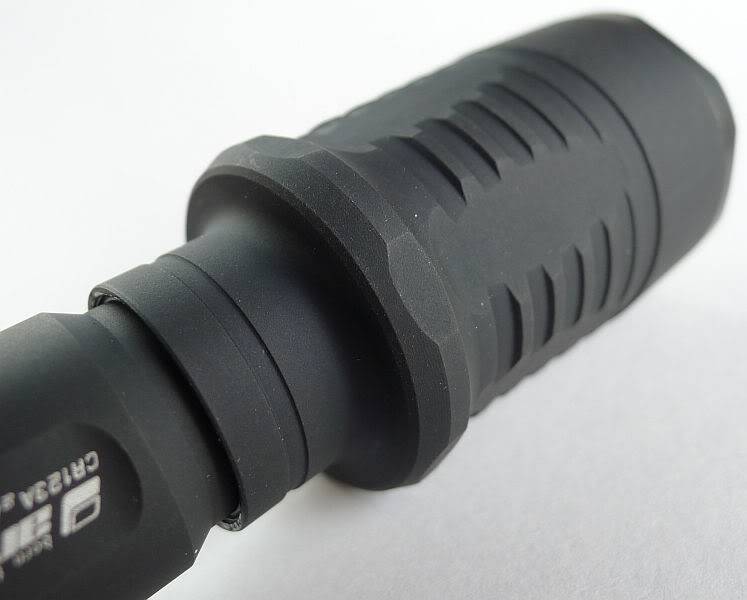
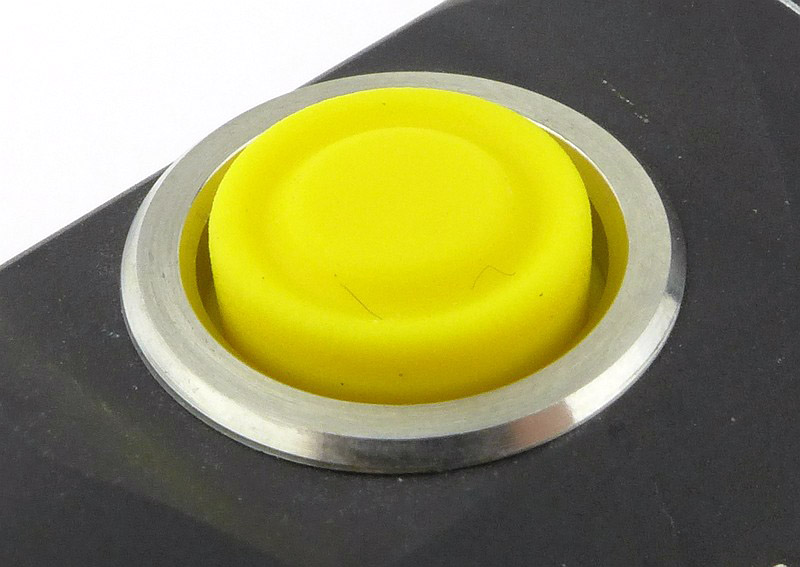
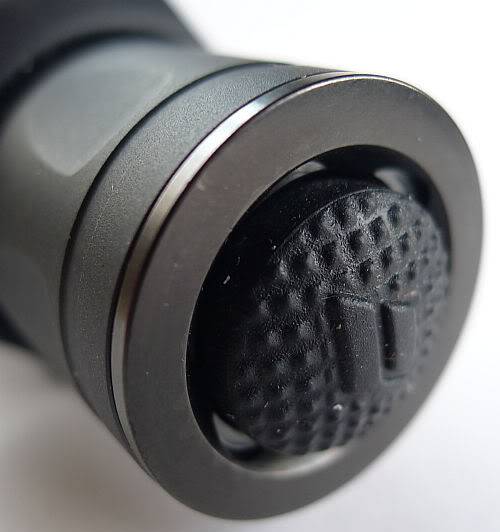
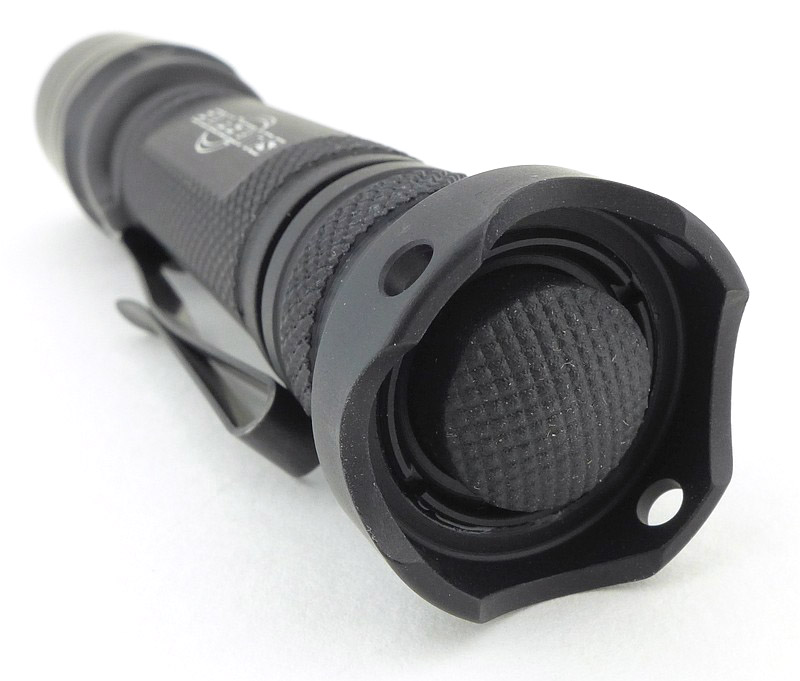
Another change from the earlier version is the tail-cap switch, which no longer sports crenulations, making the button easier to press and reducing the length of the tail-cap. The switch boot retaining ring looks like it will be a bit more challenging to remove though, now that it is smooth.

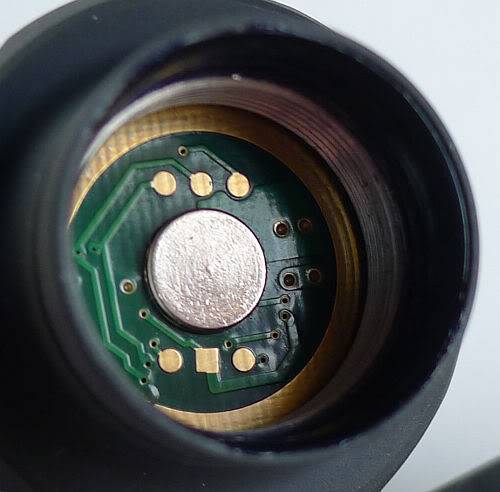
The positive contact is a raised metal pad. The battery tube ring-shaped contact is slightly raised, but has texture that makes it look like a raised part of the PCB rather than a metal contact ring, so this may not be as robust as the positive contact.

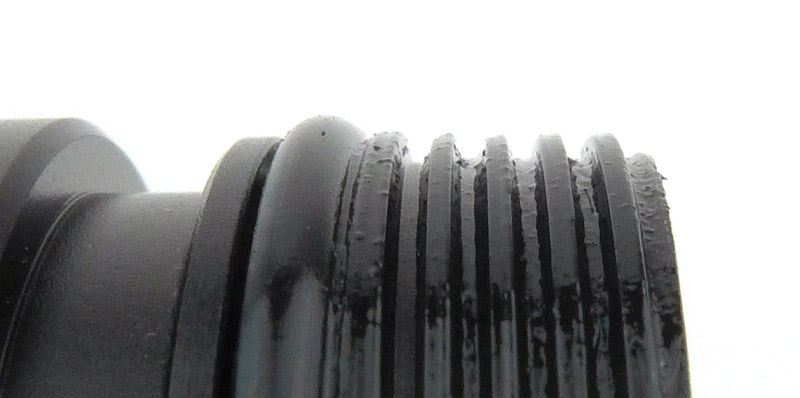
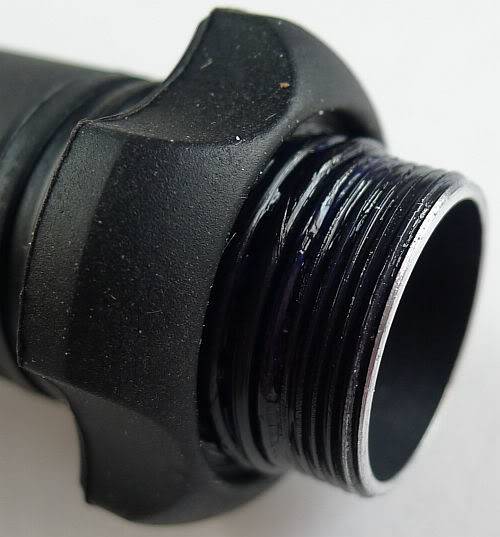
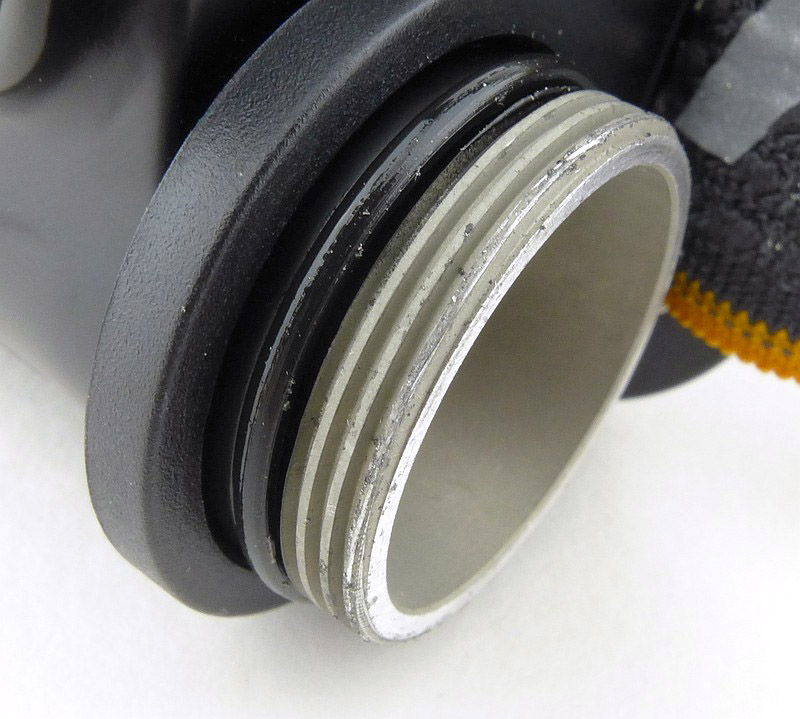
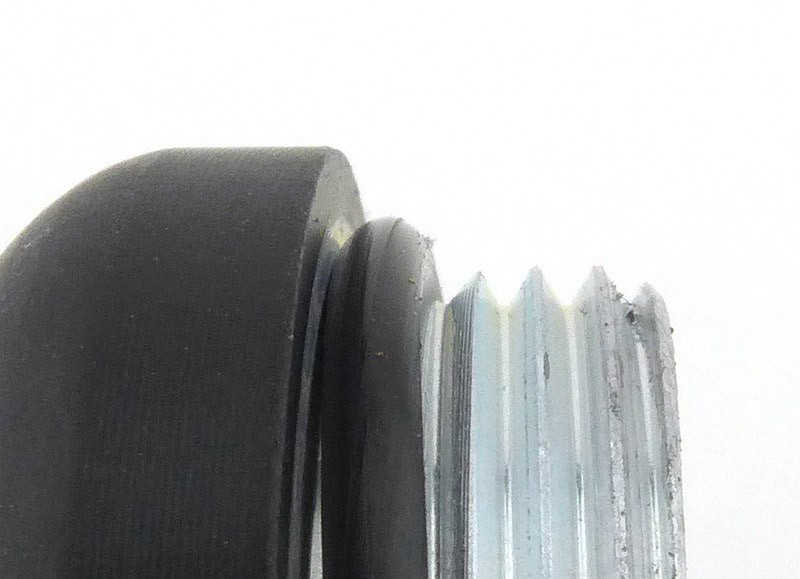
At the head end of the battery tube, the threads are bare. Two o-rings are used to seal the battery tube.

The threads are standard and cleanly cut. As supplied they are well lubricated.

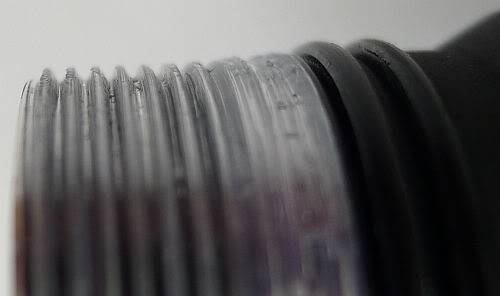
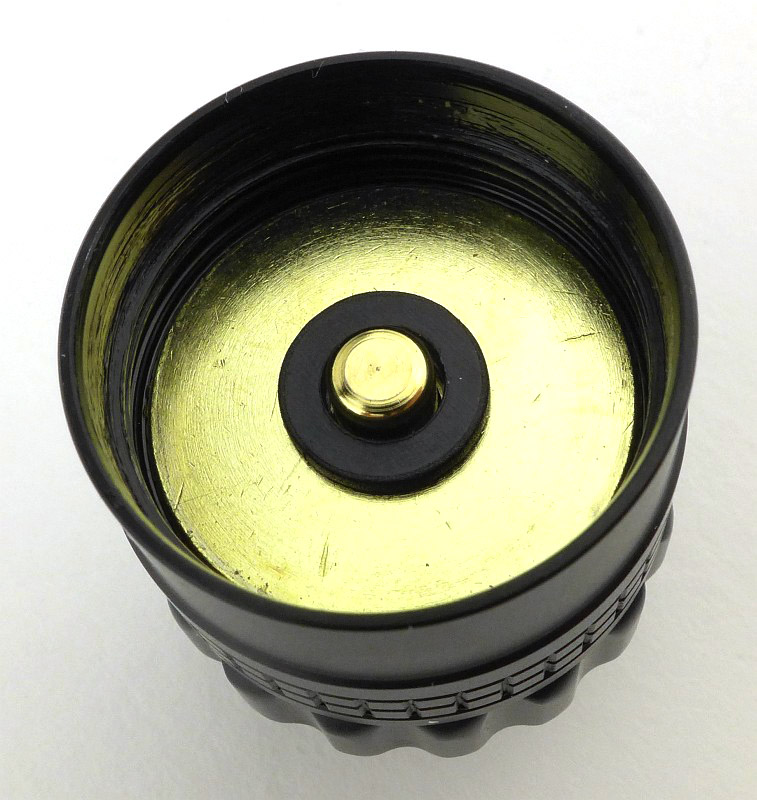
At the tail-cap end there are also two o-rings and the threads are anodised. Again as supplied they are well lubricated.

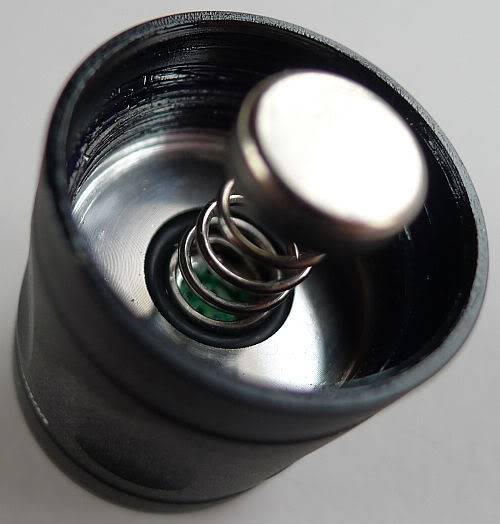
The negative terminal in the tailcap is a strong spring with a metal cap to increase surface contact area and stabilise the end of the spring.

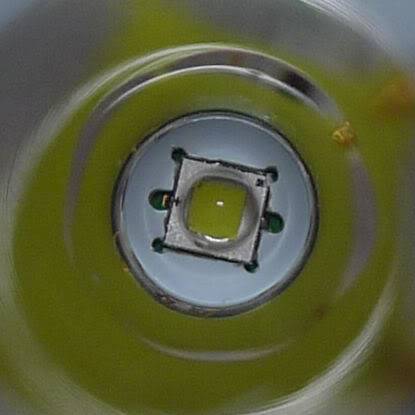
First LED is the Predator X’s XM-L U2.
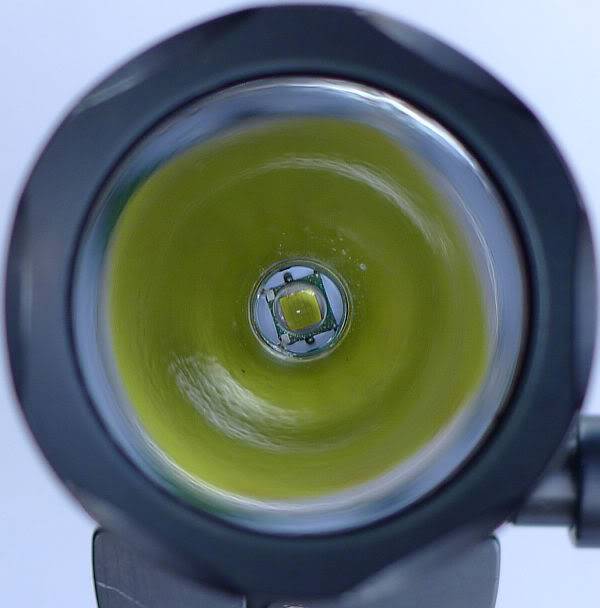
A closer look.

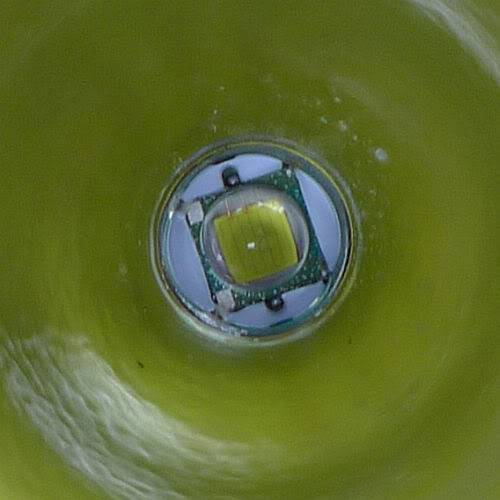
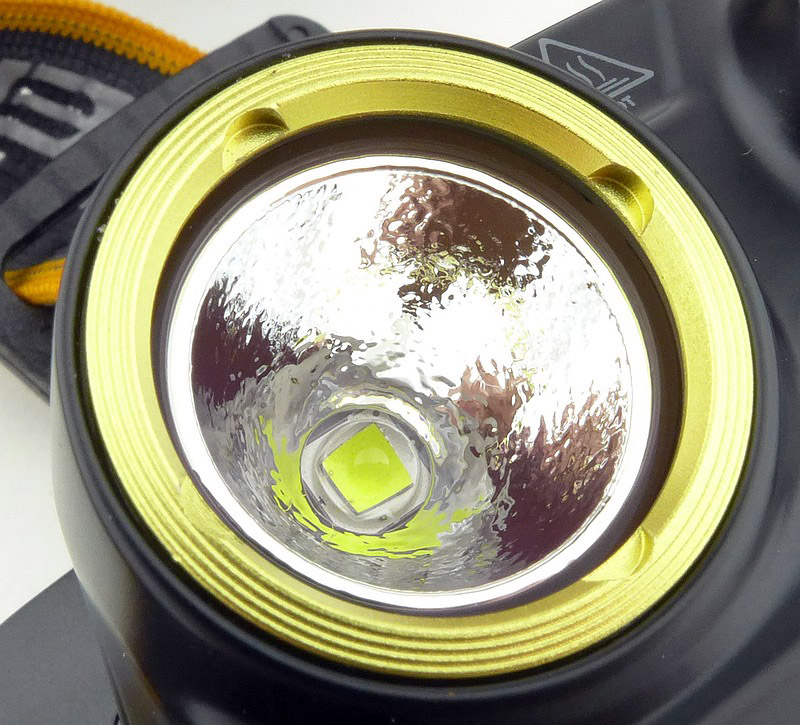
Looking into the deep well finished reflector of the Predator G2 for a first look at the XP-G2 LED

And straight into the reflector

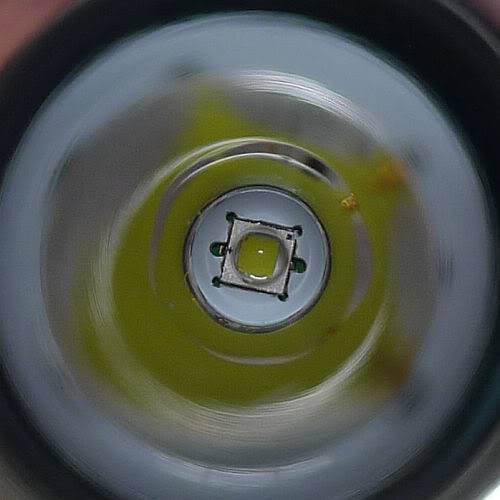
Looking a little closer the G2’s surface is more even than the XP-G with a lack of visible conductor strips.

Modes and User Interface:

The Predator’s user interface has two inputs. The first is the forward-clicky tail switch, and the second is the head being tightened or loosened.

With the head tightened you are using what ArmyTek refer to as Line 1 modes.

With the head loose, you are using the Line2 modes.

Each ‘Line’ can have multiple output modes. By default Line 1 has three constant output levels (equivalent to say Max, Medium and Low), and Line 2 has one flashing and one constant (strobe and brighter of three ‘firefly’ modes).

To change mode within the ‘Line’ you are using, either loosen then tighten (or tighten then loosen if using Line 2) quickly to move to the next output mode in that ‘Line’.

As supplied, you can just start to use the Predator like this, and you don’t HAVE to do any programming to customise it……..but you can, so why not.

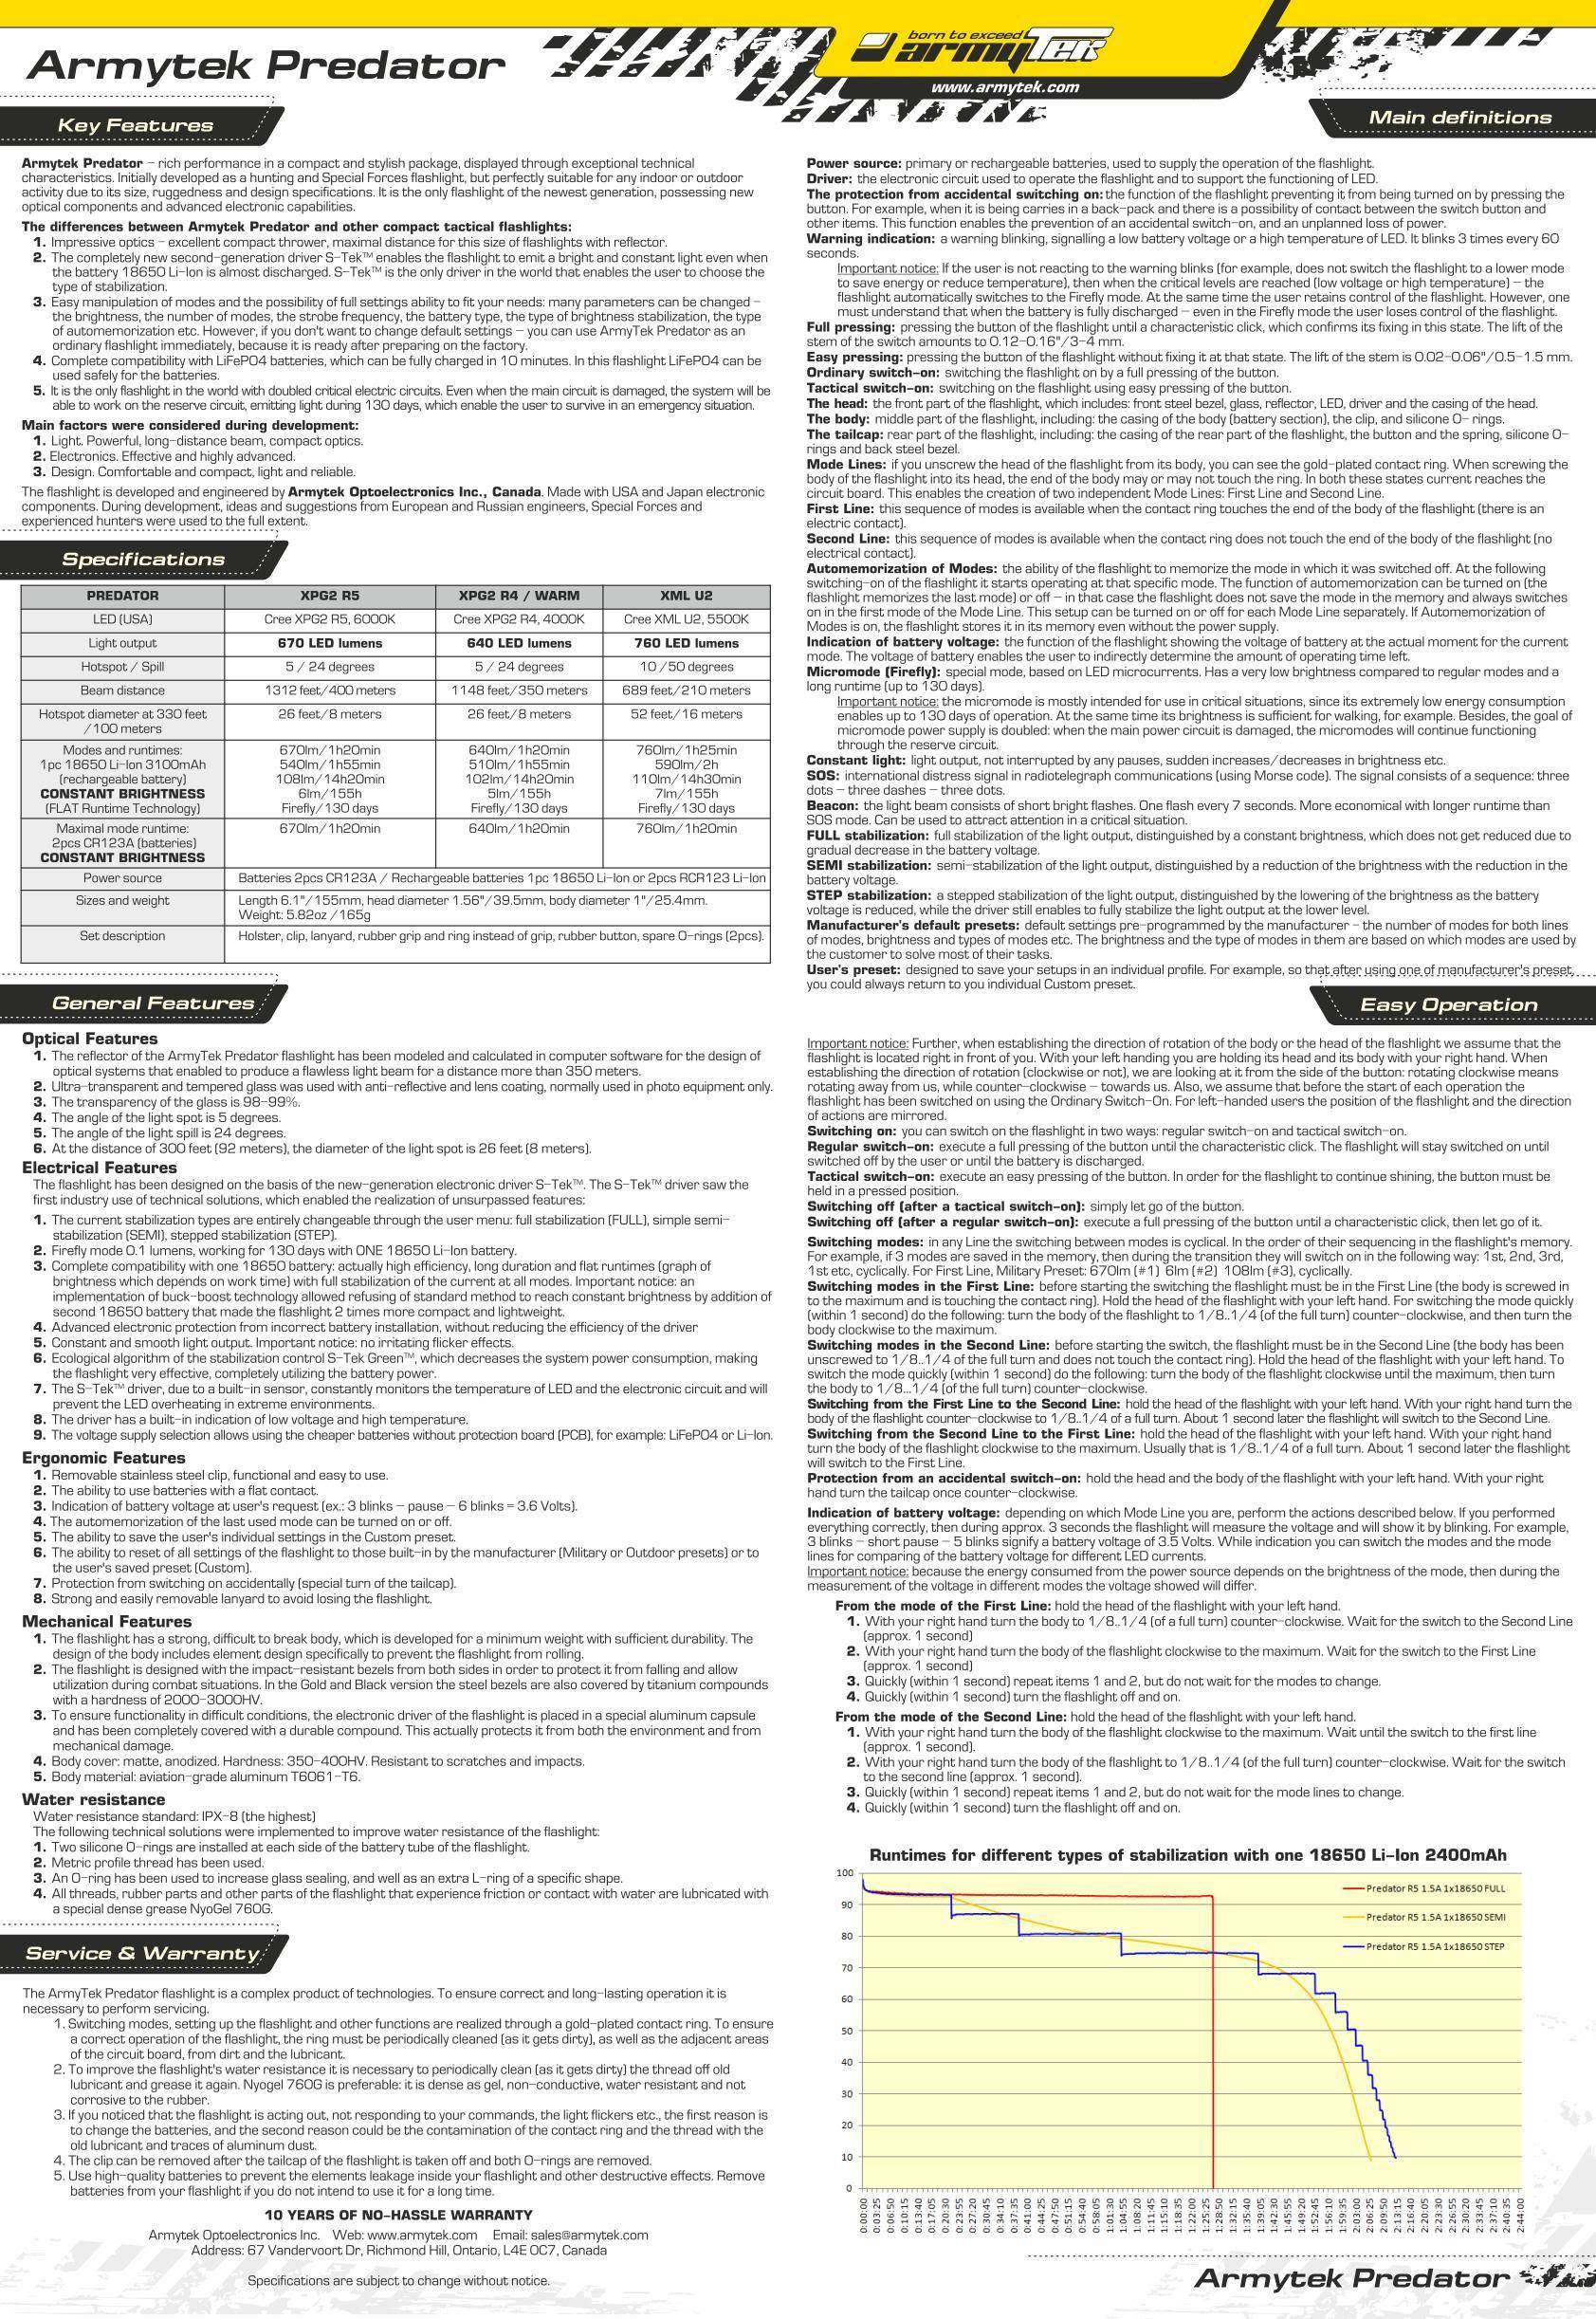
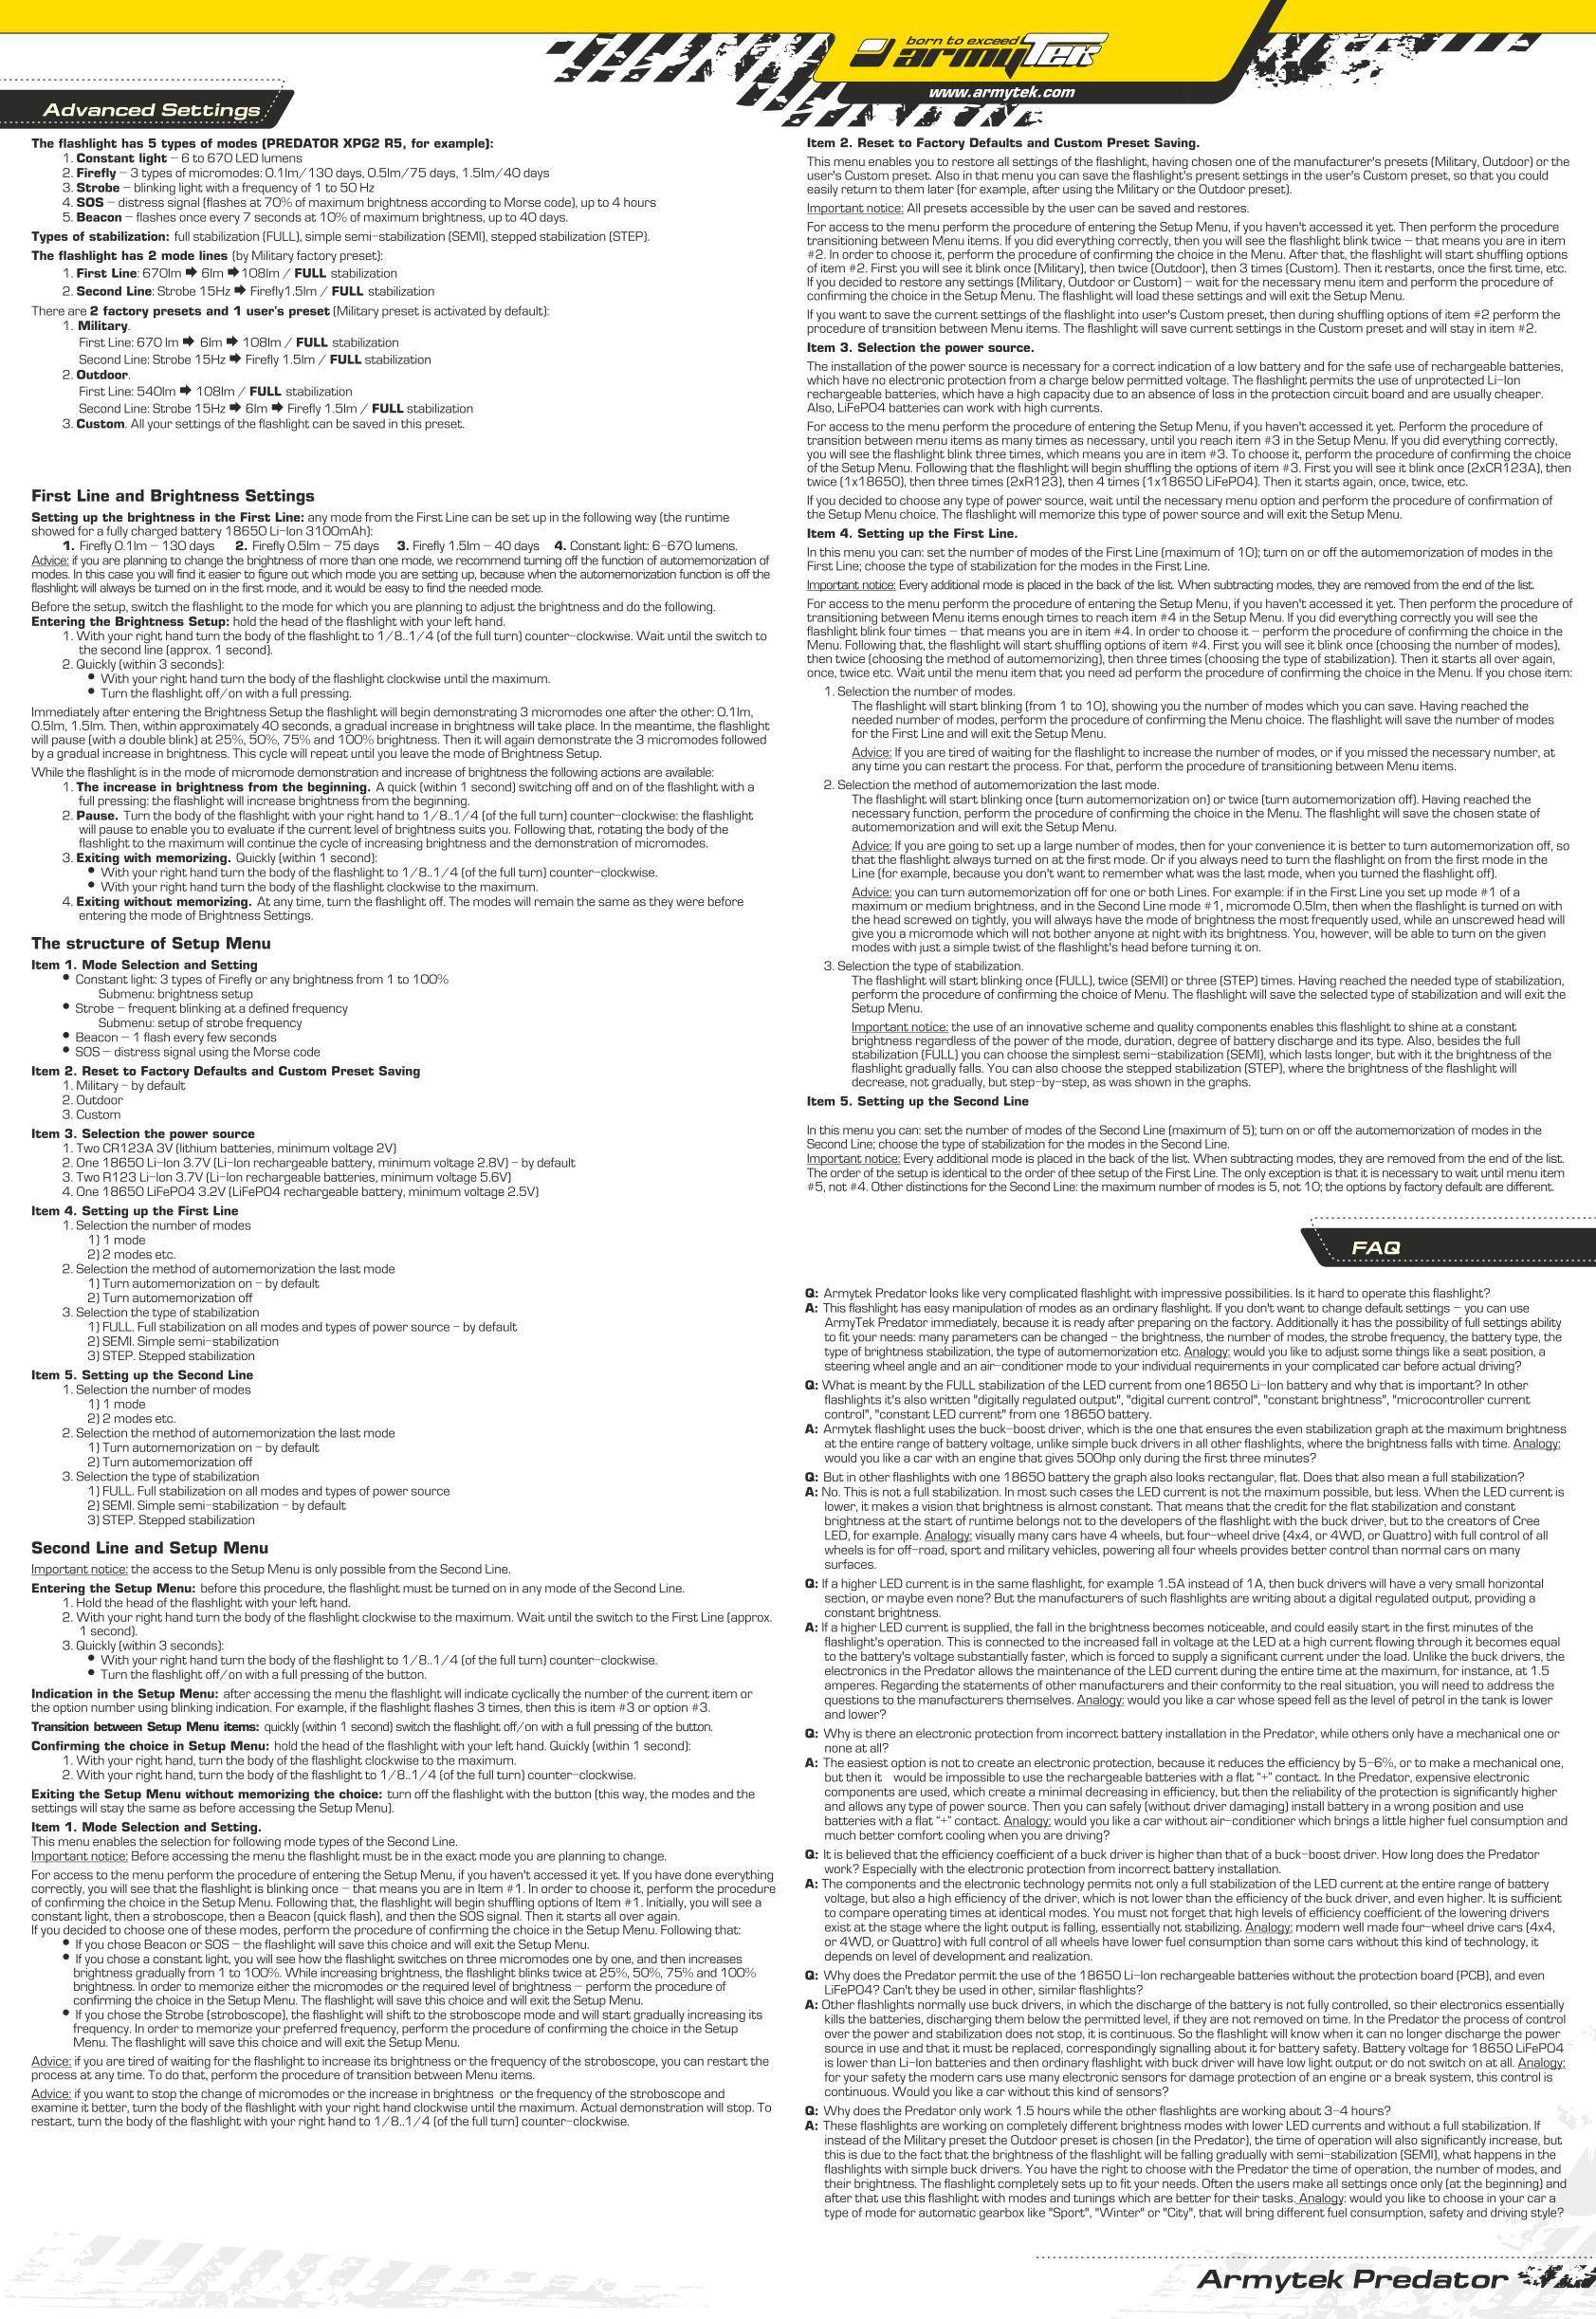
This is where the Predator really is outstanding. No other light I know of gives the user so much control. It can be quite daunting at first when you take a look at the instructions:

(click to open the full size version of each page)

You are able to set the:

Number of output levels for each ‘Line’
What each and every output level (constant and firefly, strobe, SOS or beacon) is within the ‘Line’ (Line 1 only uses constant and firefly outputs)
Line memorisation on or off
The output stabilisation for each ‘Line’ (Full, Semi or Step)
The power source type (2xCR123 or 2xRCR123 or 1x 18650 Li-ion or 1×18650 LiFePO4)
Reset to factory defaults or use custom presets.

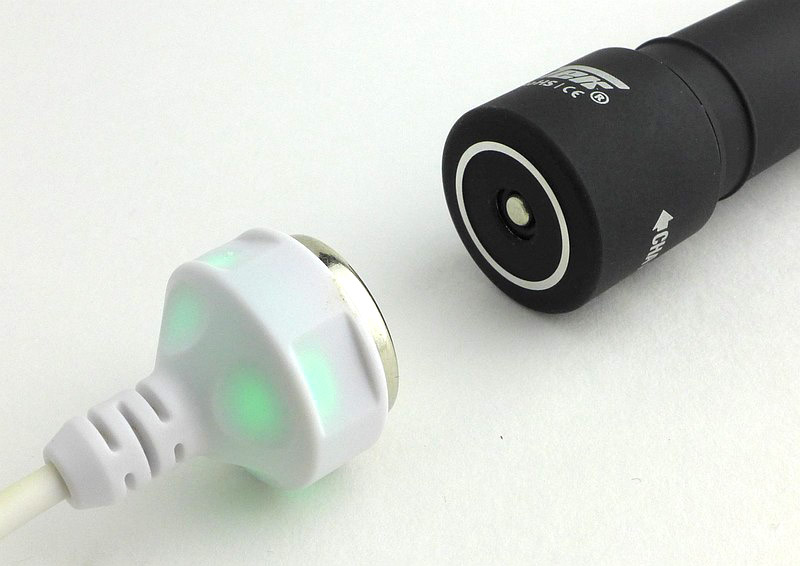
Also included is a battery voltage check feature which will indicate the battery voltage with a set of flashes.

Now that is outstanding!

Initially I found consulting the full double sided A3 sheet of instructions a bit overwhelming when trying to make a few changes, so I put together a single side of A4 as a set of condensed programming notes:

(click to open the full size version)

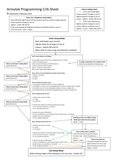
This summarises the three main tasks:

Setting up the Line 1 modes output levels.
Using the main Setup menu to configure the majority of options.
Displaying the battery voltage

You will still need to consult the ArmyTek instructions for the detail and planning what you want to set up, but hopefully this condensed guide will help you actually carry out the programming.

So with all of this choice, the biggest problem is deciding how you want to customise it.

Batteries and output:

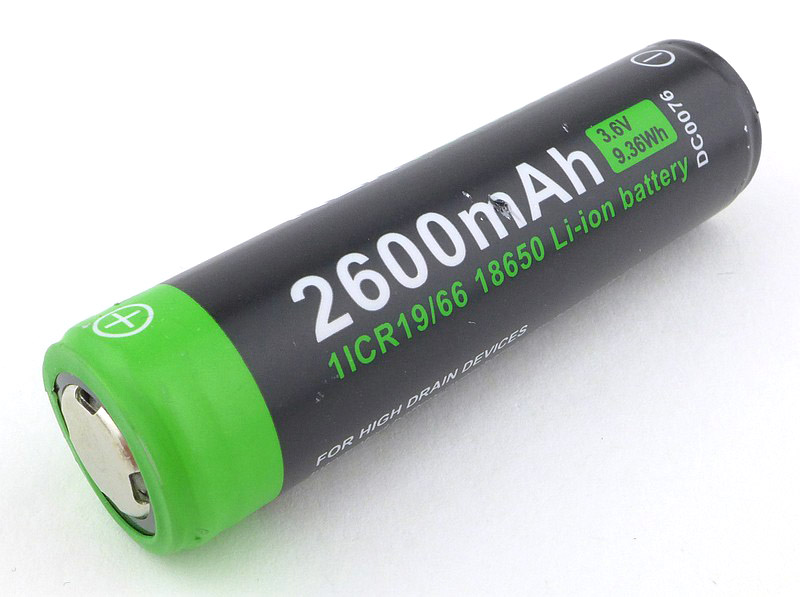
The Predator can run on2xCR123 or 2xRCR123 or 1x 18650 Li-ion or 1×18650 LiFePO4.

Although you can get away without bothering to change the power source in the menu, doing so optimises the Predator to work with the chosen power source (effectively changing the lower cut off voltage and therefore the low battery warning voltage). This allows you to safely use unprotected Li-ions as the Predator itself will prevent damage to the cell once the low voltage limit has been reached.

When set to 2xCR123 the Predator will run them down to 2V allowing you to get the most out of them.

Due to the terminal design, the Predator can use button or flat top cells. However I did come across one issue when trying to use AW’s 3100mAh cells.

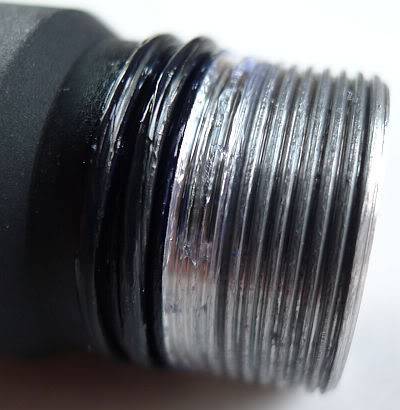
AW’s 3100mAh cells have three raised dots on the negative terminal. When screwing the tail-cap on, the metal cap on the Predator’s negative terminal spring, catches on these dots and gets dragged sideways. As you can see here, the battery terminal has a groove scored into it when this happened.

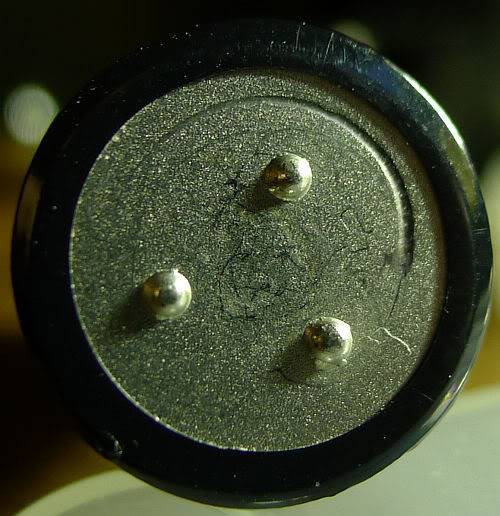
Inside the tail-cap there is similar damage where the negative terminal cap dug in. When this happened the tail-cap switch was bypassed and the light came on without the switch being pressed.

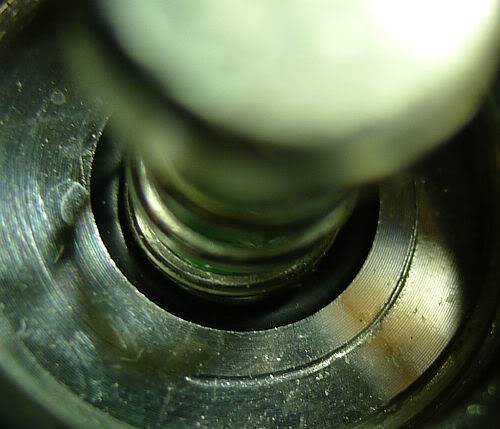
This only happened due to the raised dots. The AWs are the only cells I have with this design feature, but unfortunately it means you cannot use them with the Predator.

Due to this, all testing was carried out with Fenix ARB-L2 18650 cells and CR123 primary cells.

To measure actual output, I built an integrating sphere. See here for more detail. The sensor registers visible light only (so Infra-Red and Ultra-Violet will not be measured).

Please note, all quoted lumen figures are from a DIY integrating sphere, and according to ANSI standards. Although every effort is made to give as accurate a result as possible, they should be taken as an estimate only. The results can be used to compare outputs in this review and others I have published.

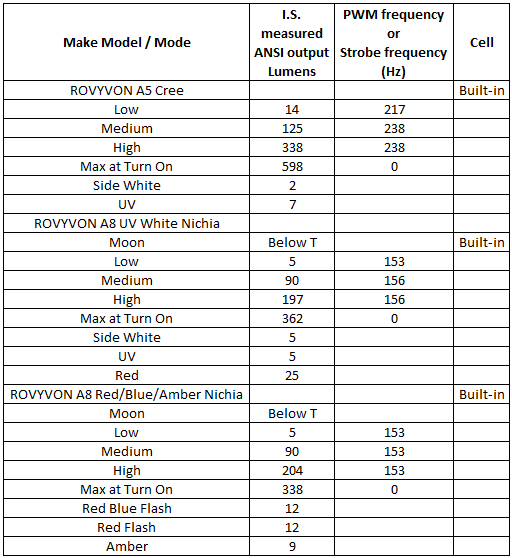
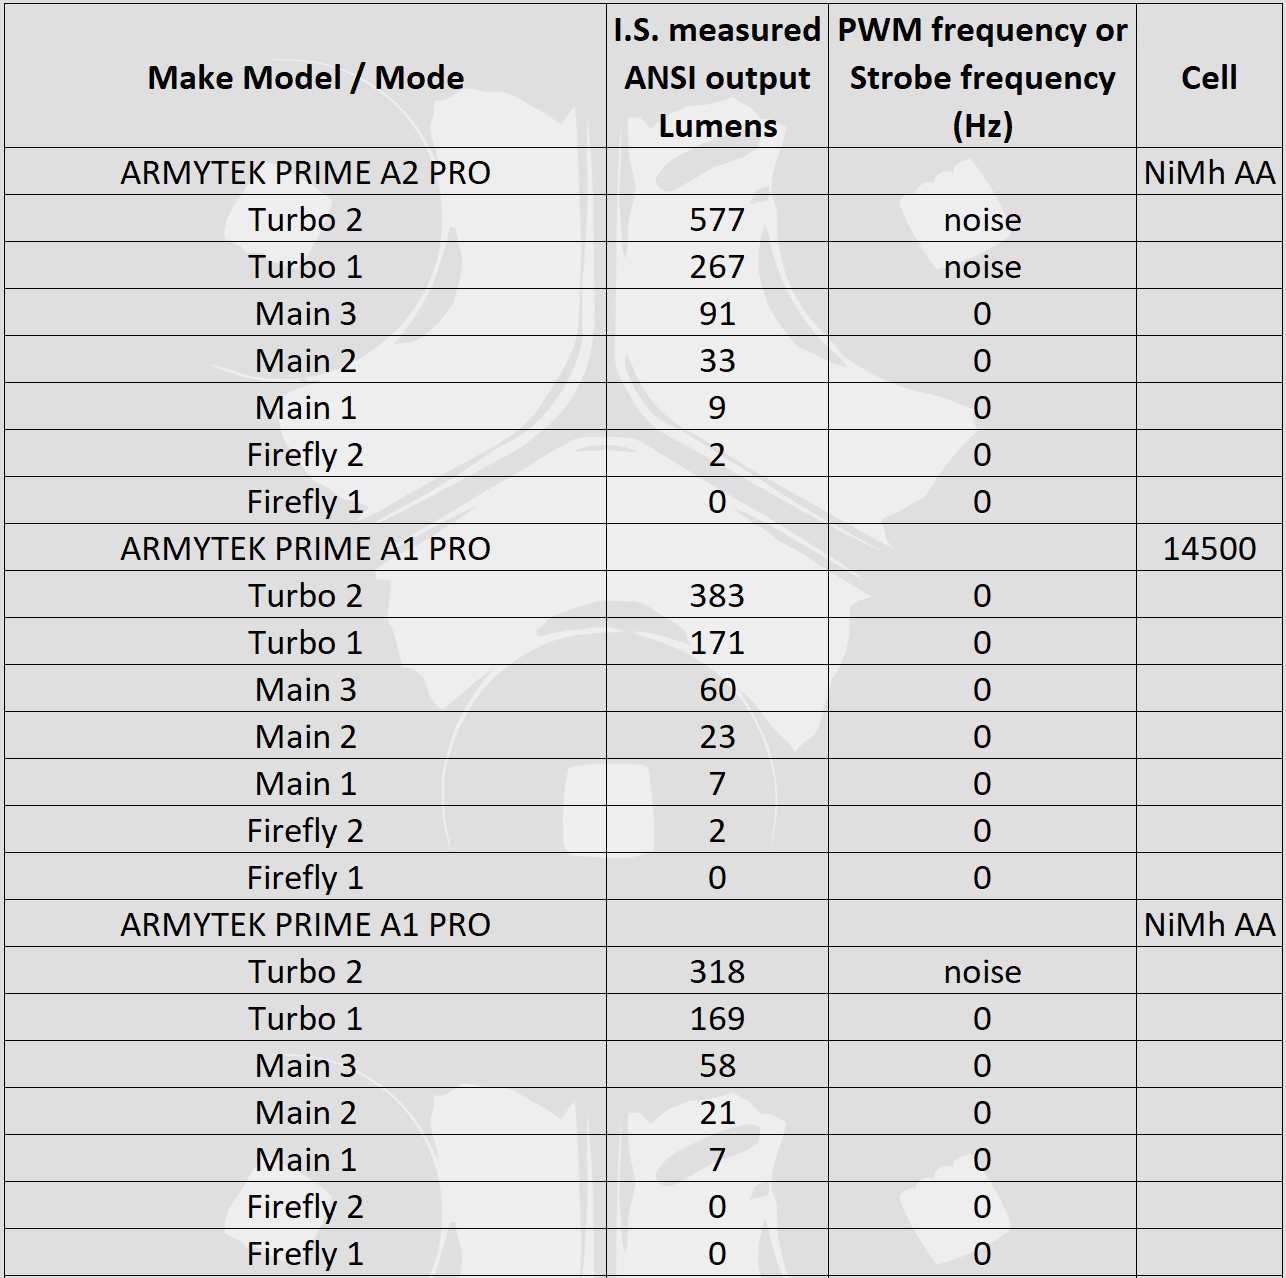
Predator G2 using ARB-L2 I.S. measured ANSI output Lumens PWM frequency (Hz)
Military (default) High 497 0
Military (default) Medium 84 0
Military (default) Low 5 0

(High on CR123 was 487lm)

All output modes are free of any sign of PWM.

Predator X using ARB-L2 I.S. measured ANSI output Lumens PWM frequency (Hz)
Military (default) High 593 0
Military (default) Medium 84 0
Military (default) Low 3 0

(High on CR123 was 586lm)

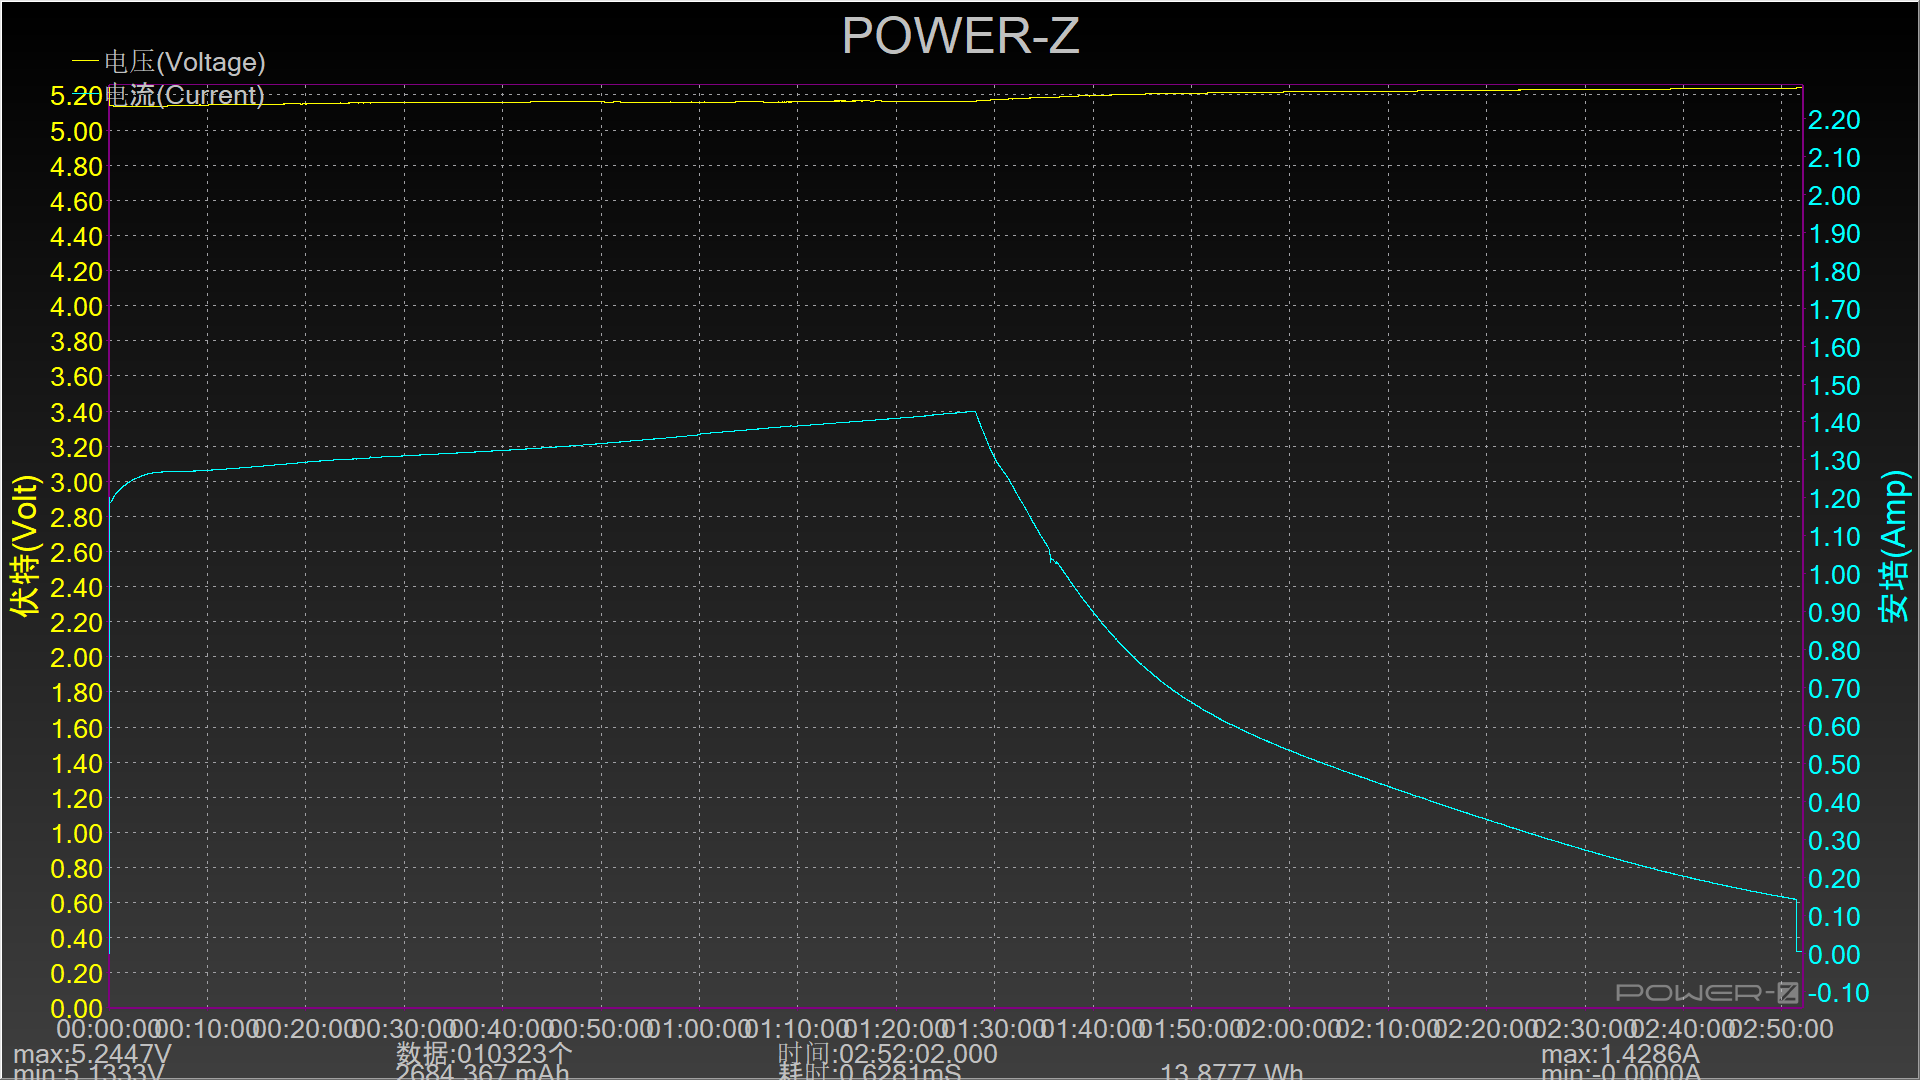
As mentioned previously the Predator uses three different types of output stabilisation (see the instructions for more details), including FULL stabilisation which maintains the specified output level without dropping at all until the battery can no longer maintain that output.

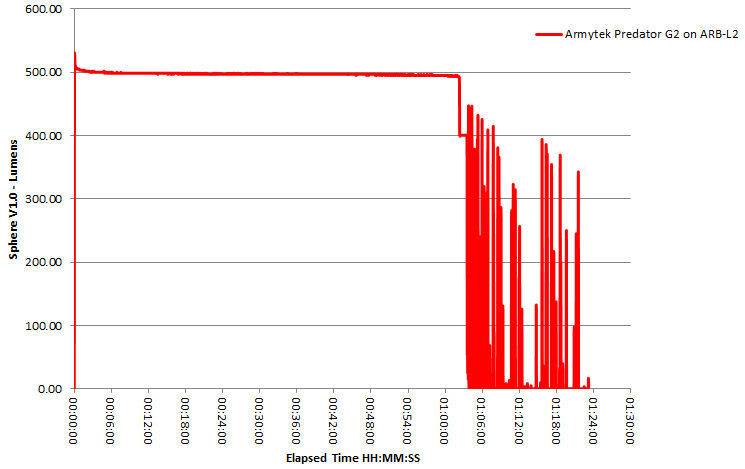
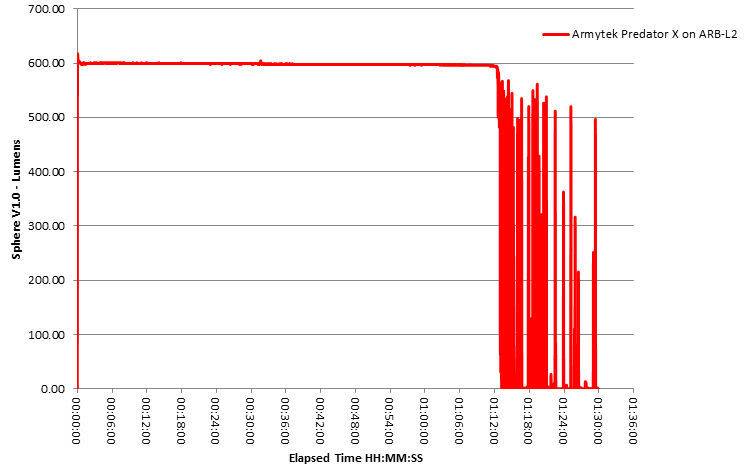
The default configuration is for the Line 1 modes to be run as FULL stabilisation, so this is how I tested the maximum output runtime test.

First up is the G2. At the end of the runtime, the trace becomes noisy – at this point the Predator started to flash to indicate the battery was low. The low battery flash continued for over half an hour giving you light you could find your way about with. Switching off and on in Line 1 resulted in no output. Changing to Line 2 while off did allow further use on firefly modes.

Next is the Predator X. Again at the end of the runtime, the trace becomes noisy – at this point the Predator started to flash to indicate the battery was low. The low battery flash continued for over half an hour giving you light you could find your way about with. Switching off and on in Line 1 resulted in no output. Changing to Line 2 while off did allow further use on firefly modes.

Another aspect of the Predator’s output that must not be looked over are the excellent ‘firefly’ modes. At a specified 0.1lm, 0.5lm and 1.5lm these are too low for my integrating sphere to measure. Bearing in mind that ArmyTek have specified their outputs as at the LED, the real output of these firefly modes is probably even less.

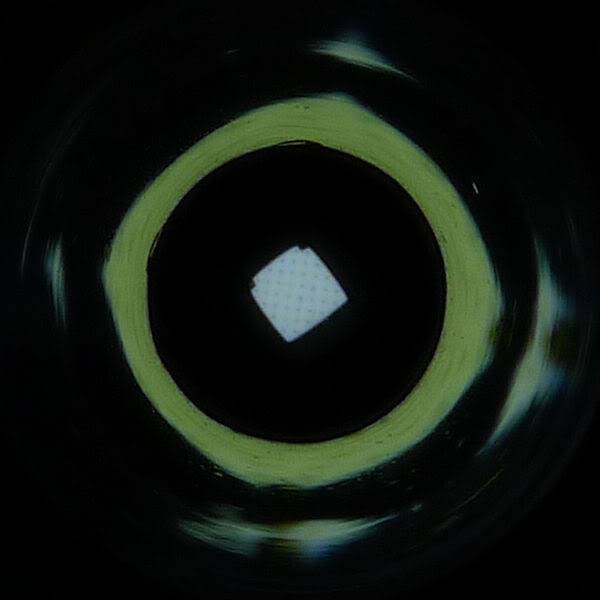
On the lowest mode, looking straight into the G2 shows the emitter’s surface structure.

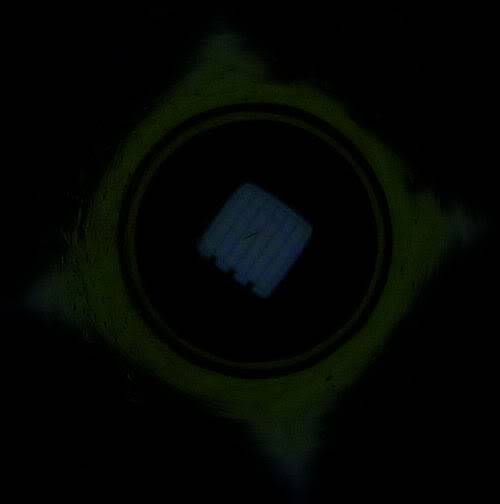
The Predator X goes even lower

As I can’t measure these low outputs, here are the two Predators next to two other well known low output lights.

Far left is the Quark AA on moon mode, then the Predator G2, Predator X and the Photon Freedom Micro all on their lowest modes.

Interestingly the Predator X’s lowest output appears to be about half that of the G2 version. Both are significantly lower than the Quark Moon mode and the Predator X is not far off the Photon Freedom Micro which is one of the lowest outputs out there (but the Photon achieves this with a terrible PWM whereas the Predator’s output has no PWM).

In The Lab

NEW for Winter 2012 ANSI standards include maximum beam range. This is the distance at which the intensity of light from an emitter falls to 0.25lux (roughly the same as the lux from a full moon). This standard refers only to the peak beam range (a one dimensional quantity), so I am expanding on this and applying the same methodology across the entire width of the beam. From this data it is possible to plot a two-dimensional ‘beam range profile’ diagram which represents the shape of the illuminated area.

In order to accurately capture this information a test rig was constructed which allows a lux meter to be positioned 1m from the lens and a series of readings to be taken at various angles out from the centre line of the beam. As the rig defines a quadrant of a circle with a radius of 1m, all the readings are taken 1m from the lens, so measuring the true spherical light intensity. The rig was designed to minimise its influence on the readings with baffles added to shield the lux meter from possible reflections off the support members.

The distance of 1m was chosen as at this distance 1lux = 1 candela and the maximum beam range is then calculated as the SQRT(Candela/0.25) for each angle of emission.

In this plot, the calculated ANSI beam ranges are plotted as if viewed from above (for some lights there may also be a side view produced) using a CAD package to give the precise ‘shape’ of the beam.

Starting with the 5m range grid, the G2’s beam profile.

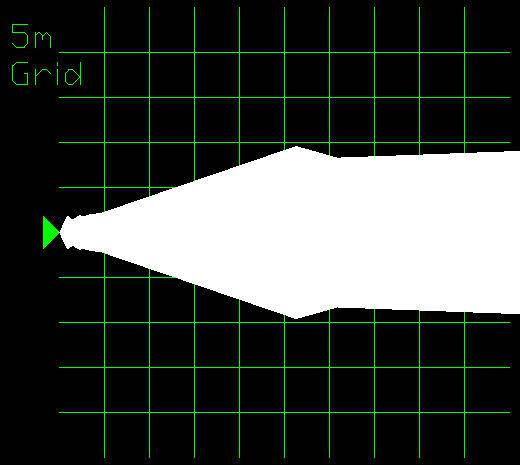
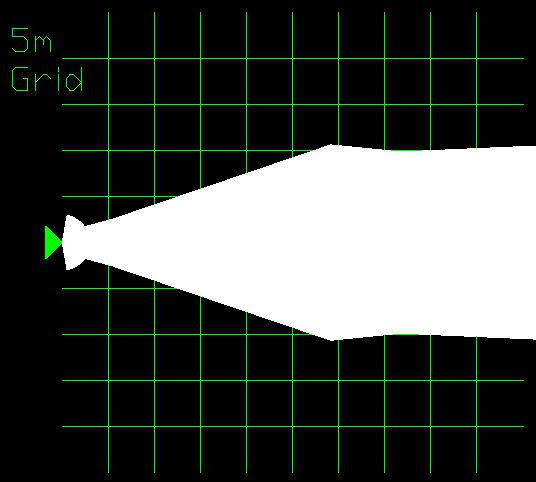
And the Predator X’s on the 5m range grid. Although the spill of the G2 is specified as 5º hotspot and 24º spill and the Predator X with 8º hotspot and 55º spill, although the Predator X does have a stronger spill, the difference is not as obvious as it is in the beamshots.

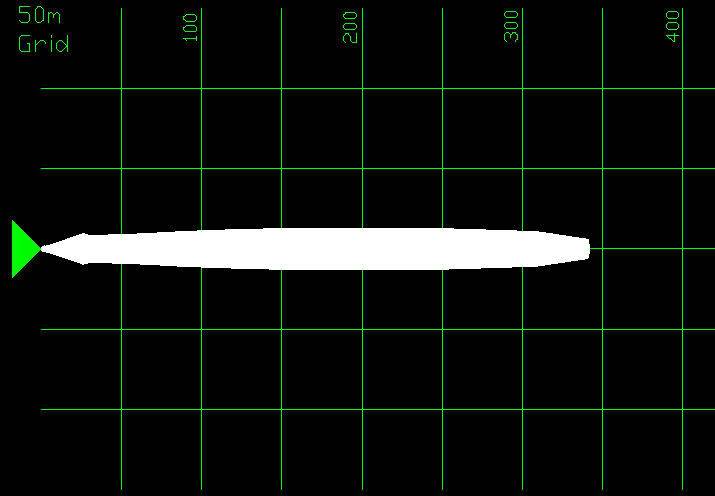
However zooming out to the 50m grid shows a bigger difference with the G2 being a strong thrower.

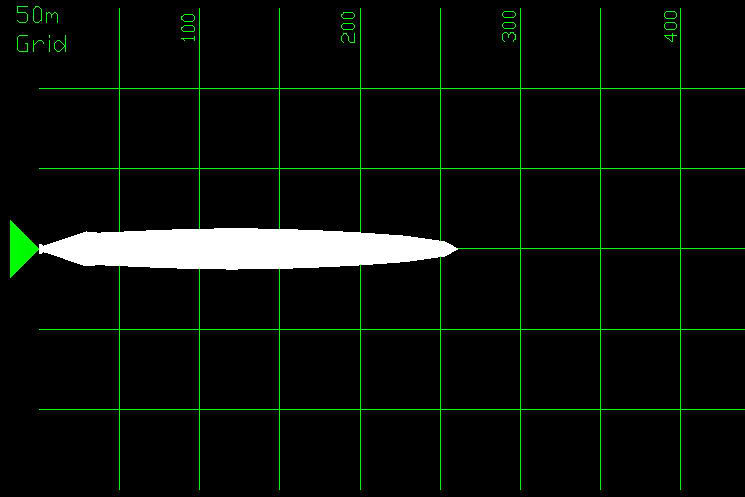
And the Predator X having a generally wider beam up to 150m (with the broader spill using up the extra output of the Predator X).
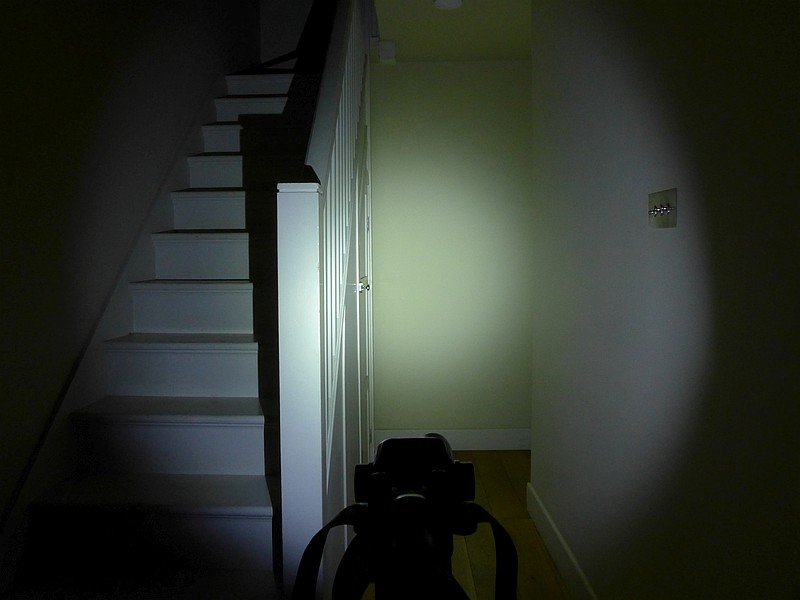
The beam

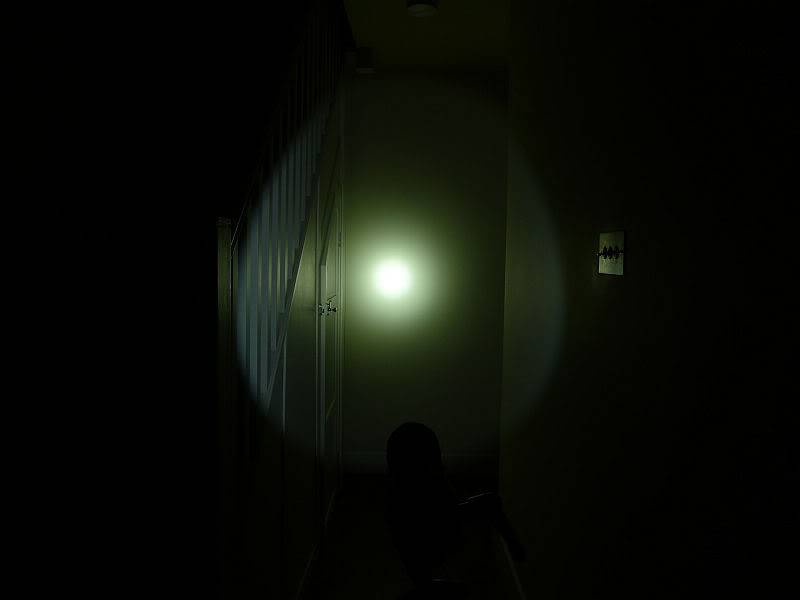
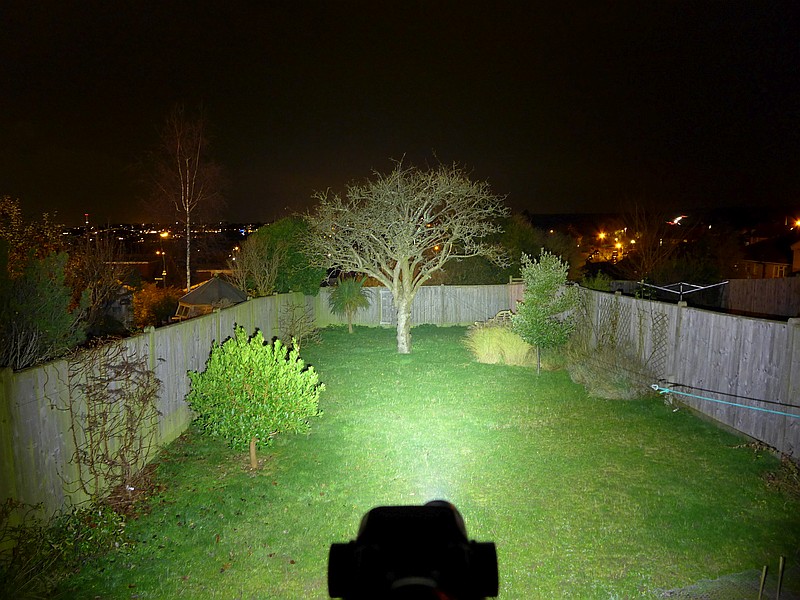
The G2 version’s beam is very smooth with a very even and round hotspot

Underexposing the beam shot shows the very bright and round small hotspot

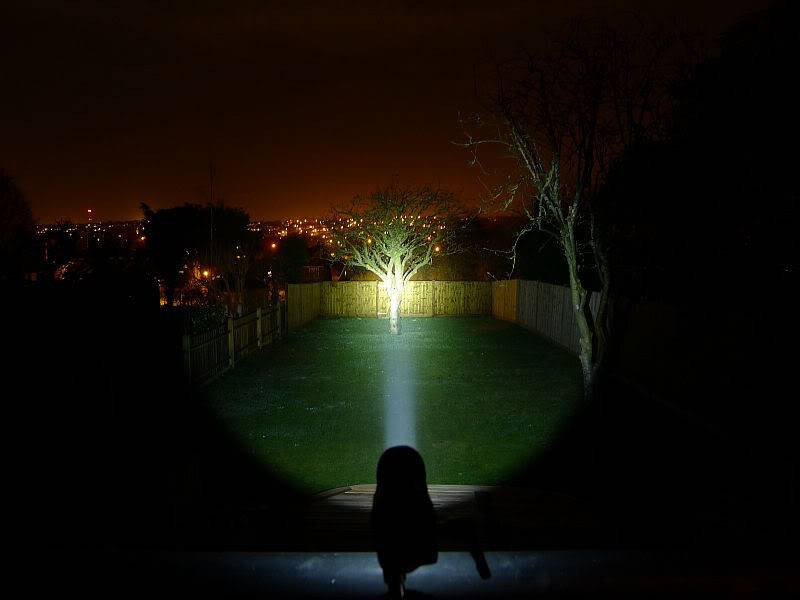
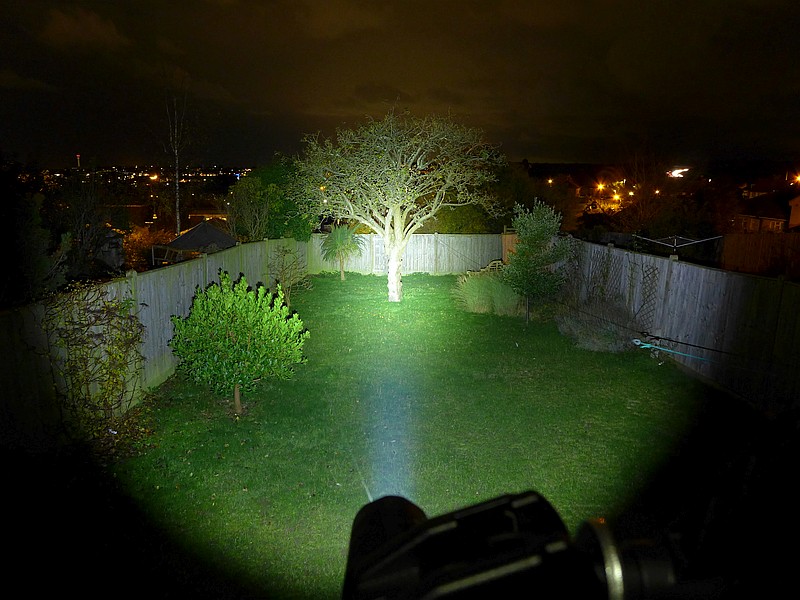
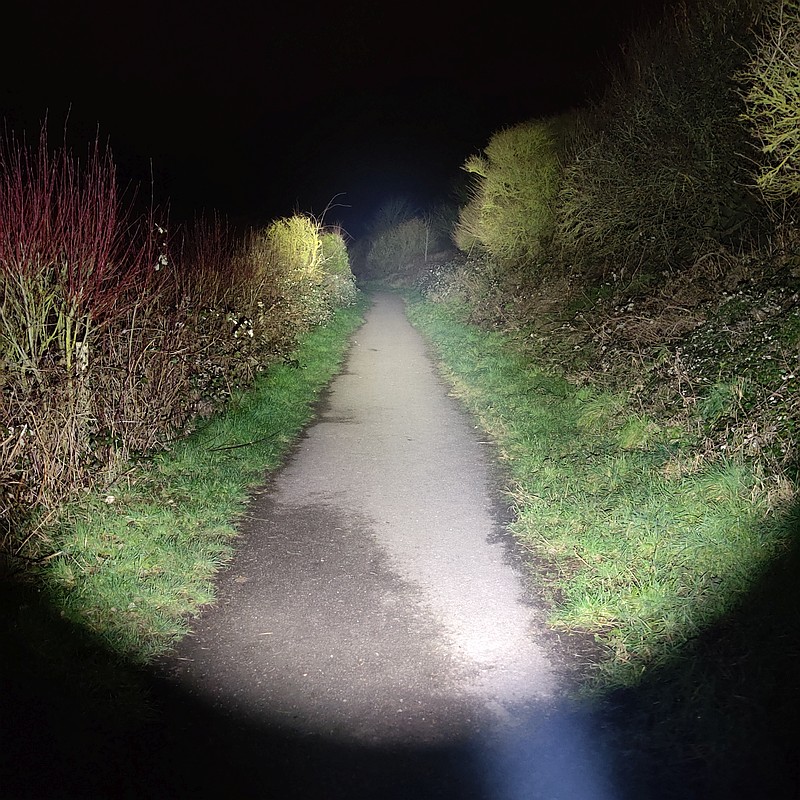
The outdoor beam shot confirms how good the throw of the Predator G2 is.

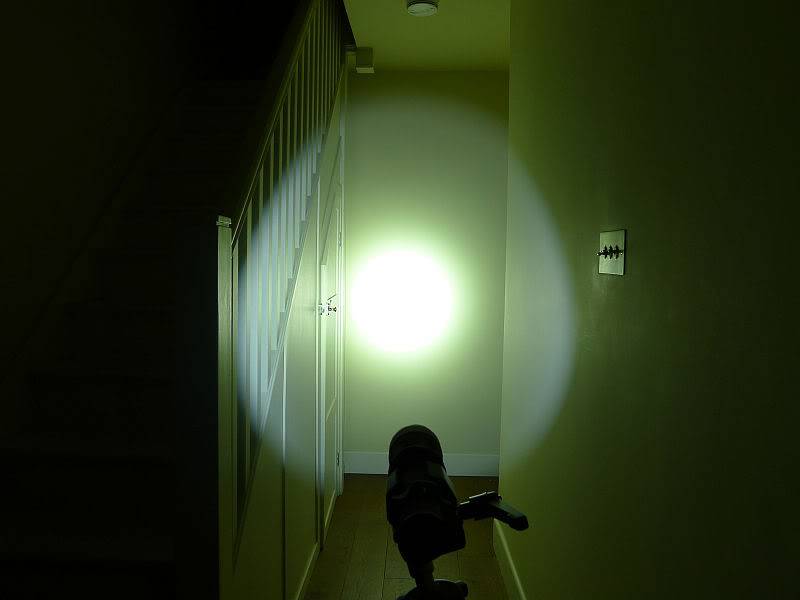
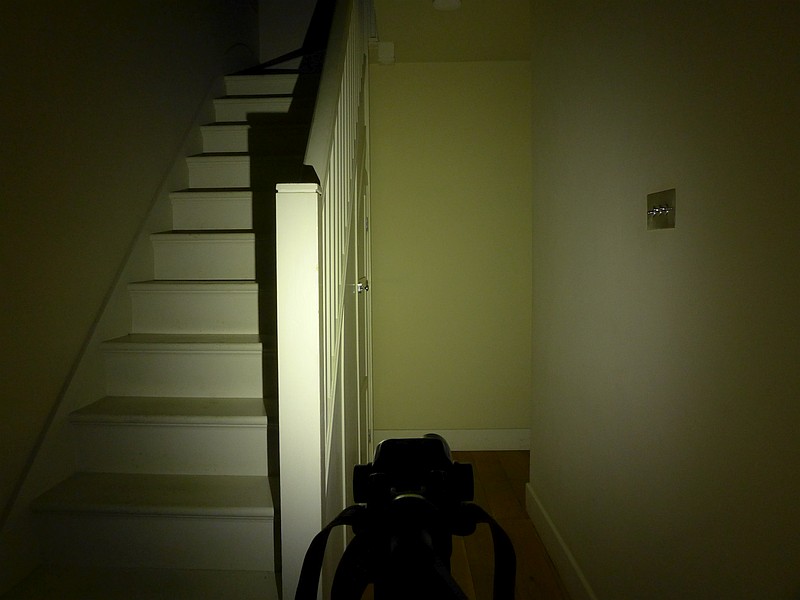
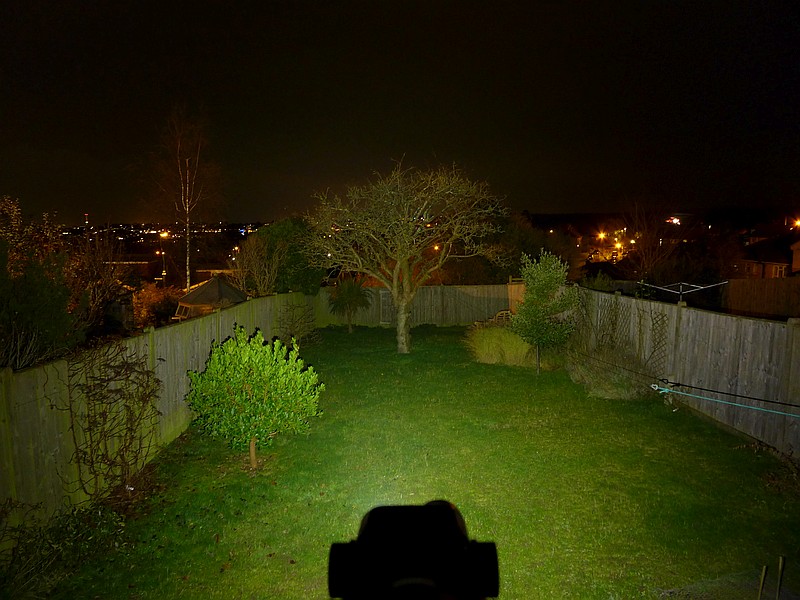
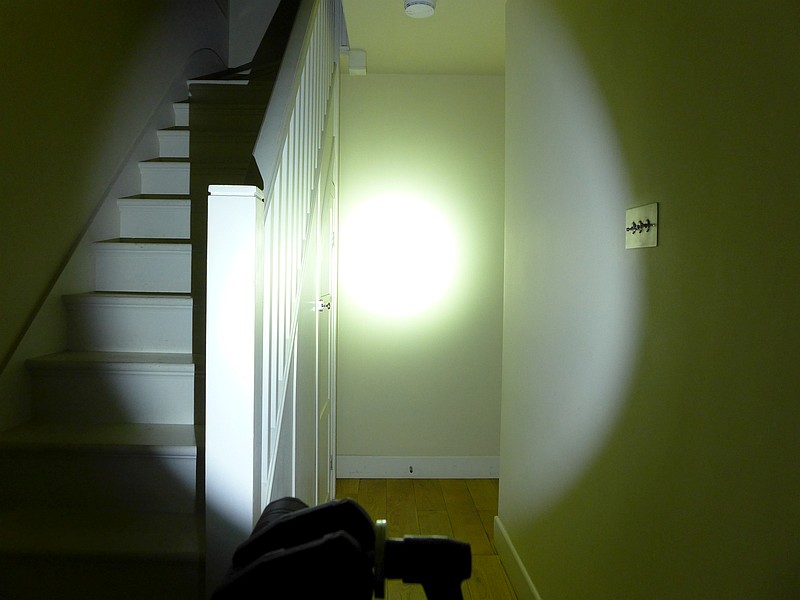
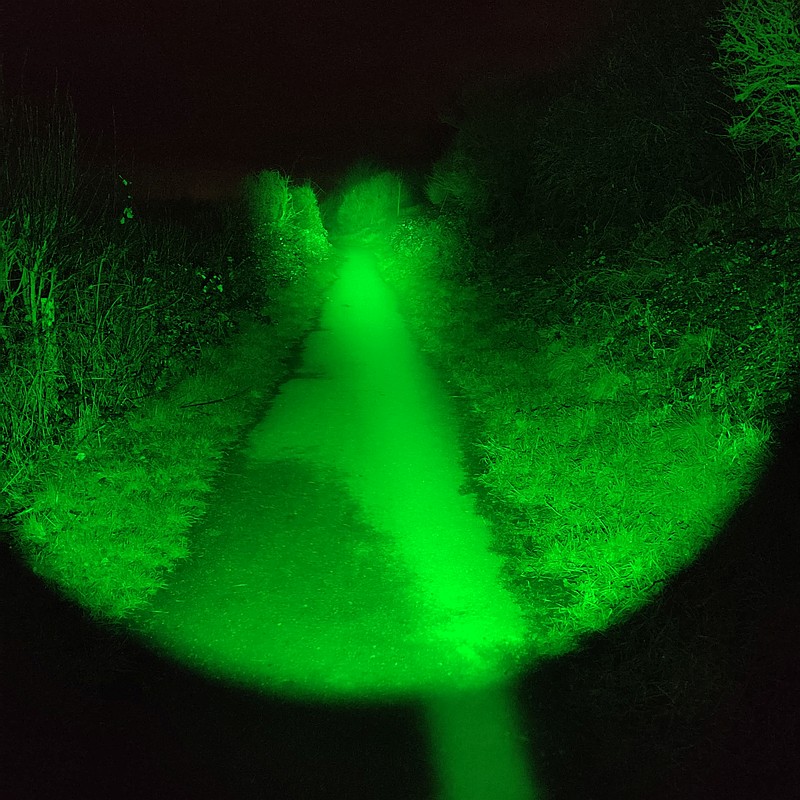
The Predator X’s beam has a much brighter spill and much wider hotspot.

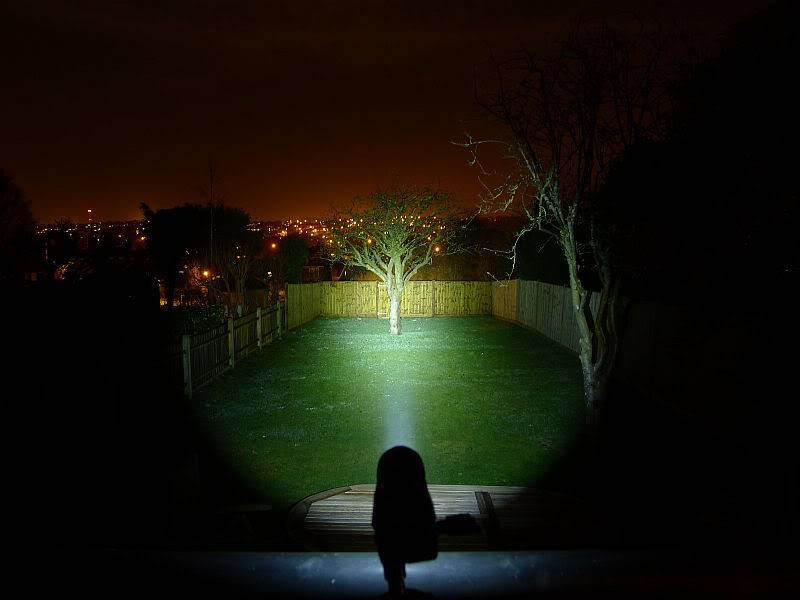
The difference between the Predator X and G2 version being even more obvious outdoors (same exposure setting as the G2)

What it is really like to use…

The older Predator V1.2’s tail switch was always a bit stiff to operate. It is nice to see that ArmyTek have addressed this with the new Predator V2.0 as the switch requires much less force to operate.

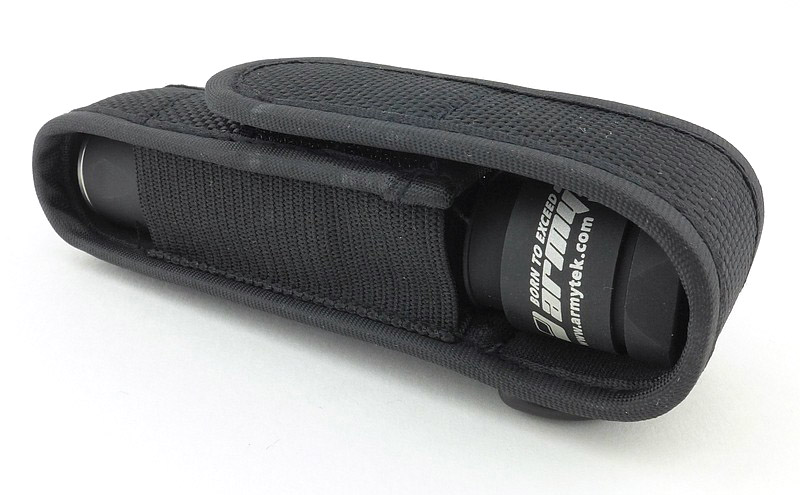
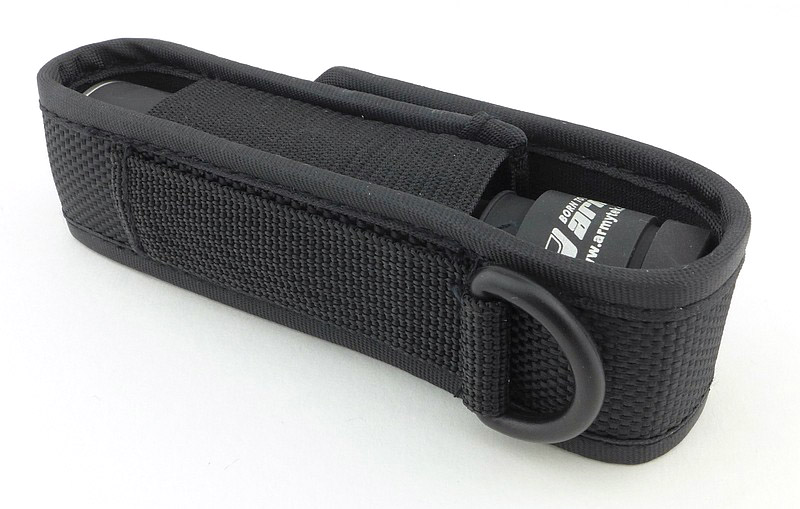
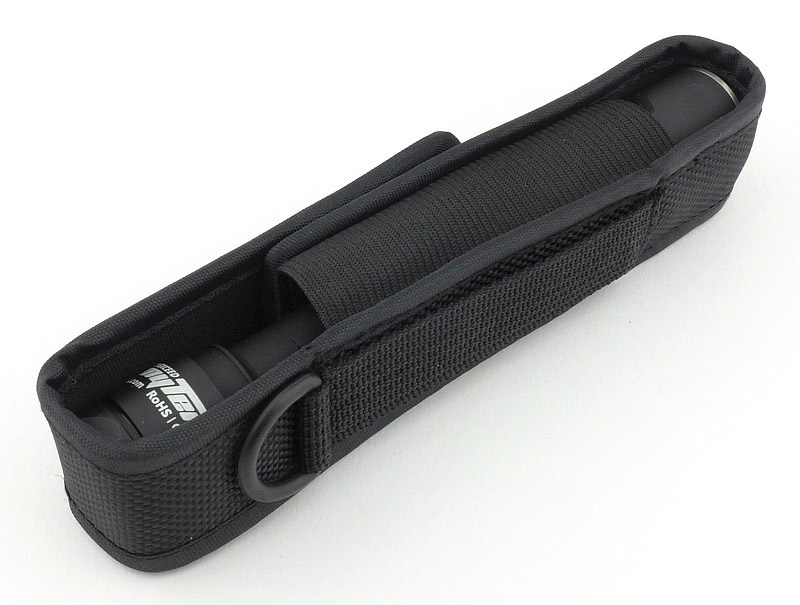
The holster supplied is designed for bezel down carry, and is a ‘gentle fit’ as the elasticated side panels hold the Predator gently while allowing very easy insertion and removal.

You can use it straight out of the box, but knowing what the Predator is capable of I programmed the G2 version with:

Line 1 – as default Military mode
Line 2 – 0.1lm, 0.5lm, 1.5lm, beacon, strobe (with auto memorisation)

And the Predator X as:

Line 1 – as default Military mode
Line 2 – 0.1lm, 0.5lm, 1.5lm
(in this configuration Line 2 (loose) will always give a firefly mode and Line 1 (tight) a brighter mode, so just make sure it is loose and it will be on a firefly output)

….these are my preferences, at least for now…

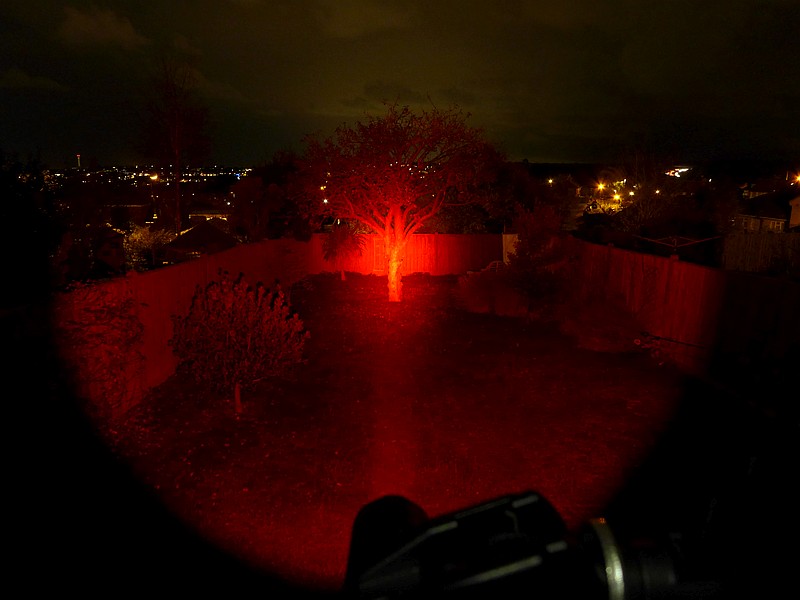
The Predator G2 is one of the best throwers I have used, not in absolute range, but in the fantastic beam quality and a very good range. At longer distances where the spill fades away, the Predator G2 projects a perfect disc of light, like a spotlight, allowing you to scan areas a long way away.

The Predator X provides a more even spread of light so has a smaller overall range but lights up a wider area. This is better for closer and indoor use than the G2.

Both beam profiles are excellent, and it is difficult to pick a favourite as the G2 has better throw, but the X has the lower firefly output and higher maximum output. I sense a CPF resolution to the problem of deciding – simply get both.

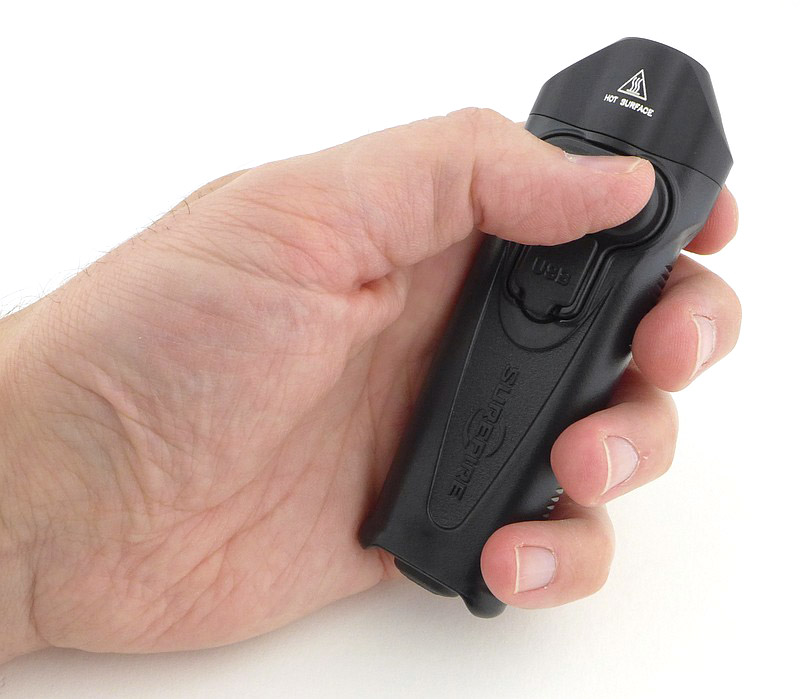
The new tactical grip ring feels really comfortable, much more so than metal grip rings, and with my XL hands (well that is my glove size) the Predator is a good fit in my hand. The softer touch tail switch with forward clicky action makes for easy, silent momentary use, and coupled with the ultra-low output levels is perfect for night time forays.

I’ve kept the default full stabilisation on Line 1 as the totally consistent output regardless of the state of the battery is excellent. The low battery warning means you are not plunged into darkness even when using full stabilisation, and as the two ‘Lines’ can be set with different stabilisation modes you could easily program the same output levels in each ‘Line’ but with different stabilisation – one for times when maximum performance is needed and one for when extended runtime is preferred.

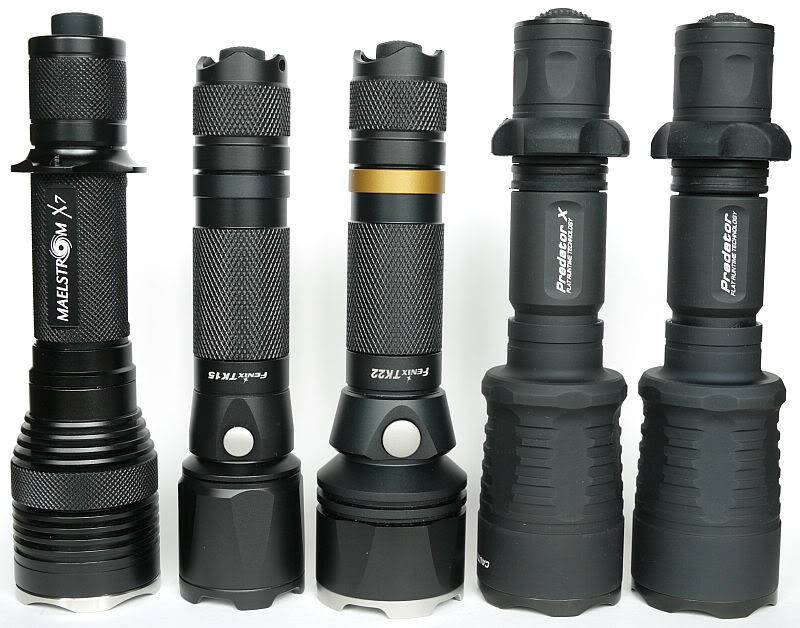
For an idea of the size of the Predator V2.0 compared to other 1×18650/2xCR123 lights, here they are shown with (from the left to right) the FOURSEVENS Maelstrom X7, Fenix TK15 and Fenix TK22. It is the size of the excellent quality reflector that makes the Predator slightly longer and it is this reflector that gives the Predator such a great beam.

I still feel slightly restless about whether I have the Predator G2 and X set up just as I want them. With so many options it makes you wonder. But of course the joy is that you can change the configuration any time you like. The only slight issue being that you need to plan this as you really need the instructions in front of you for reference if you are going to make a change (it is not something I would do out in the field).

The build quality, beam quality and extensive features and customisation options really do make this an outstanding light, and genuinely one of my all-time favourites. The Predator is a light you’ll make up any excuse to use it ‘just for the sake of using it’, well I do.

Test samples provided by ArmyTek for review.

Light Review: Nextorch TA15, TA30 and Tactical Ring FR-1

Nextorch have always seemed happy to be a bit different, which is great for us as we get products that are innovative and unusual. This review is of the Nextorch TA15 and TA30 plus the Nextorch FR-1 Tactical Grip Ring. The TA15 supports several different battery types and sizes, and along with the more powerful TA30, has Nextorch’s dual-function tail-cap with magnetic control ring and two-stage button.

The TA15, TA30 and FR-1 as they arrived.

Taking a more detailed look at the FR-1:

With so much to look at, each model has a gallery of its own. This first one is of the FR-1 Tactical Grip Ring.


Taking a more detailed look at the TA15:

Next we take a look at the multi-power option TA15.


Taking a more detailed look at the TA30:

The slightly larger and more powerful TA30 is the last of the models we are looking at here.


The beam

Please be careful not to judge tint based on images you see on a computer screen. Unless properly calibrated, the screen itself will change the perceived tint.

The indoor beamshot is intended to give an idea of the beam shape/quality rather than tint. All beamshots are taken using daylight white balance. The woodwork (stairs and skirting) are painted Farrow & Ball “Off-White”, and the walls are a light sandy colour called ‘String’ again by Farrow & Ball. I don’t actually have a ‘white wall’ in the house to use for this, and my wife won’t have one!

The main feature to note is that the bezel contours where the nano-ceramic glass-breaker balls are fitted do cut into the outer spill of these lights; most obviously on the indoor beamshots.


Modes and User Interface:

In previous reviews I have detailed the actual UI, but with the ease of access to user manuals, this section will now only include observations or differences in the operation.

In the process of tightening the tail-cap you also turn the magnetic control ring to the ‘Tac’ position. ‘Tac’ mode is actually ‘Off’ but you have direct access to maximum output from the tail-cap button switch (and Strobe from the second-stage of this switch).

This also means that to change modes using the control ring you are rotating it as if unscrewing the tail-cap. Being used to twisty interfaces where you tighten the tail-cap to turn on and then go brighter this has been counterintuitive for me, and I still find myself twisting it the wrong way when wanting to turn the lower modes off or down.

Unfortunately I can’t see any way round this, as it is completely right that when tightening the tail-cap (after replacing the battery) you want the control ring to be returned to the ‘off / Tac’ position; you just have to try and get used to this.

It also means that when taking the tail-cap off to replace the battery, you generally end up gripping the control ring and twisting this (especially with the FR-1 fitted), so turn the TA15 and TA30 onto maximum or strobe until the tail-cap is loosened enough to lock it out.

Batteries and output:

The TA15 runs on 14500, 16340, CR123, AA and though not officially, it can run on AAA.
The TA30 runs on 18650 or CR123.

To measure actual output, I built an integrating sphere. See here for more detail. The sensor registers visible light only (so Infra-Red and Ultra-Violet will not be measured).

Please note, all quoted lumen figures are from a DIY integrating sphere, and according to ANSI standards. Although every effort is made to give as accurate a result as possible, they should be taken as an estimate only. The results can be used to compare outputs in this review and others I have published.

         Nextorch TA..         |   I.S. measured    |  PWM frequency or    
     using specified cell      | ANSI output Lumens | Strobe frequency (Hz)
_______________________________|____________________|______________________
    TA15 - 14500 - Tactical    |        547         |                      
    TA15 - 14500 - III         |        542         |                      
    TA15 - 14500 - II          |        202         |      15600           
    TA15 - 14500 - I           |        32          |      15600           
    TA15 - 14500 - Strobe      |                    |      10.4            
                               |                    |                      
    TA15 - CR123 - Tactical    |        313         |                      
    TA15 - CR123 - III         |        310         |                      
    TA15 - CR123 - II          |        79          |      15600           
    TA15 - CR123 - I           |        11          |      15600           
    TA15 - CR123 - Strobe      |                    |      10.4            
                               |                    |                      
    TA15 - AA    - Tactical    |        120         |                      
    TA15 - AA    - III         |        118         |                      
    TA15 - AA    - II          |        23          |      15600           
    TA15 - AA    - I           |        4           |      15600           
    TA15 - AA    - Strobe      |                    |      10.4            
                               |                    |                      
    TA30 - 18650 - Tactical    |        849         |                      
    TA30 - 18650 - III         |        837         |                      
    TA30 - 18650 - II          |        151         |      15600           
    TA30 - 18650 - I           |        32          |      15600           
    TA30 - 18650 - Strobe      |                    |      10.4            
                               |                    |                      
    TA30 - CR123 - Tactical    |        756         |                      
    TA30 - CR123 - III         |        756         |                      
    TA30 - CR123 - II          |        153         |      15600           
    TA30 - CR123 - I           |        28          |      15600           
    TA30 - CR123 - Strobe      |                    |      10.4            


* Beacon and Strobe output measurements are only estimates as the brief flashes make it difficult to capture the actual output value.

There is parasitic drain which is different for each cell type used. For the:

TA15 when using 14500, the drain was 11.6uA (8.85 years to drain the cells)
TA15 when using CR123, the drain was 9.2uA (17.36 years to drain the cells)
TA15 when using AA, the drain was 58.6uA (3.7 years to drain the cells)
TA30 when using 18650, the drain was 16uA (18.54 years to drain the cells)
TA15 when using CR123, the drain was 32uA (4.99 years to drain the cells)

The runtime graphs show the full traces, and a zoomed in section of the first few minutes of the run.


Troubleshooting

This section is included to mention any minor niggles I come across during testing, in case the information helps anyone else.

No issues were encountered during testing.

As per the description of this section, this information is provided in case anyone else finds a similar ‘issue’ that might be fixed in the same way.

The TA15, TA30 and FR-1 in use

Starting with the FR-1, though described as being suitable for any standard size light (with tail cap of 23.2 mm to 25.5 mm diameter), as yet, I’ve not found any it works with beyond the TA15 and TA30. The tail-cap needs to be bigger than the battery tube, but for most of the lights I have, the tail-cap and battery tube are the same size. It does however work very well with the TA30.

When using the FR-1 and TA30, the FR-1 covers most of the tail-cap, and this means that to loosen or tighten the tail-cap, you have to hold the control ring switch and turn that. It also means that the control ring switch is not as easy to hold as the collar of the FR-1 reduces access to it slightly. Of course it does not reduce access to the tail-cap button switch.

Tactical grip rings do add bulk to a light, but they also give you so many grip options, which is why they are worth their weight in gold. From the simplest concept, that you can hang the light off a finger and actually free up that hand entirely to hold or lift something without putting the light down (think of it like wearing a ring with a very large stone in it). How you now hold it is only limited by your imagination.


Having got to grips with these lights, I am very impressed with the interface. Combining the rotary control ring with the two-stage tail-cap button has worked really well. From any mode, or off/Tac, pressing the button gives you direct access to maximum output. The two stage button switch has a good feel, being neither too stiff or easy to press, making the division between the half press for maximum output and full press for strobe well defined. Snatch the button and you will likely get some strobe, so if this is a big issue you’ll need to go for a single mode light.

Changing from pressing the button to rotating the control ring is natural. However, as explained earlier, the direction of rotation to change modes wasn’t intuitive for me, and I need to think about it.


(The TA15 with Nextorch’s new V30 EDC bag)

I like versatility; the TA15 gives you that, and is especially good as a light to have as a backup where you might need to scavenge cells from anywhere. The output does depend on the cells you fit, but this is not only sensible, as it better matches the output to the cells capacity (so not depleting them too fast) but it also lets the user choose their preferred output levels. I prefer lower output levels, so I generally run it on AAs. It really is very useful to be able to feed it such a varied diet, but you can end up with some cell rattle (mainly CR123) due to the mechanism needing to cater for the different cell lengths.

A minor point, which I raised with Nextorch, was that if using NiMh cells, the TA15 will often not switch from off to level 1, but needs to be turned onto level 2 then back to level 1. This behaviour seemed odd and only happened on NiMh AAs, but Nextorch explained that due to the low voltage, the TA15 was automatically going into a sleep mode to reduce drain to a minimum, and would only wake up when turned onto level 2. So this behaviour is designed into the TA15, and is specifically intended to reduce drain.

The TA15 and TA30 use the exact same interface and are in fact almost the same size. They handle very well and are extremely functional.

Still looking for an opportunity to try out the glass breakers…

Review Summary

_______________________________________________
Things I like
_______________________________________________

Two-stage tail-cap button.
Rotary control ring.
Multi-cell-type compatibility.
Ceramic glass breakers.
Very useful tactical grip ring.
Supplied cells are USB rechargeable.

_______________________________________________
What doesn’t work so well for me
_______________________________________________

Cell rattle with CR123.
The direction of rotation of the control ring has been counter intuitive.
Outer spill beam broken up by glass breaker bezel.


Discussing the Review:

The ideal place to discuss this reviews is on a forum. If you started reading the shorter forum version of the review, but followed the link this full exclusive review, please return to that forum to discuss the review there.
If you read the review entirely on Tactical Reviews, please consider one of the following to join in, or start, a discussion.

CandlePowerForums – Flashlight Reviews Section (Largest and Friendliest Flashlight Community Forum)

Light Review: ACEBEAM UC15 – EDC / Keychain

ACEBEAM’s UC15 is a new contender in the keychain light market. The UC15 has a range of capabilities that make it stand out, with white, red and UV beams, and the choice of AAA or 10440 for power. We are certainly spoilt for choice when it comes to keychain lights, in many cases with there being very little to distinguish between them, but the UC15 definitely gives you more. It is one of the larger keychain lights, being in the ‘car key size’ class, many of which have built-in batteries and though those have the convenience of USB charging, they are limited by the capacity of that battery. Not the UC15 as it takes 2x AAA or 2x 10440, but can run on only one cell if needed.

Taking a more detailed look:

The beam

Please be careful not to judge tint based on images you see on a computer screen. Unless properly calibrated, the screen itself will change the perceived tint.

The indoor beamshot is intended to give an idea of the beam shape/quality rather than tint. All beamshots are taken using daylight white balance. The woodwork (stairs and skirting) are painted Farrow & Ball “Off-White”, and the walls are a light sandy colour called ‘String’ again by Farrow & Ball. I don’t actually have a ‘white wall’ in the house to use for this, and the wife won’t have one!

Modes and User Interface:

ACEBEAM helpfully provided a diagram to help you navigate the UC15’s UI. However, the current firmware version doesn’t quite follow this diagram once you have activated the ‘colour group’.
On one copy of the UI diagram I have made a couple of adjustments, and the reason for these is as follows…
Turning on to Moon mode does NOT ‘activate’ the white group when the current group is the colour group; it only temporarily enters the white group. So, if the colour group was the active group and you turn on to Moon mode, even if you then select another white output level, once you turn the UC15 off, it will revert to the colour group.
From OFF, with the colour group active, the only way to ‘activate’ the white group is via a double click.
If the colour group is active, and the UC15 is OFF, a double click does NOT turn Turbo on, instead it turns on the memorised white level; it then takes one more double click to enter Turbo.

Batteries and output:

The UC15 runs on 2x AAA or for maximum output 2x 10440. These are used in parallel, so you can actually use only a single cell if that is all you have.

To measure actual output, I built an integrating sphere. See here for more detail. The sensor registers visible light only (so Infra-Red and Ultra-Violet will not be measured).

Please note, all quoted lumen figures are from a DIY integrating sphere, and according to ANSI standards. Although every effort is made to give as accurate a result as possible, they should be taken as an estimate only. The results can be used to compare outputs in this review and others I have published.

         ACEBEAM UC15          |   I.S. measured    |  PWM frequency or    
     using specified cell      | ANSI output Lumens | Strobe frequency (Hz)
_______________________________|____________________|______________________
  Turbo  10440                 |      679           |                      
  High   10440                 |      441           |                      
  Medium 10440                 |      251           |                      
  Low    10440                 |      109           |                      
  Moon   10440                 |        5           |                      
  Red    10440                 |       93           |                      
                               |                    |                      
  Turbo  AAA NiMh              |      190           |                      
  High   AAA NiMh              |       93           |                      
  Medium AAA NiMh              |       51           |                      
  Low    AAA NiMh              |       25           |                      
  Moon   AAA NiMh              |        5           |                      
  Red    AAA NiMh              |       53           |                      


There is parasitic drain but is incredibly low. When using 10440, the drain was 3.6uA (22 years to drain the cells), and when using AAA, the drain was 1.1uA (165 years to drain the cells).

The runtime graph shows the UC15 running from Turbo to the ANSI cut-off for AAA NiMh and 10440. Also included are the manufacturer output specifications.

Troubleshooting

This section is included to mention any minor niggles I come across during testing, in case the information helps anyone else.

The only minor observation to report here was difference in the expected behaviour of the UI, as noted earlier.

As per the description of this section, this information is provided in case anyone else finds a similar ‘issue’ that might be fixed in the same way.

The UC15 in use

Compared to many keychain lights, the UC15 is a fairly large addition to your key-ring, but it is packed with features and performance. This high CRI Nichia LED version doesn’t quite have the same 1000lm output as the XP-L version, but at around 700lm when using 10440, is very impressive.
Personally I find the levels a bit too bright when using 10440, and I prefer to use AAA, which brings the levels down to a brightness that works better for an EDC light. You have the choice though, a true pocket-rocket, or a seriously useful EDC light. The level chosen for ‘Moon’ mode is more like a low level than a moon mode as at 5lm is too bright for dark adapted eyes.
When it comes to red light, typically this is used to help maintain dark adapted vision. In the case of the UC15’s red output, it is very bright, with nearly 100lms of red when using 10440; this is too much. If you were to go to an astronomy ‘star party’, and broke out the UC15’s red beam, you would be asked to leave – immediately. With the red beam being a specific wavelength (630nm) it is virtually invisible to many night time quarry if you are out hunting after dark, so in this regard is useful. Beyond that, the red could be useful for signaling considering its brightness.
Unlike many ‘UV lights’ the UC15 is a proper UV light using the 365nm wavelength. This has minimal blue light and appears very dim to the eye, until you shine it onto materials that fluoresce. This is particularly obvious with bank note security features. Only true UV brings out their colours and makes them glow brightly.
Rated as IP54, I am slightly surprised that ACEBEAM have left the tail-cap without any kind of seal. It might be slightly splash proof, but it is not waterproof. Perhaps a keychain light is not that likely to get soaked (a car key might not like that), but it seems strange not to have a seal.
Adding the clip makes it more of a pocket light than a keychain light, but gives you that extra flexibility. With the clip open at the tail-end of the UC15, you can slide it onto the baseball cap peak to use it as a head-lamp. Fitting the clip itself is fiddly. The small screws don’t fit through the holes in the clip, so have to be tickled into position underneath the clip, and then tightened.
Overall the 2x AAA side-by-side configuration makes for a very ergonomic light to use, and with three different beams to choose from, the UC15 is a serious contender for your EDC.

Review Summary

_______________________________________________
Things I like
_______________________________________________

High CRI ~700lm output.
Choice of AAA or 10440 power.
Choice of output levels (based on cell choice).
White, Red and UV outputs.
Good UI (despite minor issue).
Can run on only one cell (as the two are used in parallel).
Very low parasitic drain.
No Pulse Width Modulation.

_______________________________________________
What doesn’t work so well for me
_______________________________________________

‘Moon’ mode is too bright.
Moon mode not memorised.
Red output very bright.
Not waterproof, only water resistant.


Discussing the Review:

The ideal place to discuss this reviews is on a forum. If you started reading the shorter forum version of the review, but followed the link this full exclusive review, please return to that forum to discuss the review there.
If you read the review entirely on Tactical Reviews, please consider one of the following to join in, or start, a discussion.

CandlePowerForums – Flashlight Reviews Section (Largest and Friendliest Flashlight Community Forum)