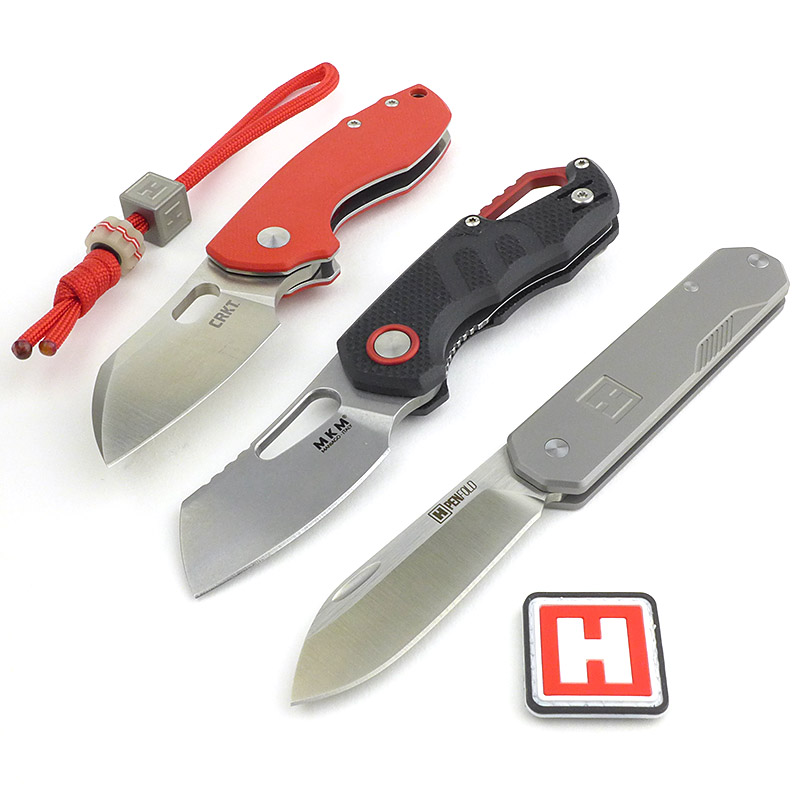
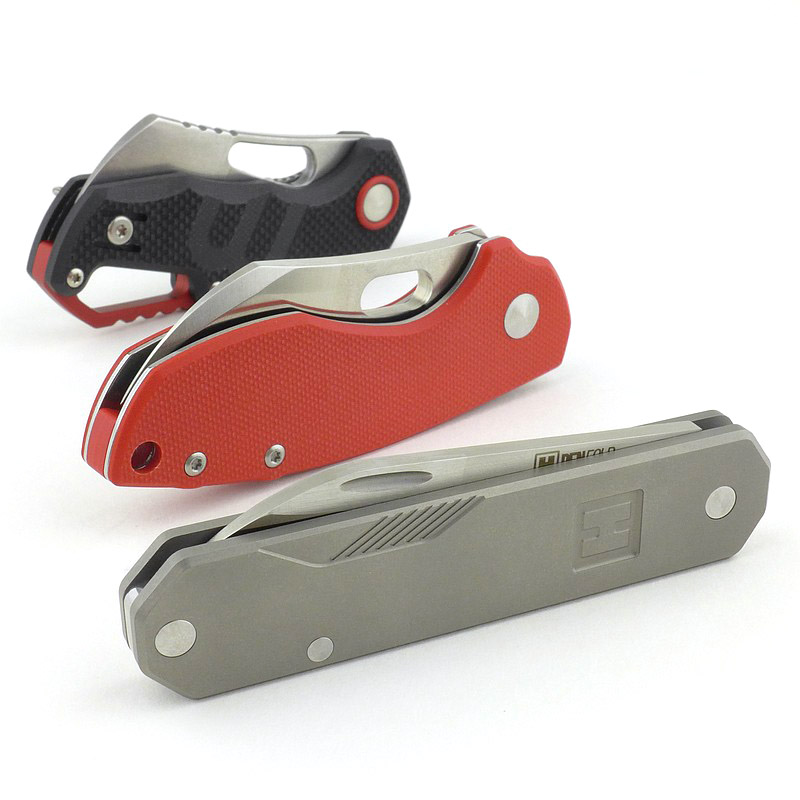
In the UK, Heinnie Haynes is an institution and essential in the search for knives as well as outdoor and EDC gear. Having been a specialist in knives for so long, not satisfied with just selling standard production knives, Heinnie Haynes have been commissioning customised and enhanced special editions, many of which are slip-joint conversions of lock knives (to allow UK EDC). In this review we are taking a look at three of these Heinnie special editions – a slip-joint conversion of the CRKT Pilar and MKM Isonzo, plus a the sleek Heinnie designed Penfold.
The details:
This video has a quick look at the Heinnie Penfold and MKM Isonzo, and then a much more detailed examination of the CRKT Pilar.
A good look round the Heinnie CRKT Pilar – Things to look out for here are:
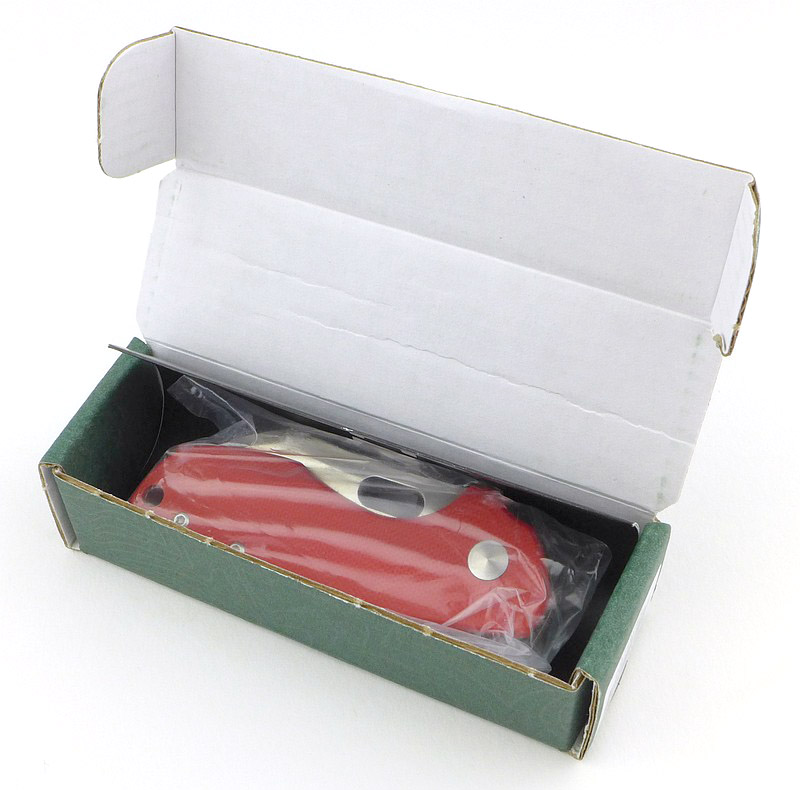
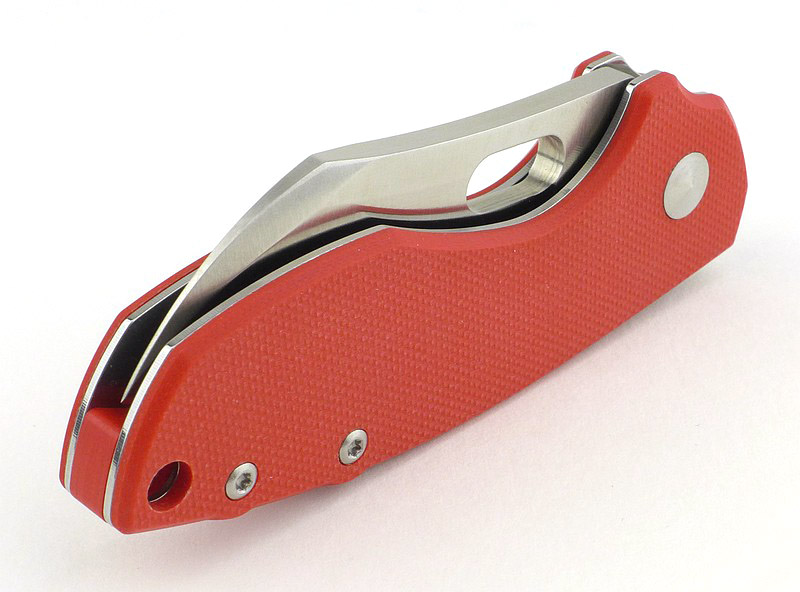
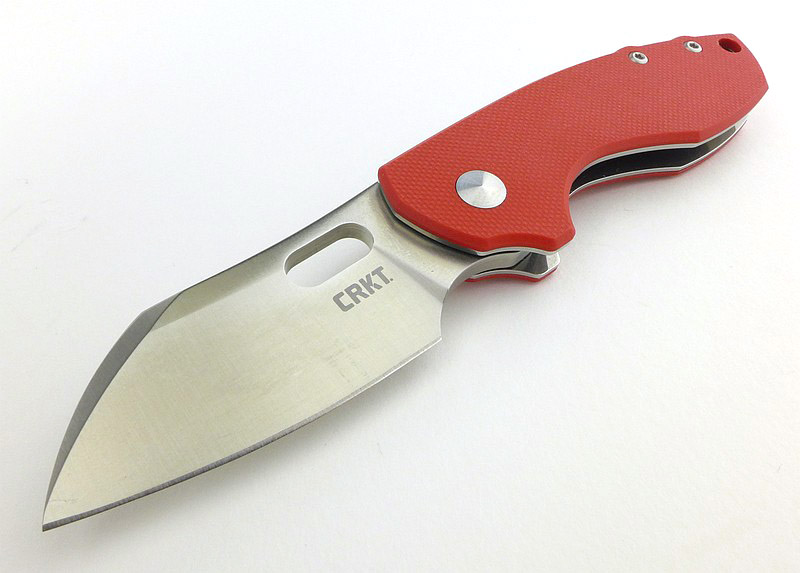
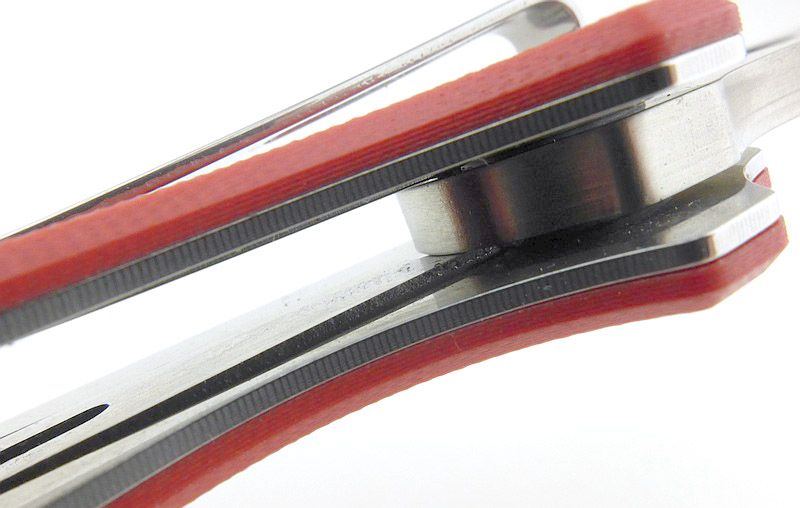
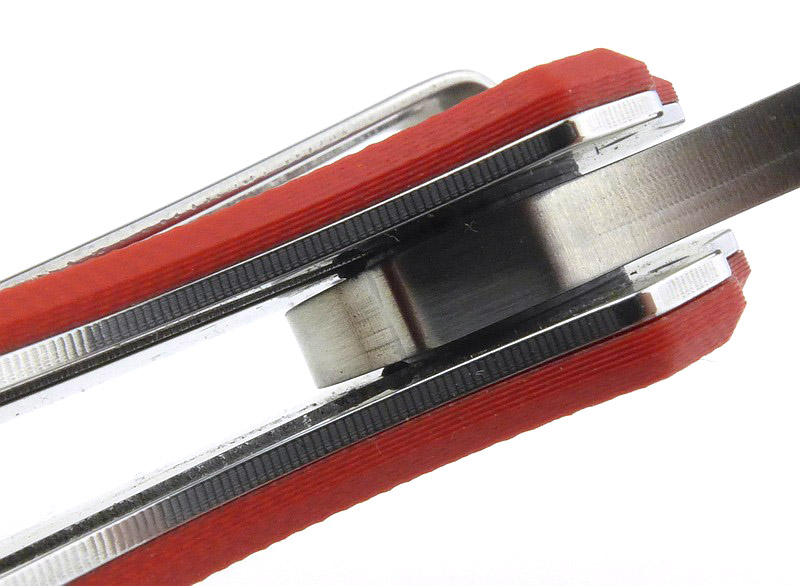
The exclusive special edition features include the G10 scales and spacer in Heinnie red, plus the conversion to slip-joint using a double spring-and-detent concealed within the handle.
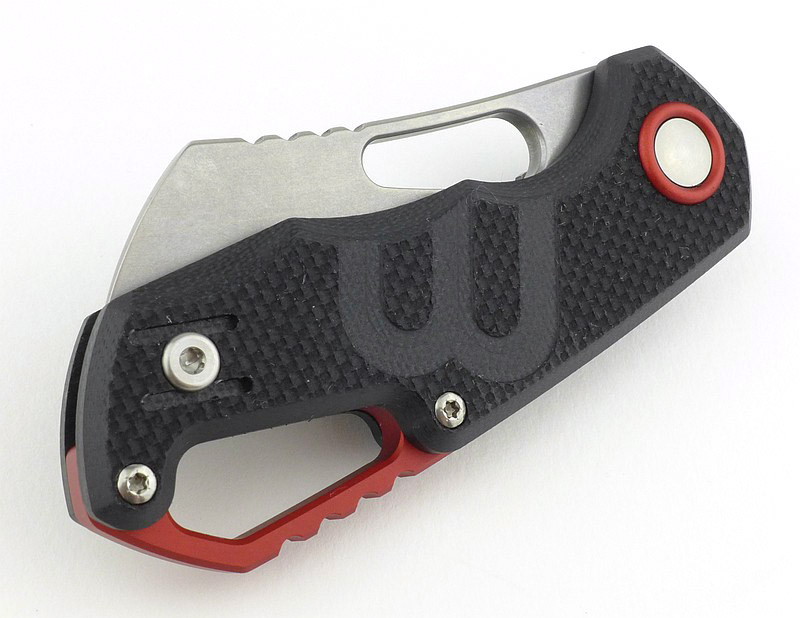
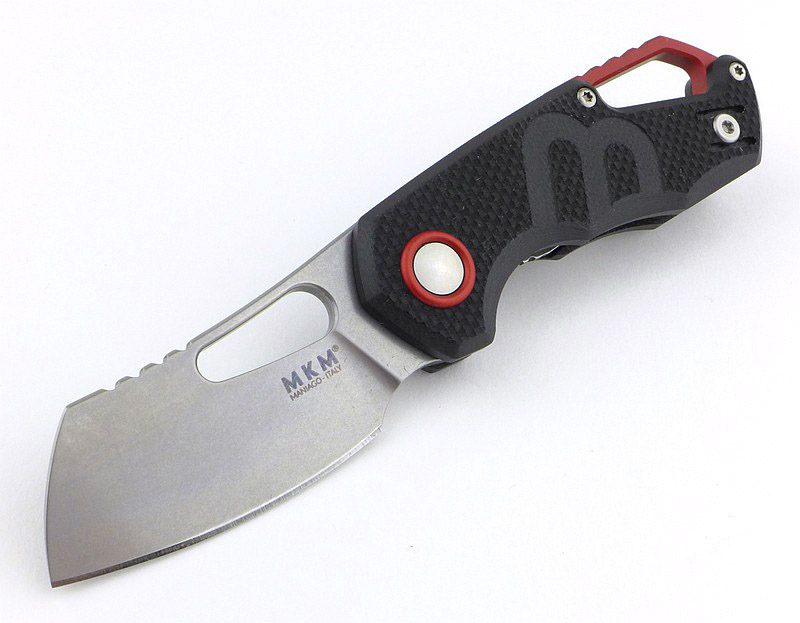
A good look round the Heinnie MKM Isonzo (Cleaver blade)- Things to look out for here are:
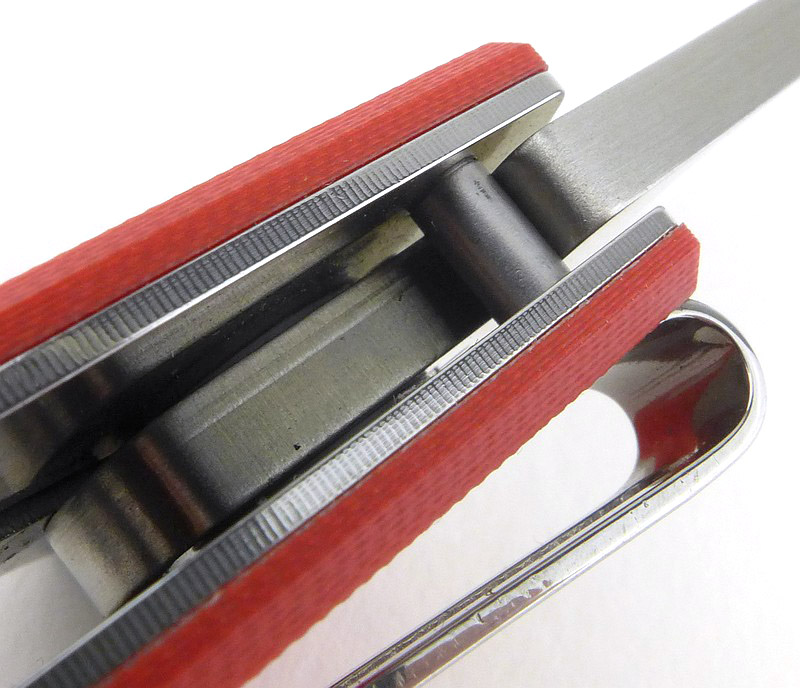
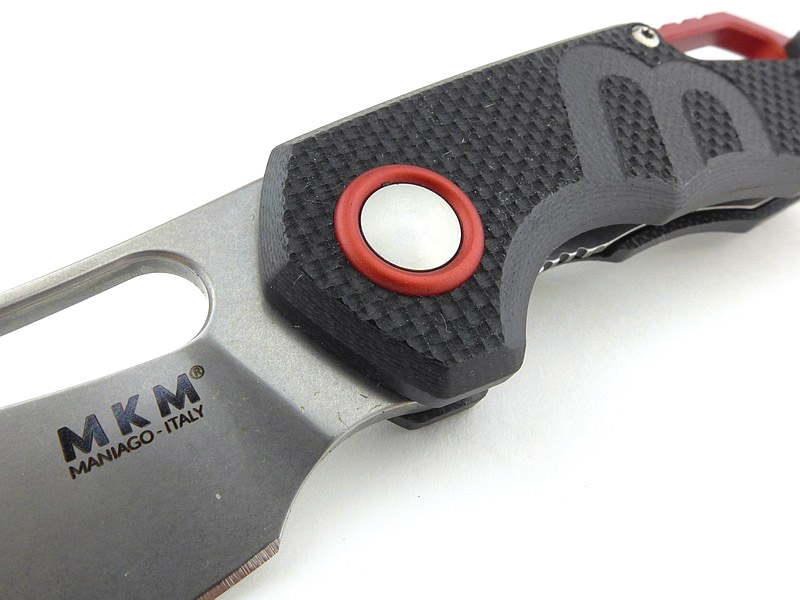
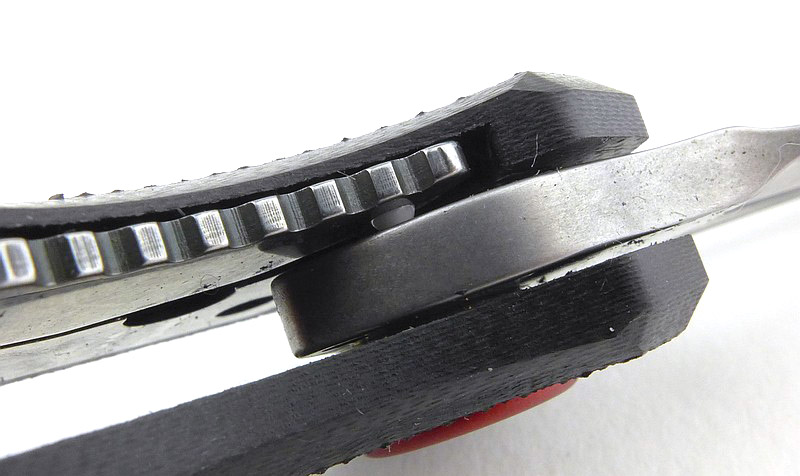
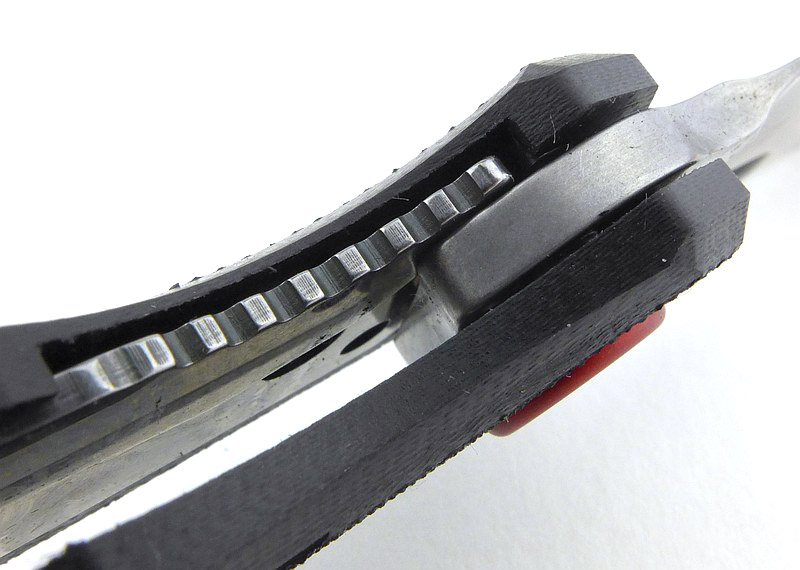
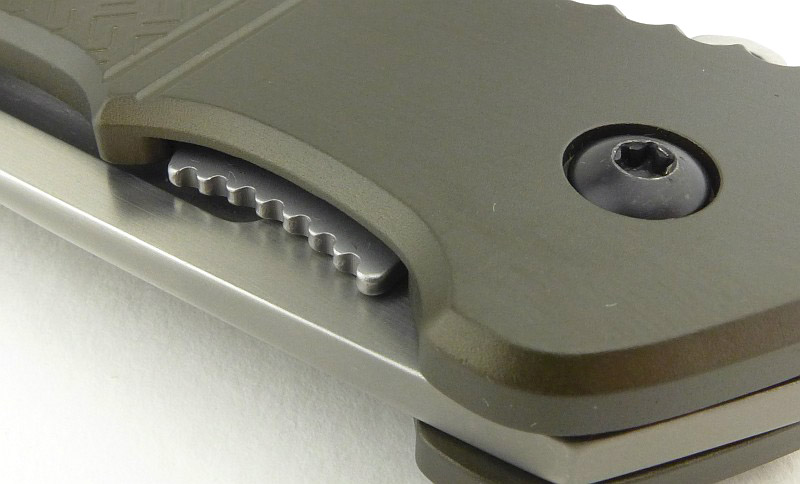
Originally using a liner lock, the remains of this lock are clearly visible, but with the addition of a detent on the sprung bar (previously the lock bar). Highlights of Heinnie red let you know this is the special edition.
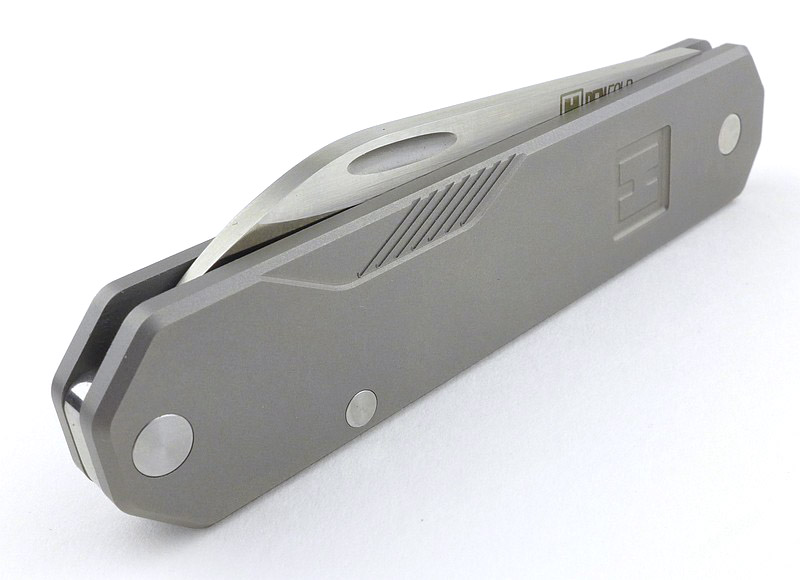
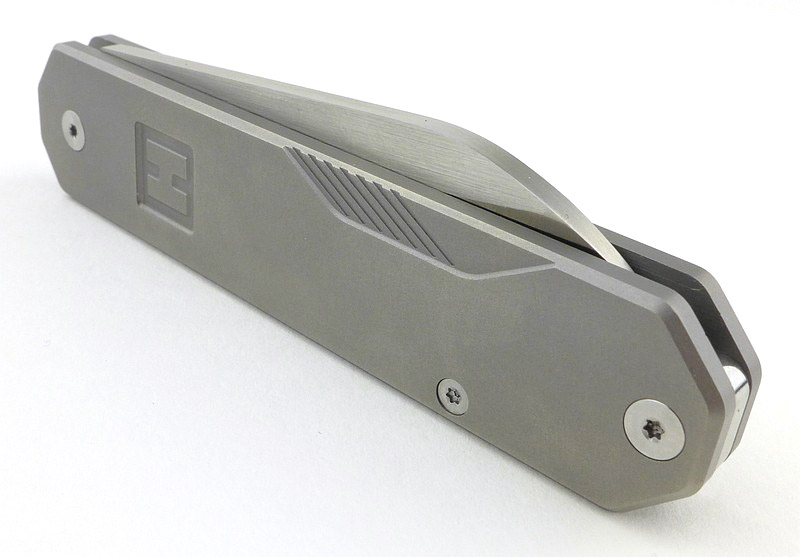
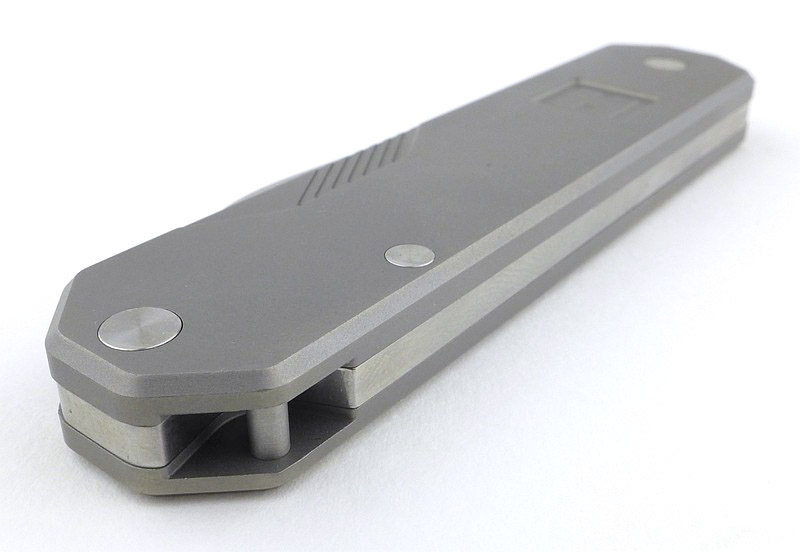
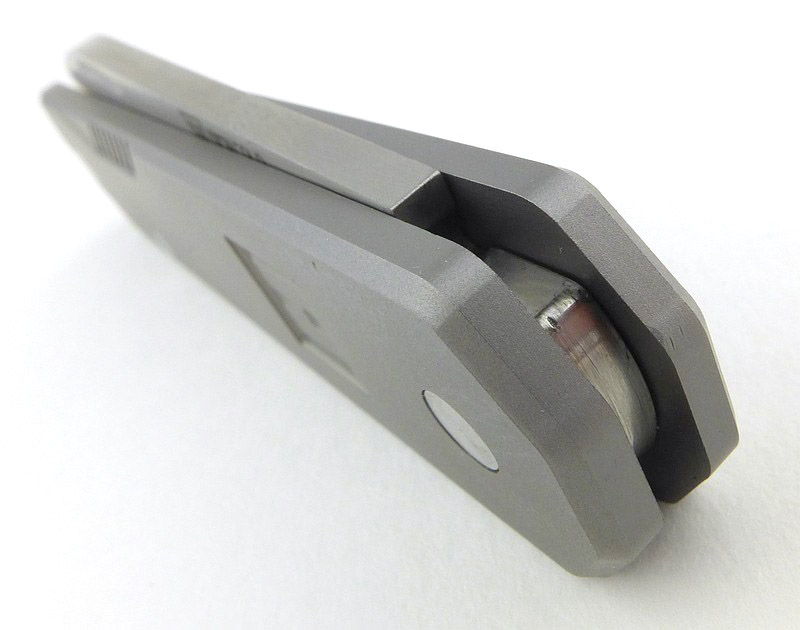
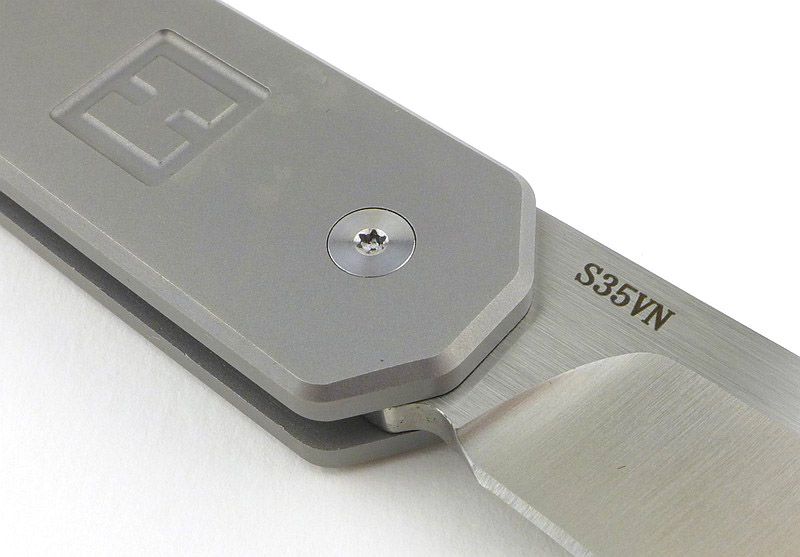
A good look round the Heinnie Penfold – Things to look out for here are:
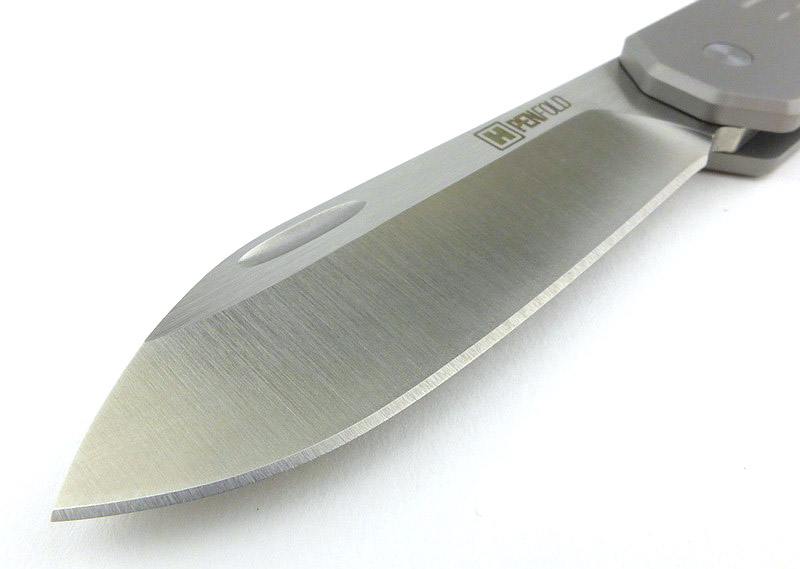
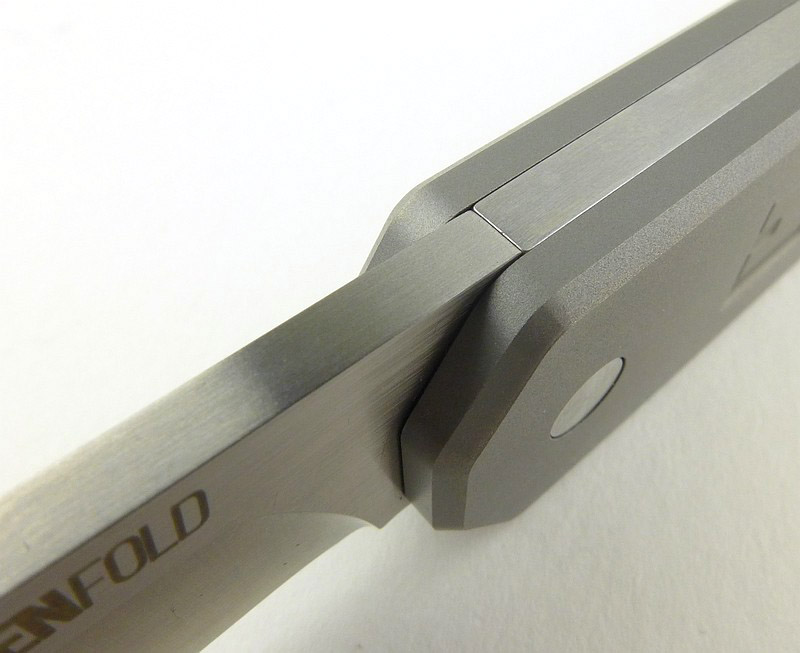
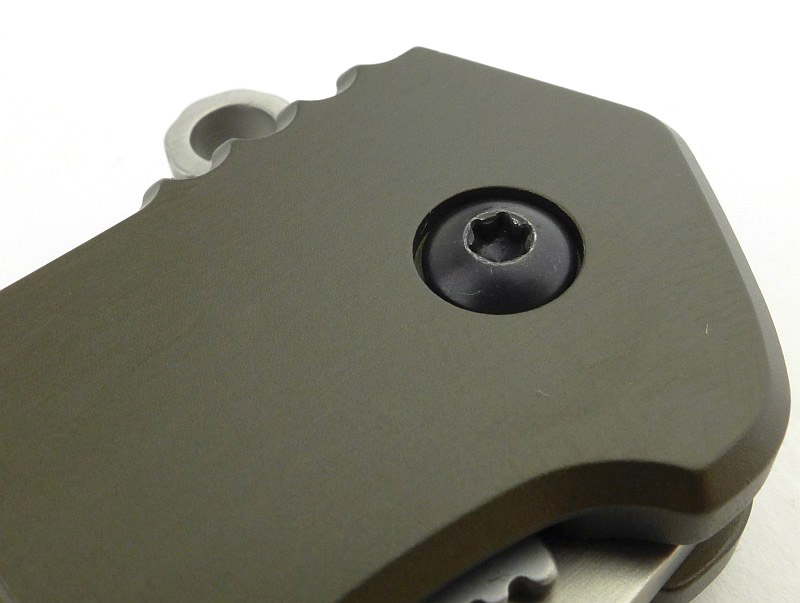
Entirely a Heinnie design, the Penfold takes the classic pocket-spring slip-joint knife, and streamlines it with a beautiful simplicity and clean look.
The Blade and Handle – Detailed Measurements:
For full details of the tests and measurements carried out and an explanation of the results, see the page – Knife Technical Testing – How It’s Done.
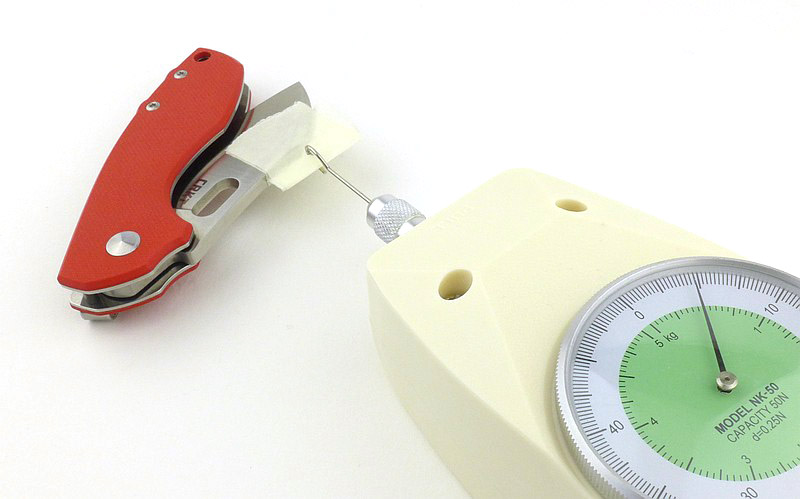
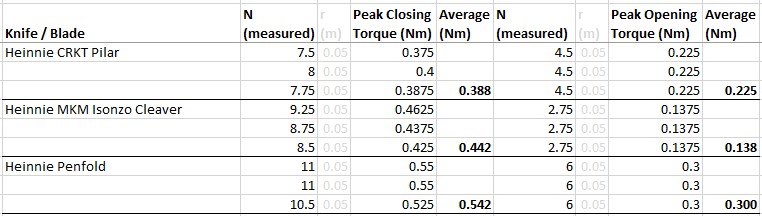
The Torque measurement:
What is it like to use?
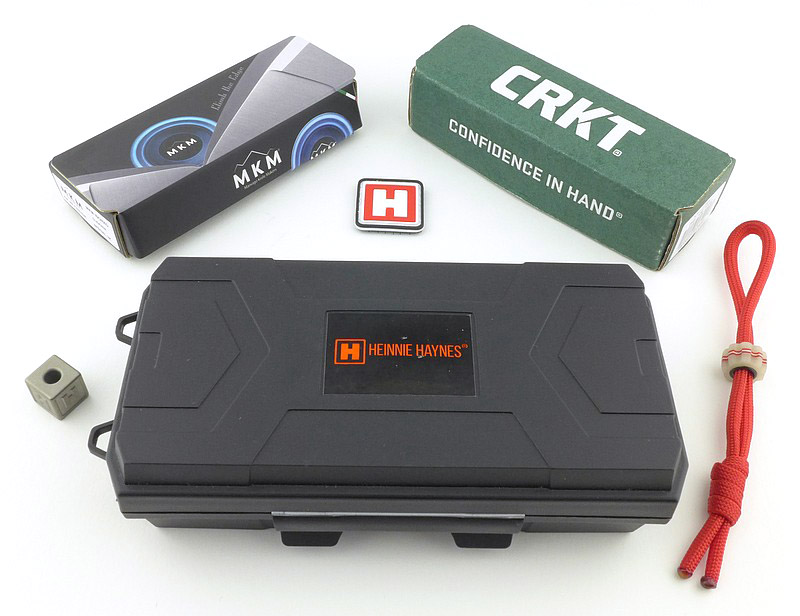
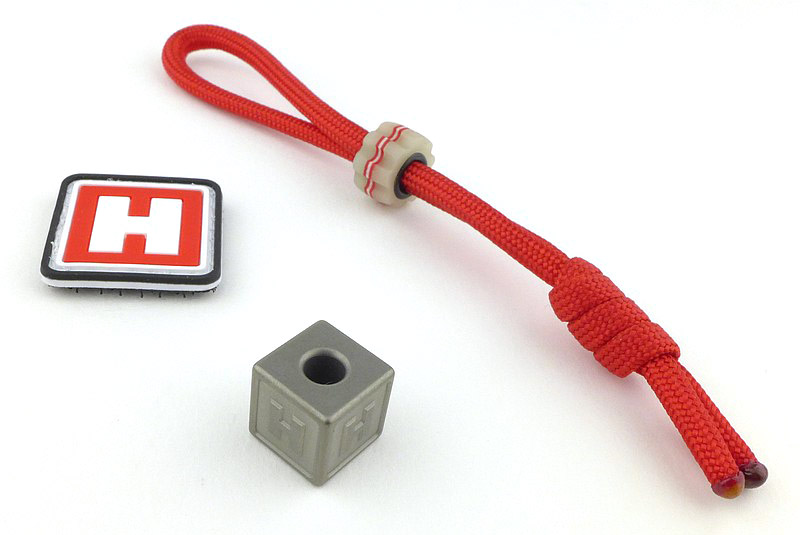
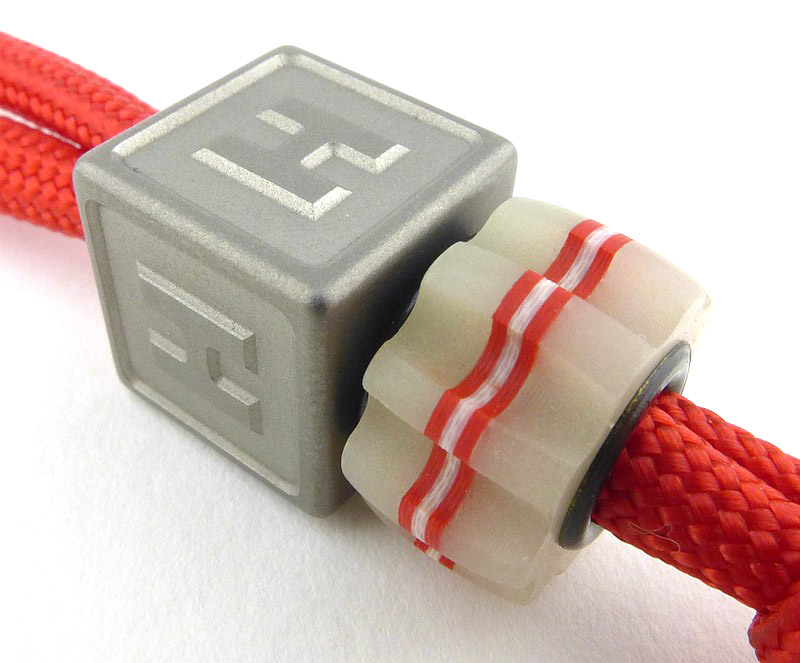
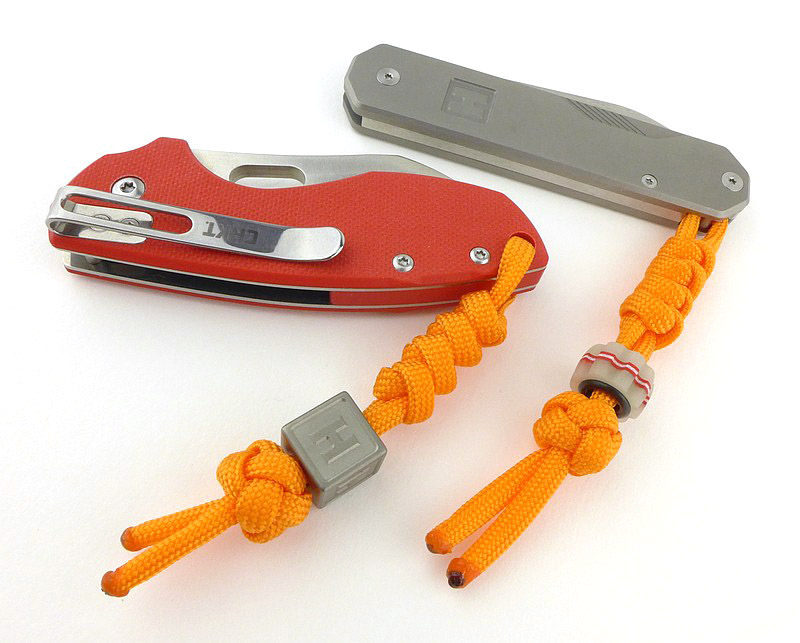
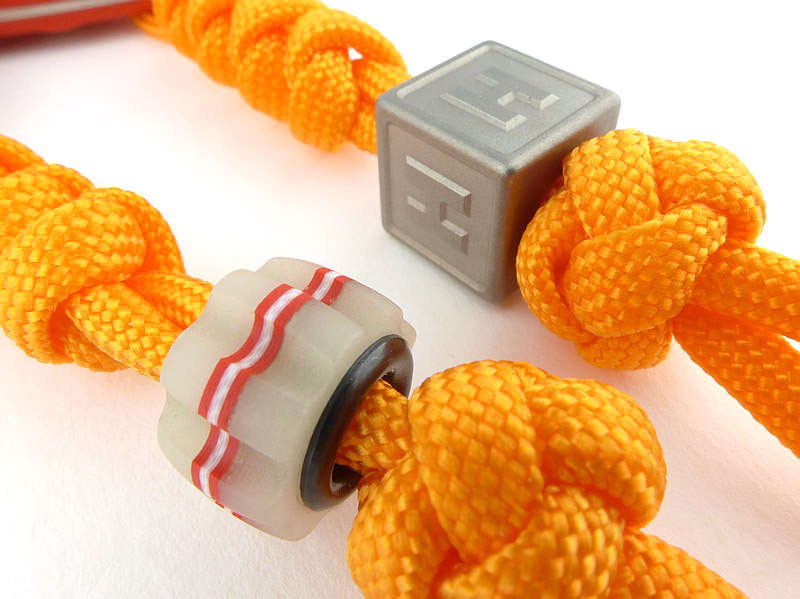
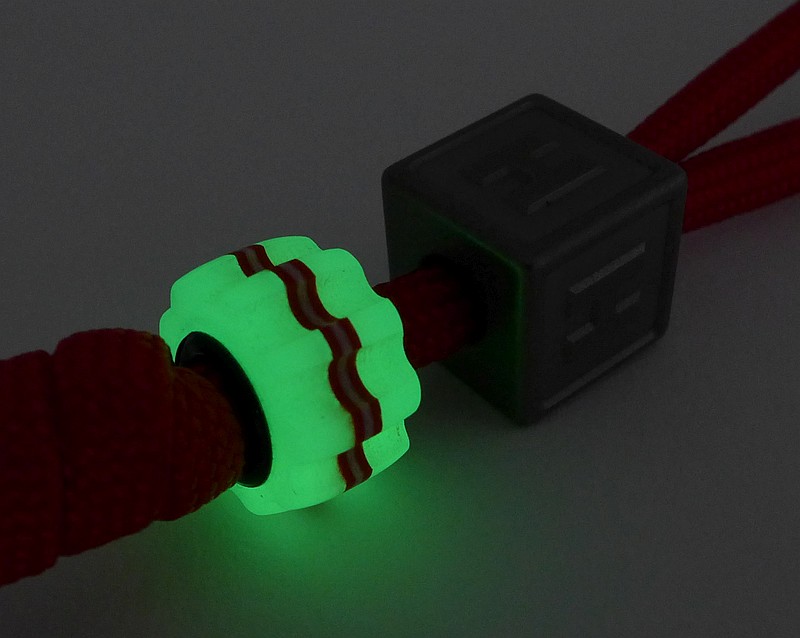
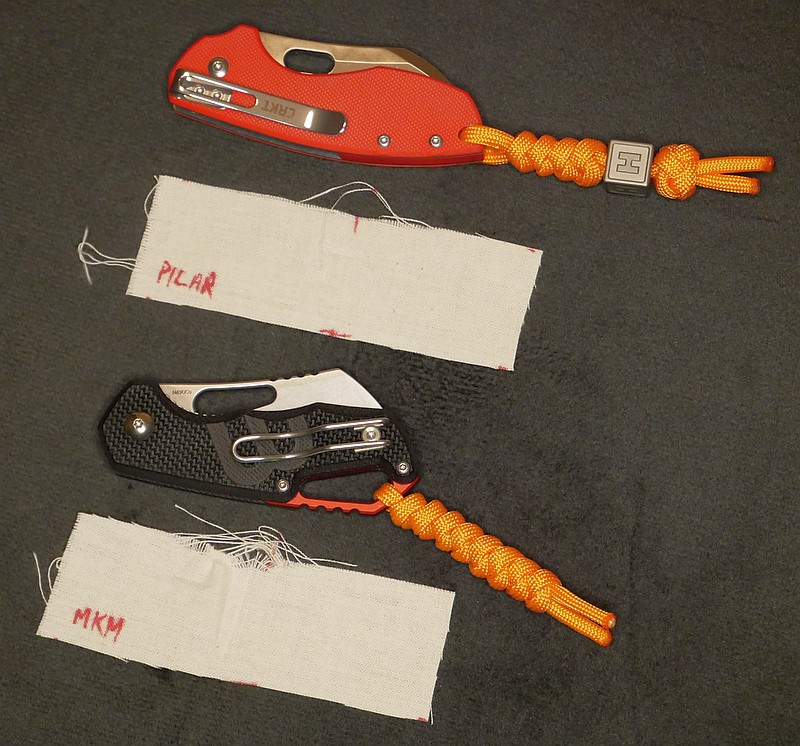
As a little ‘cherry on top’ I’ve added a couple of Heinnie beads onto paracord lanyards.
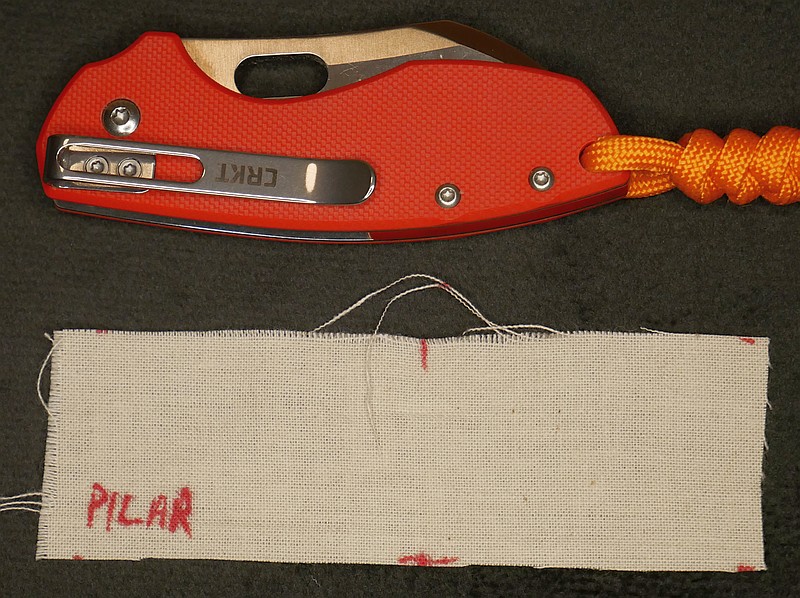
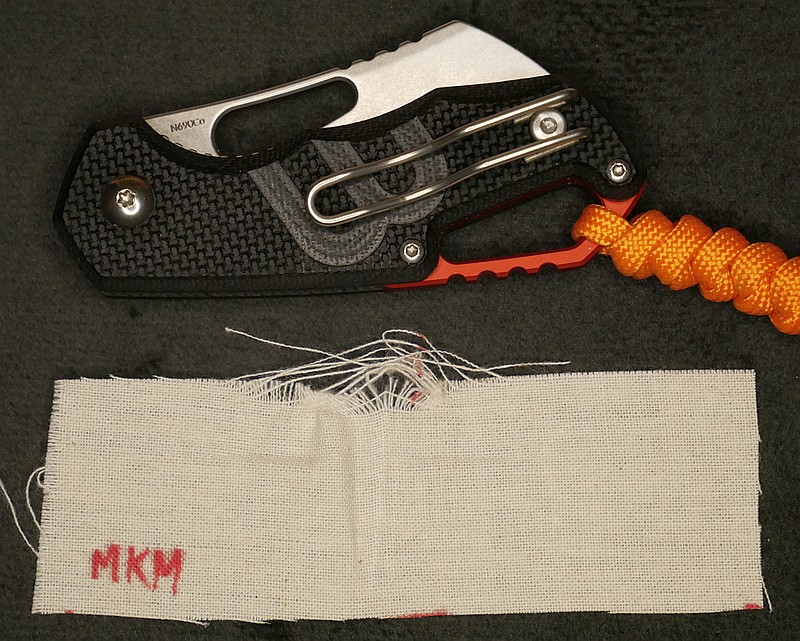
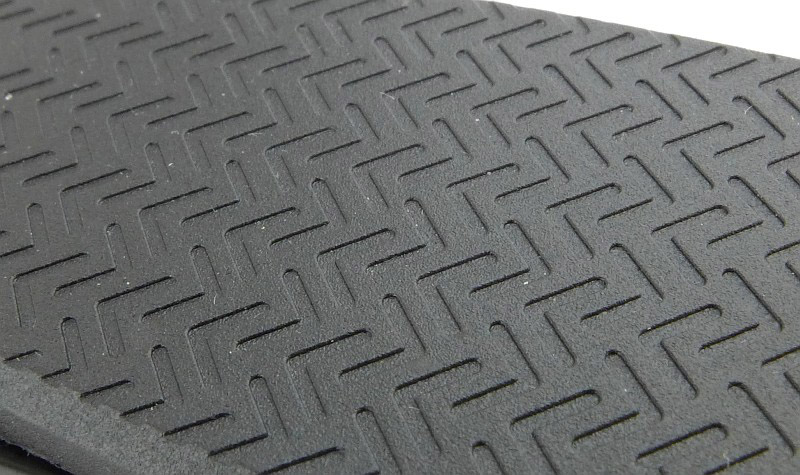
Inspired by the rasp-like grip texture of the MKM Isonzo handles (plus noticing other ‘pocket ripping knives’ over the years), a new test was born – the pocket-shredder test. Taking some raw calico and fitting and removing the knife’s pocket clip onto the calico fabric as if it were a pocket edge. This was done only 5 times; here you can see the comparison of how aggressive the pocket clip grip is. The MKM is a shredder!
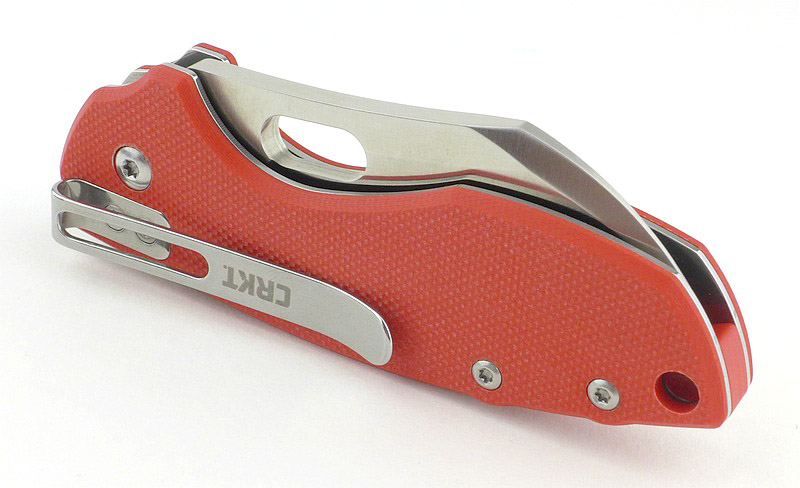
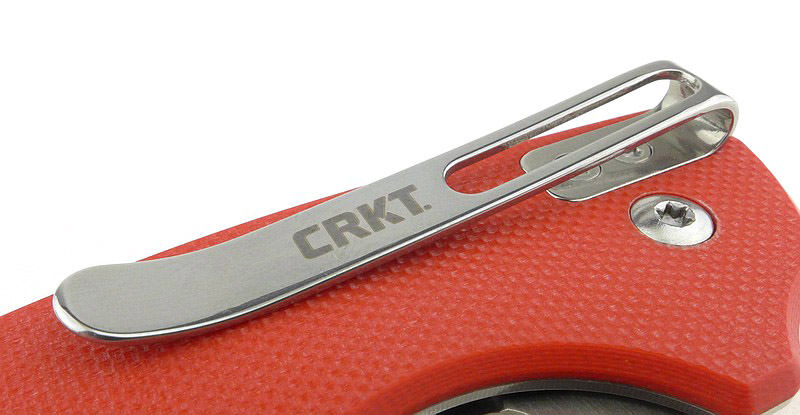
Heinnie Edition CRKT Pilar – It’s a compact knife, three-finger-grip size, so, frustrating for it to be a lock knife where carry restrictions prevent EDCing a locker. Heinnie Haynes special slip-joint edition makes this a lovely, and EDCable, working knife. It is a slight disappointment that it only has a tip-down pocket clip. I initially thought this might be a deal breaker and this does conflict slightly with the lanyard hole, as to use the pocket clips means stuffing the lanyard into your pocket, opposite to how it should be. However, thanks to its small size and ease of handling it actually hasn’t been a real issue.
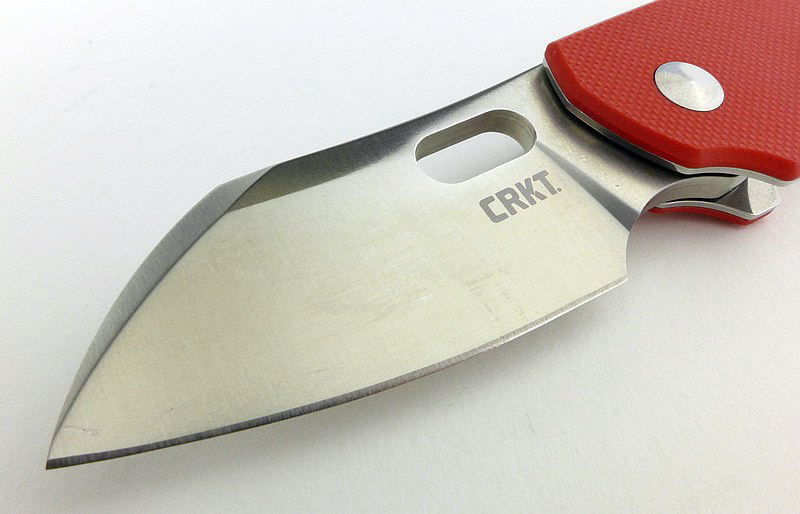
The sheepsfoot blade shape is very practical, presenting the tip and edge nicely for draw cuts.
One-handed-opening is easy and the slip-joint detent is firm enough (assuming correct cutting technique). Thanks to the vision of Heinnie Haynes, we have a super usable, easy to carry, and inexpensive EDC pocket knife.
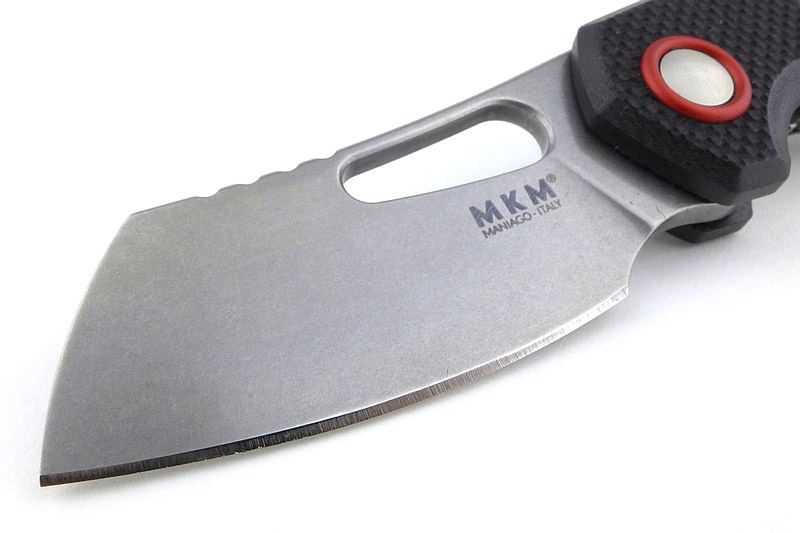
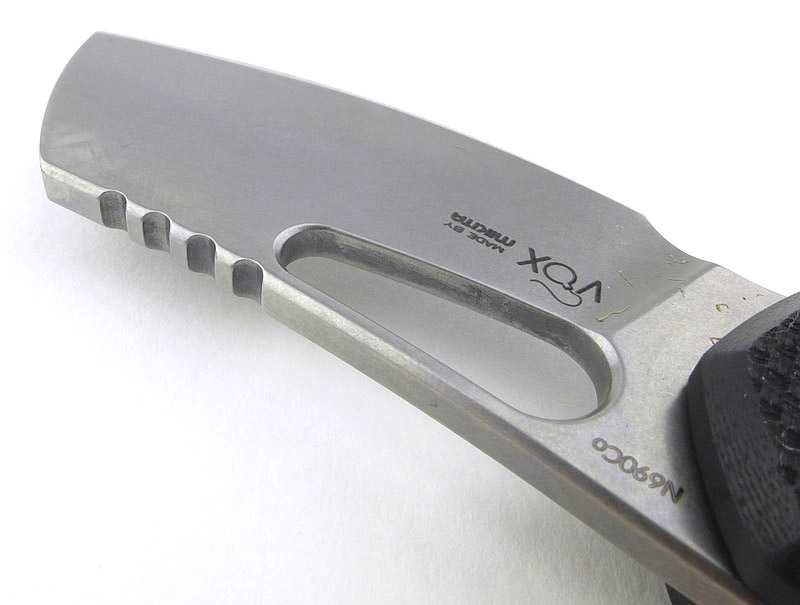
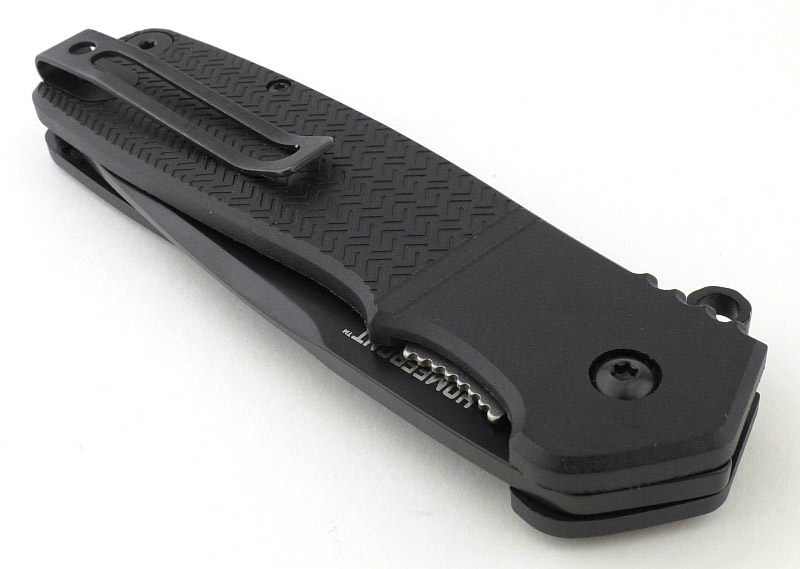
Heinnie Edition MKM Isonzo Cleaver – This knife drew me in as soon as I saw it, Jesper Voxnæs’ distinctive design, which was also originally a liner-lock knife. With Heinnie Haynes stepping in and arranging for a slip-joint conversion to open up this excellent knife’s EDC-ability.
In this version, it has the ‘cleaver’ blade (although effectively this is really a slightly deeper sheepsfoot shape), with the characteristic downward presentation of the tip, making it a very practical cutter.
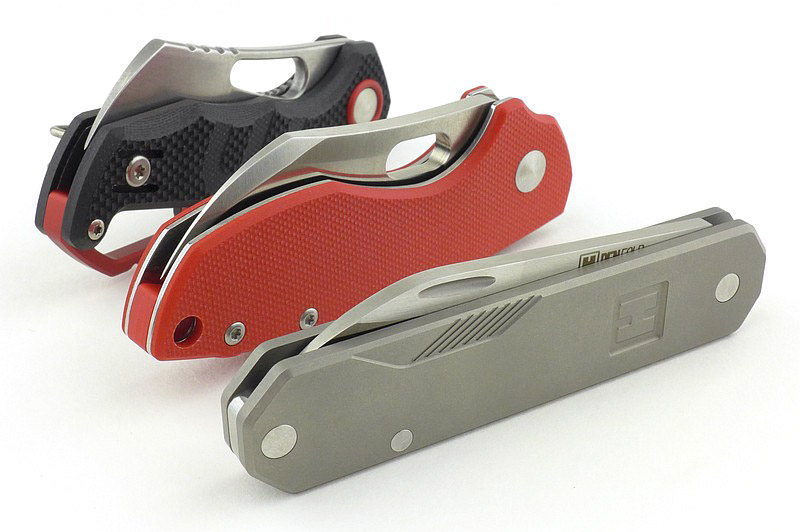
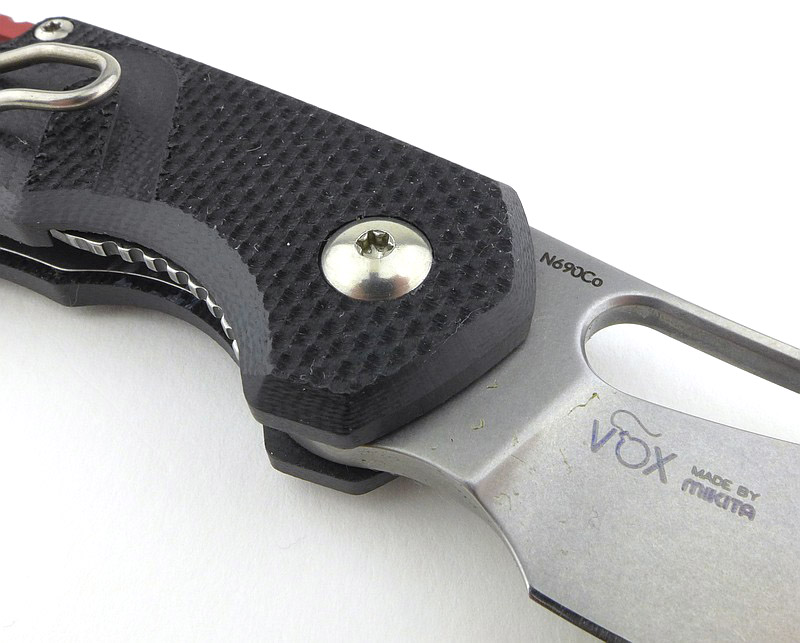
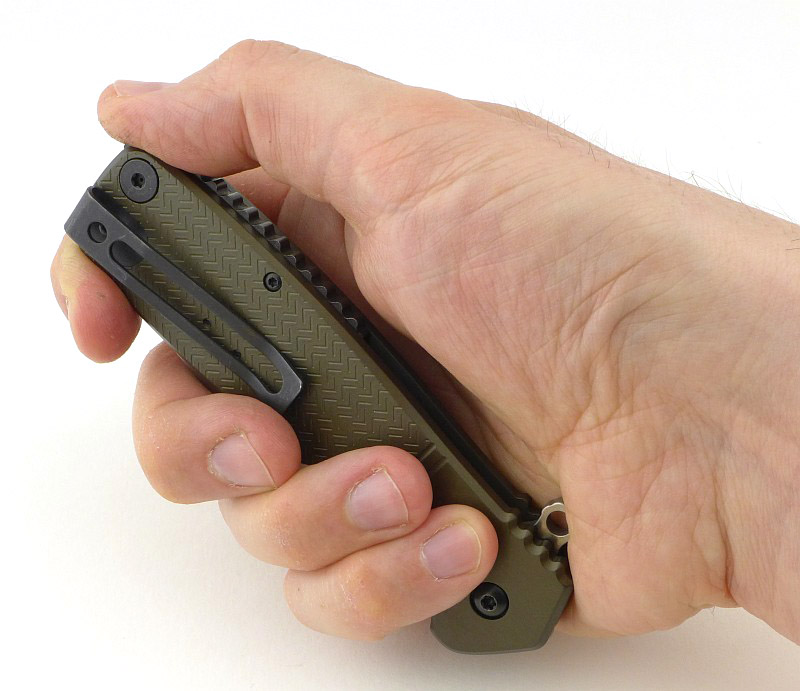
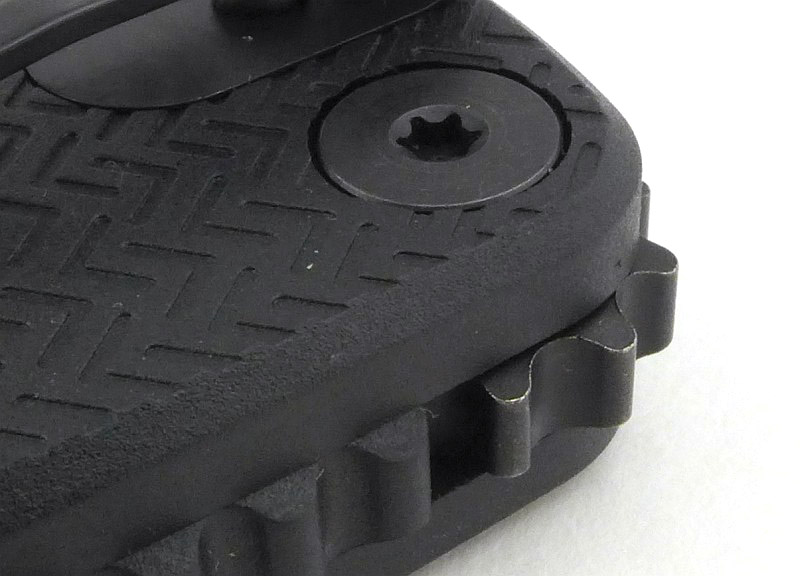
The peeled G10 scales have a texture that almost reminds me of the rasp side of a box grater (the one you end up skinning your finger joints on). This texture is super grippy, and I feel I could keep hold of this despite oil or anything else slippery on my hands.
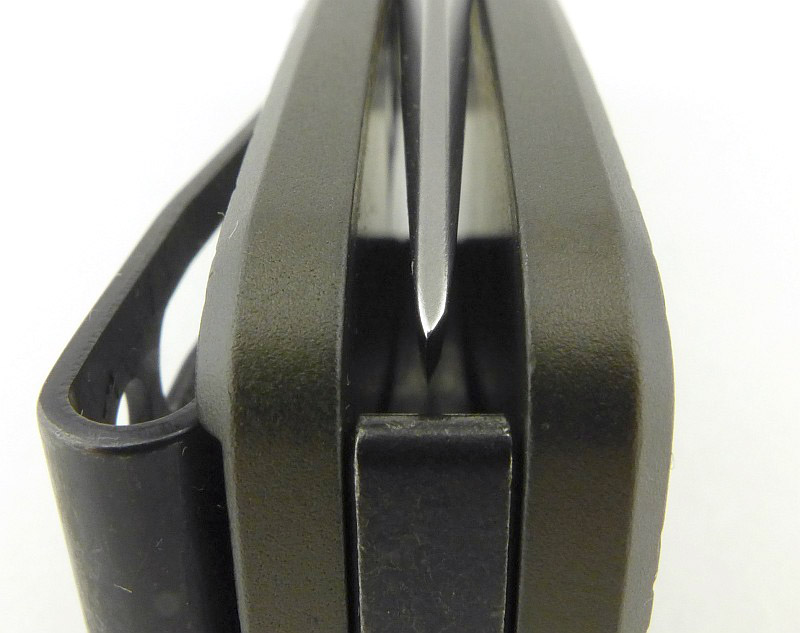
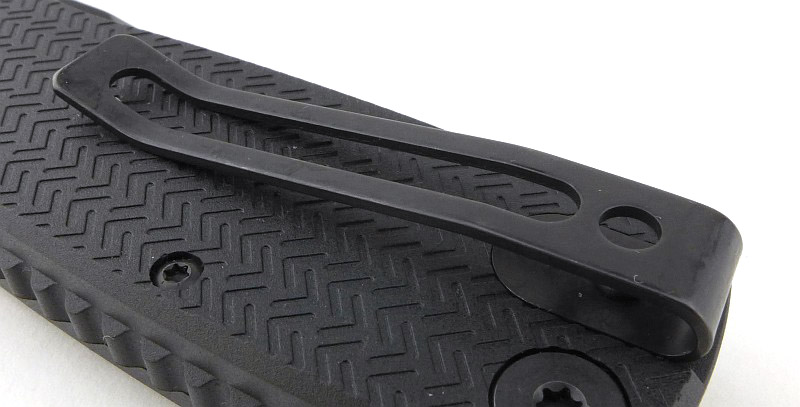
For its overall size, the Isonzo is quite wide when folded; wide enough I could not fit it into any of the knife belt pouches I have. The secure grip from the rough handle texture is actually really good, and feels fine for general use, so I definitely want to carry this. Despite being my preferred tip-up clip position, its ferocious grip texture makes the pocket clip something I won’t use, as it will rip pockets to shreds; so, I just popped it into the bottom of whatever pocket or pouch/bag I had.
With a deep full flat grind, the blade had the narrowest primary bevel angle of the three in this review, and proved a great slicer with lots of control.
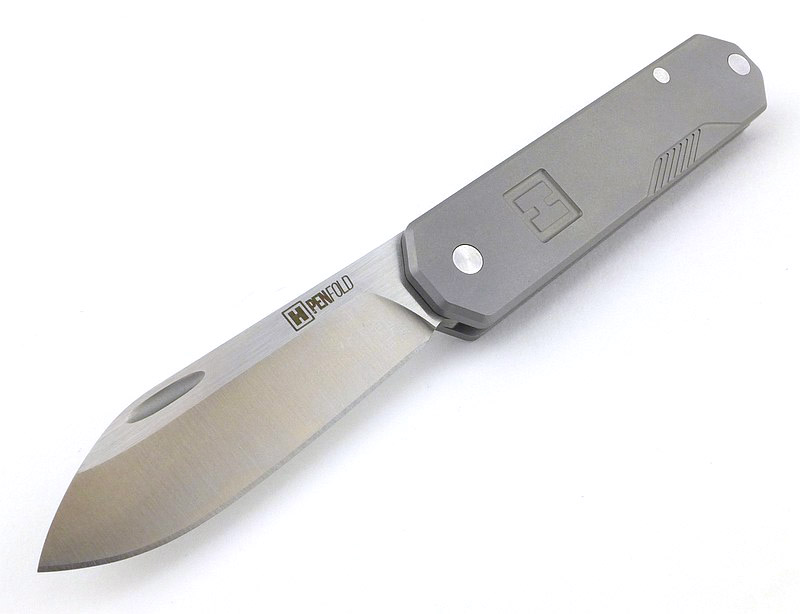
Heinnie Penfold – Those sleek lines make the Penfold beautiful in its simplicity. This is a knife imbued with elegance and sophistication, and a joy to behold every time you bring it out. When this arrived, I got out an old leather belt pouch I’ve had for probably over 25 years, and it’s been on my belt every day since then (with the Penfold in it of course).
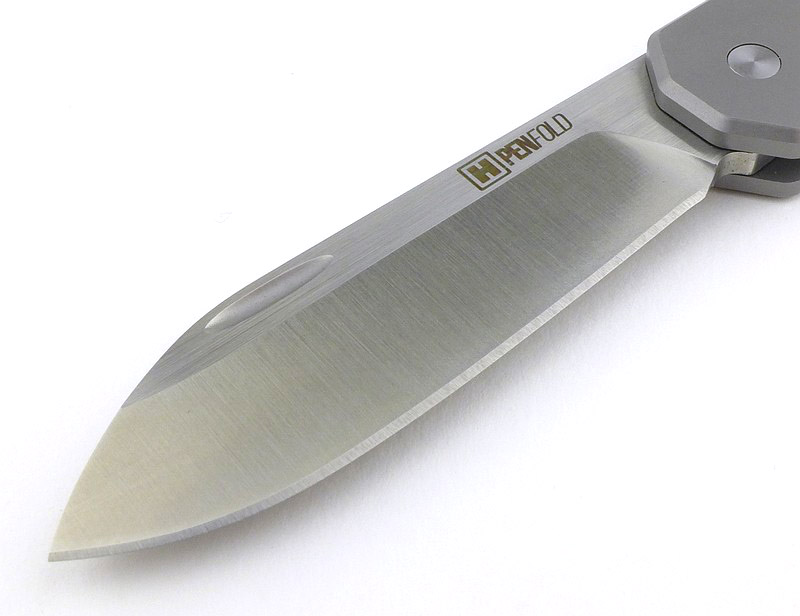
Initially I was a little put off by the thickness of the blade. In terms of visual design, the thick blade looks super, but a thick blade loses out in slicing ability, so I didn’t have high hopes for the usability. Well, I could not have been more wrong; every task I’ve used it for has been completed with ease and not impeded by the blade thickness. There will be some cutting jobs the blade thickness may end up slowing down, but so far this has proven a cracking daily carry!
Review Summary
The views expressed in this summary table are from the point of view of the reviewer’s personal use. I am not a member of the armed forces and cannot comment on its use beyond a cutting tool or field/hunting knife.
Something that might be a ‘pro’ for one user can be a ‘con’ for another, so the comments are categorised based on my requirements. You should consider all points and if they could be beneficial to you.
_______________________________________________
What doesn’t work so well for me
_______________________________________________
Pilar – tip-down clip position.
Isonzo – pocket shredding grip texture.
Penfold – thick blade and steep primary grind angle.
Penfold – lanyard point fiddly and a tight fit for 7-strand paracord.
_______________________________________________
Things I like
_______________________________________________
Pilar – converted to a slip-joint for EDC.
Pilar – sheepsfoot blade shape.
Pilar – compact and easy to carry.
Isonzo – converted to a slip-joint for EDC.
Isonzo – super grippy handle texture.
Isonzo – very easy to one-hand-open.
Penfold – elegant and stylish design.
Penfold – S35VN and Titanium.
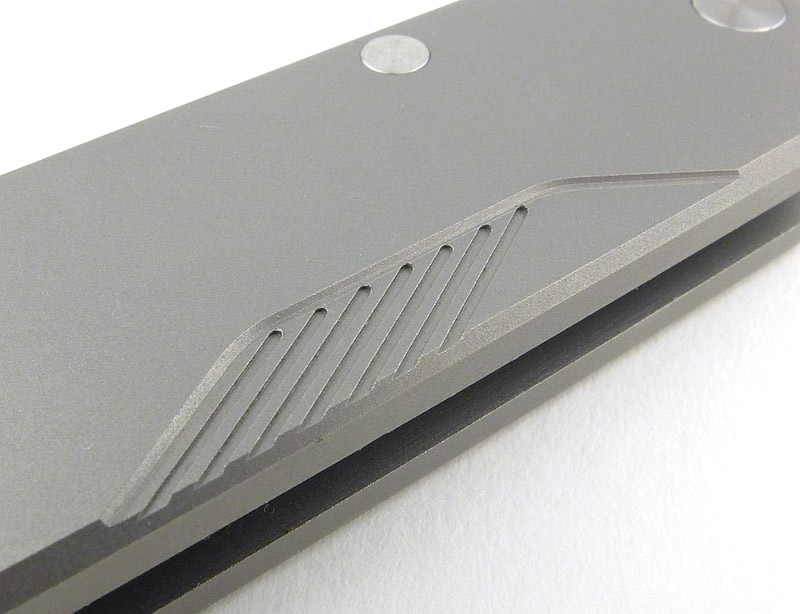
Penfold – slim and narrow making it a low profile carry.
Discussing the Review:
The ideal place to discuss this review is on the Tactical Reviews Facebook Page
Please visit there and start/join the conversation.
As well as the Tactical Reviews Facebook Page, please consider visiting one of the following to start/join in any discussion.
CRKT are full of interesting and innovative ideas, and with the Homefront and Homefront Tactical bring us ‘Field Strip’ Technology, or in other words tool-less disassembly. The design comes from world renowned Ken Onion and has been a work in progress for many years. Now thanks to this technology you can clean out a build up of grit and dirt wherever you are without any tools. Take your Homefront folder anywhere knowing you don’t need anything else with you to carry out a full strip and clean.
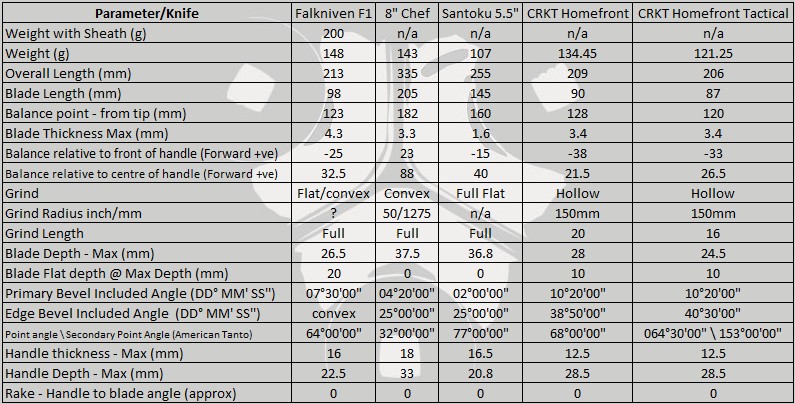
The Blade and Handle Geometry:
Most knife specifications have a basic description of the blade geometry, but in this section I will be taking a more detailed look at geometry and balance.
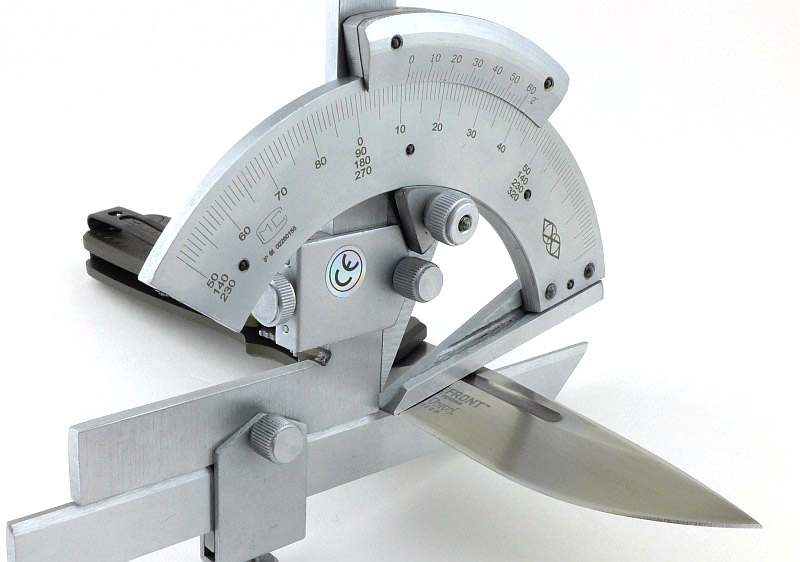
Using a set of gauges and precision measuring equipment including a Vernier protractor, callipers, fixed radius gauges and the unique Arc Master adjustable radius gauge (the one that looks like a crossbow).
These measurements have been tabulated and are presented along with a few reference blades (8″ Chef’s Knife, 5.5″ Santoku and the popular Fällkniven F1).
Key aspects such as the primary bevel angle, grind type, blade depth, blade thickness, length, weight are detailed, along with balance information.
The ‘Balance relative to the front of the handle’ tells you if the knife will feel front heavy, or if the weight is in your hand (a positive value means the weight is forward of the front of the handle). The ‘Balance relative to the centre of the handle’ indicates how close to a ‘neutral balance’ the knife has in the hand.
In the case of full convex grinds the approximate centre of the grind is used for the primary bevel angle estimate.
The Homefront blade is made from AUS 8 steel and the Homefront Tactical from 1.4116 steel (also known as 420MoV or X50CrMoV15).
Explained by the Maker:
The reasons for certain design choices may not be clear when simply looking at an object, so this section is intended to give an insight into the thinking behind a design by speaking to the designer themselves.
Unfortunately I can’t always get time with the designer so will use this section to include relevant information about the knife and its designer.
A little description from CRKT’s of the Homefront:
“It might look like your grandpa’s classic WWII knife, but it’s got an impressive secret. The new Homefront™ knife is the first in our fleet to feature “Field Strip” technology. This in-field, no-tool take apart capability lets you purge your most reliable companion of a hard day’s grime right where you are, without ever returning to your workbench.
The breakthrough “Field Strip” innovation comes from the shop of world-renowned knife craftsman Ken Onion and has been over ten years in the making. To disassemble the Homefront™ when the knife is in the closed position, push the front release lever away from the blade, then spin the turn release wheel on the rear of the handle away from the pivot shaft. Once you feel the handle release, pull it up and away from the blade. Reassembly is as easy as reversing the procedure, al-lowing for practical, quick maintenance where you stand.
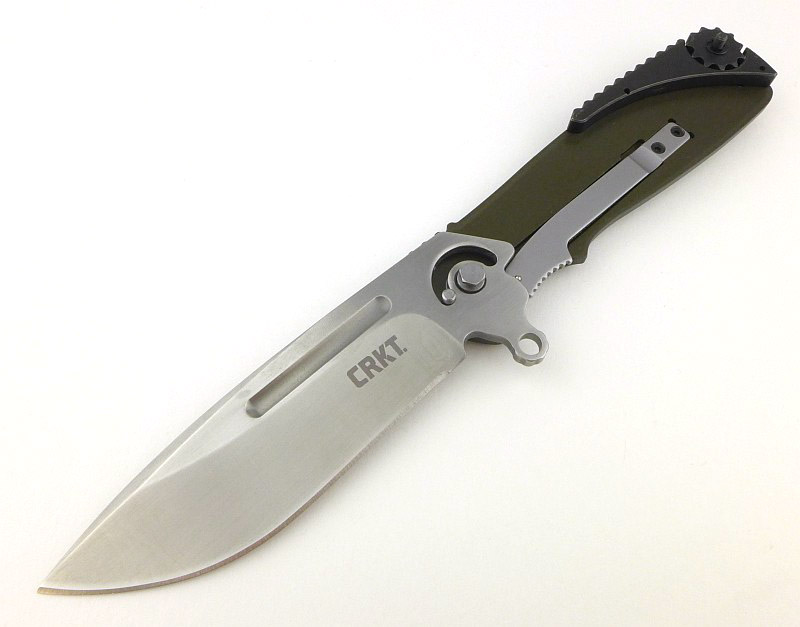
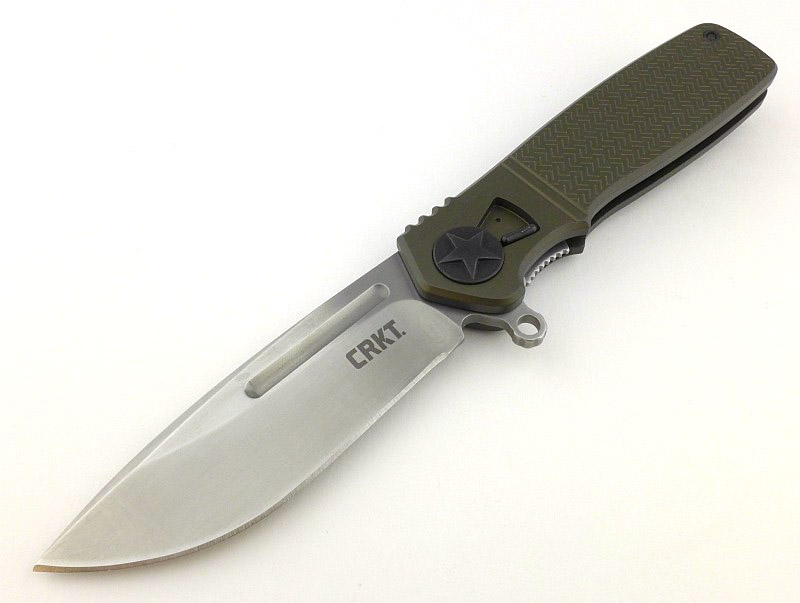
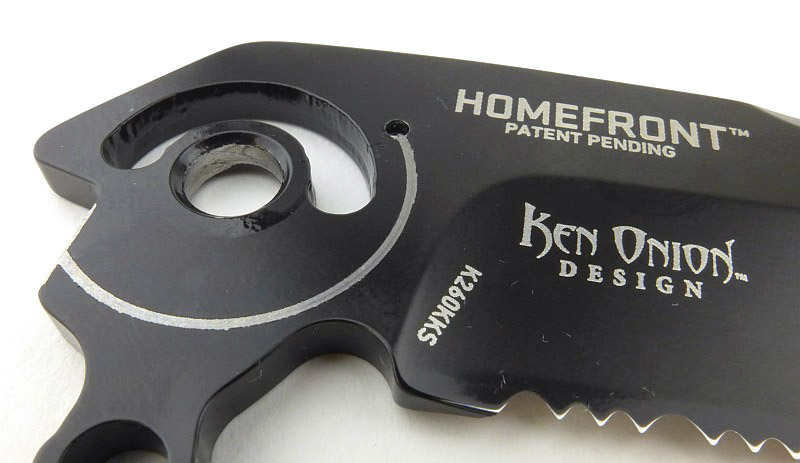
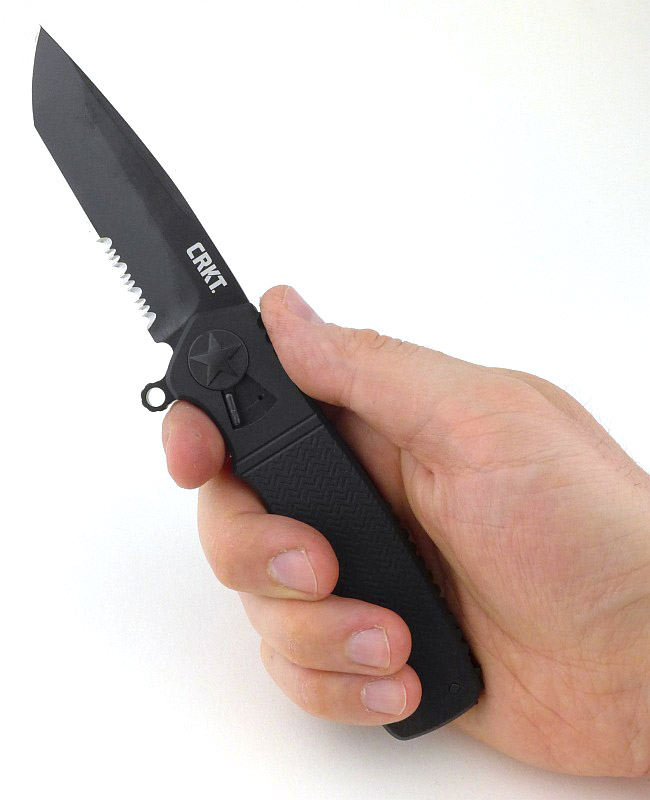
From his shop in Kaneohe, HI, Ken Onion designed the tactically inspired, everyday carry Homefront™ knife to stay true to its vintage roots. The bayonet lug-style flipper sets off the smooth open action of the 3.5” modified drop point blade, while tank jimping on the backstrap sits snugly against your palm.
It stands up to the looks of a WWI heirloom, and it sure as hell stands up to any job it encounters. The handles are made from 6061 aircraft-grade aluminium and house an impressively beefy AUS 8 stainless steel blade.”
A few more details of the Homefront:
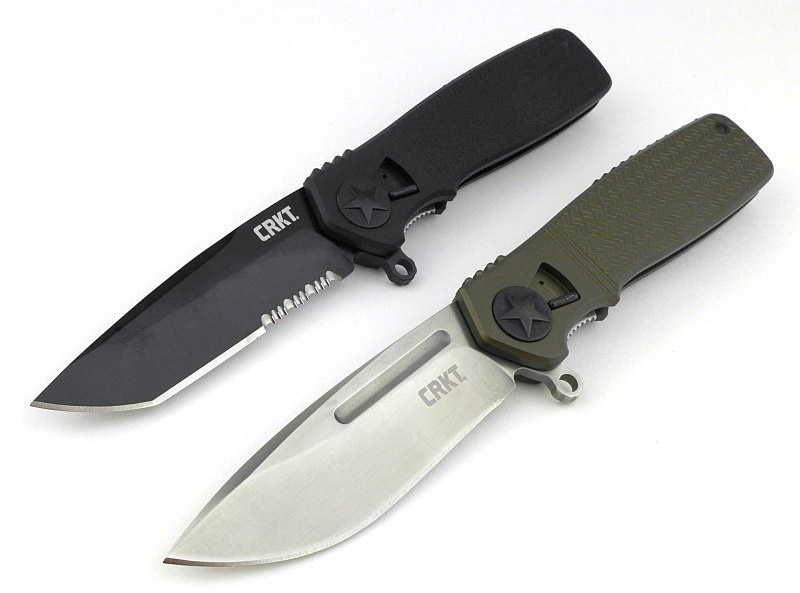
This review covers the Homefront (green handle) and Homefront Tactical (black handle), but we are going to look at the original Homefront first. There are no boxes as these knives came straight from the CRKT IWA 2017 display stand at the end of the show. They have been handled and used.
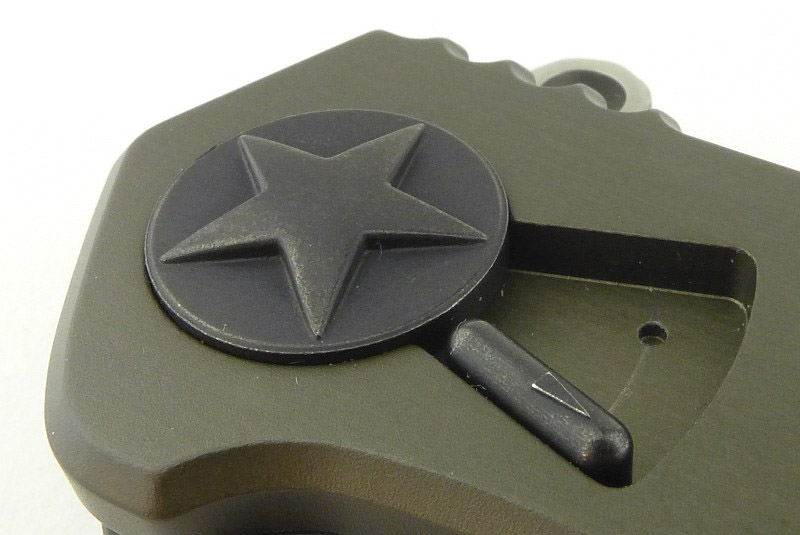
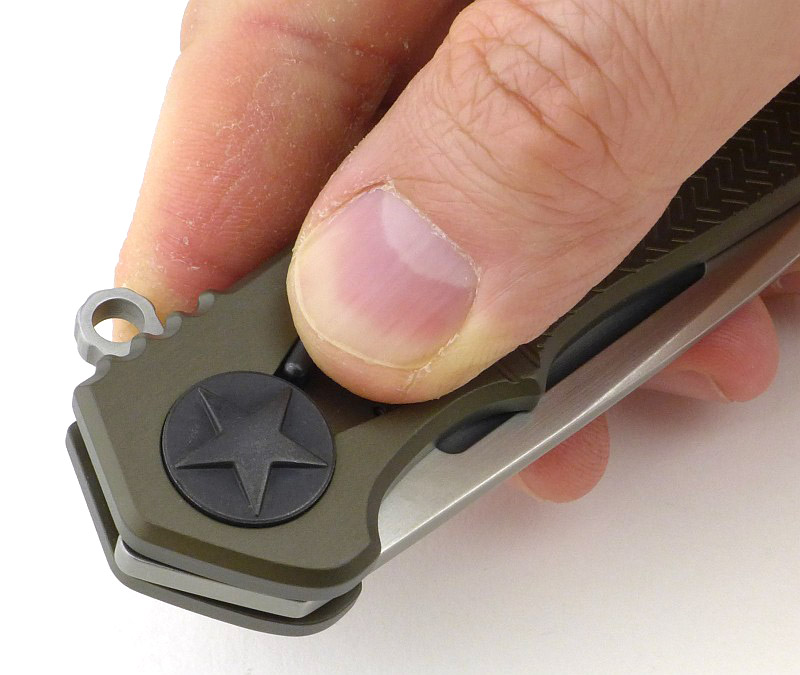
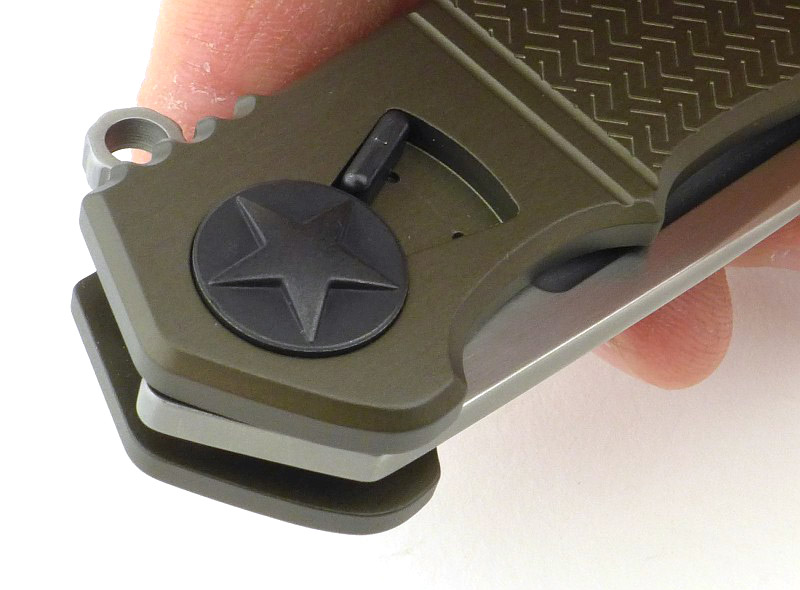
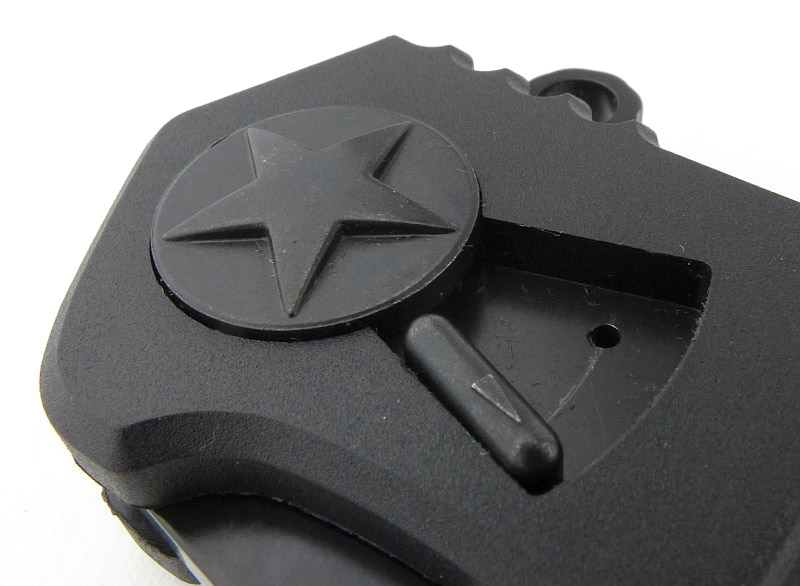
The pivot has what appears to be the standard US aircraft star insignia (as used from 1942). The lever next to this is where the magic is hidden.
Apparently styled after a bayonet lug, the flipper tab has a hole in it. (Do not try to attach a lanyard here!)
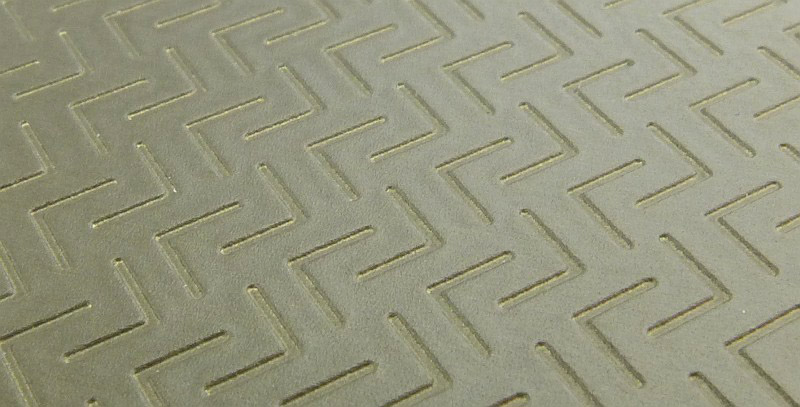
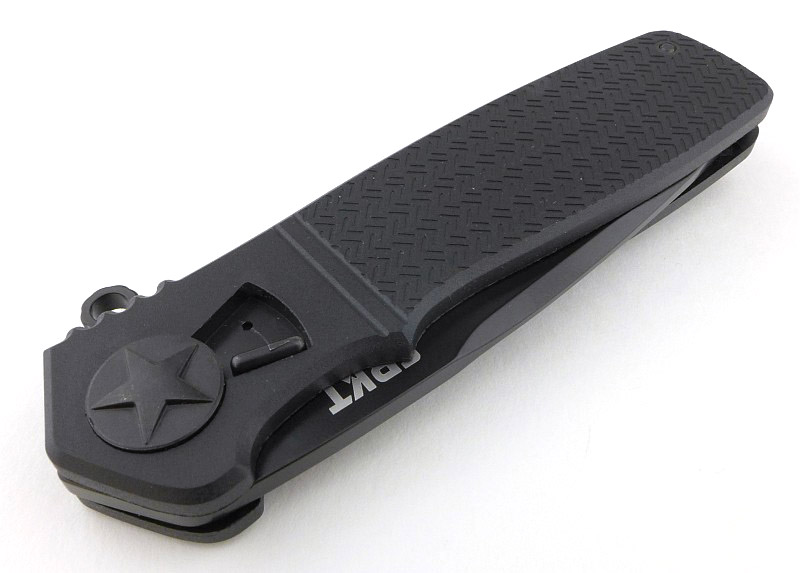
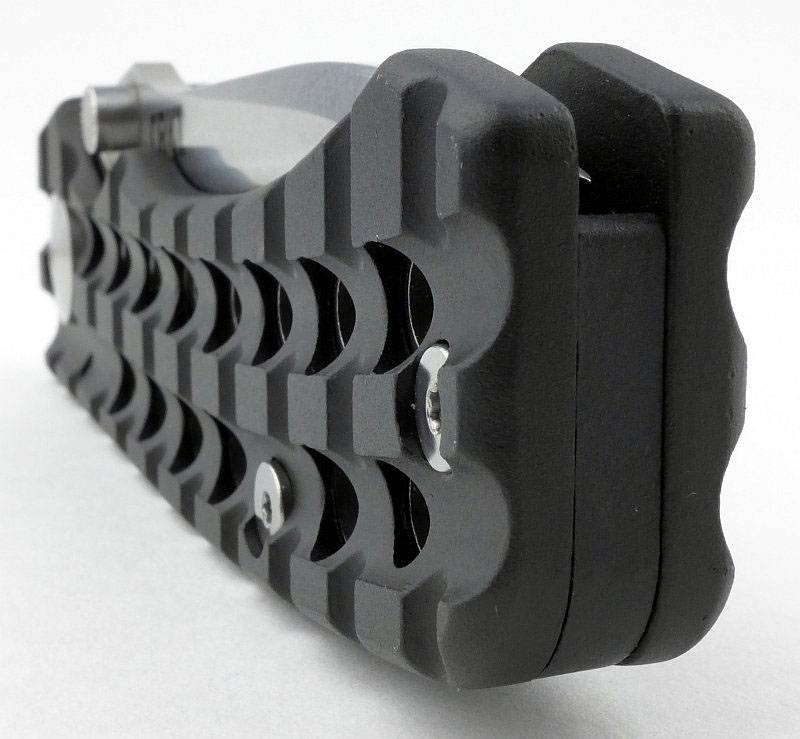
Both handles have a subtle grip pattern. This appears to have been laser etched into the surface before anodising.
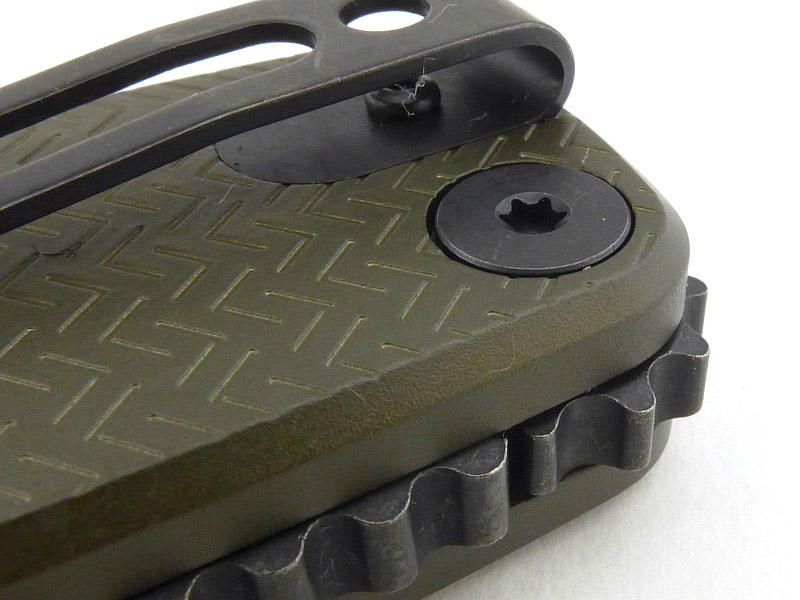
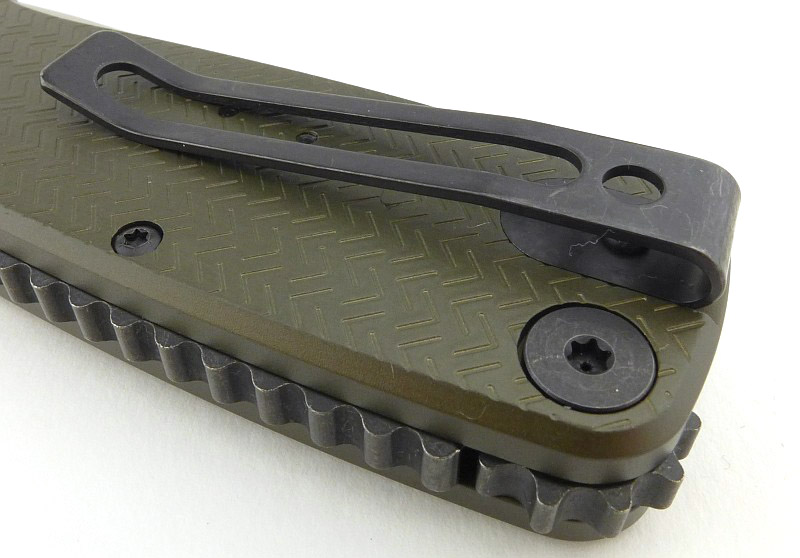
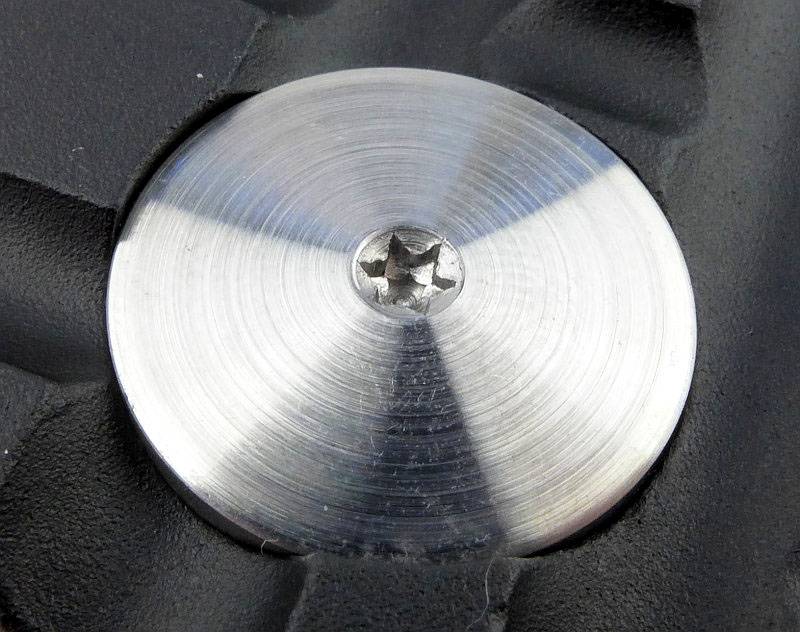
The other bit of magic, comes from the thumb-wheel screw that holds the butt of the knife together.
A steel pocket clip also gives you a hole for attaching a lanyard should you wish to.
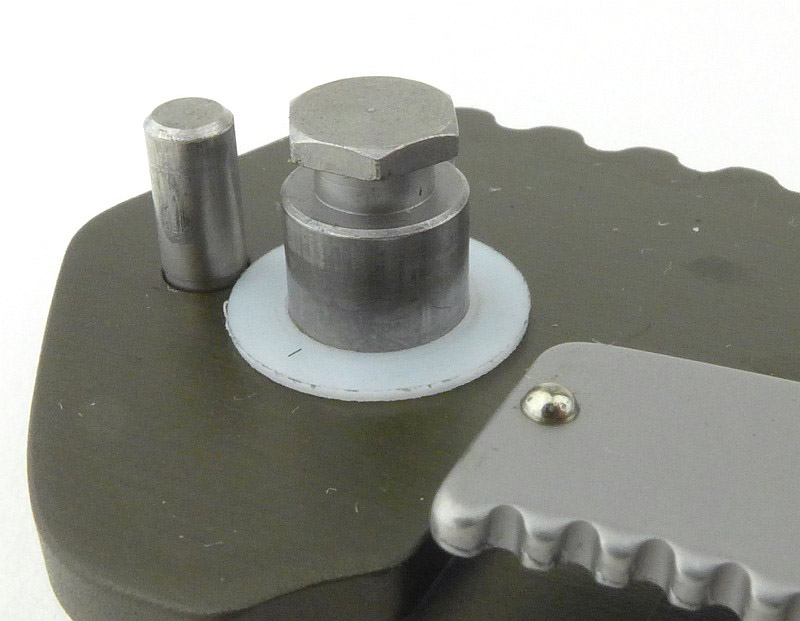
Though not strictly a ‘liner-lock’, tucked neatly into the inner side of the Homefront’s aluminium handle is a sprung steel locking lever.
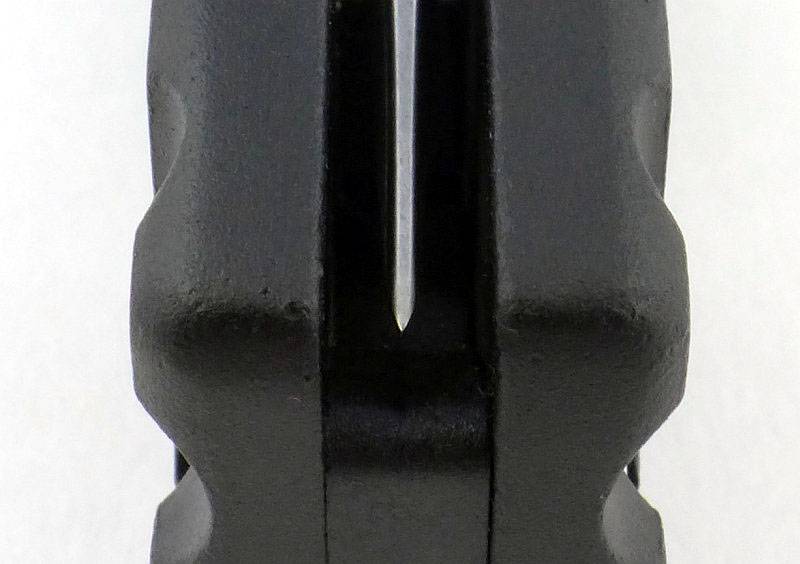
Blade centring is good, with the tip appearing slightly off due to the edge grind.
A Torx screw holds the jimped handle spacer in place on one side.
On the opposite side to the star insignia, the pivot has an adjustment screw that sets the height of the pivot bolt.
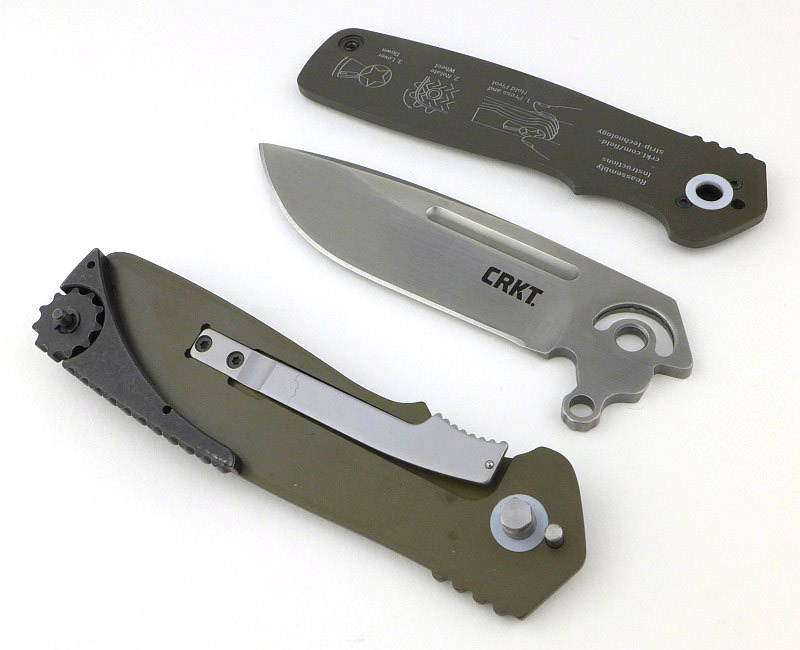
Right! Let’s take this knife apart. First loosen the thumb-wheel screw by pushing it away from the pivot. Keep going until the thread ‘clicks’ to indicate it is fully undone.
Flip the knife round and push the locking lever towards the flipper tab (with the knife folded).
Now, as you lift your thumb, the handles spring apart at the pivot.
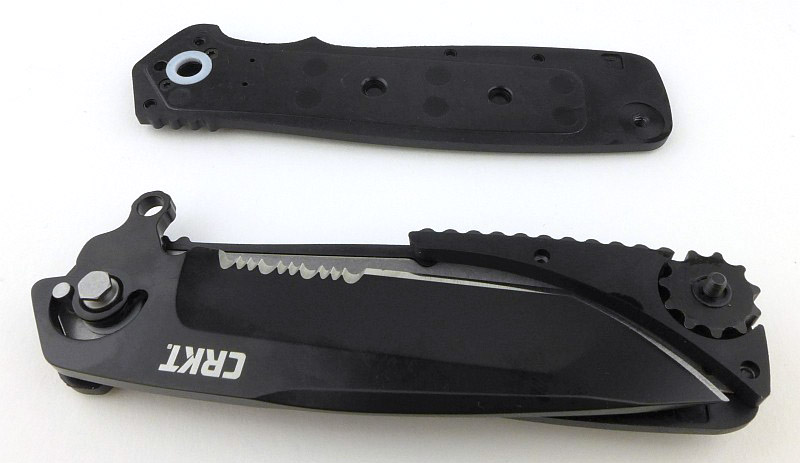
As we had already loosened the thumb-wheel, the handle can now be lifted away, fully exposing the folded blade.
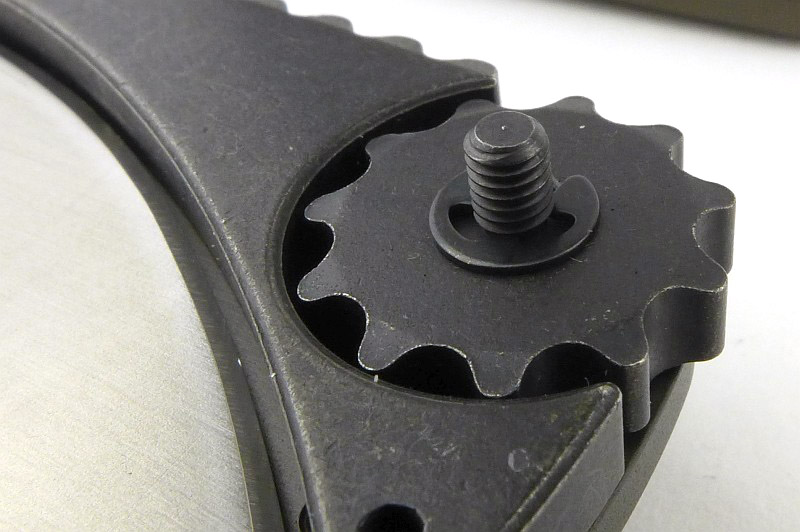
A closer look at the thumb-wheel while we can. Note the circlip; the wheel fits over the threaded bolt, and there is a little bit of play, with the wheel having some movement even when the connector is fully tightened.
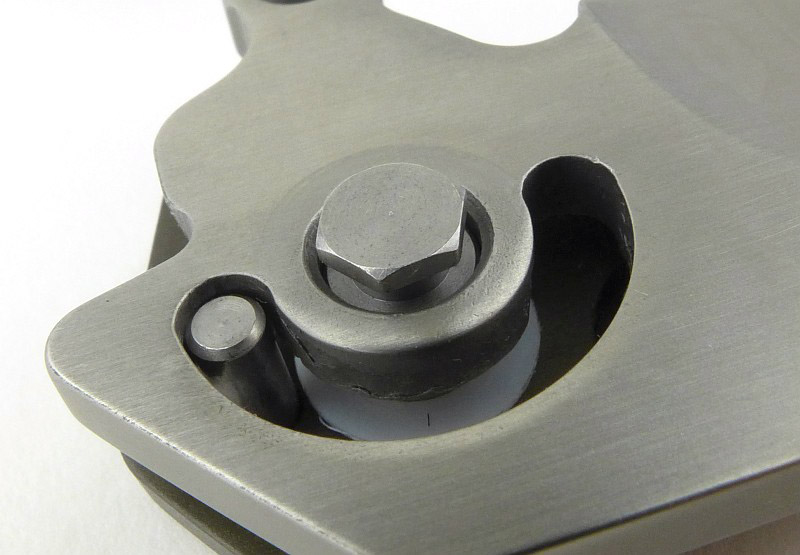
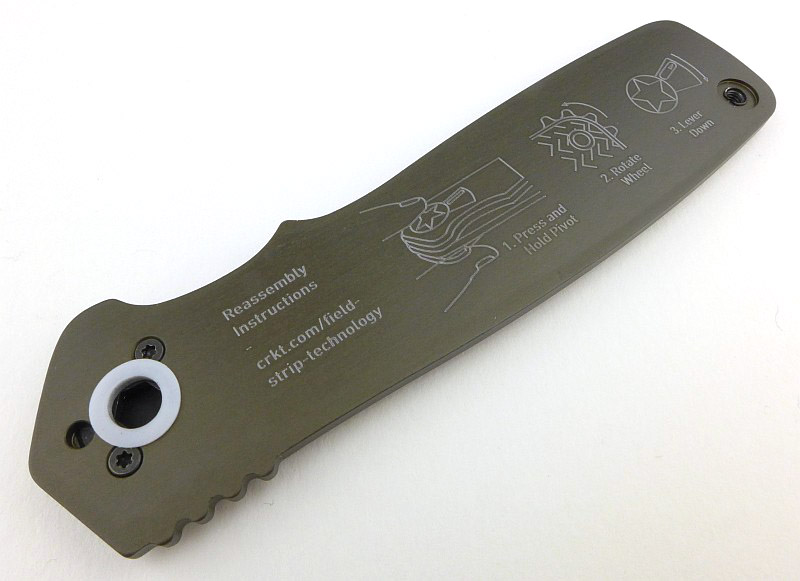
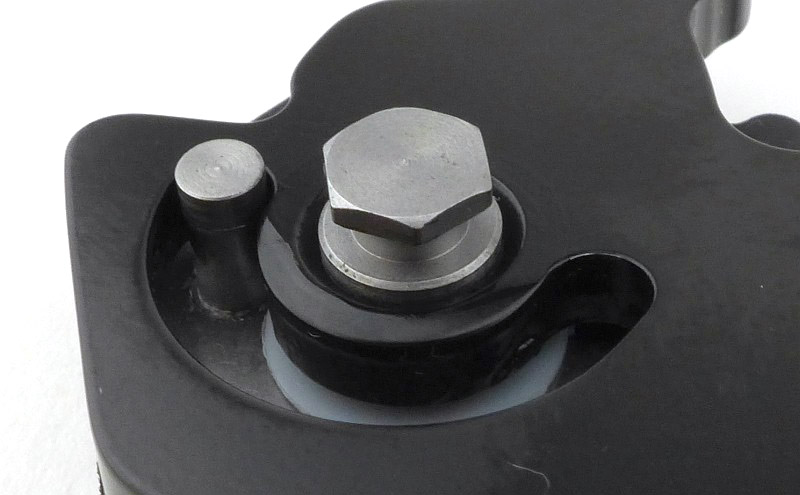
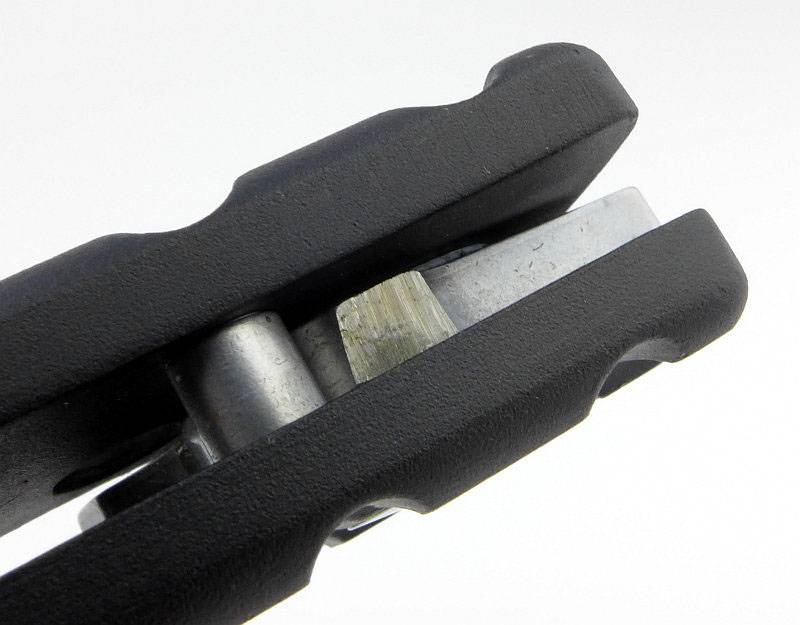
And this is the magic pivot that lets it all happen. Note the hex-shaped head. The homefront also uses a concealed stop pin which limits the open and closed positions of the blade.
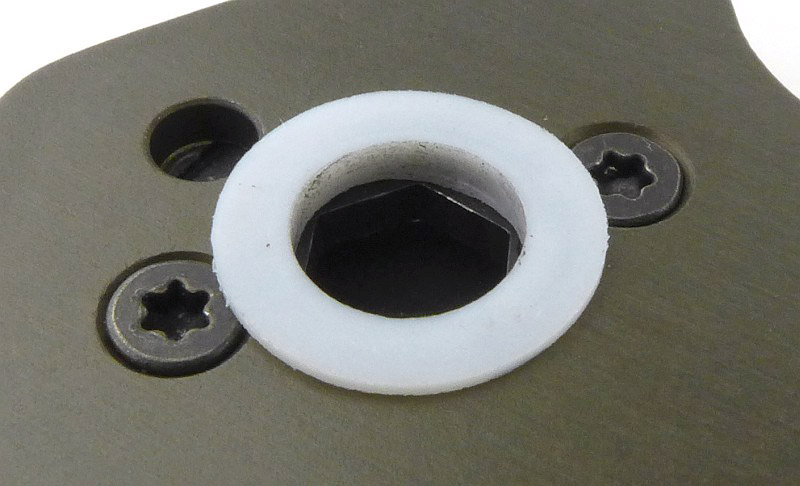
Look into the hole of the handle we removed first, and you can see the hex shaped hole that locks onto the top of the special pivot bolt.
If you forget how you took it apart, or somehow it just ‘came apart in your hands’, inside the handle is a set of instructions for putting it back together again.
When stripped you have the three main components, the master handle (with pivot, stop pin, lock bar and thumb wheel screw), the blade, and the second handle.
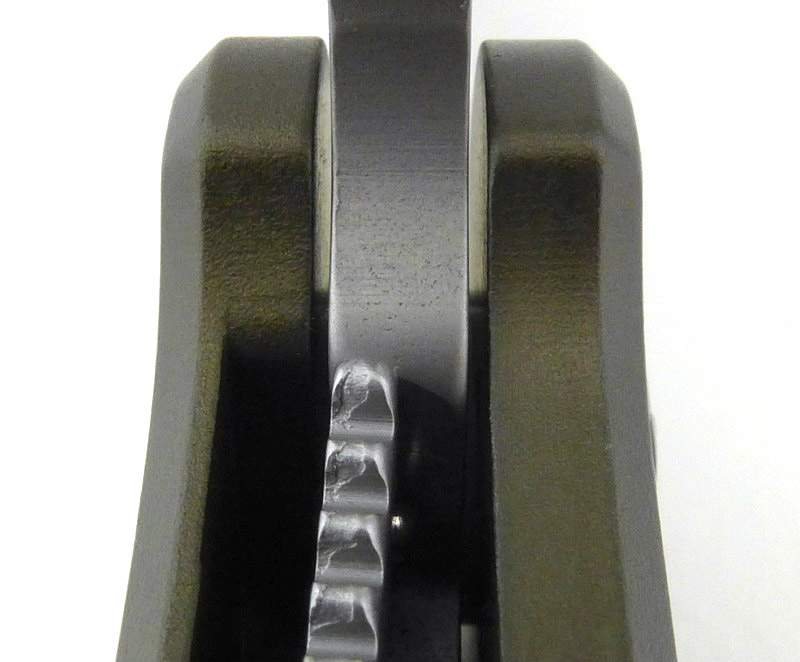
While it is fully stripped this is a closer look at the special pivot, stop pin and the detent ball on the end of the lock bar.
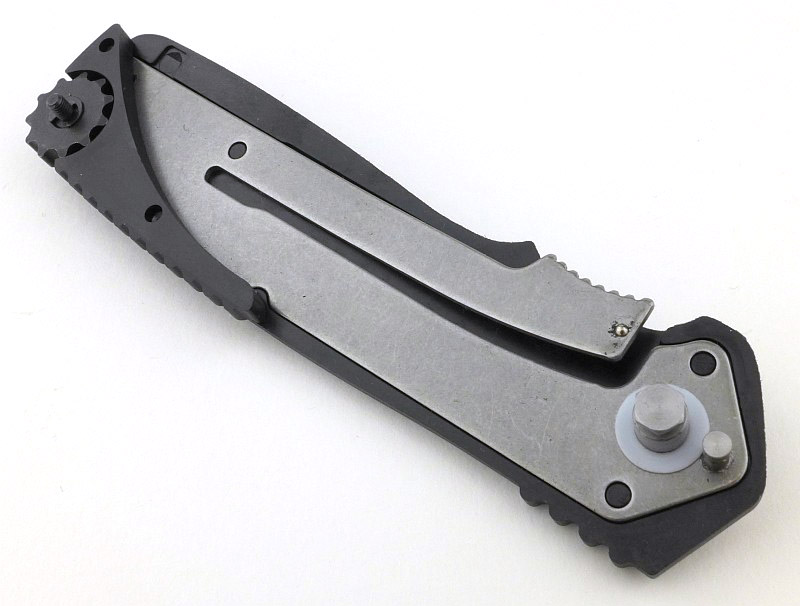
So, not a ‘liner’ , this lock bar is inset into the aluminium handle, but functions exactly as a liner lock.
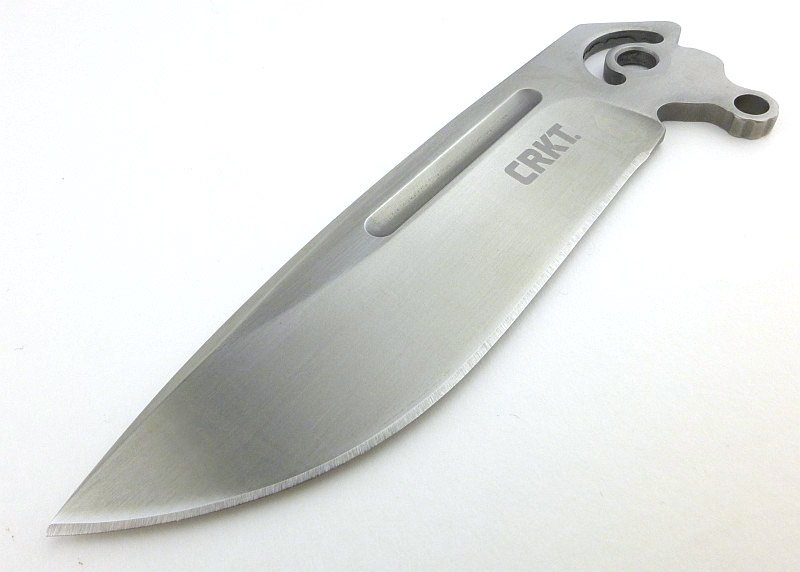
The blade tang has the pivot hole and a semi-circular stop pin slot. The markings in the hole suggest this is a stamping and is not water jet cut.
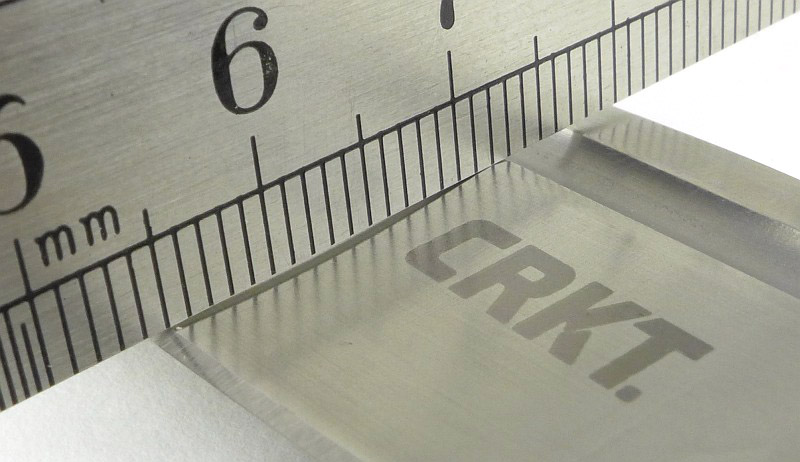
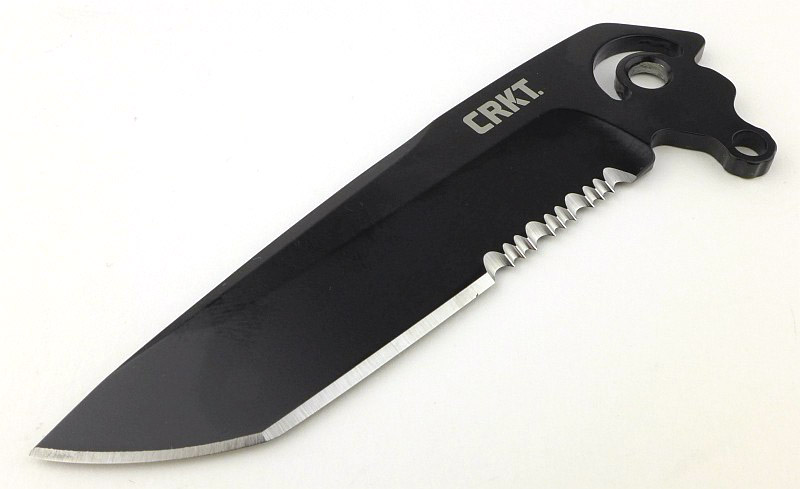
A really good looking blade with swell near the tip and a fuller, giving it a classic look.
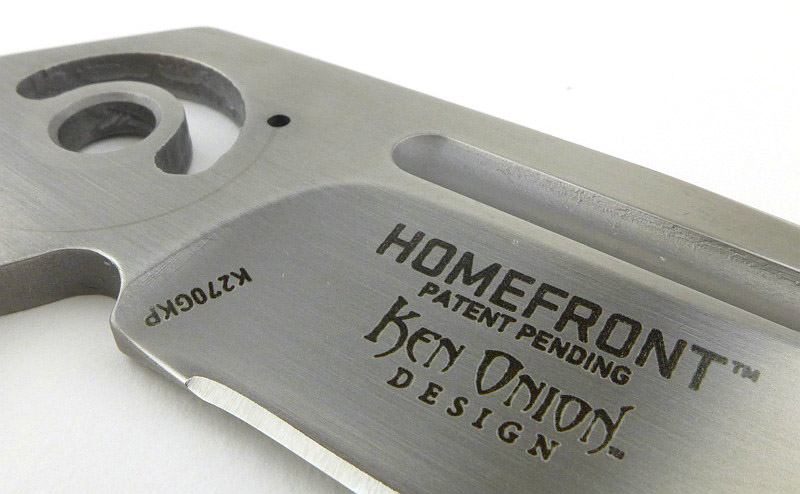
Ken Onion is credited on the blade. On this side of the blade you can see the detent hole.
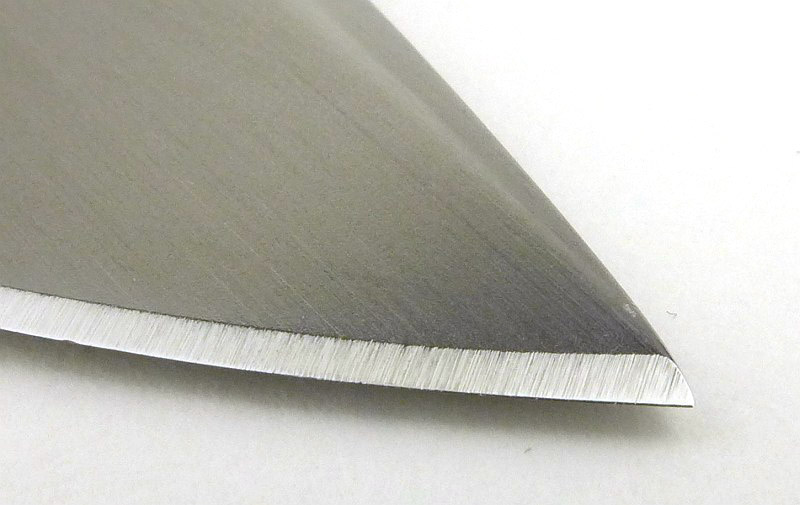
A close-up of the blade tip, showing the contrast in surface finish and the edge bevel grind.
With one handle removed you get a cut-away view of the workings of this knife.
Lock engagement is good with the entire lock bar touching the blade tang with a firm snap-open.
And in no time at all it is all back together.
The Homefront achieves a real vintage look, despite not looking like any historical knife I’ve found.
A few more details of the Homefront Tactical:
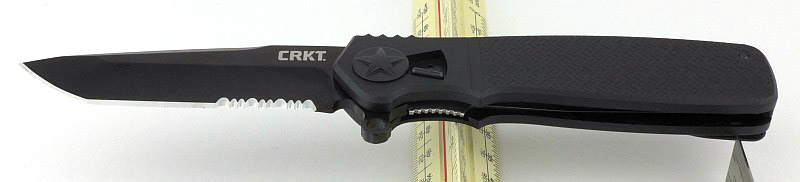
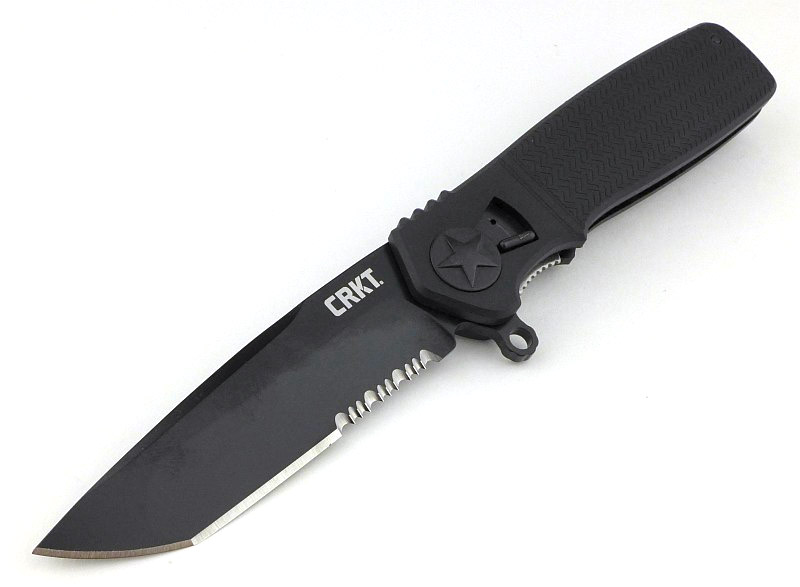
Next we have one of the second wave of Homefront models where instead of the aluminium handles, these have Glass Reinforced Nylon handles and a different blade steel. This is the Homefront Tactical, with a part-serrated Tanto blade
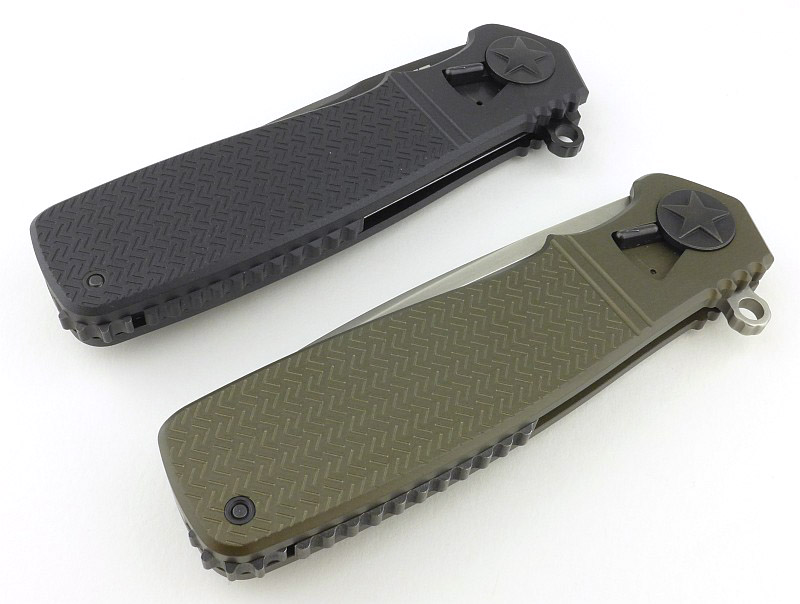
The design and shape of the handle is the same as the original Homefront, including the pivot star insignia.
In terms of the function and design the GRP handled version is basically the same. Here we have the thumb wheel.
And the same steel clip.
That bayonet lug flipper. However note that this time the blade is black. It has an EDP finish (electronically deposited paint, which is baked on).
A hint of bare steel with the lock bar. We will see that this time it is actually a liner.
Although the same grip pattern is used, in this version the width of each line is wider than on the original Homefront. Of course, in this case it is moulded into the surface instead of being laser etched.
Going straight for a field strip, exactly as with the Homefront; here the handle is off.
The internal curve of the handle spacer is a match to the Homefront’s blade, but here we have a tanto. Clearance is still good. The spacer is also now GRP instead of metal.
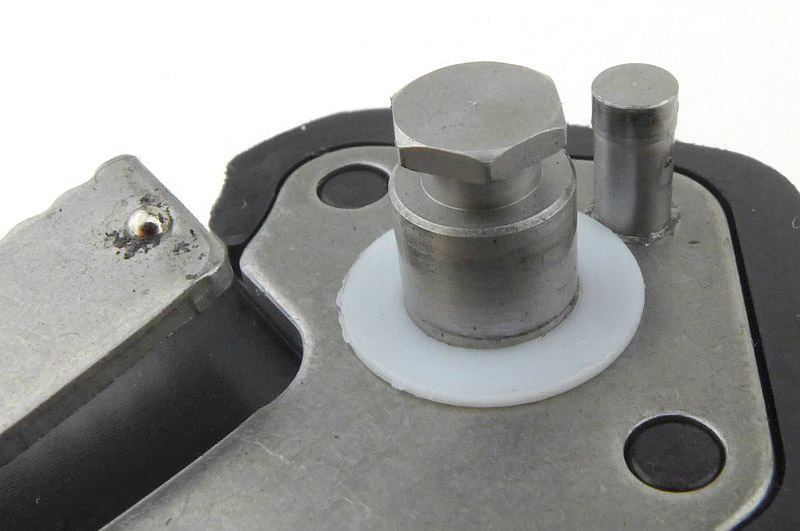
As before, the pivot has a hex shaped head.
Now we see one of the major differences. With the handle being plastic, it cannot have the lock bar screwed to it. Instead there is a full metal liner moulded into the inside of the handle.
This full metal liner also has the stop pin fixed to it and supports the pivot. The dirt around the detent ball on the lock bar is worn off paint from the blade.
A Teflon bushing acts as the pivot washer. You can see the outline of a metal liner inside the moulded handle. Two screws hold the pivot locking mechanism together.
Apart from the cutting edge, the entire blade is EDP coated.
EDP is just paint, so where the detent ball rubs on the blade tang, the paint has been scratched off.
Looking at the finish on the edge bevel grind.
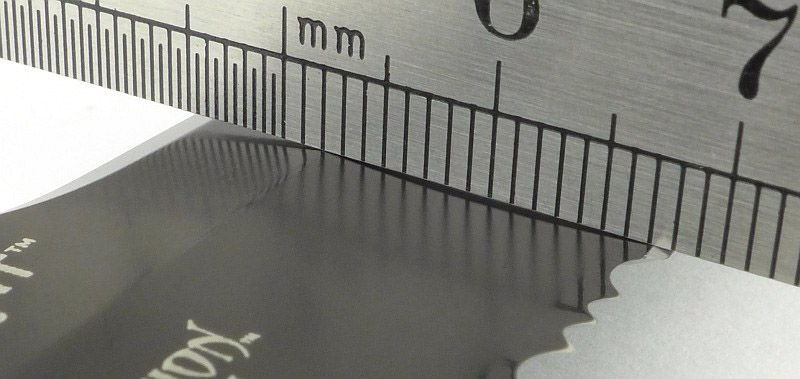
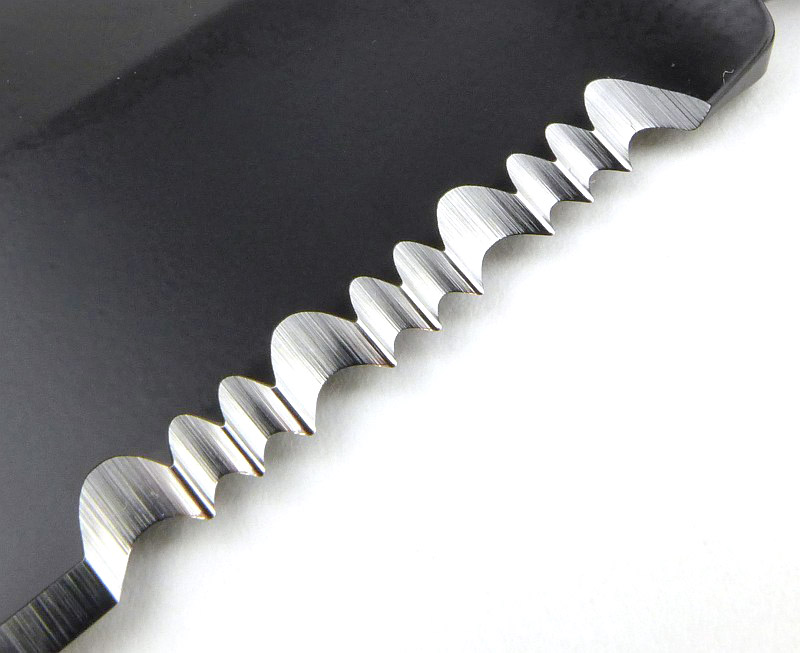
There are part serrations near the handle which are a chisel grind (single bevel) and have two sizes of scallop.
The all black Homefront Tactical.
And there is more when you put these two together…
What are they like to use?
Headlined as a ‘field strip’ technology, it could also be an ‘easy disassembly’ feature. You can take the Homefront apart anywhere, but you can also pop it apart any time for a quick service, not only when it needs a major overhaul. By making the deep-clean a super easy process, you are much more likely to keep these knives in top condition all the time.
The styling of these knives is mentioned prominently by CRKT. The Homefront is described as a remake of grandpa’s WWII, and the Tactical as a classic WWI knife and though there is a vintage look; firstly I suspect the WWI reference is a mistake as the US Airforce aircraft marking Star Insignia was a WWII design, and secondly I would disagree that it is like any WWII folder, certainly none I’ve ever seen.
Let me make it very clear that I really like the design and styling, which definitely has a vintage look, and incorporates design features that do give a modern interpretation of a WWII knife. My disagreement is with the statement that it looks like grandpa’s knife, show me a knife from WWII that looks like this and I’ll happily eat my words.
This is really not a negative as, in particular, I like the choice of colour for the handle of the Homefront along with the finish of the blade steel and the inclusion of a fuller. Overall a really stylish design that stands out from the crowd.
Moving on to how it is in the hand, that most crucial aspect, and this is a good sized folder with plenty of handle to give a stable grip. The handle has an area of grip positioned perfectly for the thumb to sit on when using a saber style grip. It is a relatively slim aluminium slab handle, yet its shaping allows it to fit into the hand very comfortably. Not so well that I’d want to do a lot of heavy cutting with it, but well enough to find it regularly in my pocket.
The Homefront Tactical has the same ergonomics, as the handle shape is exactly the same, but the nylon GRP material gives it a different feel, warmer, slightly lighter and a slightly different balance. It does not feel diminished compared to the original Homefront, just a different option. It may only be around 13g lighter, but does feel easier to carry.
Talking of options, should you have more than one of the Homefront models you can mix things up a bit and try a different blade or handle. Have a look at this short video to see this and the ‘field strip’ in action.
Video Edited with – Cyberlink Director Suite 5 (PowerDirector 16 and AudioDirector 7)
Camera – Panasonic HC-V770 Microphone – Tonor TN120308BL
Here the Homefront and Homefront Tactical have their original blades.
After a quick strip down and shuffle around, the blades are swapped over.
It is true that the fit and lock-up of the swapped blades are not perfect, with the GRP handle taking either blade with no issues, but the aluminium handle lacks the totally secure lock-up. Actually even with its original blade, the Homefront would benefit from a little adjustment of the end of the lock bar to increase lock engagement. This in turn would make the Tactical blade work better in this handle.
One potential weakness in the design is that the lever that is used to release the pivot could itself be fouled and prevented from operating. If this happens you might find you can’t field strip the knife after all; a consequence of having a ‘mechanism’ for releasing the pivot, as any mechanism can be fouled and jam.
With the popularity of the super slick flipper, the Homefront knives have a much more laid back action. With the (presumably) Teflon washers, the action is smooth but not super slick. The Homefront Tactical won’t lock without a flick of the wrist, and the Homefront needs a quick finger to get lock-up without a flick. Some might think this is a negative, but I like the relaxed feel, and a blade that doesn’t flop around easily when closing the blade.
Stylish, functional and so easy to maintain – I find myself taking it apart just because I can.
Review Summary
The views expressed in this summary table are from the point of view of the reviewer’s personal use. I am not a member of the armed forces and cannot comment on its use beyond a cutting tool or field/hunting knife.
Something that might be a ‘pro’ for one user can be a ‘con’ for another, so the comments are categorised based on my requirements. You should consider all points and if they could be beneficial to you.
_______________________________________________
_______________________________________________
Things I like
What doesn’t work so well for me
_______________________________________________
_______________________________________________
Take apart with no tools (Field Strip).
Potential for pivot release lever to be jammed with dirt.
Stylish, vintage design.
Fixed pocket clip cannot be relocated.
Comfortable in the hand.
Smooth action.
Zero blade play (despite the Field Strip mechanism)
Discussing the Review:
The ideal place to discuss this reviews is on a forum. If you started reading the shorter forum version of the review, but followed the link this full exclusive review, please return to that forum to discuss the review there.
If you read the review entirely on Tactical Reviews, please consider one of the following to join in any discussion.
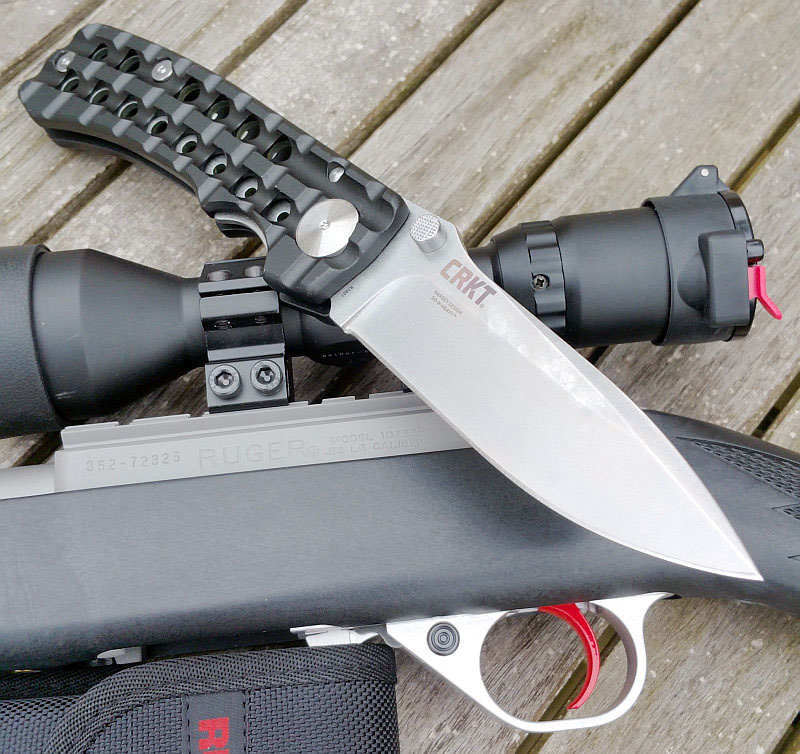
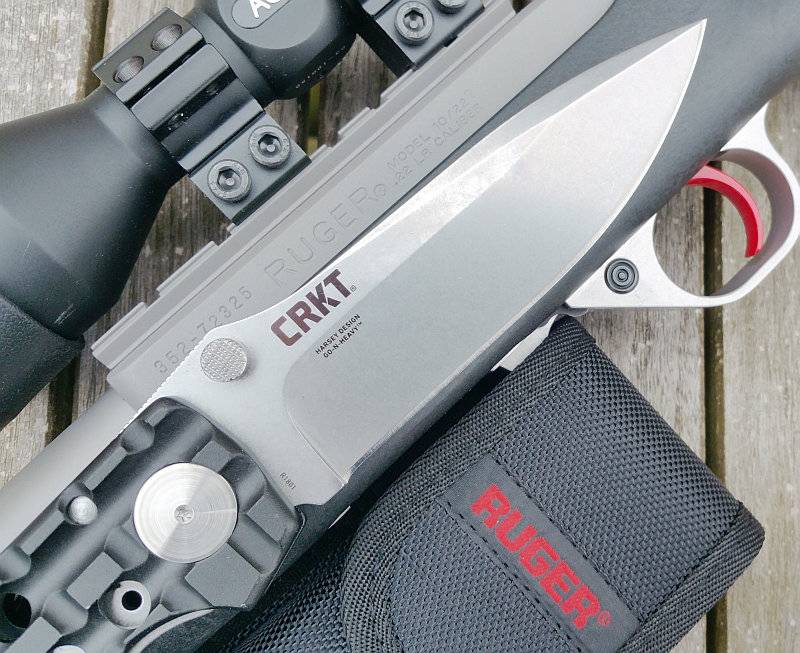
One of my highlights of IWA 2016 was a visit to the CRKT stand, and on that stand was a knife I could not leave IWA without. Amongst the new Ruger line of knives (produced by CRKT) was the super-sized Go-N-Heavy which stood out not only due to its size, but for the distinctive look which comes from a combination of the design brief for the Ruger line of knives and its pedigree of being a William Harsey design.
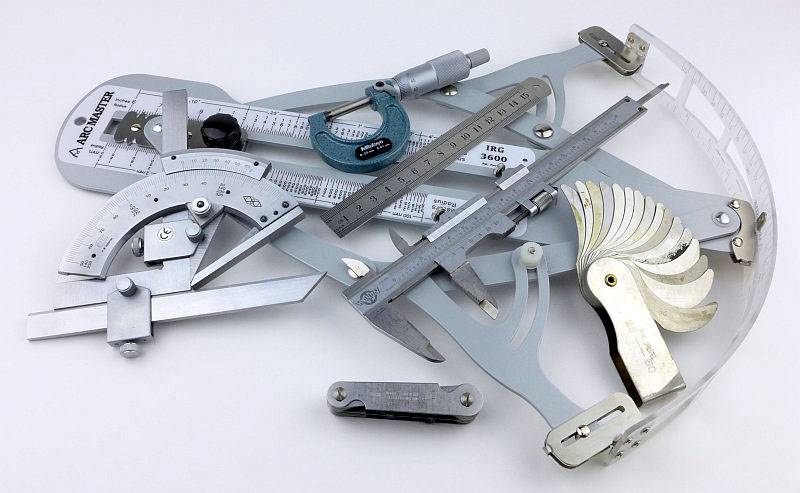
The Blade and Handle Geometry:
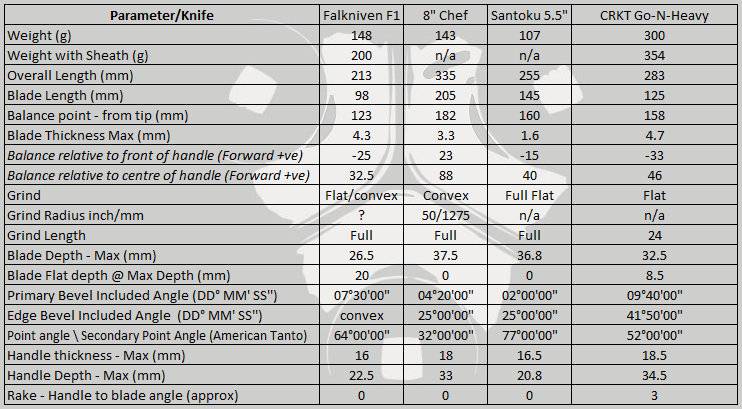
Most knife specifications have a basic description of the blade geometry, but in this section I will be taking a more detailed look at geometry and balance.
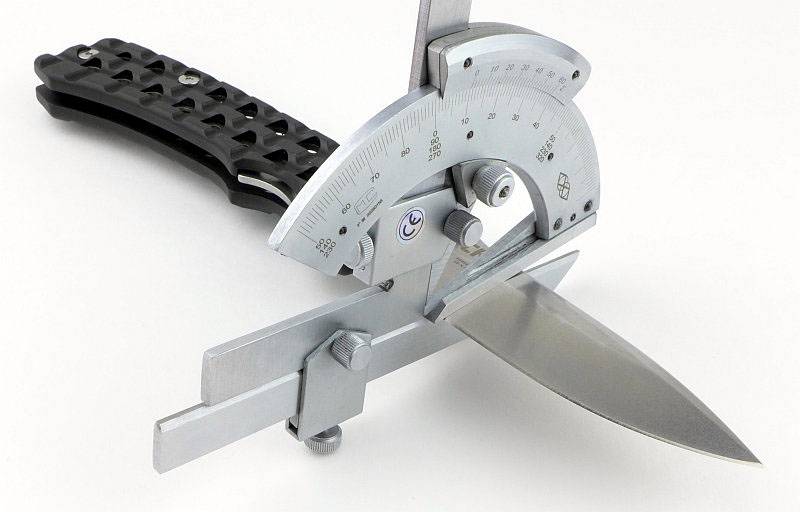
Using a set of gauges and precision measuring equipment including a Vernier protractor, callipers, fixed radius gauges and the unique Arc Master adjustable radius gauge (the one that looks like a crossbow).
These measurements have been tabulated and are presented along with a few reference blades (8″ Chef’s Knife, 5.5″ Santoku and the popular Fällkniven F1).
Key aspects such as the primary bevel angle, grind type, blade depth, blade thickness, length, weight are detailed, along with balance information.
The ‘Balance relative to the front of the handle’ tells you if the knife will feel front heavy, or if the weight is in your hand (a positive value means the weight is forward of the front of the handle). The ‘Balance relative to the centre of the handle’ indicates how close to a ‘neutral balance’ the knife has in the hand.
In the case of full convex grinds the approximate centre of the grind is used for the primary bevel angle estimate.
The blade is made from 8Cr13Mov steel, the washers from Teflon and the handles are hard anodised 6061-T6 Aluminium.
Explained by the Maker:
The reasons for certain design choices may not be clear when simply looking at an object, so this section is intended to give an insight into the thinking behind a design by speaking to the designer themselves.
Unfortunately I can’t always get time with the designer so will use this section to include relevant information about the knife and its designer.
While discussing the Ruger knives with CRKT, there were a couple of insights into the processes that led to the final designs of the knives.
The project started with Ruger approaching CRKT and asking them to design a special line of knives for them. The knives had to represent Ruger, so would not simply be any old design, but had to fit in with the feel of Ruger’s products.
As one of the designers CRKT have worked with before, it turns out that Bill Harsey had already been working on a design that was reminiscent of the Picatinny rails on the SR line of rifles. Never quite making it off his workbench, it seemed a perfect fit, so was adopted for the Go-N-Heavy and Go-N-Heavy Compact knives in the Ruger lineup. The Ruger range also includes a total of 23 different models, fixed and folding, plain edges and part-serrated.
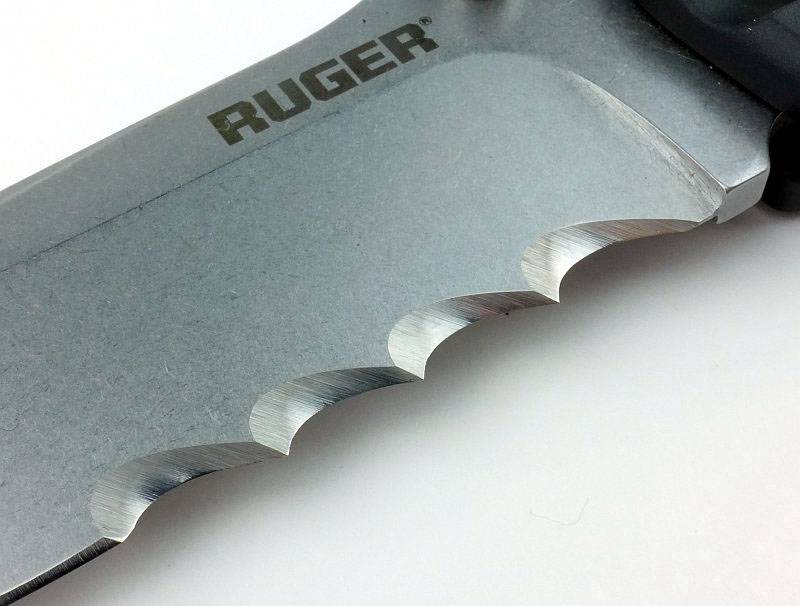
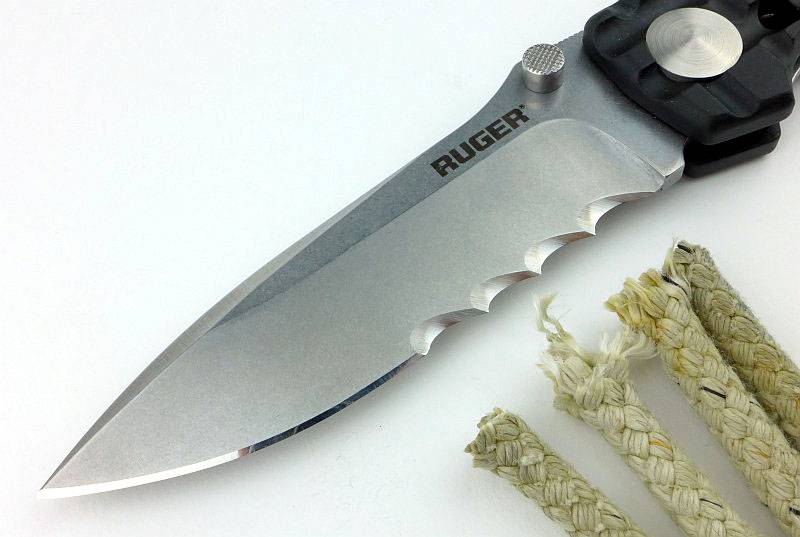
A feature used in CRKT knives are the unique Veff Serrations (which we will see in more detail). A different take on the design of serrations where the scallops are angled to give a positive feed into the cut. The effect is similar to a normal wood saw where the teeth cut into the material in one direction, but ride over the surface (clearing the cut) in the other. Veff serrations give real bite to the cut. We will cover these in more detail later.
A few more details:
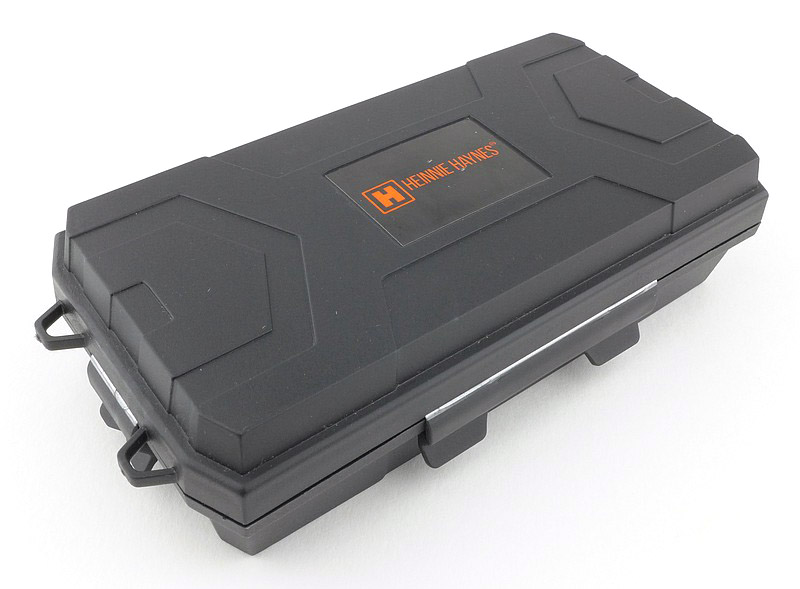
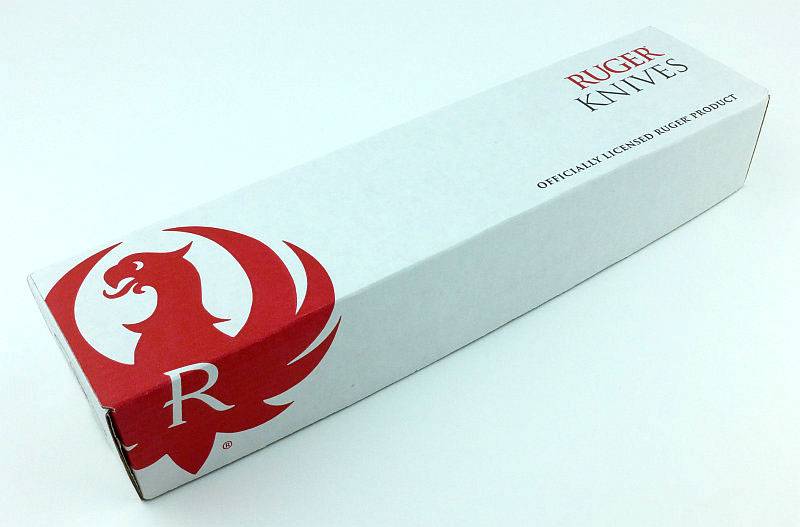
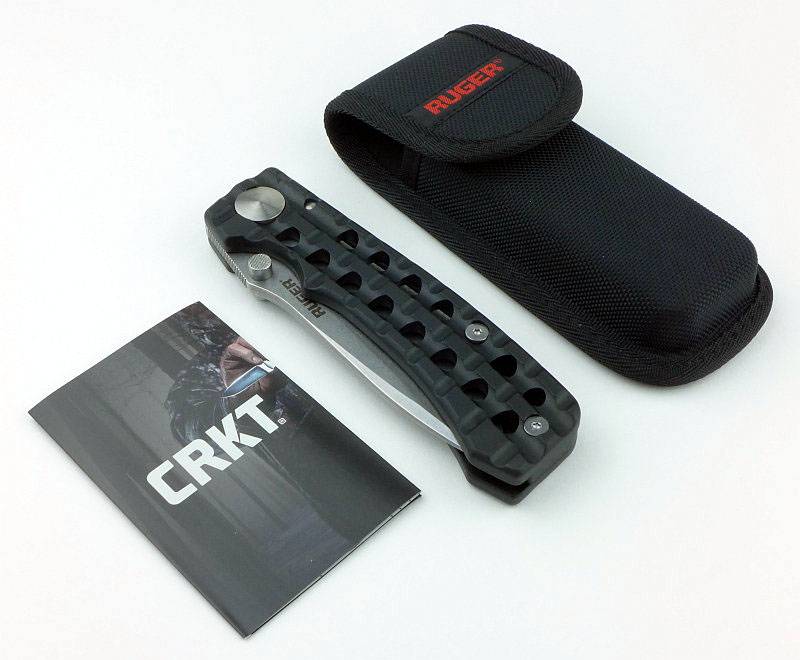
This review is going to look at both versions of the Go-N-Heavy, the plain edge and part-serrated (Veff serrations). The knife arrives in a Ruger branded box.
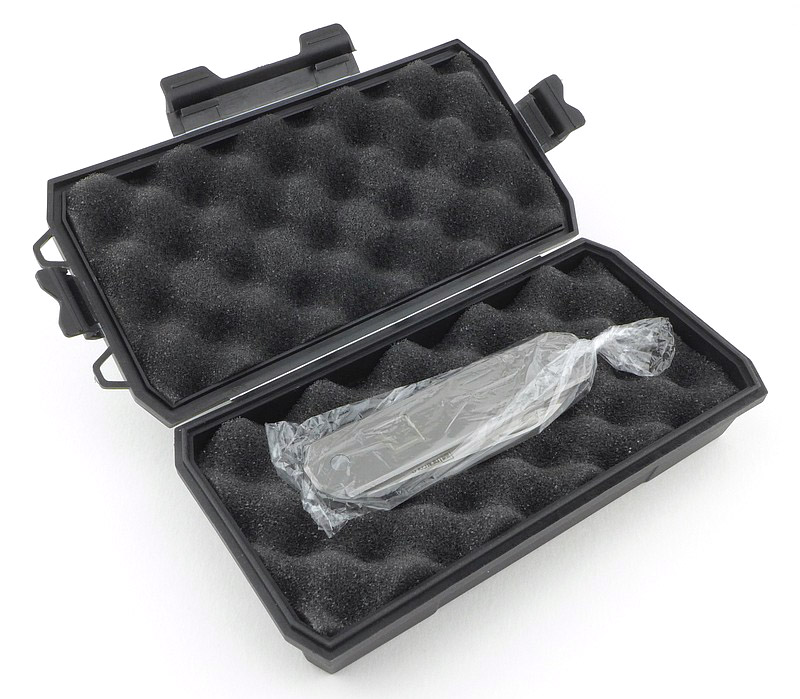
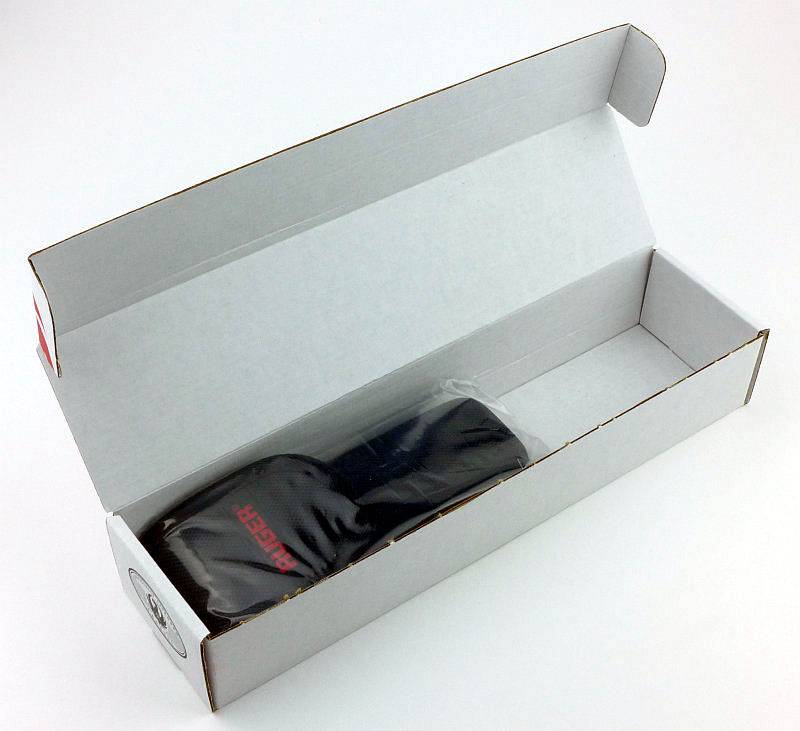
Inside the knife is in its belt pouch and wrapped in a plastic bag.
Along with the knife and belt pouch is a CRKT leaflet.
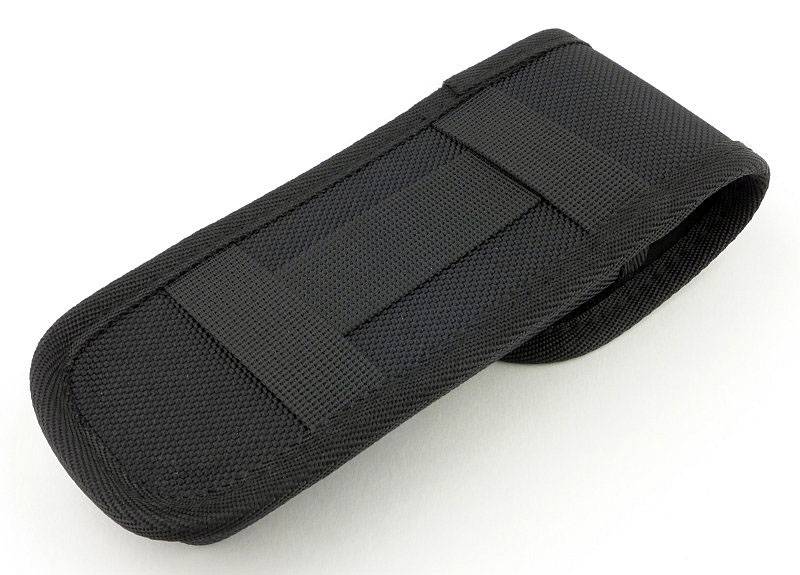
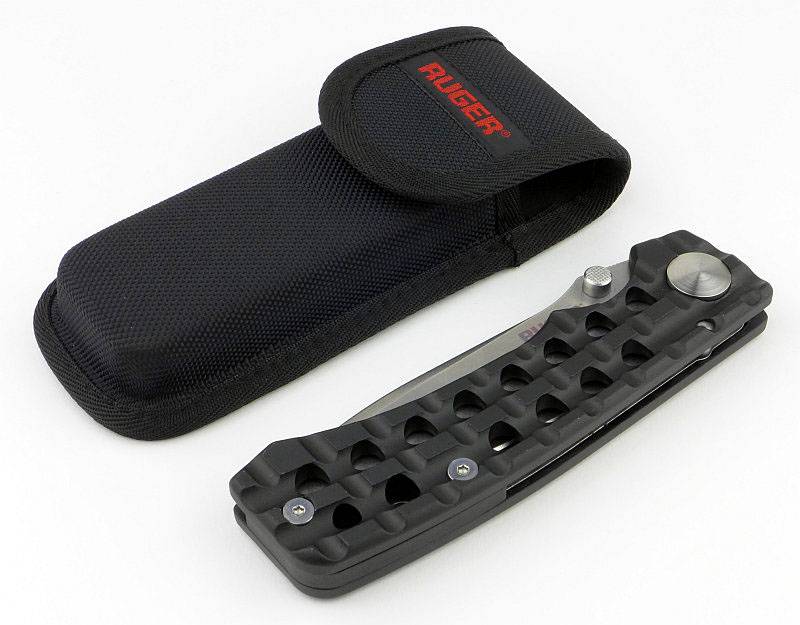
Especially important as this is a large folder, there is a well finished nylon belt pouch.
The belt pouch loops allow for horizontal or vertical carry positions.
That large belt pouch is filled by the Go-N-Heavy.
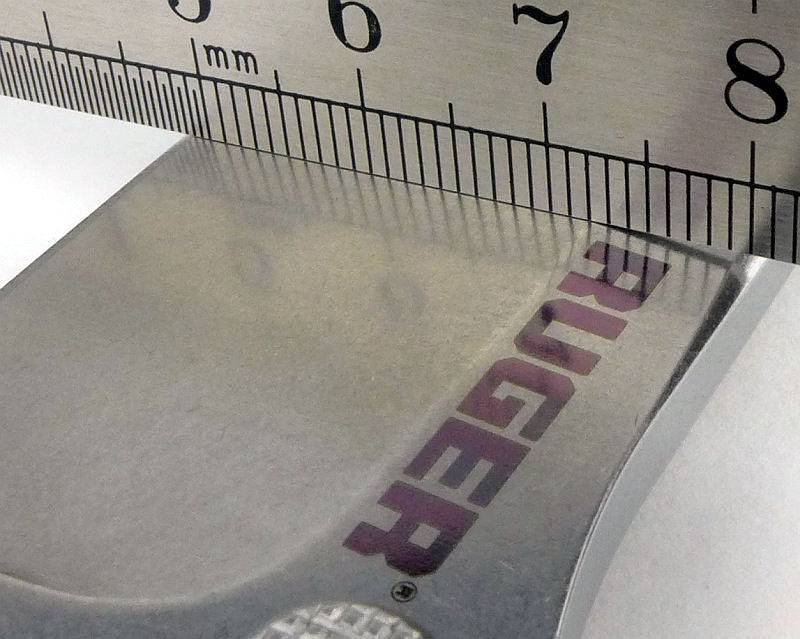
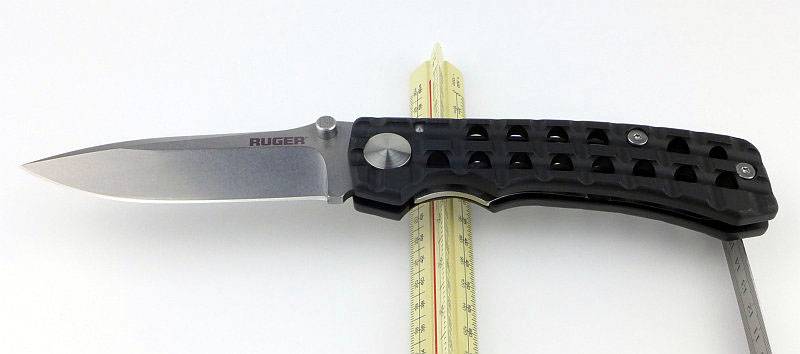
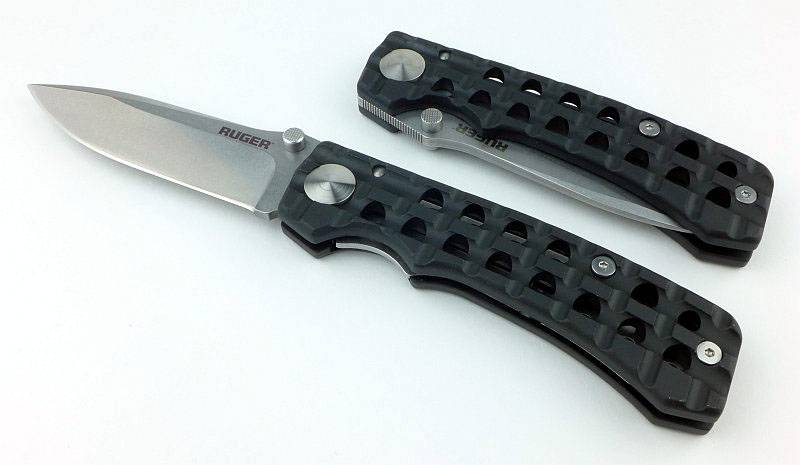
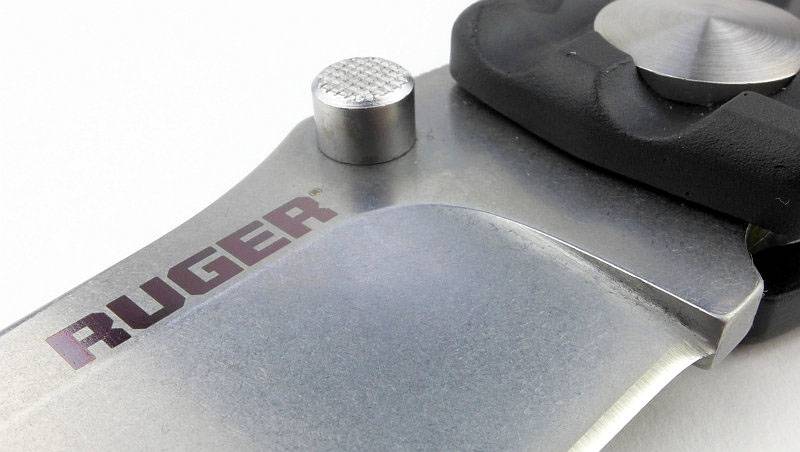
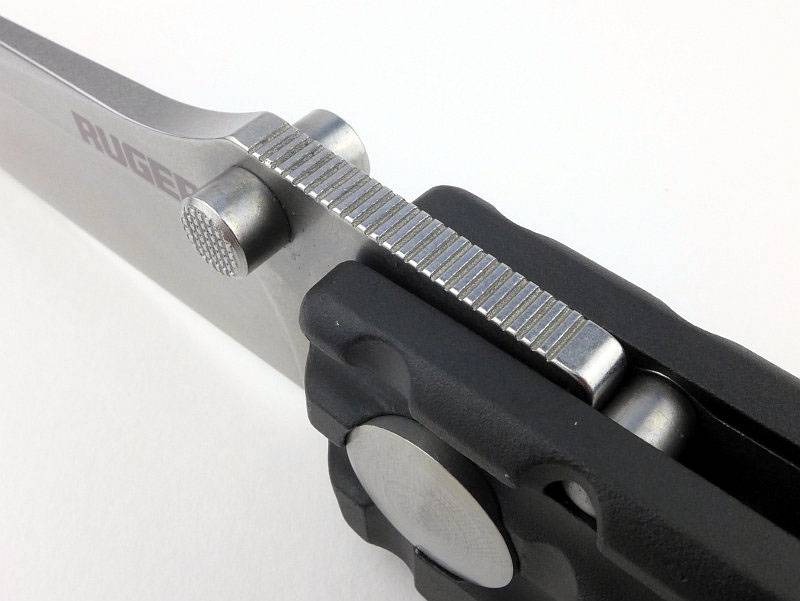
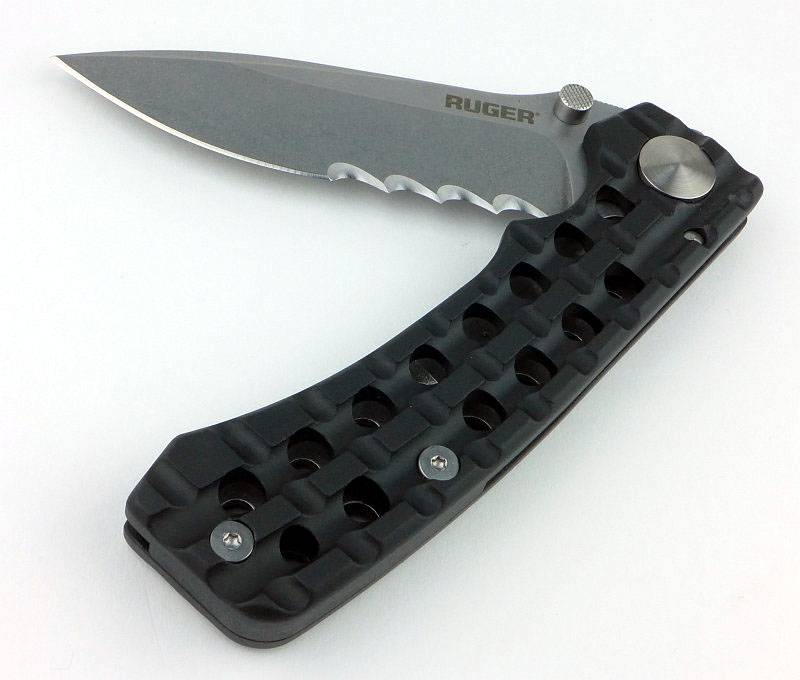
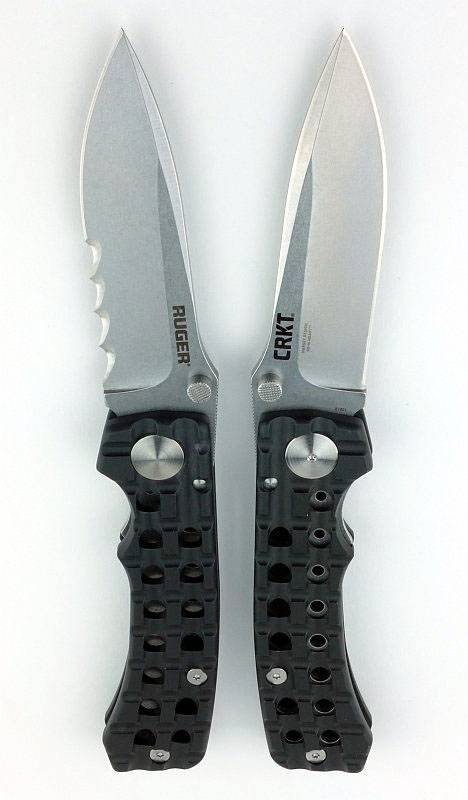
Let’s take a look round this, starting with the Ruger side of the blade.
Then the CRKT side of the blade. (On this side you can see the stainless steel lock insert/liner.)
Centring is pretty much spot on. Oddly, I’m looking at the actual knife right now and it looks better than this photo.
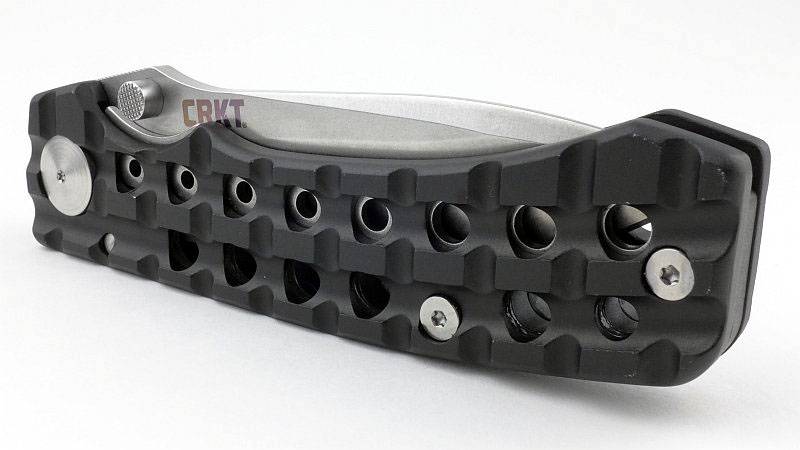
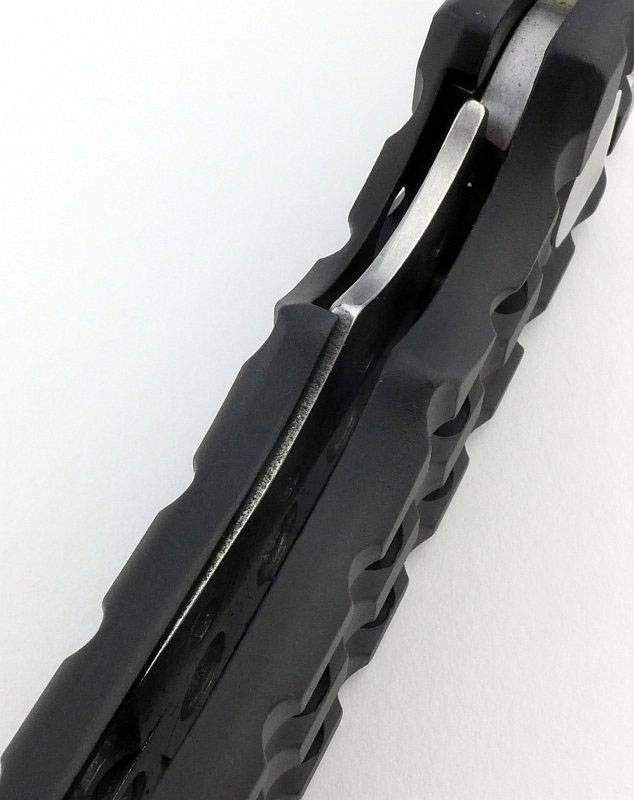
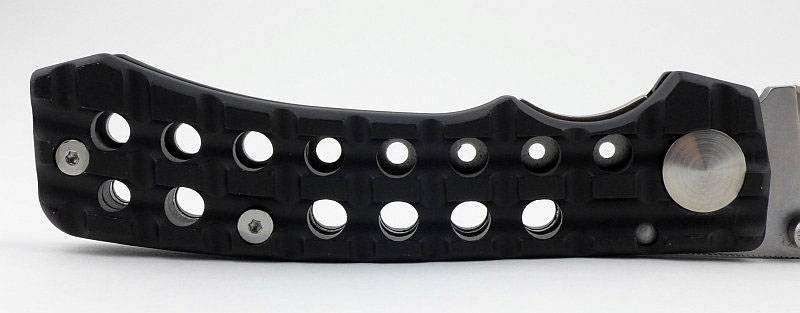
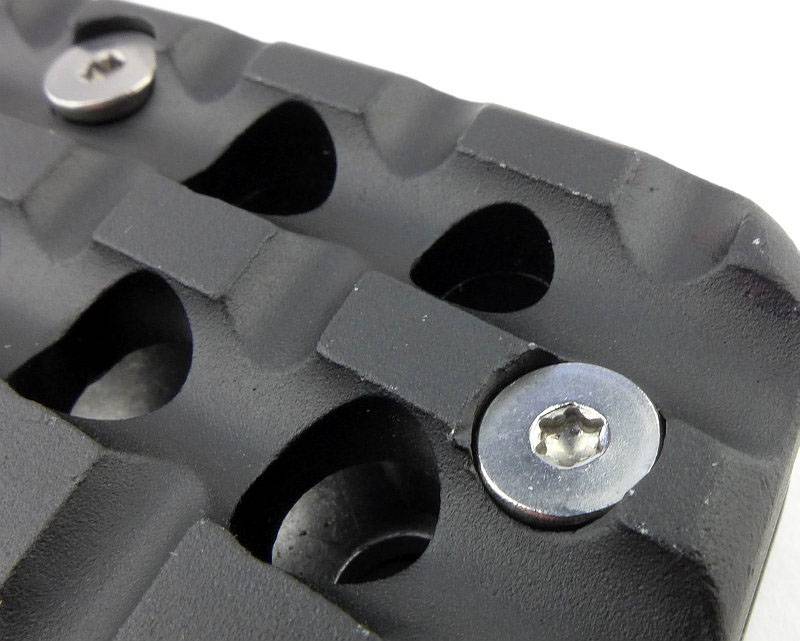
Loving the details in the handle. Though not a Picatinny rail, it is certainly reminiscent of one.
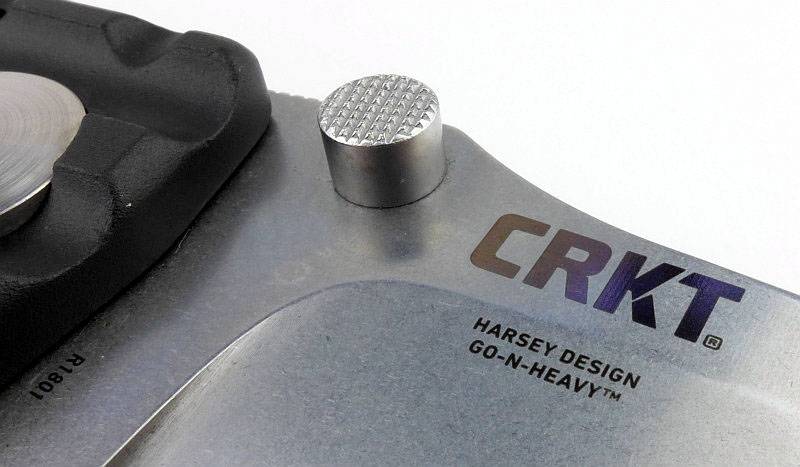
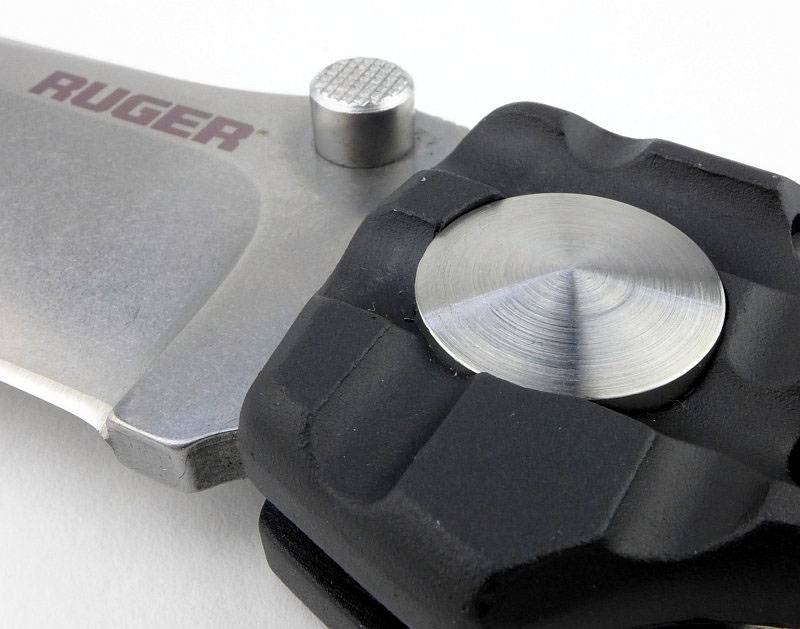
Enough blade is exposed to allow two handed opening, but there is also an ambidextrous thumb stud fitted to the blade.
One side of the pivot has a torx fitting for adjustment. The pivot bolt appears big and oversized, but this is for stylistic reasons and sits very well with the black anodised handles.
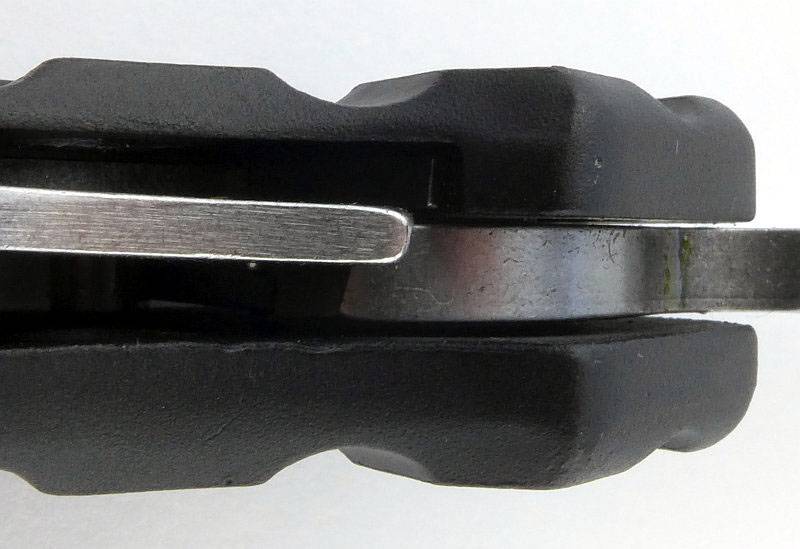
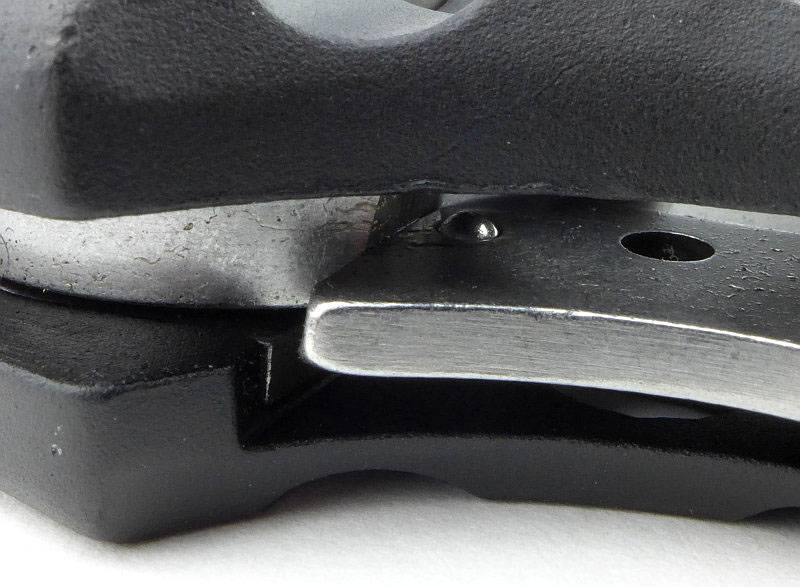
Here we can see the blade stop pin and locking surface (which is fresh and unused straight out of the box).
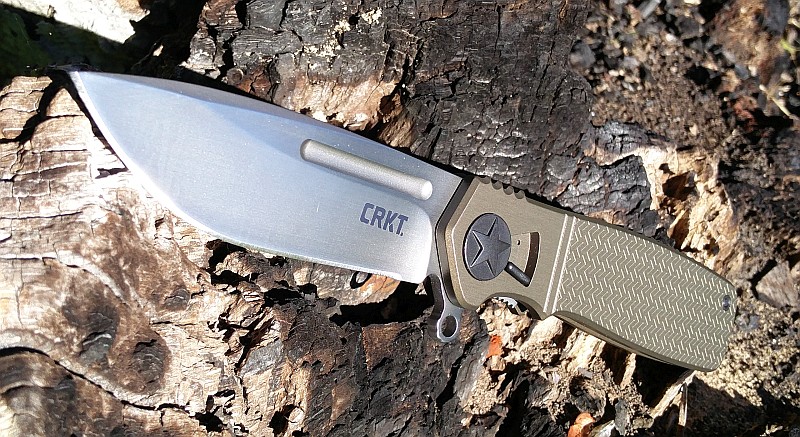
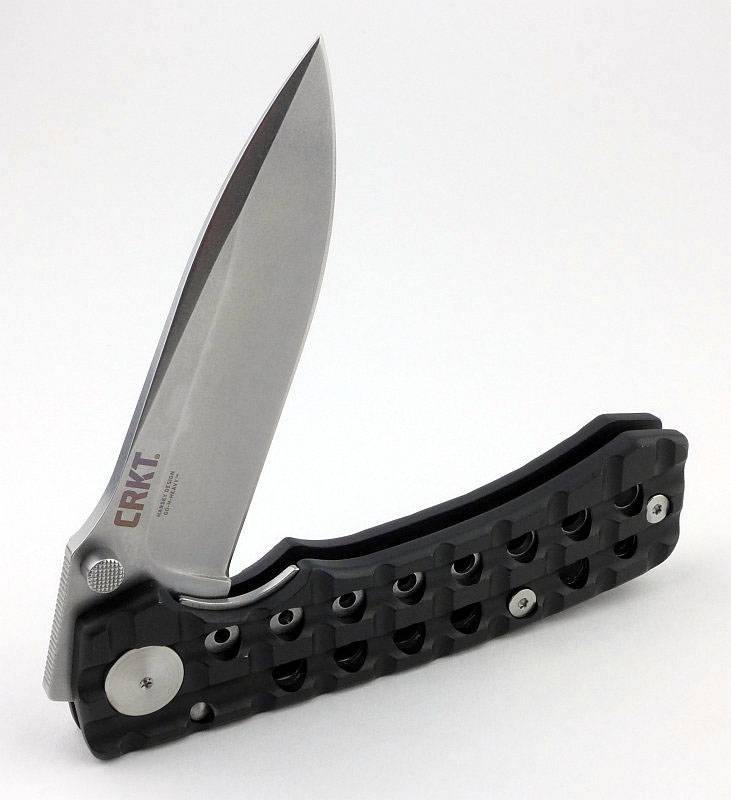
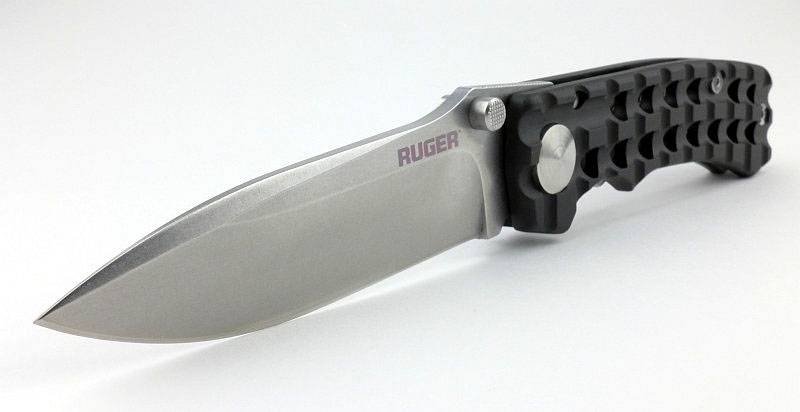
And out comes that nice big blade with recognisable Harsey style.
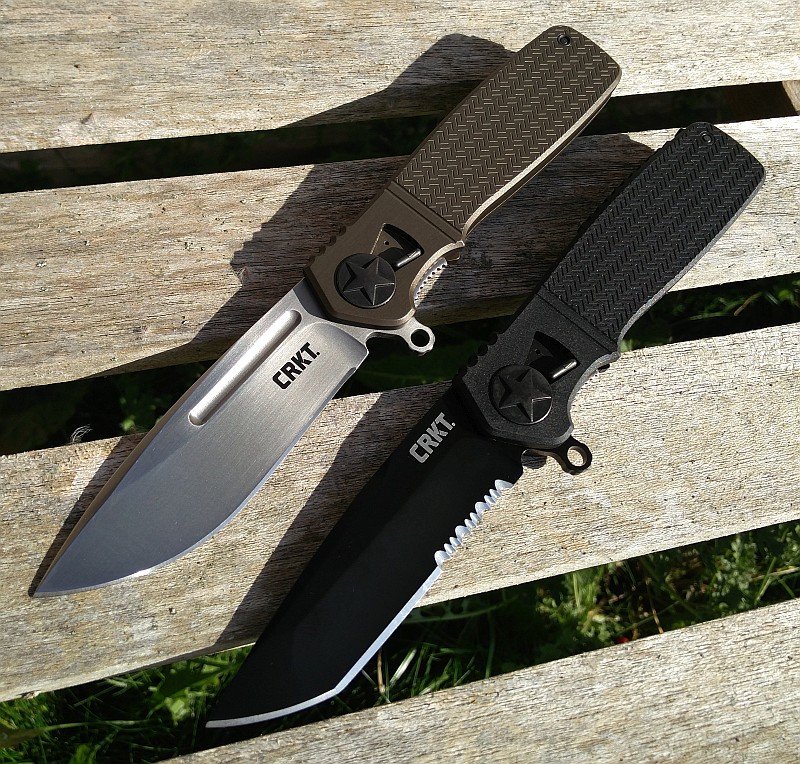
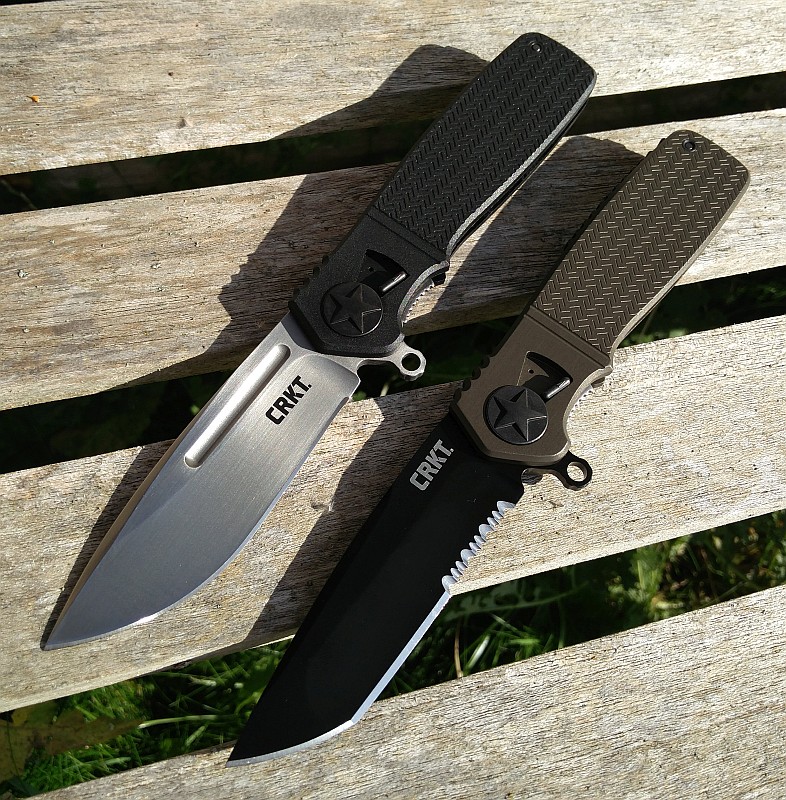
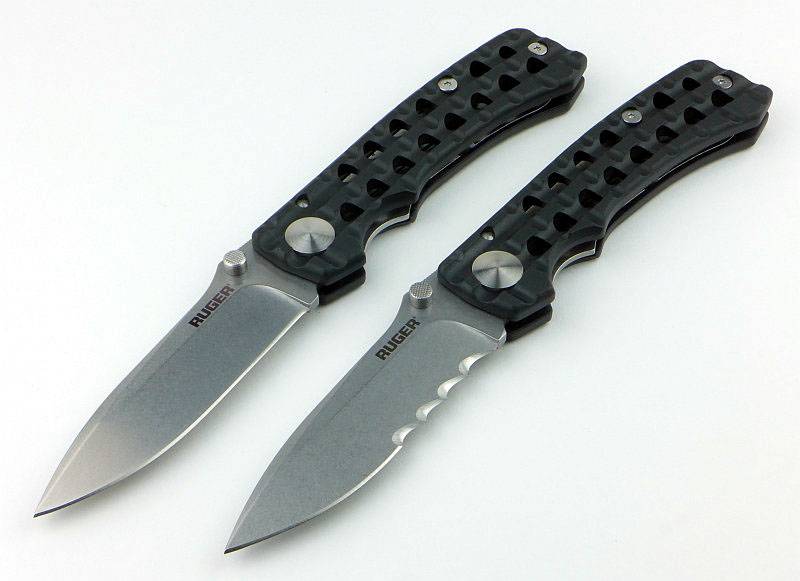
Both versions together to show how it looks open and closed.
One side of the blade has the CRKT logo, plus model, engraved into the surface.
Lock engagement straight out of the box looks a little light, but was strong and soon settled in slightly with use.
Stepping back a little this view shows how the stainless liner fits into a recess in one of the aluminium handles.
The holes in the handles do go all the way through. You might also spot that the holes in the stainless steel liner are slightly smaller.
Only one side of the pivot bolt has a torx fitting. The other side is completely plain.
The plunge line is neatly executed.
Torx bolts are used to hold the handles together.
On the thumb ramp there is some fine jimping to give you extra grip.
Taking a very close look into the Go-N-Heavy with the blade open you can see the detent ball on the side of the lock bar which holds the blade in the closed position.
There is a nice flowing semi-swedge on the blade spine.
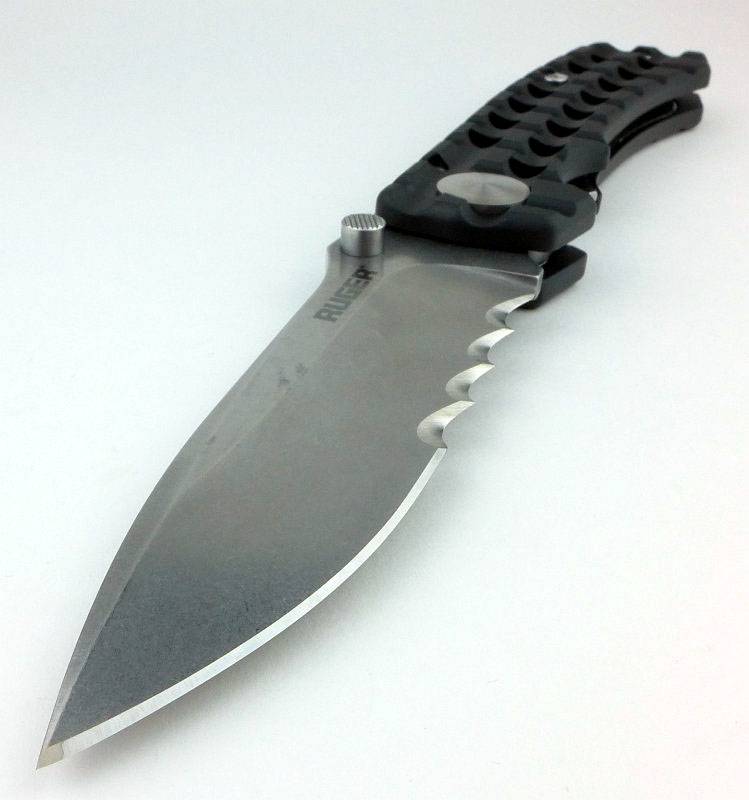
Now a switch over to the part-serrated version featuring Veff serrations.
Really heavy-duty serrations with only four scallops in the serrated area.
From the other side of the blade you can see the serrations are cut with a single bevel.
The two versions.
What is the Go-N-Heavy like to use?
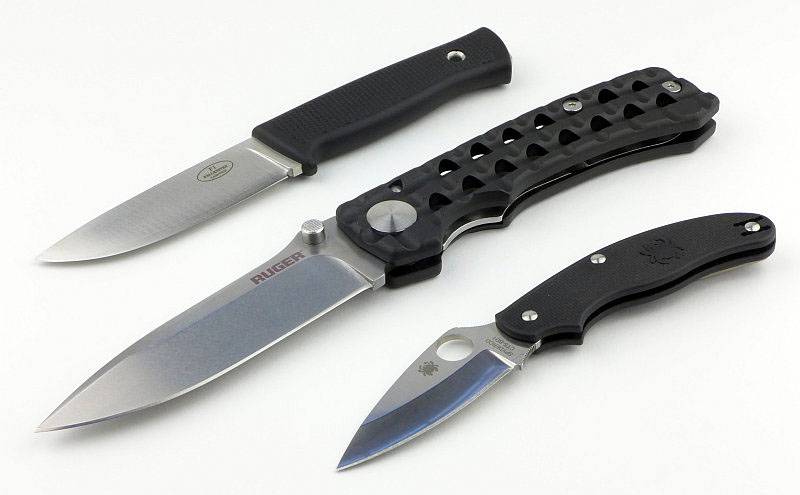
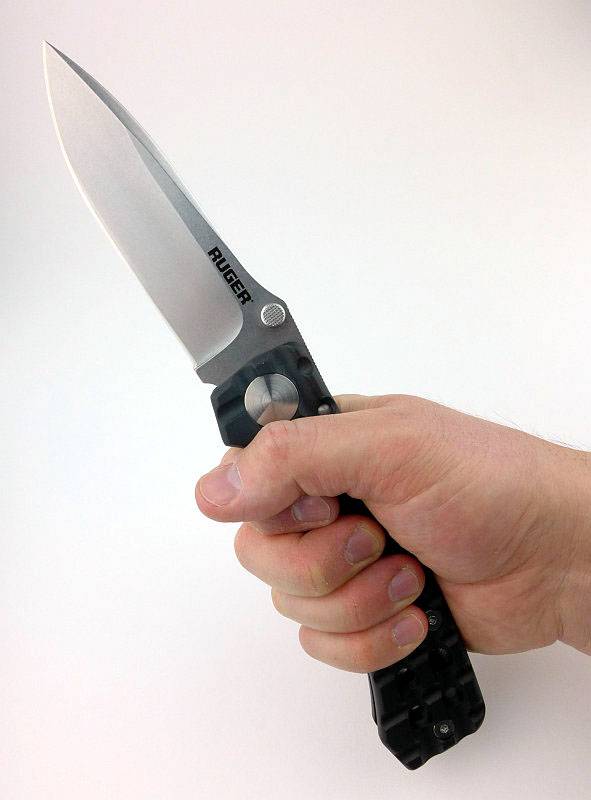
Before we go onto using it, to start with we have to get the proper ideal of scale, so here the Go-N-Heavy is next to the Fällkniven F1 and a Spyderco UK Pen Knife. Yes, it really dwarfs the Fällkniven in blade and handle.
I take XL size gloves, and this knife makes my hand look small. What the large handle does allow for however are a range for different grip positions all of which remain comfortable.
Ok, I’m not going to argue that it is the most practical knife, but saying that there are plenty of occasions I want to have a large knife with me but can’t really justify a fixed blade. The Go-N-Heavy gives you a knife with presence but which is small enough when folded to pop into a bag or onto your belt and not be too noticeable; until you need it.
There is also just something so satisfying about a big folder, watching that large blade appear and the knife double in size. When at IWA I found it very difficult to put down, and knew exactly which CRKT knife I wanted to test.
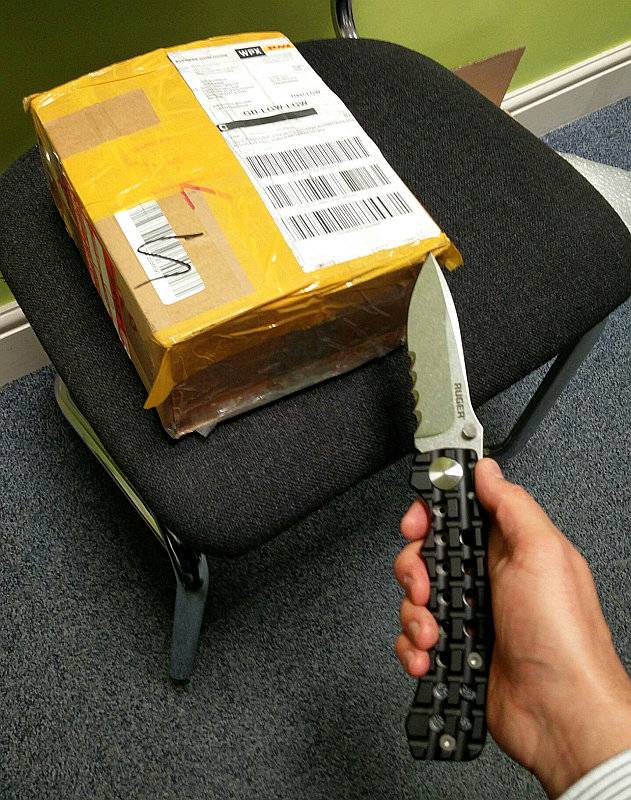
Perhaps a little over sized for a box cutter (especially as you might end up going through the entire box and cutting the contents), but it did the job. Clearly this is not what the knife was intended for.
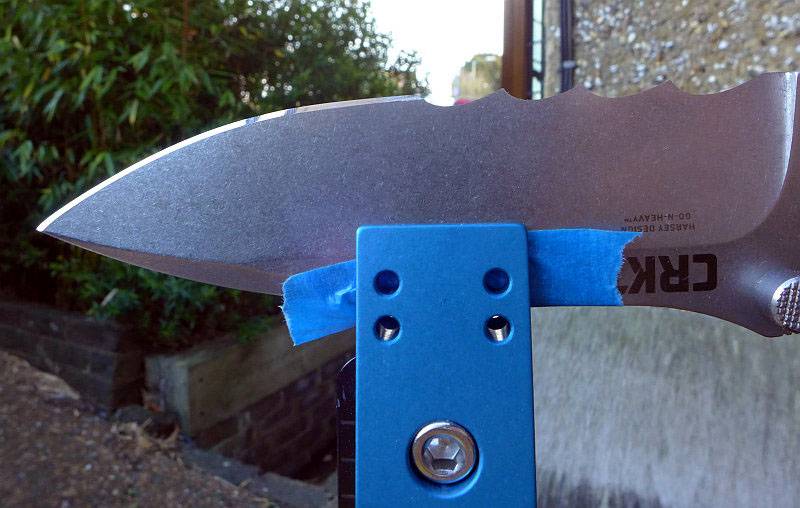
Though the factory plain edge was serviceable enough, I decided to give it a bit of an upgrade and pop a Wicked Edge onto it.
Looks rather nice with its new edge.
Unfortunately no large rope cutting tasks have yet presented themselves, so I’ve had to make do with smaller ropes. On the smaller sizes, the rope tends to stick in one of the serrations rather than the serration sawing through. It makes it more like a series of line cutting hooks. You need to scale up the cutting job to really get the Veff serrations showing their power. They look great, and are very aggressive, but on smaller jobs they can be hard work.
What you really can feel is the effect of the angled serrations; they actively bite deeper into the material as you cut instead of riding over the surface. In the right cutting job it makes for a very aggressive and efficient cut. For smaller jobs you often have to push the cut away from you to stop the teeth biting so deeply.
Serrated or plain edge, its your call and depends on your requirements (I’d love to see a mid-serrated version – see The Mid-Serrated Blade – A new concept from Subwoofer). Either one will give you a really satisfying super-sized folder.
Review Summary
The views expressed in this summary table are from the point of view of the reviewer’s personal use. I am not a member of the armed forces and cannot comment on its use beyond a cutting tool or field/hunting knife.
Something that might be a ‘pro’ for one user can be a ‘con’ for another, so the comments are categorised based on my requirements. You should consider all points and if they could be beneficial to you.
_______________________________________________
_______________________________________________
Things I like
What doesn’t work so well for me
_______________________________________________
_______________________________________________
Super-Sized Folder.
Serrations are too large for some jobs.
Harsey Design.
Smaller hands may struggle to open one handed.
Multiple grip options.
Distinctive Styling.
Veff Serrations have excellent bite.
Belt pouch included.
Discussing the Review:
Please feel free to add comments to the review, but the ideal place to freely discuss these reviews is on a forum. If you started reading the shorter forum version of the review, but followed the link this full exclusive review, please return to that forum to discuss the review there.
If you read the review entirely on Tactical Reviews, please consider one of the following to join in any discussion.